Make a Chisel Handle
Create a custom handle for your socket chisel in ten steps and practice basic hand-tool use along the way.
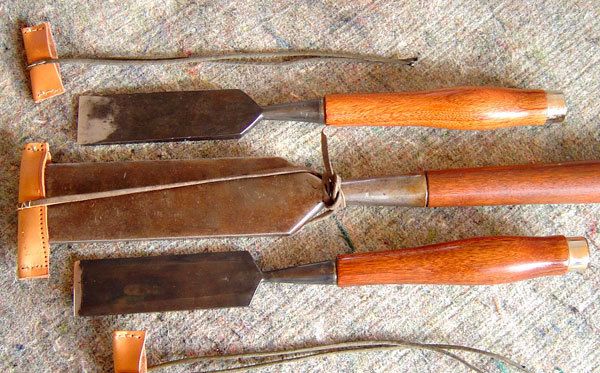
I prefer to make my own socket chisel handles rather than stick with the one that came from the manufacturer. I can shape them to fit my hand and my working style, and I can use a dense hardwood of choice, such as hickory, ash, or oak. Most of the time I make chisel handles on the lathe. However, if you don’t have a lathe the process can be accomplished just as well — though maybe not as fast — with a drawknife, spokeshave, rasps, and files. The following 10-step process illustrates my method. I took these photos as I shaped two framing chisel handles on a job site. Click on each image to see a larger view.
STEP 1: Rough cut a 16-sided workpiece
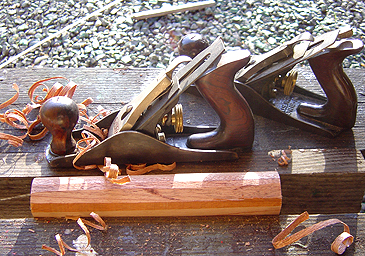
Begin by milling a piece of stock for the tool handle to rough dimensions; about 2-in. square by 10 in. long. I leave the workpiece extra-long so there is sufficient stock to mount in a vise. I’ll cut it to length later. Remove the four corners of the workpiece on the tablesaw with the blade tilted to 45 degrees. This will leave you with an eight-sided workpiece. Then use a hand plane and remove the eight corners until you have a 16-sided workpiece. I use two planes for the job — one set course for the first few cuts and one set fine for the last, finishing cut.
STEP 2: Shave it close to round
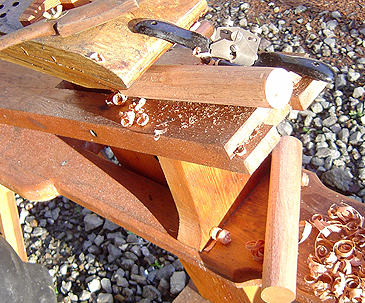
Next, use a spokeshave to remove the corners on the 16-sided workpiece until it has 32 sides. I support the workpiece with my shave horse. However, most woodworkers don’t have a one of these specialty benches, so this can be done at the workbench, securing the workpiece between bench dogs.
STEP 3: Mark out the ferrule tenon
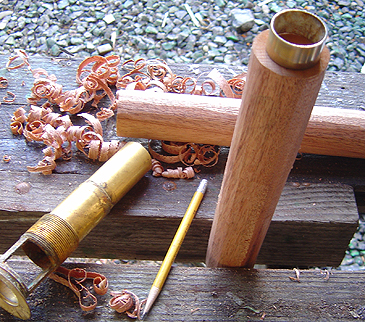
With the handle close to round, fit the ferrules on the striking ends of the handles. These are simple sections of 1-1/4 in. dia. brass pipe salvaged from an old plumbing fixture with a hacksaw and buffer-grinder. Mark the center and then use a pencil to mark the inner diameter of the ferrule.
STEP 4: Cut the ferrule tenon
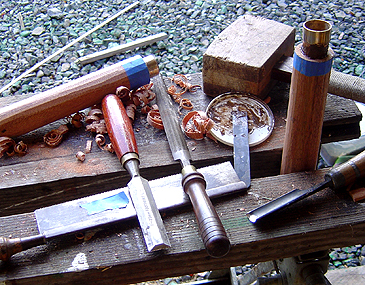
With the ferrule circumference and depth laid out, use a handsaw and chisels to cut the round tenon. A piece of masking tape on your dovetail saw functions as a depth gauge for the should cut. Then pare away the waste with a gouge and chisel. The ferrule should fit tightly over the tenon, and you can use a patternmaker’s rasp to do any final fitting. In order to achieve an extremely tight fit, I heat the ferrule to expand the metal just before driving it on with a mallet. I also coat the wood tenon with a bit of thickened and dyed epoxy. I like to create a thick bed of epoxy at the shoulder, so the ferrule won’t act as a riving knife and split the wood when struck. Last, I drive on the hot ferrule.
QUICK TIP: Why use epoxy? thickened epoxy provides a microscopically perfect fit and rock-hard surface, so when the handle is struck thousands of times during its life, there will be minimum wood crushing and the resulting cam action that will eventually wear it out. When it has to be replaced eventually, it is a simple matter to heat the metal to the 110 degrees required to break the epoxy bond.
STEP 5: Create the tapered tenon for the socket
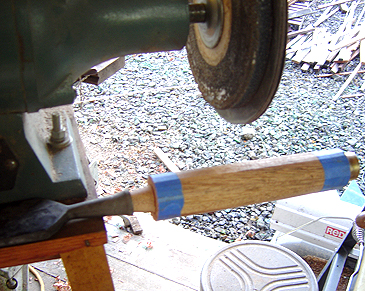
I do similar work to fit the chisel sockets. Since these are tapered, I find it convenient to use the sanding disk on the buffer-grinder. As I’m removing waste, I’ll drive on the socket occasionally to mark high spots on the wood. You can see the high spots where the fibers have been crushed shiny by the drive fit. You can also use sooty smoke from an alcohol lamp burning mineral spirits, Prussian Blue machinist’s layout paste, or even lipstick, to perform the same function.
STEP 6: Determine a shape
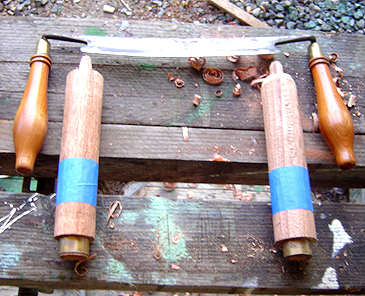
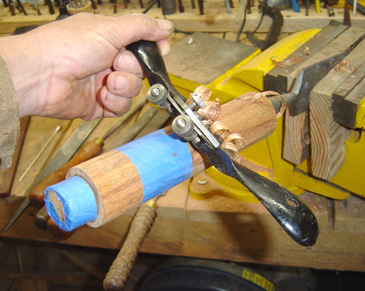
With the ferrule and socket ends complete, turn your attention to the handle. These chisels will pare more often than chop, so I want a compromise between a traditional framing chisel handle and the longer handle for a slick. As my favorite handle shape is one I used for turning the cherry handles for Grandpa’s old drawknife a couple decades ago, I simply eyeball the proportions for the new handles and lay out my guidelines using masking tape that I will simply slice through during shaping.
STEP 7: Install the handle before shaping
The sockets are also driven on with thickened epoxy, as detailed in step four. After the epoxy cures, rough out the handle using a coarse spokeshave. This is where you get to be creative. Since this is made by hand, you have the opportunity to make the handle fit your hand.
STEP 8: Rasps work well for detailed shaping
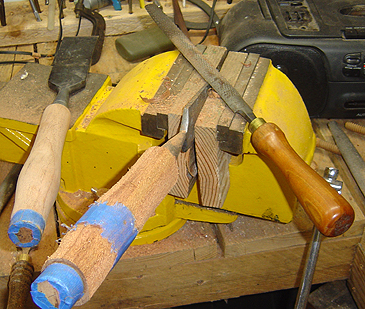
I finish the rough shaping with a coarse rasp. If you are confident using successive grades of abrasive paper, you should be just as confident with rasps. The work looks ugly, but the ugliness only extends to the depth of the teeth, and is removed with successively finer rasps with finer teeth — just like sandpaper. Rasps are really precision instruments. Learn to use them, and you will never need to use a power sander on a rounded surface like these. Finish sanding becomes a snap.
STEP 9: Sand to a smooth surface
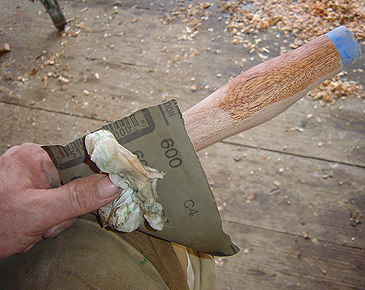
I finish sand the shaped handle in minutes with successive grits beginning with 80 grit and ending with 220 grit. I use a 600-grit abrasive to polish occasionally as I go to reveal the sanding scratches I missed. I also dampen the wood with water between each grit. Water reveals scratches I missed, but more importantly, it swells the fibers in those scratches so they can be removed with little hollowing of the surface. Water will also prevent the grain from raising beneath your finish when the tool gets wet for the first time. To finish the handle, I prefer a thin wiping varnish rubbed out with paste wax and fine steel wool.
Step 10: One down, many more to go
With one handle completed for a model, the second and any subsequent handles can be made much faster, as there is less trial-and-error during the shaping progress. The first handle takes me about 45 minutes to shape and sand; the second one will take 25 minutes. Don’t try to go fast, take your time, learn as you go and enjoy yourself.
Bob Smalser is a woodworker and boatbuilder in Seabeck, Wash. For instruction on how to make a socket chisel on the lathe, read his companion article from Fine Woodworking.
Photos: Bob Smalser
Fine Woodworking Recommended Products
Tite-Mark Marking Gauge

Starrett 4" Double Square

Bahco 6-Inch Card Scraper




Log in or create an account to post a comment.
Sign up Log in