Plane Blades and Chisels Need a Flat and Polished Back
Do the heavy work with sandpaper glued to a flat slab of granite.

Synopsis: A sharp-cutting plane blade or chisel depends upon the meeting between two flat, polished surfaces. That’s why you need to pay as much attention to the backs of your blades and chisels as you do to the bevels. A flat, smooth, polished back—as clear and reflective as a mirror—is the goal. Chris Gochnour shows you how to achieve it using sandpaper and a flat surface.
You surely have heard it before: A sharp cutting edge is the meeting of two flat, polished surfaces. That’s why you need to give as much attention to the back of a plane blade or chisel as you do to its bevel.
You must first flatten and smooth it, and then polish it to remove all the scratches. when you’re done, it should be as clear and reflective as a mirror.
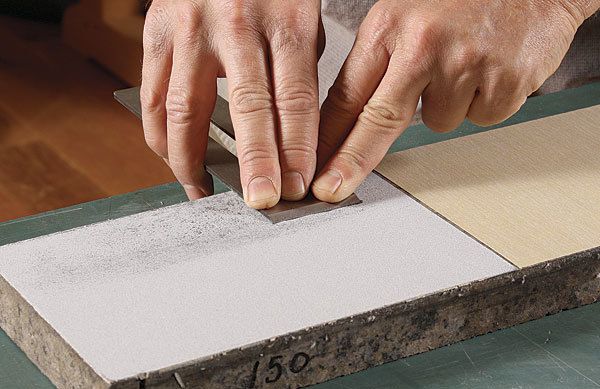
I wouldn’t be surprised if the prospect of flattening and polishing a blade or chisel’s back kept you out of the shop for a while. It can be a boring and tedious job, but it doesn’t have to be. My technique is fast and gives perfect results. I use sandpaper for the heavy work, gluing a progression of grits to a piece of granite. Sandpaper is inexpensive and easy to find, and because the granite never goes out of flat, the sandpaper doesn’t either.
I flatten the first 1 in. to 2 in. of the blade behind the cutting edge. That’s essential on a chisel, but some say that it’s unnecessary on a plane blade, that only the cutting edge needs to be flat and polished. But for a plane to cut well, you need more than just a sharp edge.
On bench planes, for example, the chipbreaker must mate perfectly with the back of the blade. Any small gaps between them are opportunities for shavings to get stuck and eventually clog the throat. By flattening a larger area of the back, I create a perfectly flat mating surface for the chipbreaker. Also, working a bigger area makes it easier to hold the blade flat on the sandpaper.
Preparing the back is really a three-step process. But before you start, polish the back a bit on your highest-grit stone or sandpaper. This will give you an idea of how flat the back is. Blades and chisels from high-end makers might already be flat and just need polishing. The first step is to flatten it (on some blades and chisels you might also be removing machine marks at this point). This is work for the coarsest sandpaper (150 grit).
For the full article, download the PDF below.
Fine Woodworking Recommended Products

Stanley Powerlock 16-ft. tape measure

Veritas Precision Square

Marking knife: Hock Double-Bevel Violin Knife, 3/4 in.


Comments
Google Scary Sharp. I like the idea of using heat to release the glue on used up sand paper. That has always been a source of frustration using this system.
Silly question - are these CAMI or FEPA grits?
Log in or create an account to post a comment.
Sign up Log in