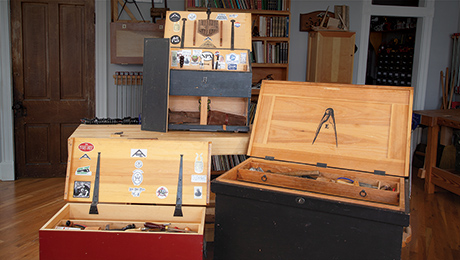
Chris Schwarz’s Coffer Chest
Cut the joinery for this Carpathian chest with a single hand plane.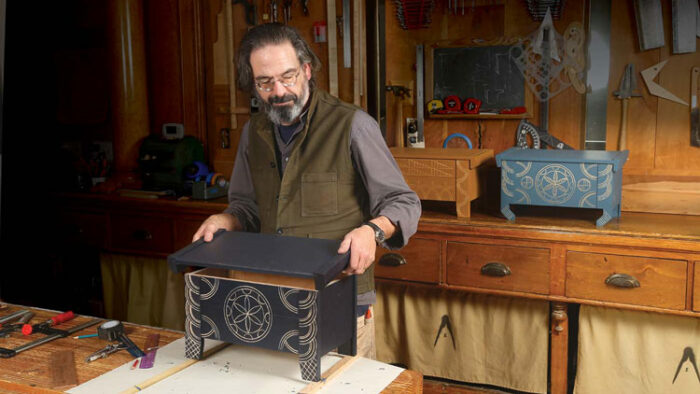
This small shepherd’s coffer, based on examples from Central Europe’s High Carpathian mountains, is sized for holding papers and writing tools. Traditionally, no matter how rich or poor, almost every family in the region owned a few of these chests and coffers.

The joinery for this chest is entirely tongues, grooves, and wooden pegs. You can make all the joinery with a tongue-and-groove plane. And the exterior is engraved with symbols (some might call them spells or prayers) intended to protect the owner of the coffer and its contents.
One plane does it all

A tongue-and-groove plane, such as a vintage Stanley No. 48 or the modern Lie-Nielsen No. 48, does most of the work. These ingenious planes cut both tongues and grooves. You need only to rotate the plane’s fence to change between cutting tongues or grooves. The plane is designed to center on 3/4-in. stock, leaving 1/4-in.-wide tongues and grooves. If you are using narrower or wider boards, the tongue will be offset from center but will still mate with the groove if you reference from the same side on both pieces. Once the pieces are together, you’ll never notice the offset.
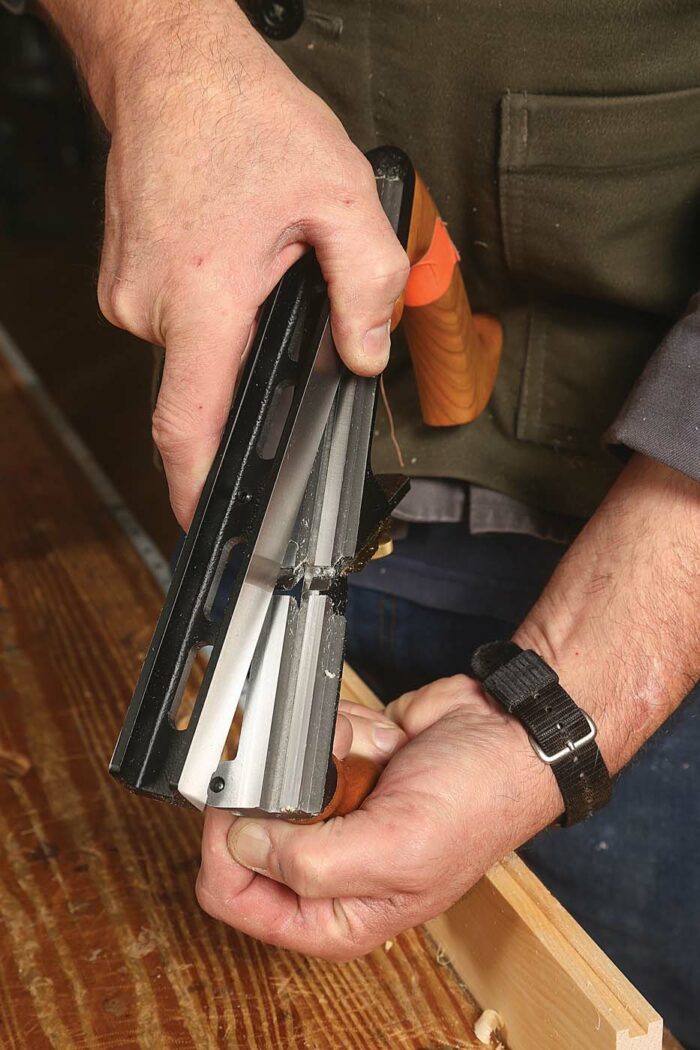
The No. 48 is simple to use. Lock the fence to make tongues or grooves. Plane the surface to cut the joint. The plane will stop cutting when the joint is complete. The cleverly designed plane makes joinery that automatically fits snug.
 |
 |
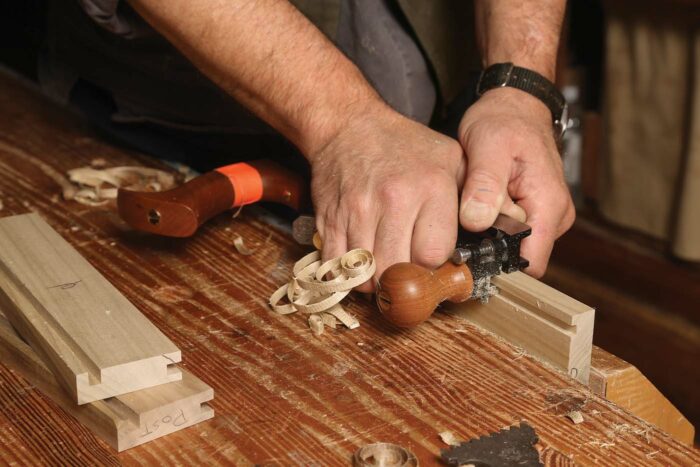
| Hold the plane properly. Instead of grabbing the plane’s front knob, wrap your thumb around it. This eliminates the chance that you will tilt the tool and crack the joint. | |
| A workaround for planing end grain
Spelching, also known as blowout, is an issue when planing end grain. Tongue-and-groove planes weren’t designed to plane end grain, but it can be done with this simple tip. |

A scrap clamped to the outfeed end of the joint protects it from splintering off. You’ll need this tip when cutting the tongues on the ends of the rails. |

Groove the legs

Begin by grooving the chest’s four legs. Scribe a cabinetmaker’s triangle on the legs so you can keep track of what needs a groove. Groove one edge of the front and back legs. Then groove a face of each leg to receive the side panels.

Note that the rails and side panels are 5/8 in. thick; the legs are 3/4 in. thick. This difference in thickness makes the rails and side panels recessed in the assembled chest. To make a chest that will actually go together, be sure that on each cut with your tongue-and-groove plane you run the fence against the inside face of the rails, panels, and legs.

The last detail on the legs is to cut a decorative shape on the feet using a bandsaw, a coping saw, or a handsaw. Simple curves or angled cuts are typical shapes with these coffers.

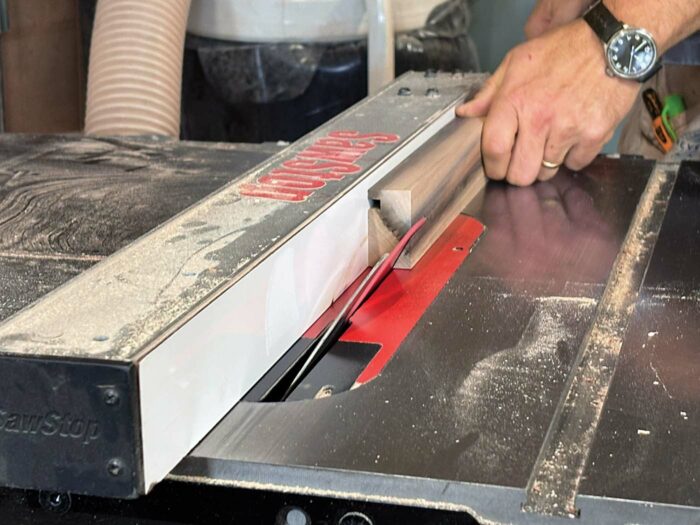
Tongue the rails and panels

Here is where it gets odd. Tongue-and-groove planes weren’t designed to plane end grain. But they do it just fine—as long as you clamp a sacrificial block to the outfeed side of the board so it isn’t spelched or splintered off.
After cutting the tongues on the ends of each rail, finish the rails with the easy cuts: tongues and grooves that are parallel to the grain of the board. Then cut tongues on the side panels. Note that the grain of the side pieces is vertical.
It might seem complicated to figure out which boards need tongues and which need grooves. But once you are working on the project, it will be obvious.
 |
 |
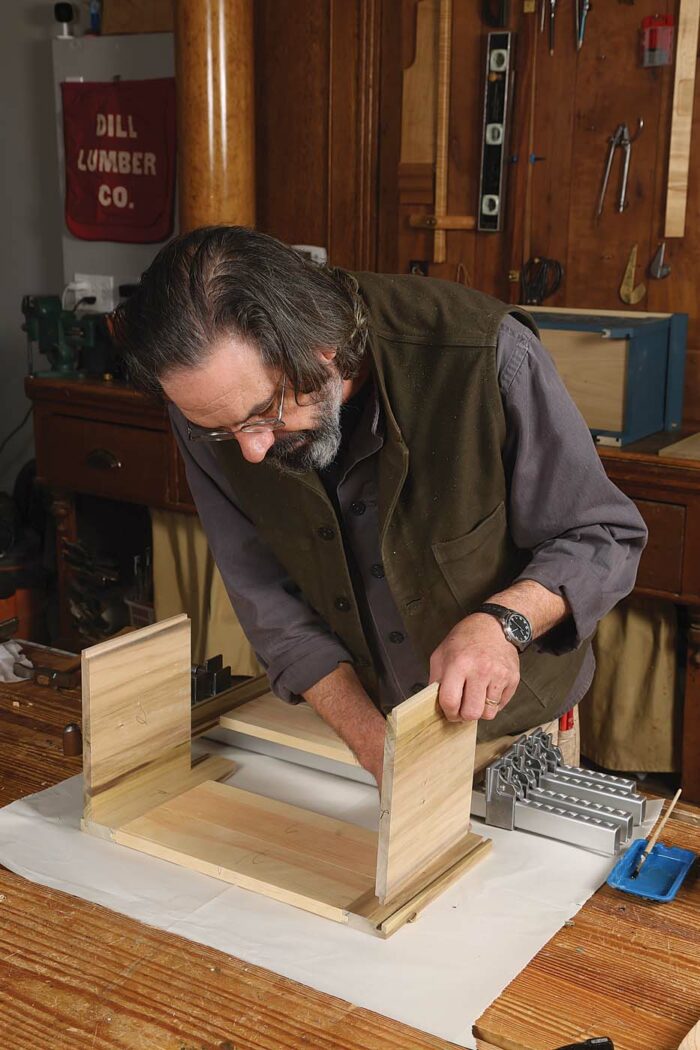
After you have tongued and grooved all the pieces for the carcase, the assembly is simple. Paint glue in the grooves and mate the legs, rails, and side panels. Then clamp things up.

Complete the assembly
Use the two side panels to join the front and back assemblies to each other, and then install the bottom.

 |
 |
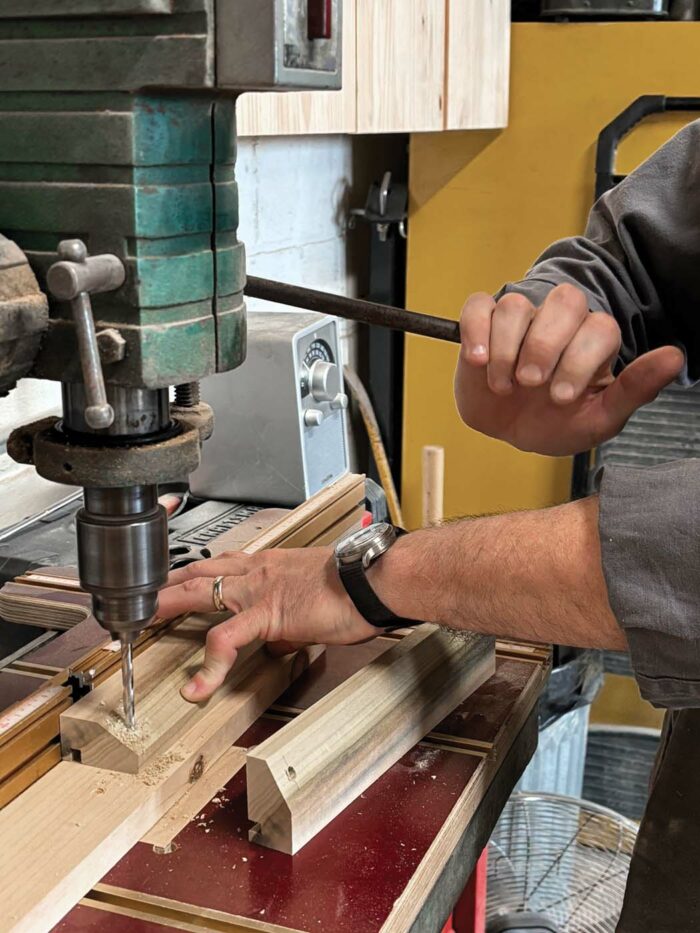
| Peg the bottom in place. Schwarz likes to use tapered wooden nails by Kakuri. You drill for them with a mating tapered bit, also available from Kakuri. When you have the bottom set in place, drill with the tapered bit, tap a nail in place, and then cut it flush with a handsaw. | |
Make the lid
The lid is simpler than the carcase. Cut tongues on each end of the lid, again using a sacrificial board to absorb any spelching on this end-grain surface. Then groove the breadboard ends, holding the plane sideways to cut the grooves as you did with the legs. While the front and back rails are within the glue’s flexibility tolerances, the lid is wider. To accommodate that, assemble the lid, applying glue to only the front half of the breadboard joints. This will allow the lid to expand and contract with the changes each season.

 |
 |
| Fit the hinges. Prop up the front and back edges of the lid with 1/4-in. scraps to give clearance for the lid to swing open. Drill through the holes in the breadboards and into the rear legs. Tap in the dowels partway to check the swing. If all is working well, remove the dowels. You’ll set them in place fully after you’ve painted and carved the piece. | |
—Christopher Schwarz is a furniture maker and writer in Covington, Ky.
Fine Woodworking Recommended Products

Marking knife: Hock Double-Bevel Violin Knife, 3/4 in.
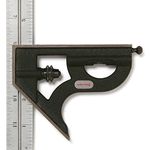
Starrett 12-in. combination square
Veritas Precision Square


Log in or create an account to post a comment.
Sign up Log in