Six Simple Finishing Fixes
Mistakes happen. Learn a pro's go-to tools and techniques for making them disappear.
Some people enjoy finishing. A few might even prefer finishing furniture to building it. For the two of you who just said, “That’s me!”—you’re reading the wrong article. For most of us, finishing is a necessary evil: We need a great finish to bring out the best in our best, but we don’t love the process and we dread a mistake. I’ve made more than my share of mistakes through the years, and I have picked up a few tips and tricks that will help you keep your sanity when the inevitable happens. I’ll go from glue-up to touch-up, and by the end I hope you’ll share my belief that everything (well, almost) is fixable, and you’ll be able to approach your finishing with less fear and more fun. I know these tips will prove as useful to you as they have to me.
Repair, don’t replace
Sometimes mistakes happen before you even begin finishing, but with the right repairs only you will know what happened. It’s heartbreaking to drop a furniture component and see a piece crack or break off, but sometimes the chemical companies smile on us and develop the perfect product for a specific problem.
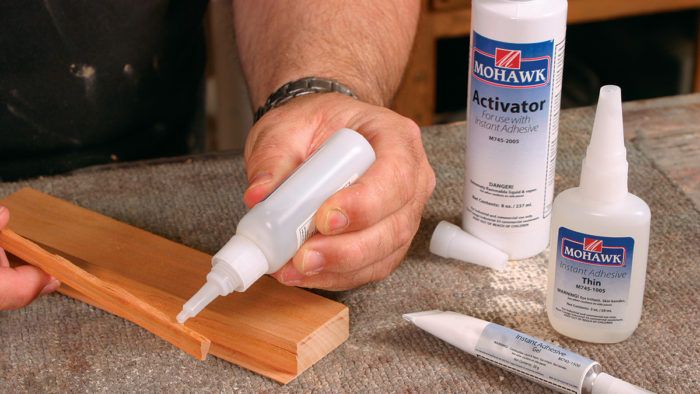
One such wonder is cyanoacrylate glue, which you probably know as “Super Glue.” To repair a crack or split, simply squeeze a conservative amount of glue onto one of the pieces, push the two parts together, and spray on an activator. Also known as an accelerator, this catalyst comes in a pump bottle or an aerosol and speeds up the glue’s setting. Wait a few seconds (the cure time will be different depending on the viscosity of the glue), and the pieces will be bonded. Unlike yellow glue, cyanoacrylate dries clear and very hard, so you can sand off the excess right away and it won’t show under a clear finish. However, you’ll need to dye or stain the piece before using this type of glue.
If you are dealing with a small piece, you can avoid getting glue on your skin by using a blunt but pointed tool as a clamp while you spray on the accelerator. This method also works on finished pieces, but use extreme care with the glue, because you have to remove all the excess when you’re finished and you don’t want to have to apply more finish because of the repair.


Got gaps? Make some filler
Sometimes your joinery skills come back to haunt you with embarrassing gaps in tabletops or carcases. Even if you can clamp the gap closed, glue is unlikely to hold it. No problem, just fill it. Here’s a simple recipe for the best sandable filler known to man. Collect fine sanding dust from the same wood as the piece you’re repairing. Create a slurry using the sanding dust and a small amount of a fast-drying finish such as lacquer or dewaxed shellac. Simply force it into the joint as you would any other filler. The advantages to using a finish to make the filler (instead of the traditional choice of glue) are twofold: The paste dries faster and harder than a glue-based one; and it contains the same combination of materials as the final product—finish and wood—so it’s virtually invisible when used under a clear finish.


Removing sanding marks and glue stain
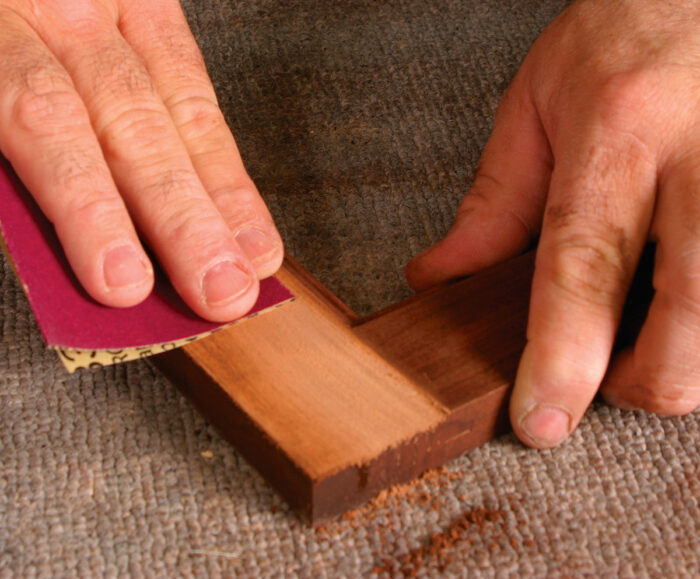
Poor sanding is the culprit behind a lot of poor finishes. Two main problems are swirl marks (from an orbital sander whose paper hasn’t been changed frequently enough) and cross-grain scratches. Either problem may hide until a stain or a clear finish is applied. Don’t panic. If you’re using an oil-based stain or clear coat, sand with the grain while the finish is still wet, using the last grit you used. Sand until the scratches or swirl marks are gone. Then reapply the stain or finish and you should have no blending issues. If you’re using a faster-drying finish, like lacquer or shellac, wait until the coat has dried, sand, and then reapply.
Another surface-preparation problem is dried glue, which is very easy to miss, especially on lighter woods. If you’ve missed some, use the same repair as you would on swirl marks. However, there is a great new product on the market to prevent this from happening. Franklin International’s Titebond II Fluorescent Wood Glue contains a dye that shows up under a black light so that you can find every last trace of it during cleanup and sanding.


Shave away drips and runs
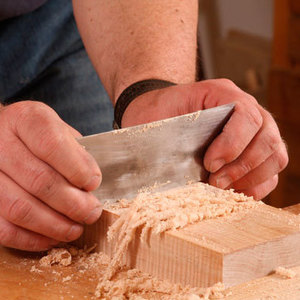
Don’t rush your finishing. One of the most common mistakes is applying too much finish too fast, causing drips and runs. Then when you try to sand away the problem, you usually sand through the finish in the areas surrounding the drip or run. Meet your new best friend, the single-edged razor blade. It is, without a doubt, the most-used tool in my repair kit. For a drip or run, I use it as a miniature cabinet scraper. Just hold it between your thumbs and forefingers, flex it a little, and shave down the spot until it’s level and glassy smooth.

on the surface.
There are several benefits to using a razor blade: Unlike sandpaper, which conceals the work area, a razor lets you see how much finish you are removing. The flex of the blade allows you to concentrate on the area you want to remove without disturbing the good finish surrounding it. Finally, a razor leaves a smooth surface that blends in with the next coat.


Touch-up for sand-through
When sanding an intermediate coat of finish, it’s very easy to sand through the finish on corners and edges if you’re not careful—and sometimes even if you are. If you’ve dyed or stained the wood, you now have the problem of matching the bare wood to the surrounding color. I do this with a couple of products.
My first choice is Mohawk’s Blendal sticks. Similar in shape to crayons, they are a soft wax blended with aniline dye as a coloring agent. You use the stick just like a crayon and lightly rub the surface with your finger to blend colors. These work great on edges, corners, and any other areas that need spot color adjustments. Don’t leave the color too thick or it could invite adhesion problems. Instead, layer color and coats of lacquer or shellac until you’ve reached the required shade.
When Blendals aren’t available, head to the drug store’s makeup department (yes, guys, I said makeup) and sort through the eyeliner and lip liners. They come in quite a few shades that match many finishes, and in the hands of a good finisher, they are like magic wands. Again, be careful not to apply too thick a layer.


Filling holes after finishing
To make repairs where the finish is already in place, I often use wax sticks. They come in many colors, making it easy to match the color of any finish. For small voids such as nail holes, simply rub the stick back and forth until the hole is filled and then wipe off the excess with a cloth.
For larger holes, cut a plug from the end of a stick and knead it until pliable. Next, press the lump of wax into the void, pushing it from side to side to ensure good adhesion. Now, return to your razor blade and start shaving away the excess until the wax is just above the surrounding surface. Switch to an old credit card or hotel room key card and scrape away the remaining surplus. Although slower than the razor blade, this won’t damage the surrounding finish.
Give the wax a few minutes to harden and then, using a cloth wrapped around a cork-faced block, lightly buff the area to remove any wax from the adjacent wood and to bring up the shine. Wax sticks are great fillers but they are soft, limiting their use on high-traffic surfaces like tabletops.


From Fine Woodworking #214
To view the entire article, please click the View PDF button below.
Fine Woodworking Recommended Products
Osmo Polyx-Oil
Bahco 6-Inch Card Scraper


Log in or create an account to post a comment.
Sign up Log in