
Handplaning With Precision
You can use a smoothing plane for more than just smoothing.

Synopsis: A handplane is useful for much more than smoothing. In fact, Bob Van Dyke uses his No. 4 to create perfect edge joints on panel glue-ups, fix an uneven reveal around a door frame, correct gaps in mortise-and-tenon joinery, adjust miter joints, and flatten cupped, bowed, or twisted boards.
It was not until I started working with Will Neptune years ago that I began to appreciate the value of a systematic approach to working with a handplane. Until then, I had used one for smoothing and making pretty shavings, and completely missed the level of precision possible. By approaching planing tasks, including joinery, systematically, I’ve been able to work more accurately using just a single plane, my No. 4, whose small size lets me target specific areas effectively.
The key is to plan and count your strokes. Most plane shavings are around 1–3 thousandths of an inch thick—the average piece of paper is 3 thousandths of an inch thick—making the handplane an incredibly precise tool for adjustment. By mapping out and counting the strokes, you can predict and control your results. This means precision doesn’t come from taking a heavier or lighter cut, but by keeping track of how many passes you have made—and where you’ve made them.
 |
 |
 |
Better edge joints
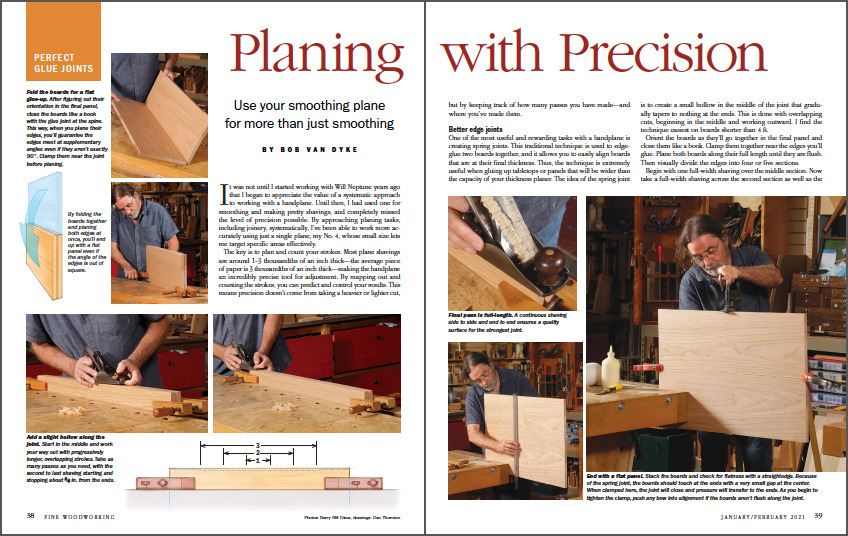
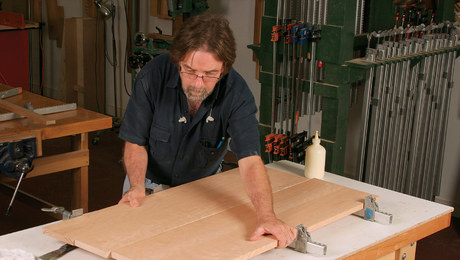
One of the most useful and rewarding tasks with a handplane is creating spring joints. This traditional technique is used to edge-glue two boards together, and it allows you to easily align boards that are at their final thickness. Thus, the technique is extremely useful when gluing up tabletops or panels that will be wider than the capacity of your thickness planer. The idea of the spring joint is to create a small hollow in the middle of the joint that gradually tapers to nothing at the ends. This is done with overlapping cuts, beginning in the middle and working outward. I find the technique easiest on boards shorter than 4 ft.
Video: Creating a spring joint with a handplane
Bob Van Dyke demonstrates how he creates a spring joint
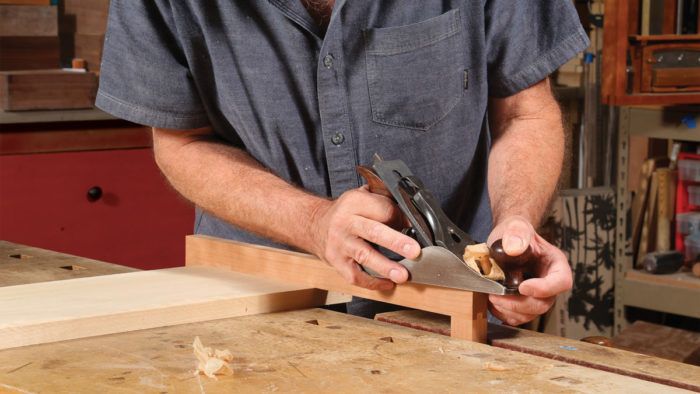
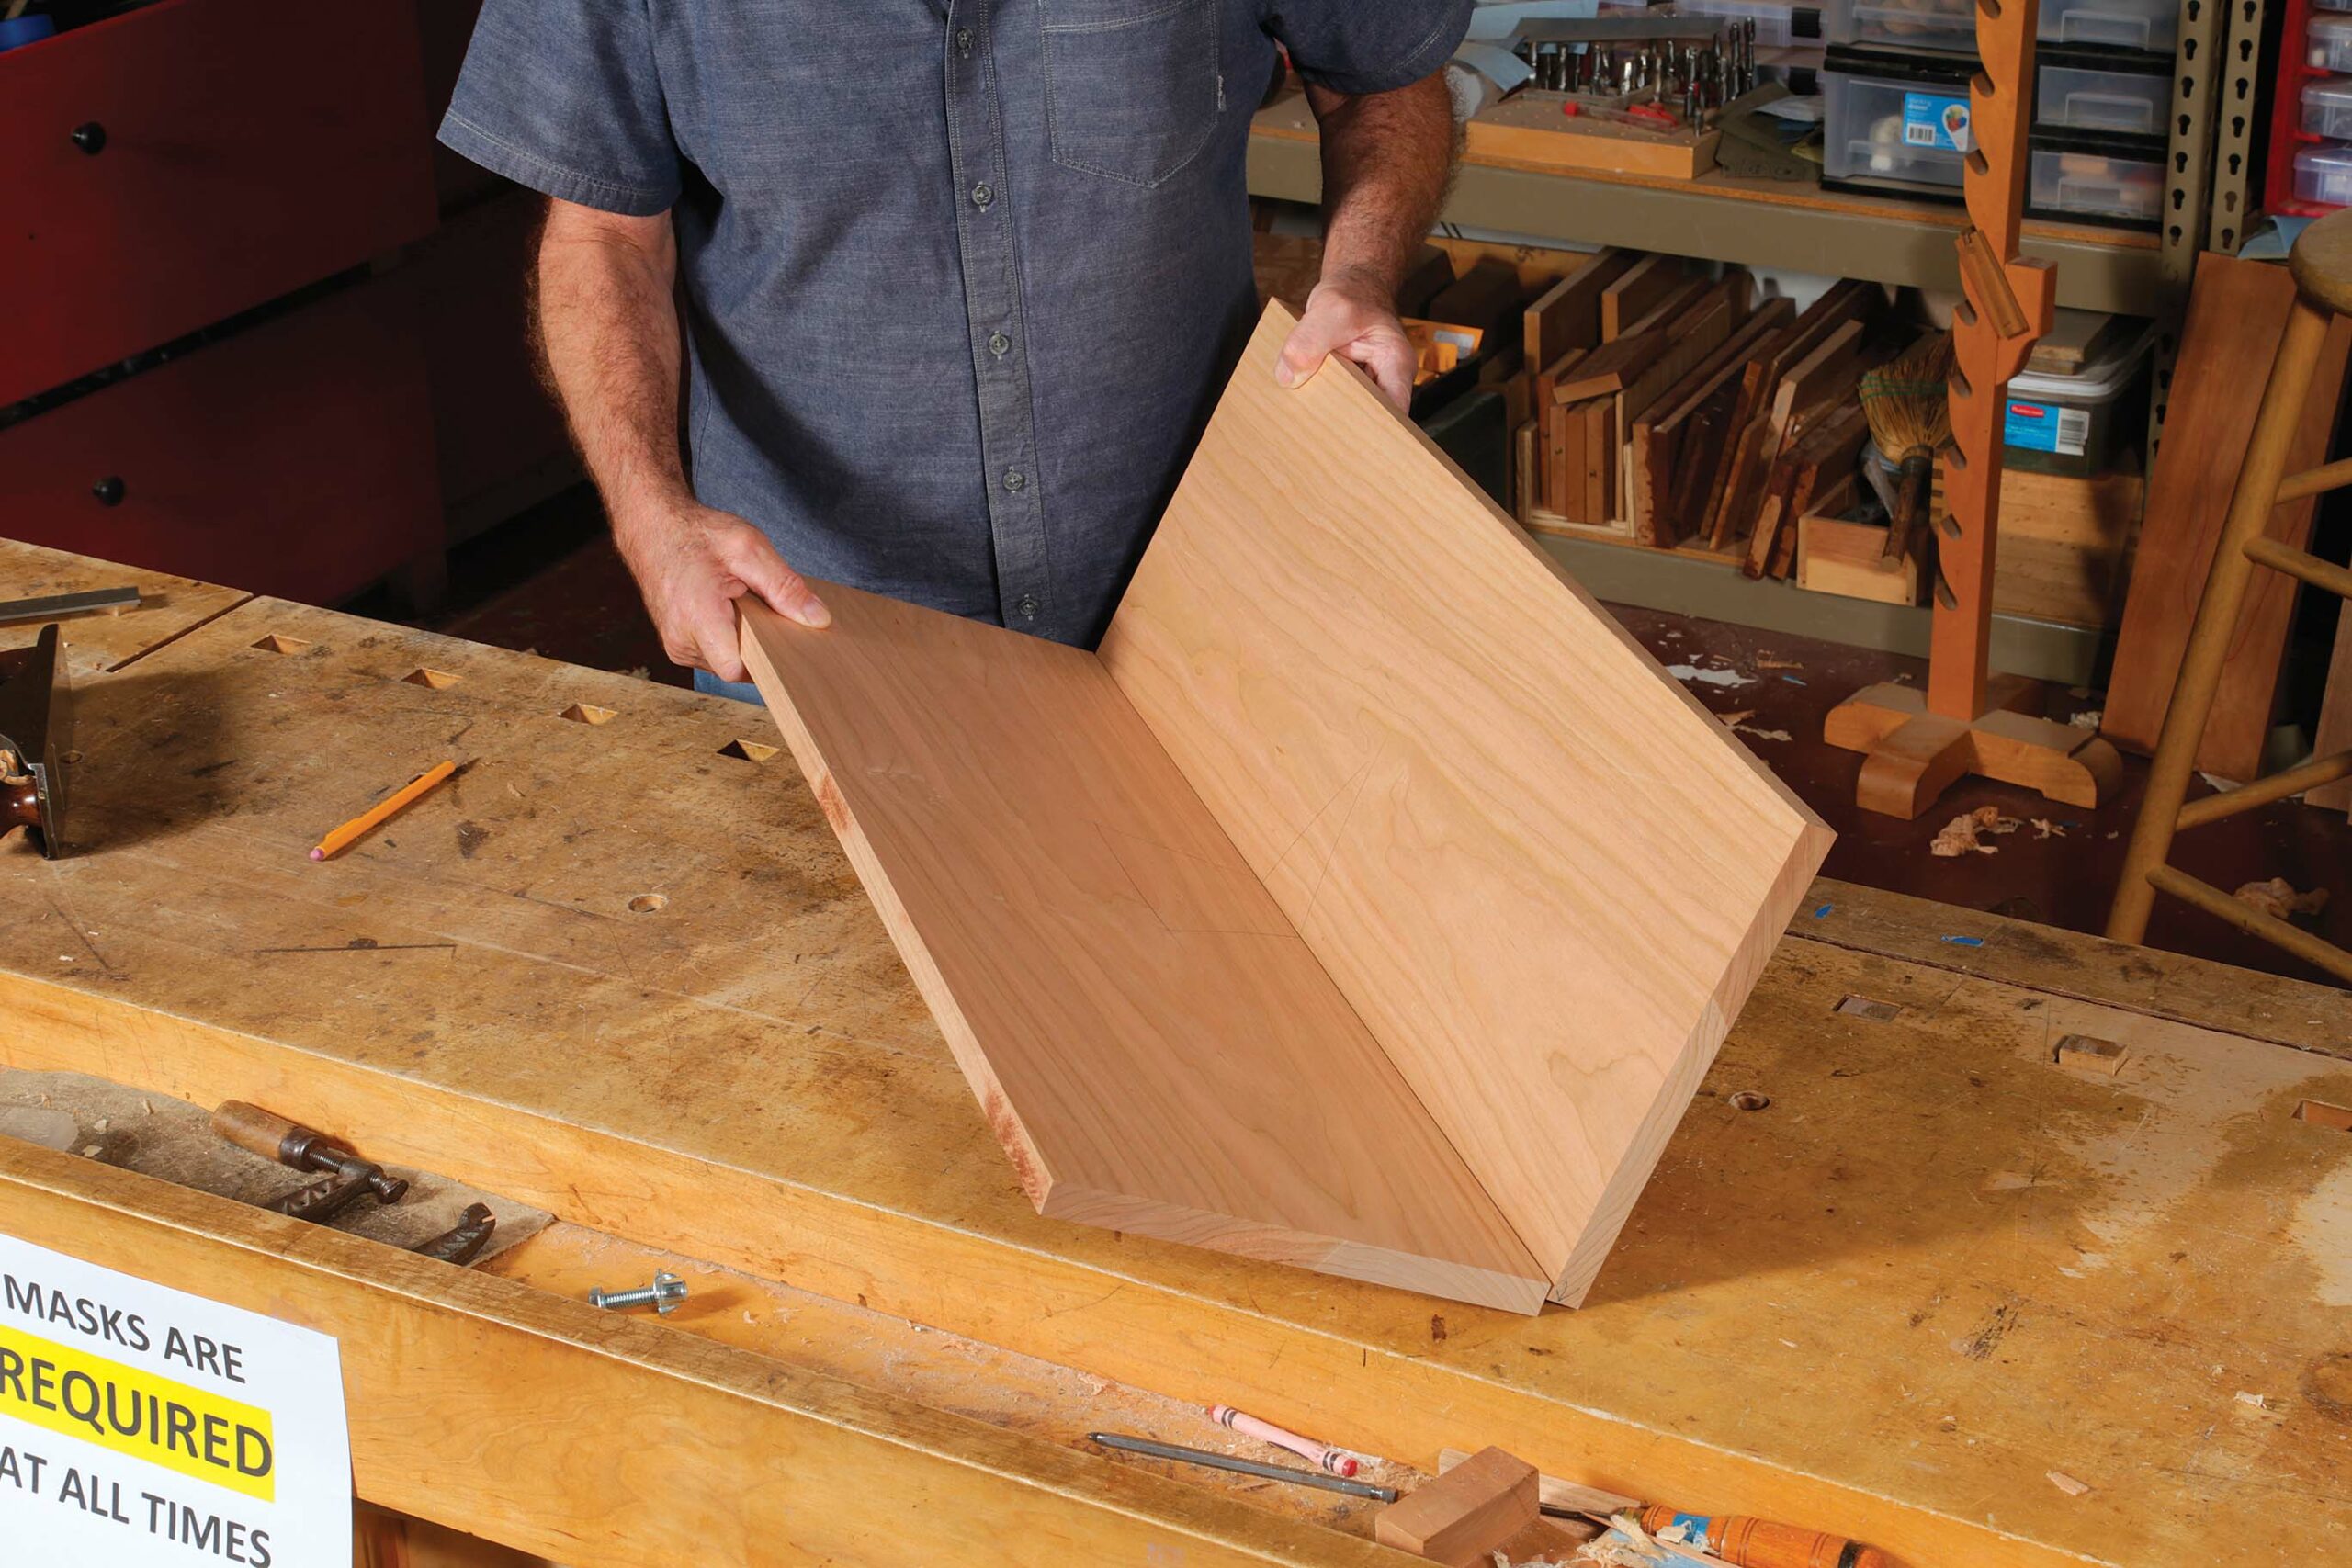
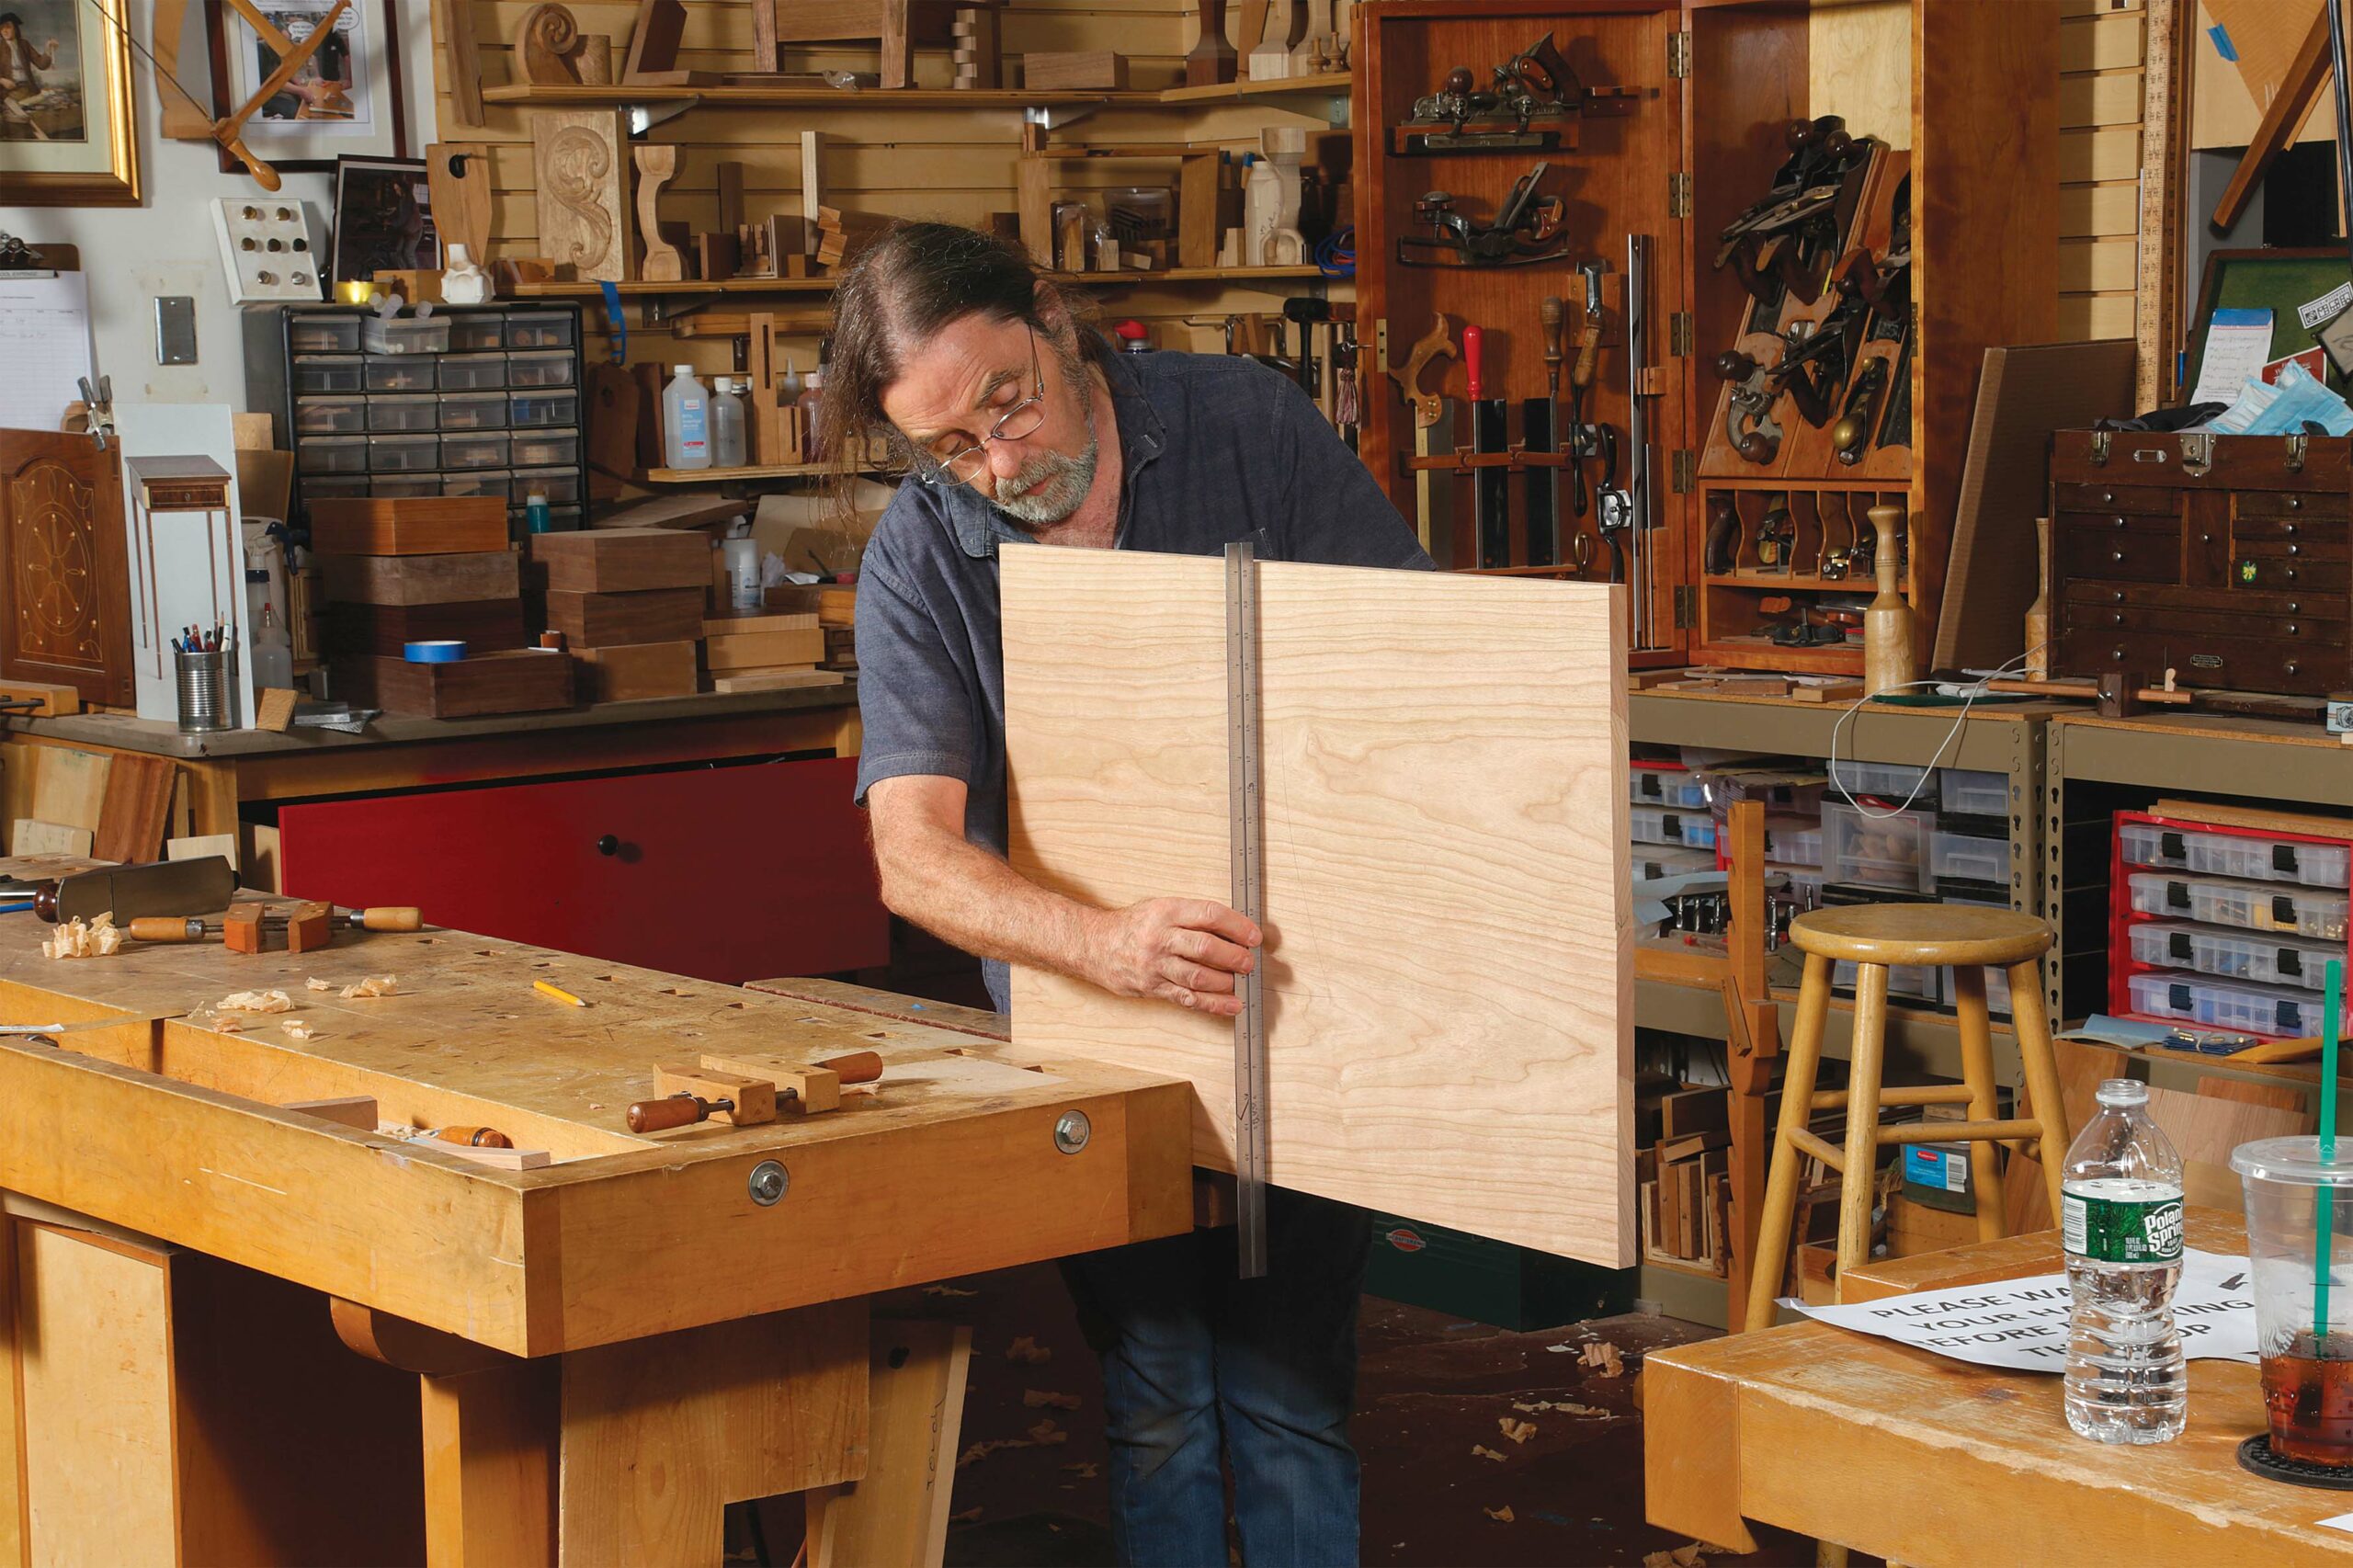
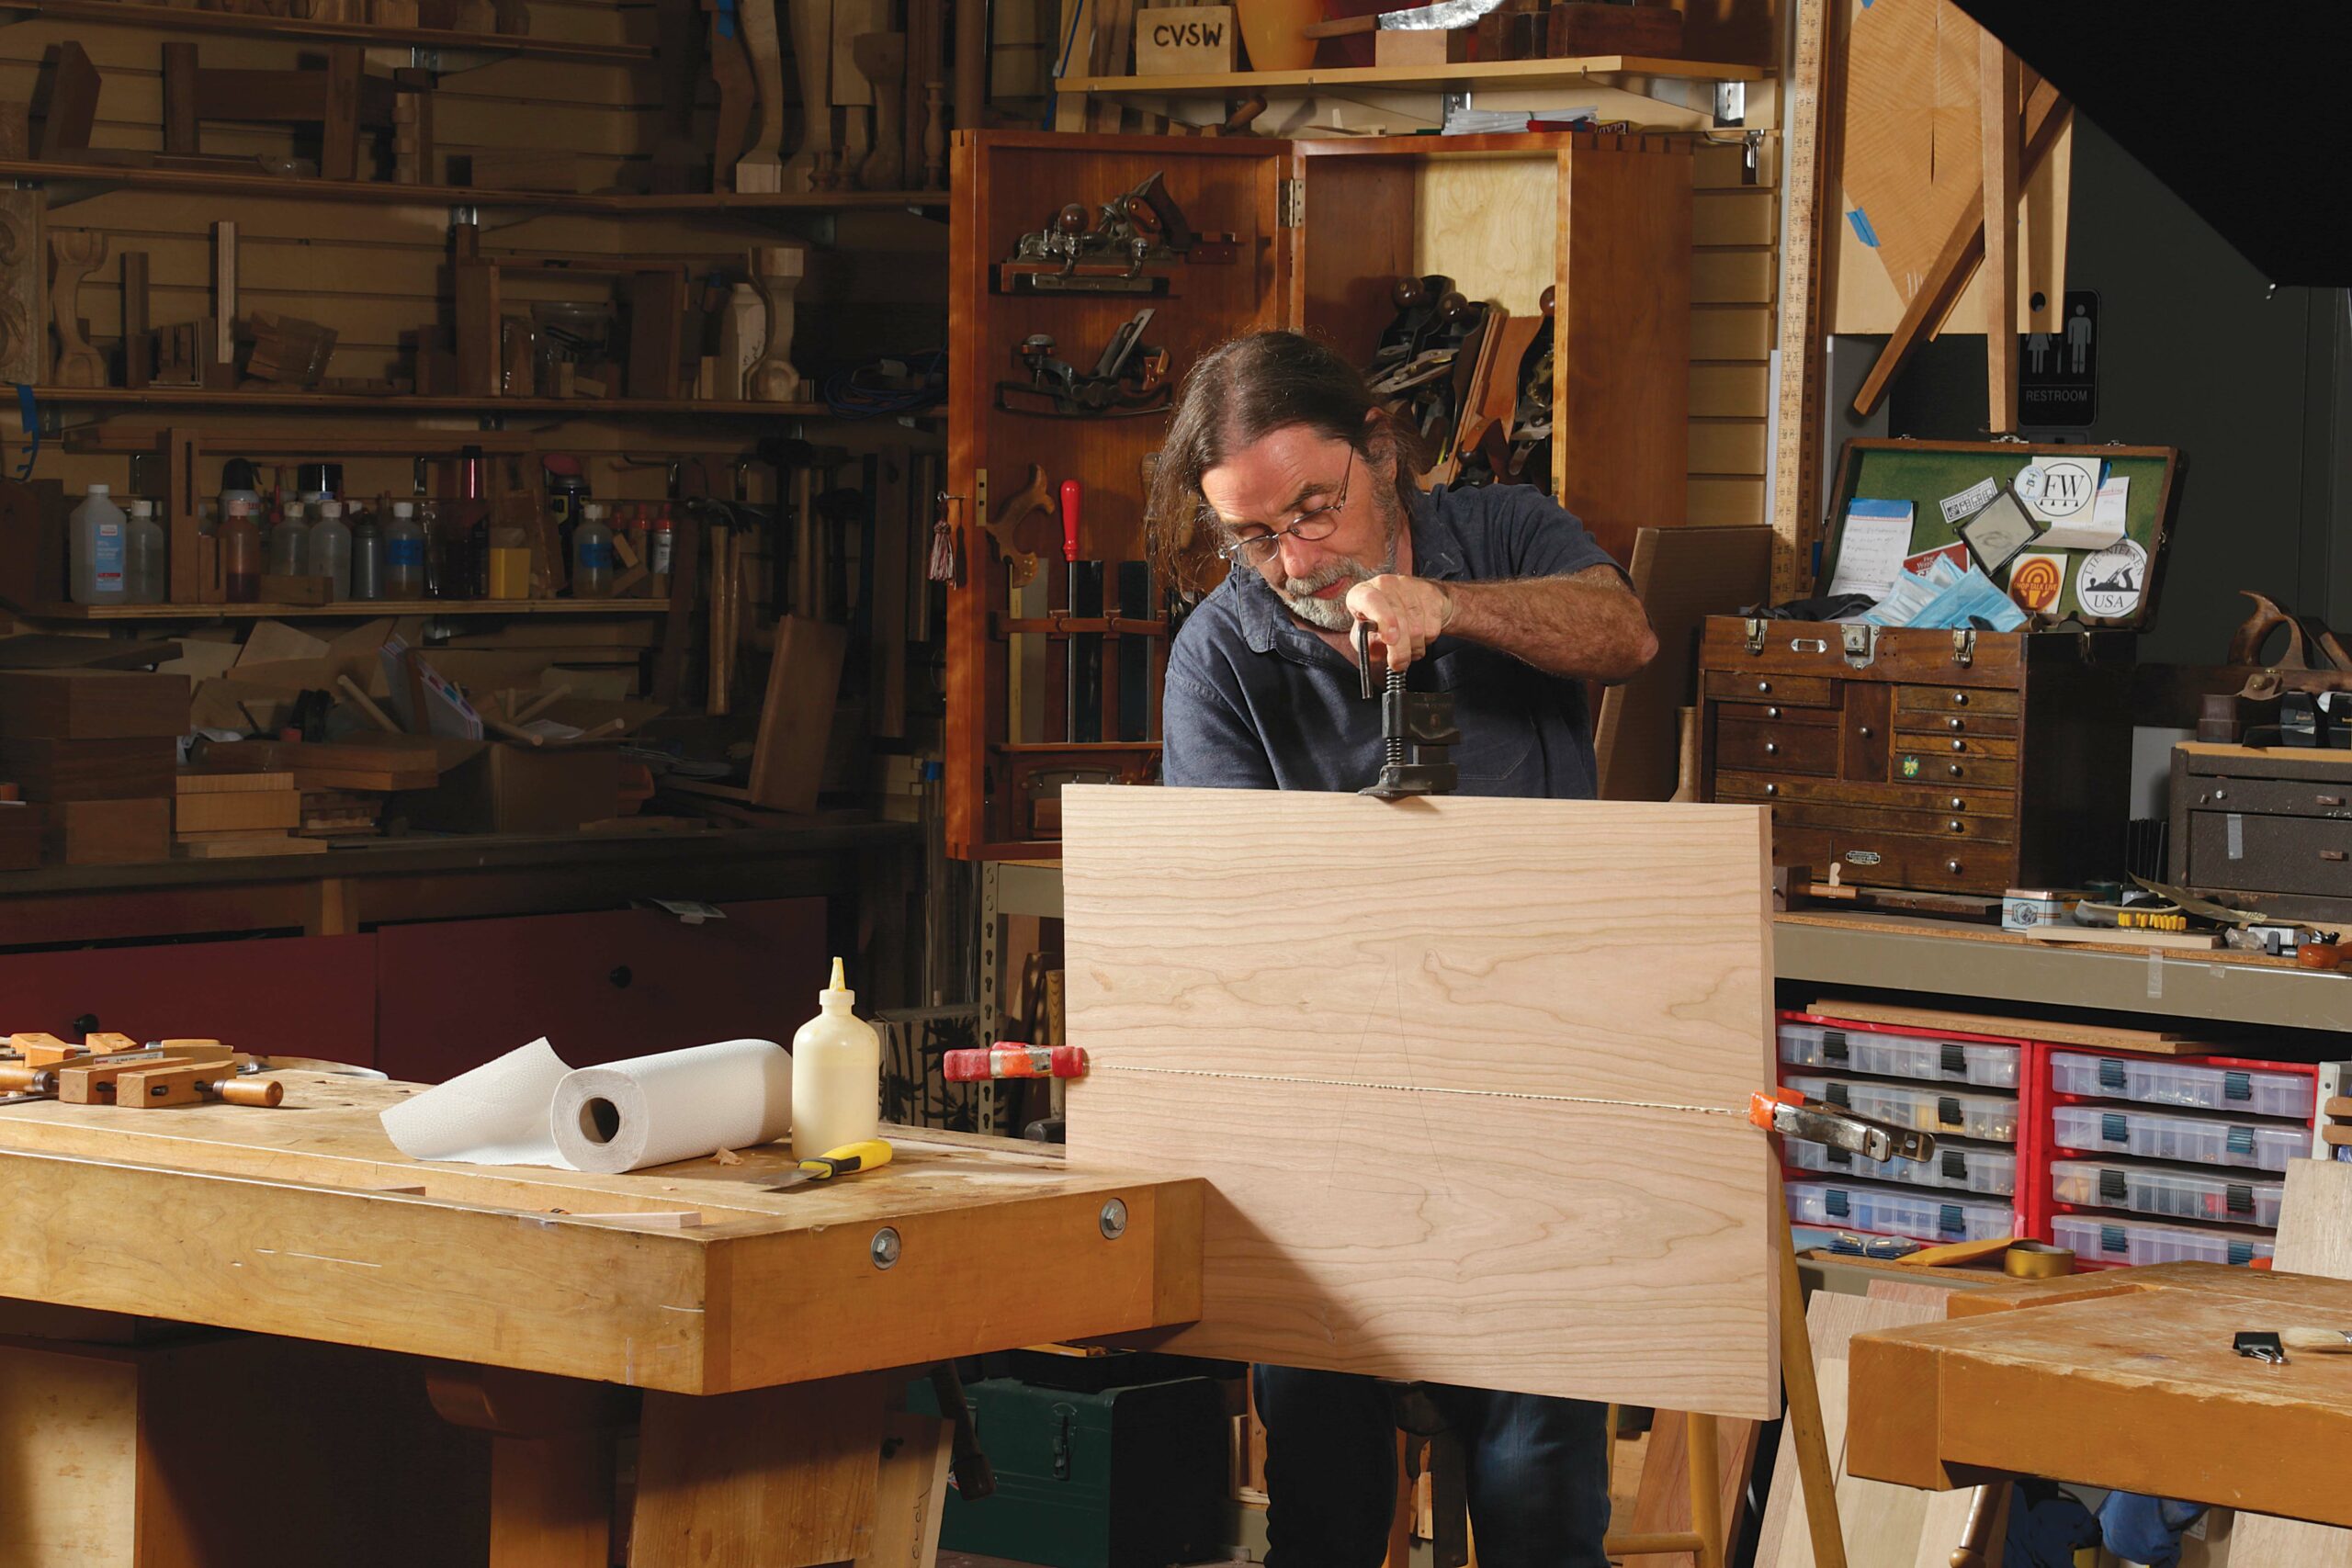
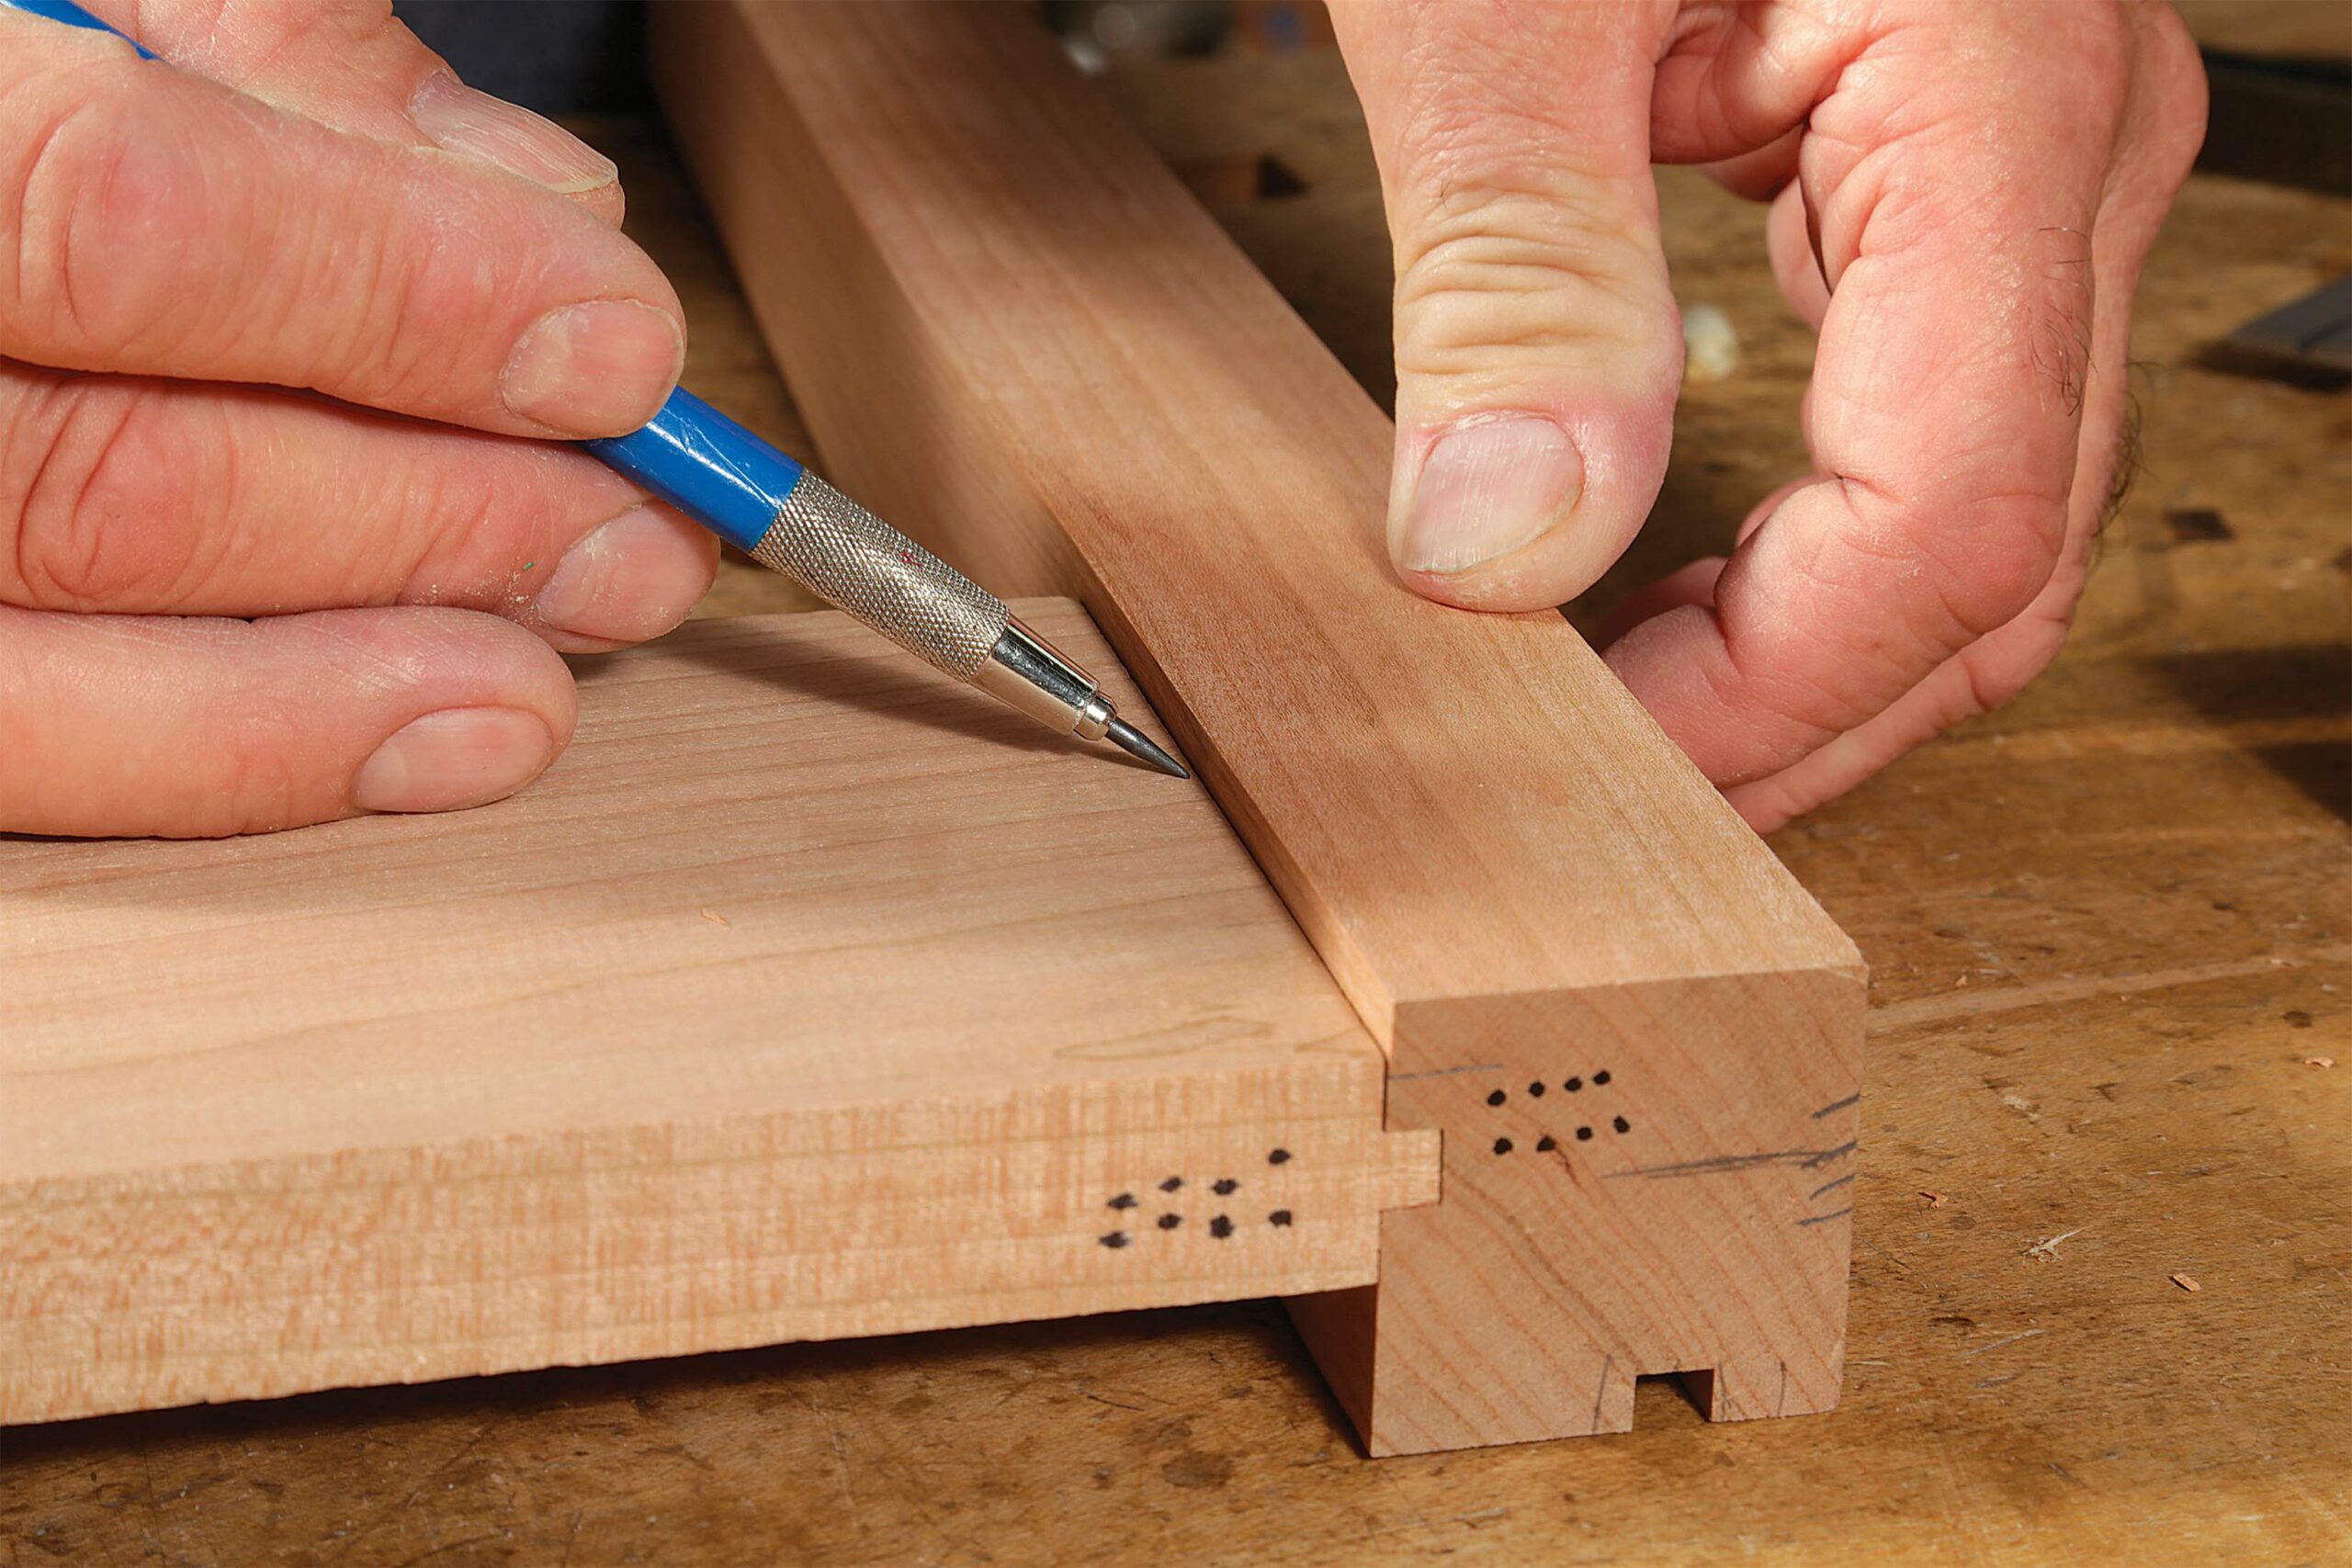
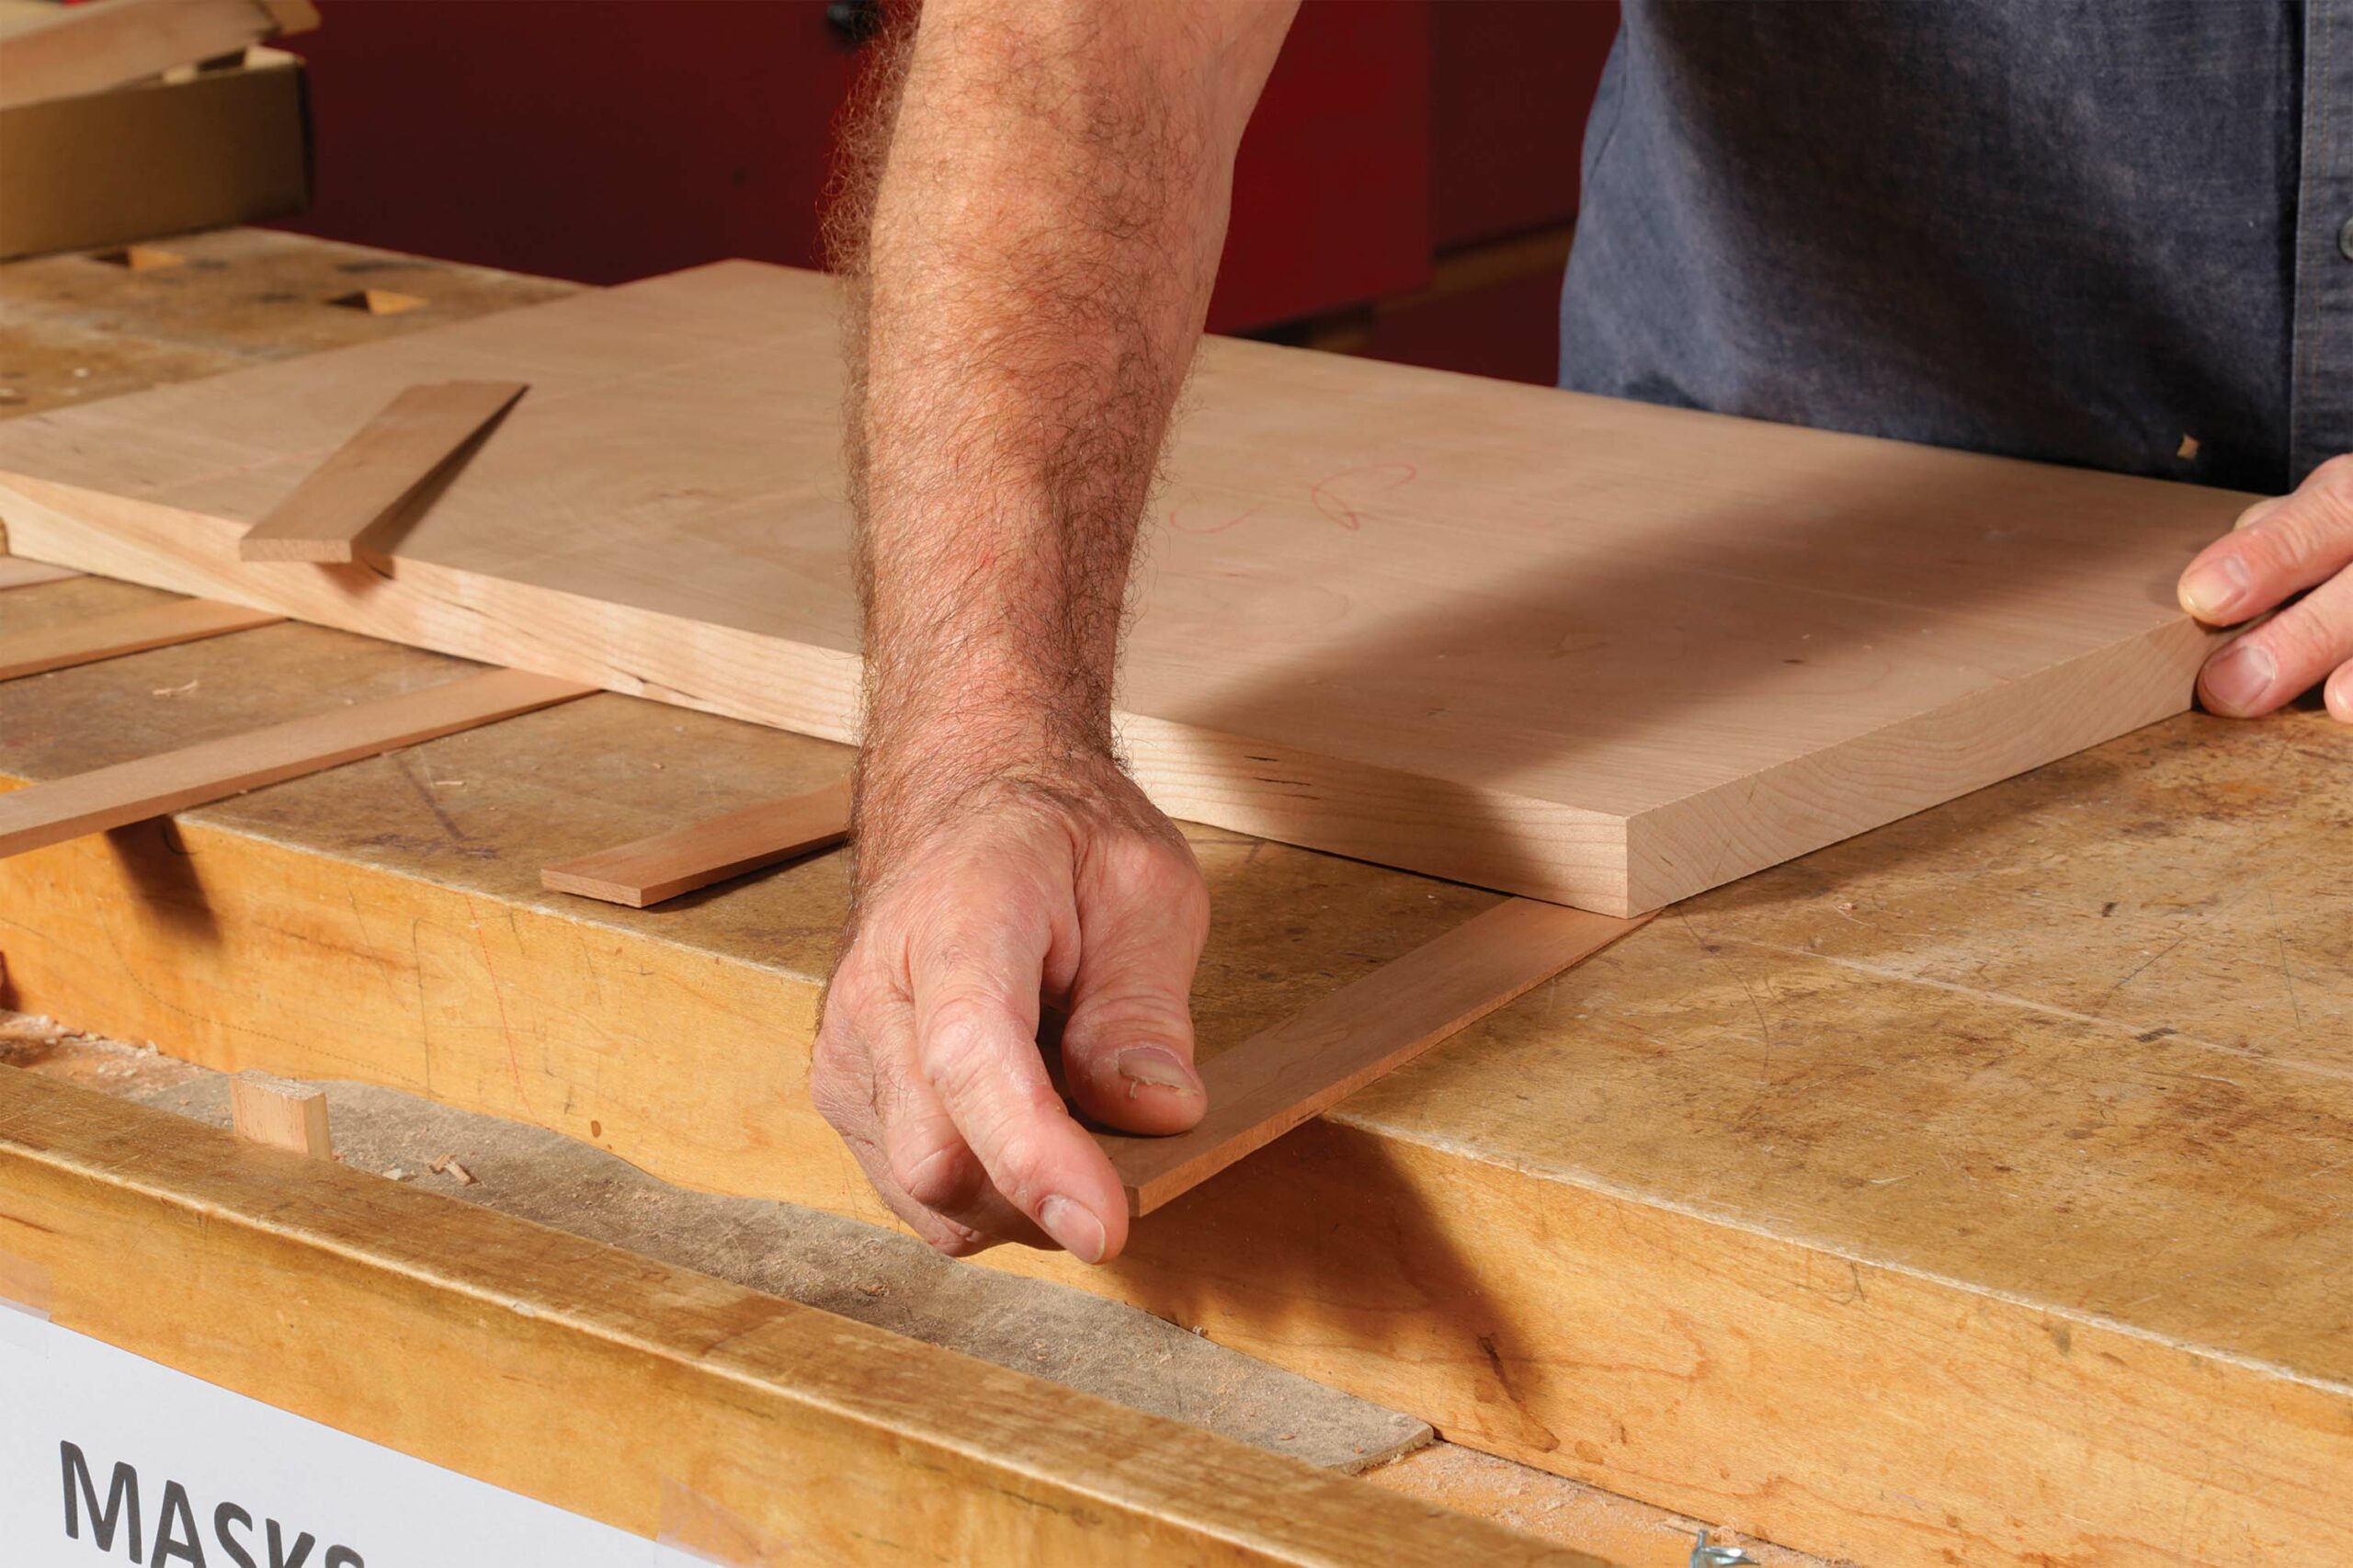
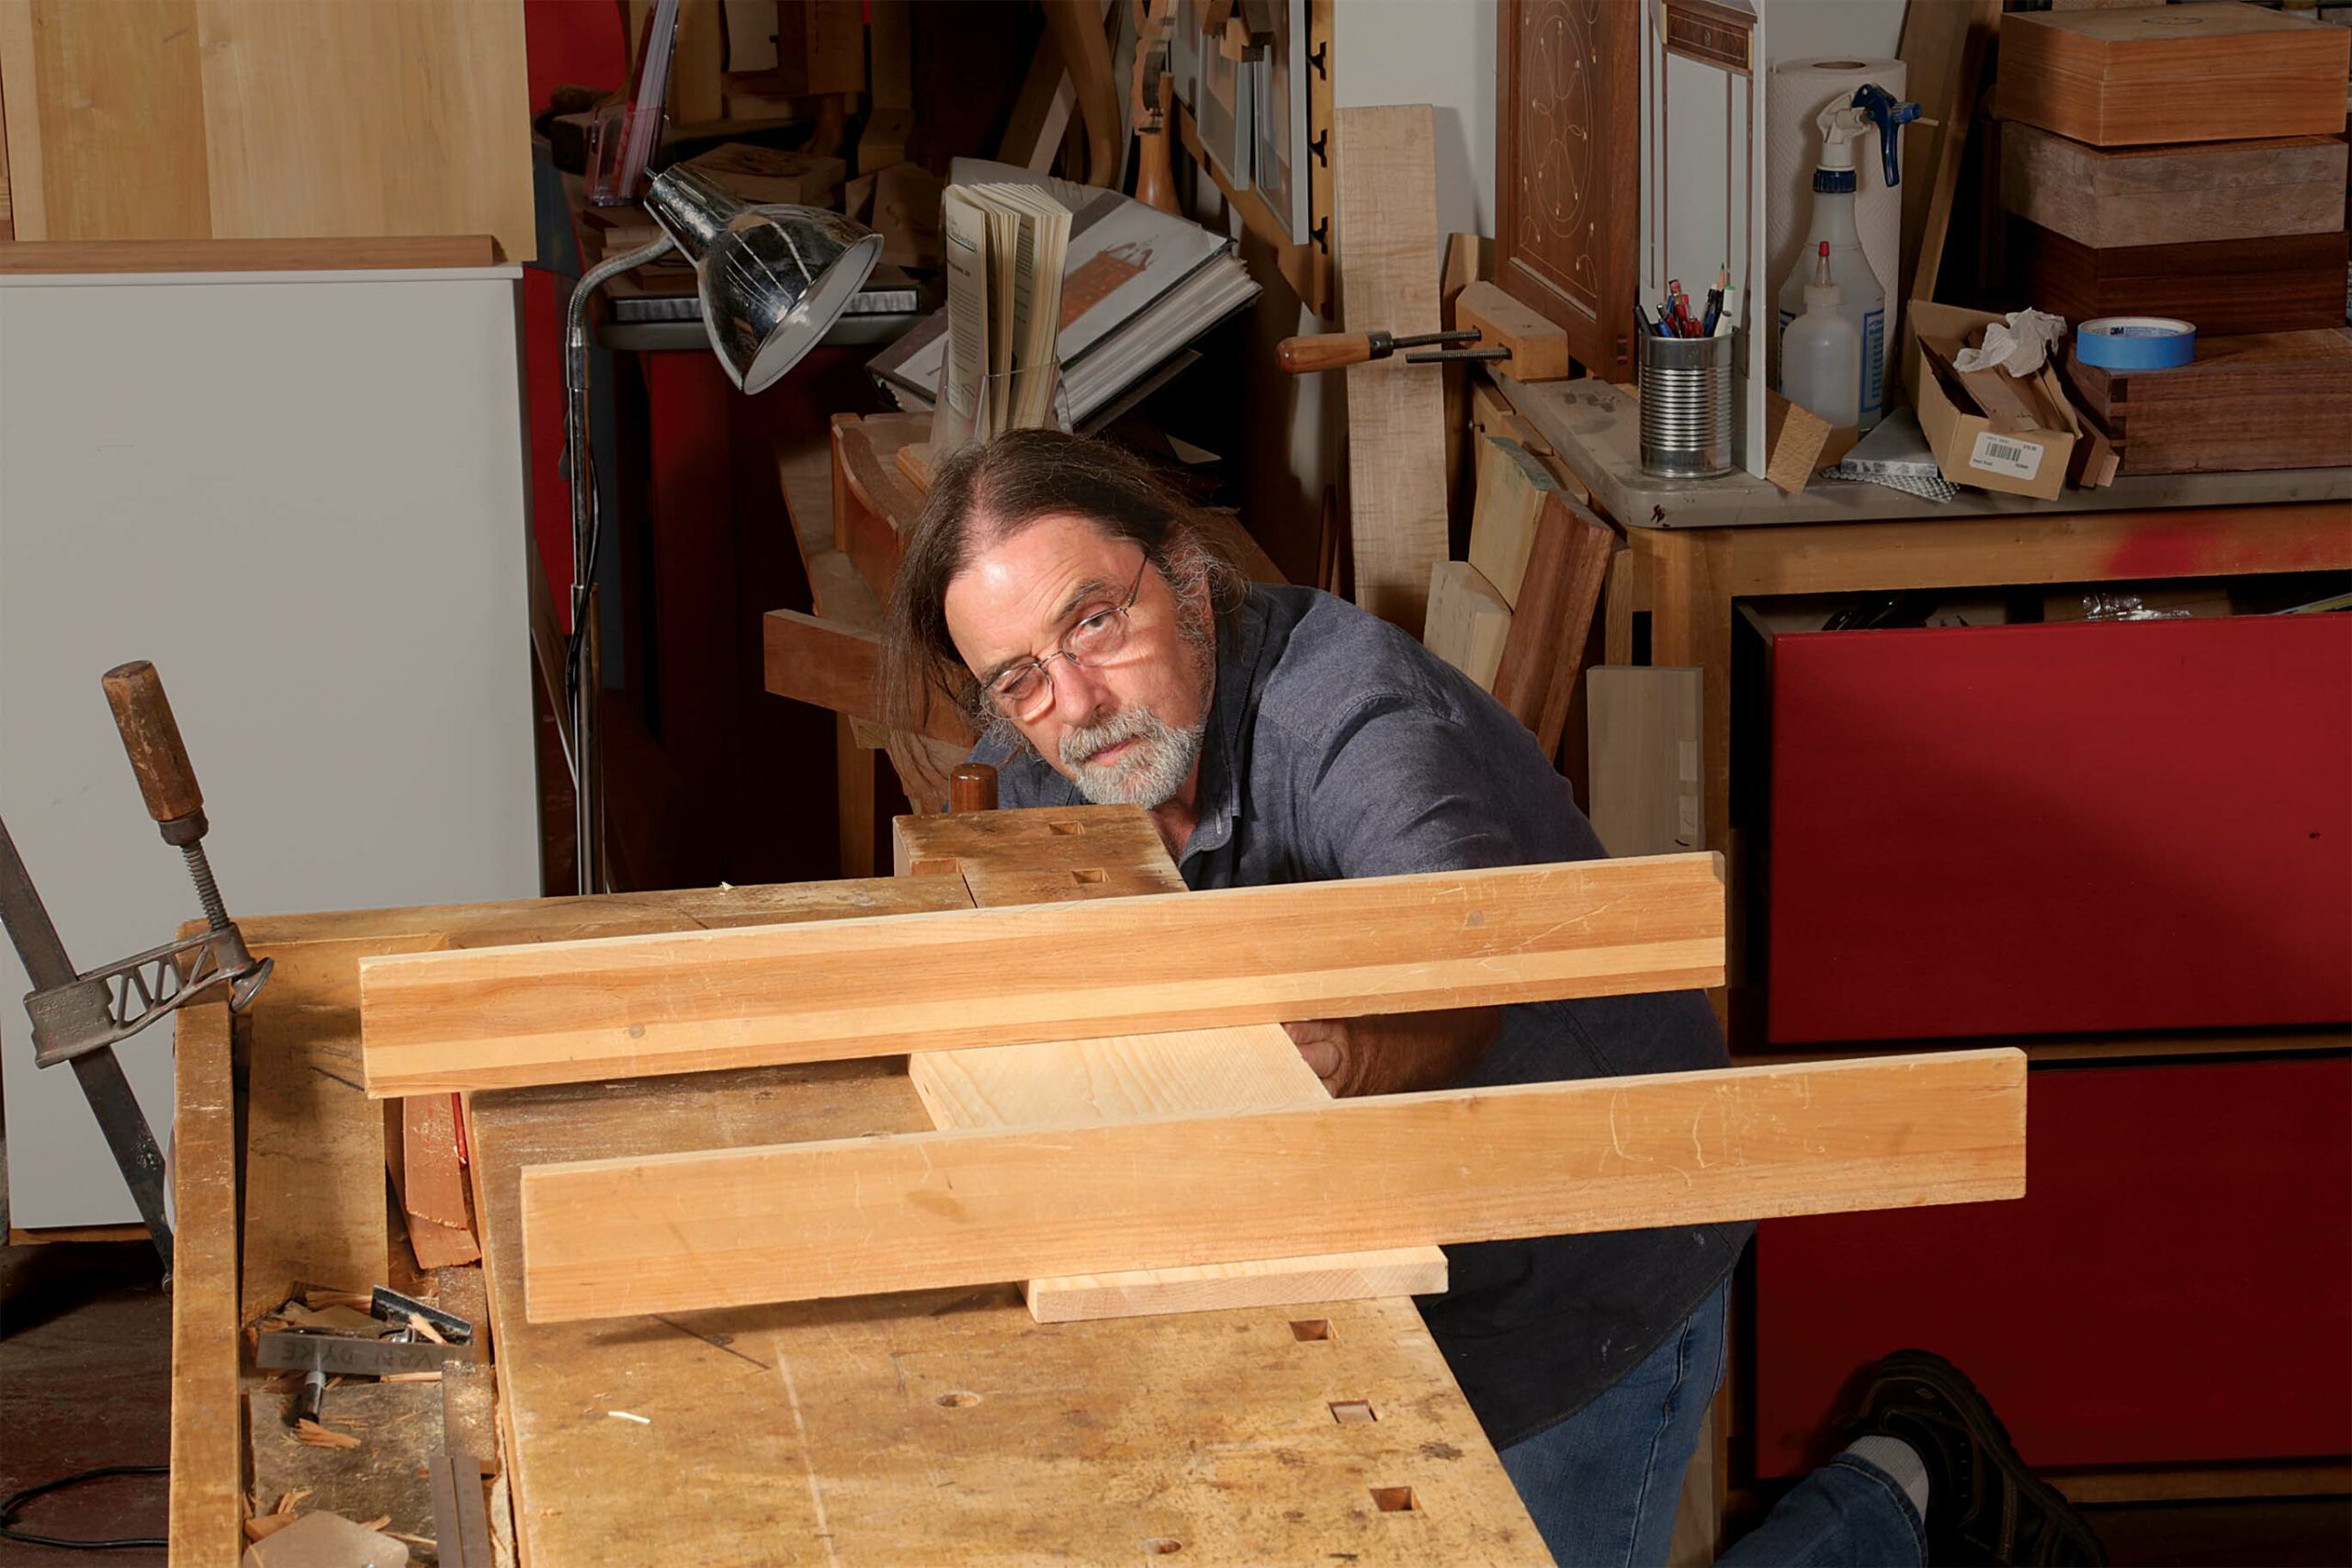
Orient the boards as they’ll go together in the final panel and close them like a book. Clamp them together near the edges you’ll glue. Plane both boards along their full length until they are flush. Then visually divide the edges into four or five sections.
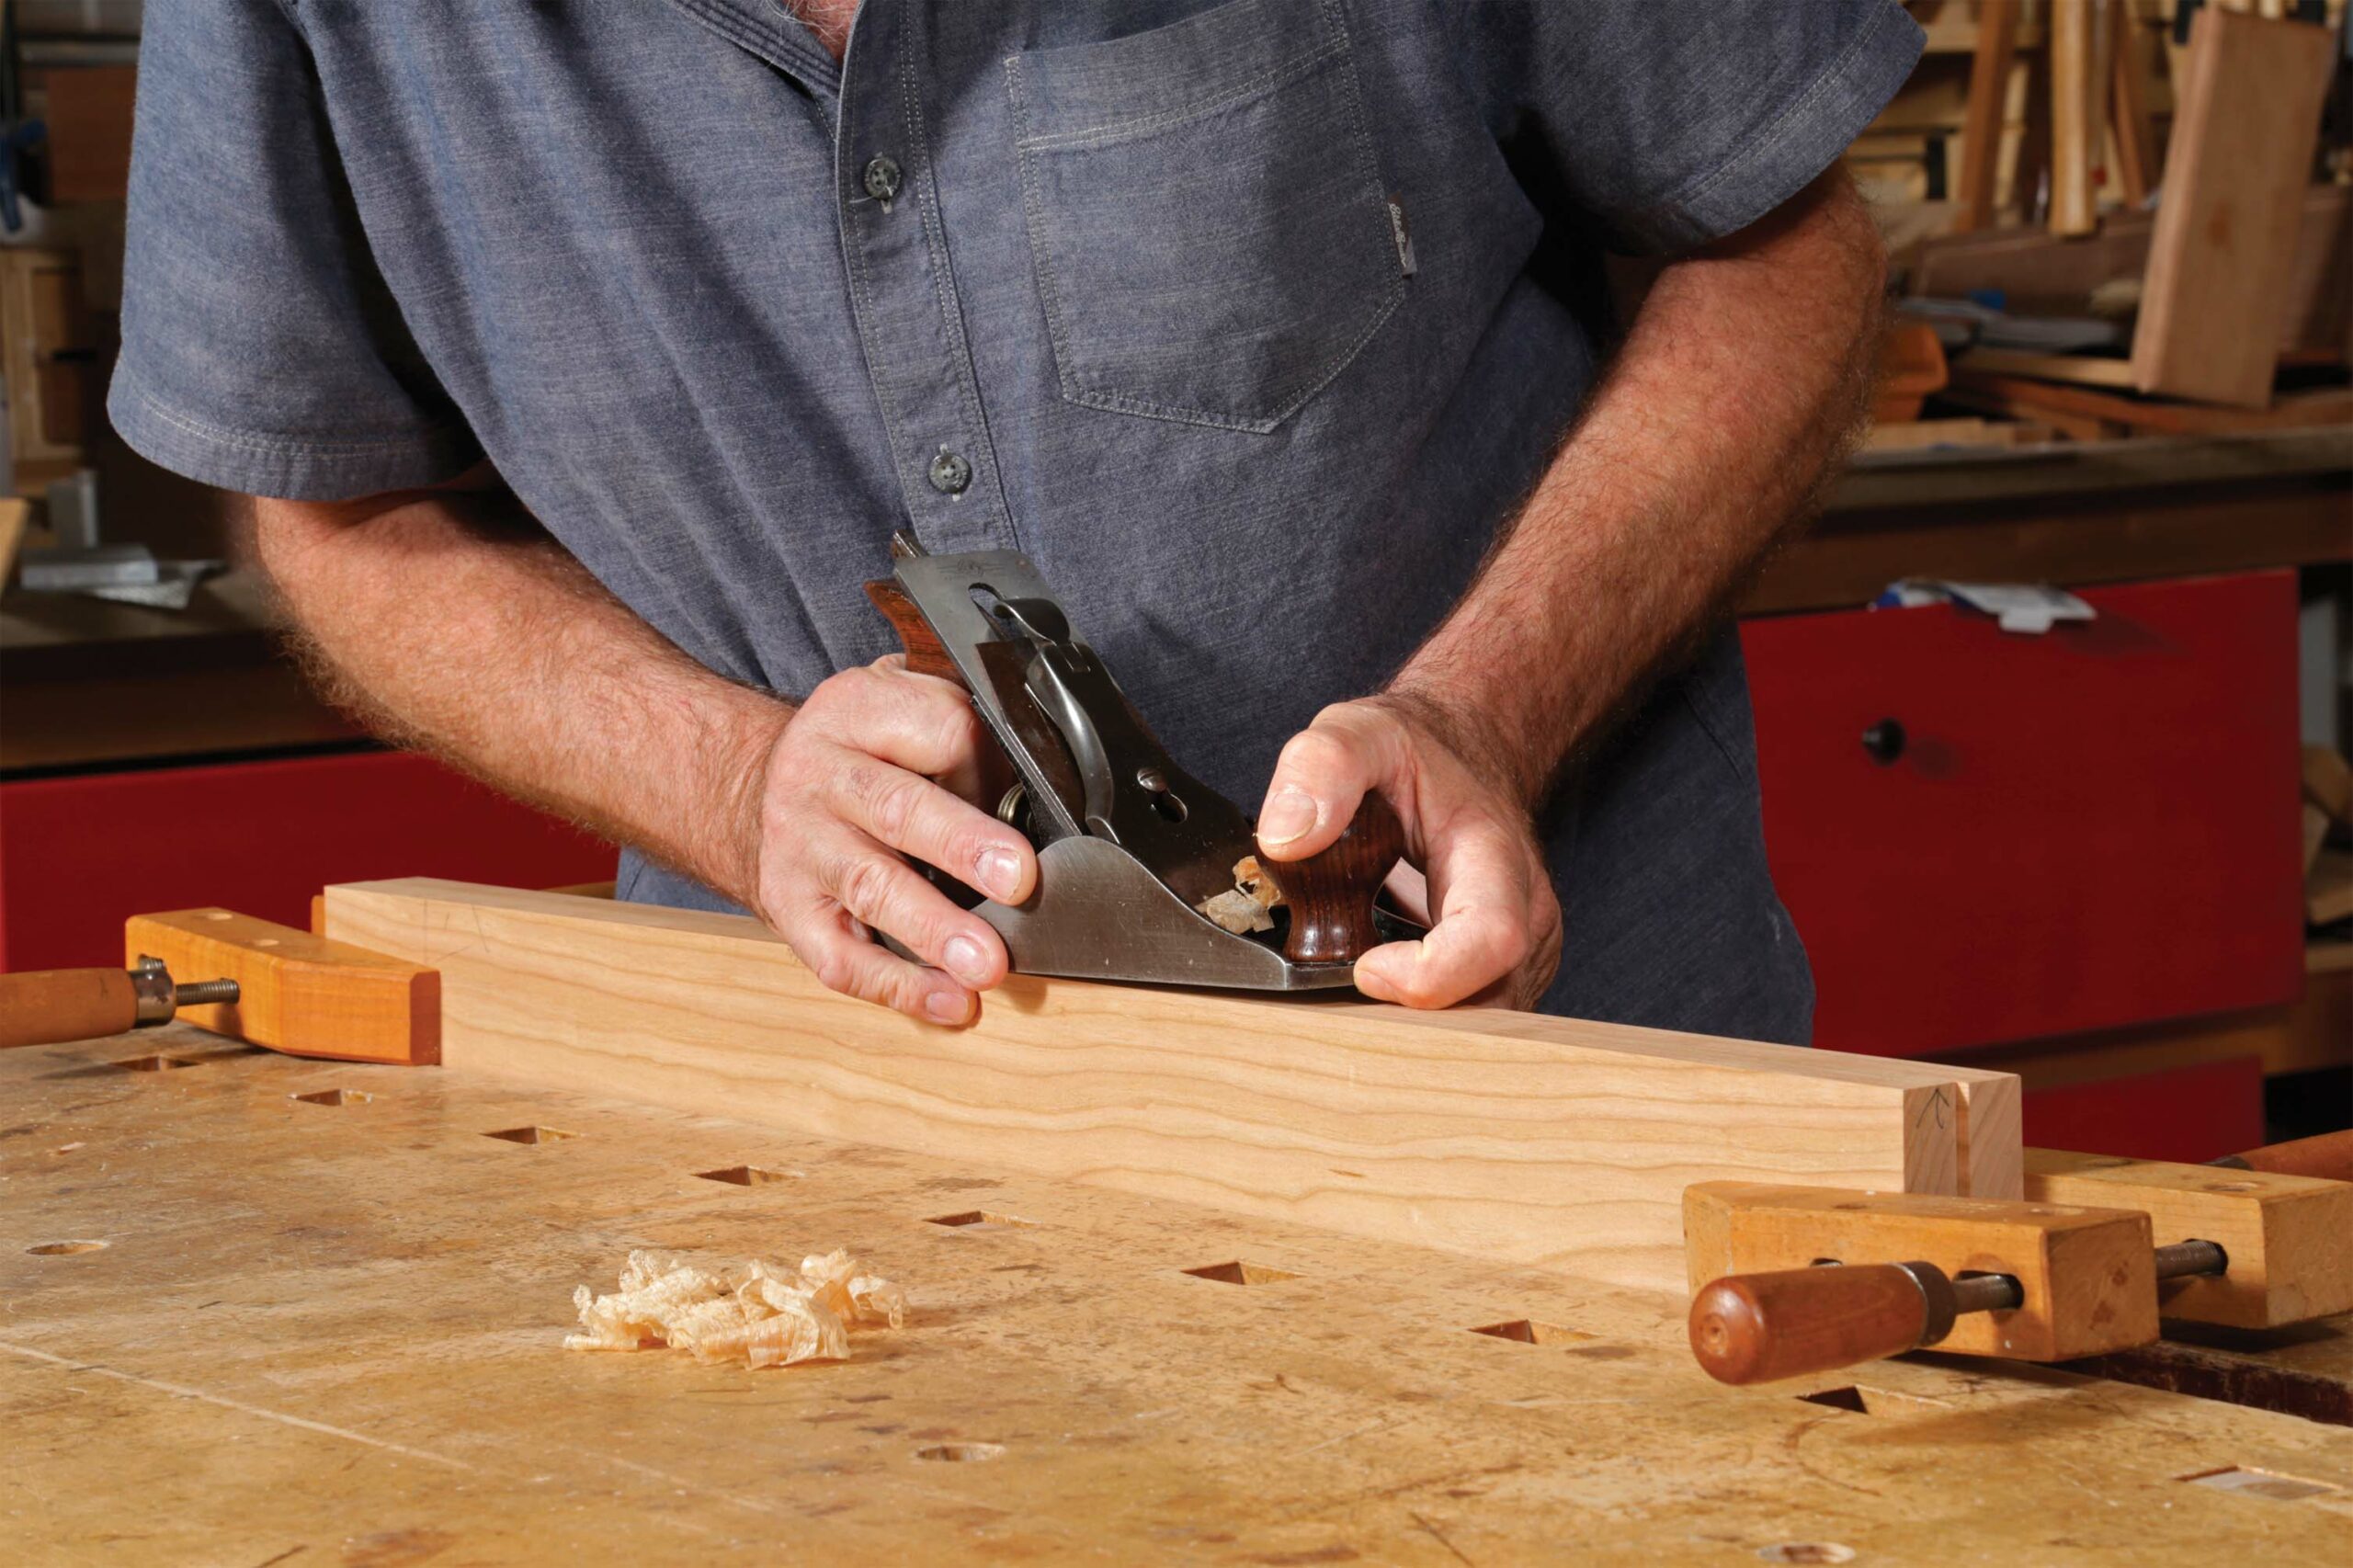
Begin with one full-width shaving over the middle section. Now take a full-width shaving across the second section as well as the first. Repeat along the length of the board. The short sole on the No. 4 allows the plane to follow the diving cut as you form the hollow. The last pass should be twin continuous shavings the length of both boards.
 |
 |
 |
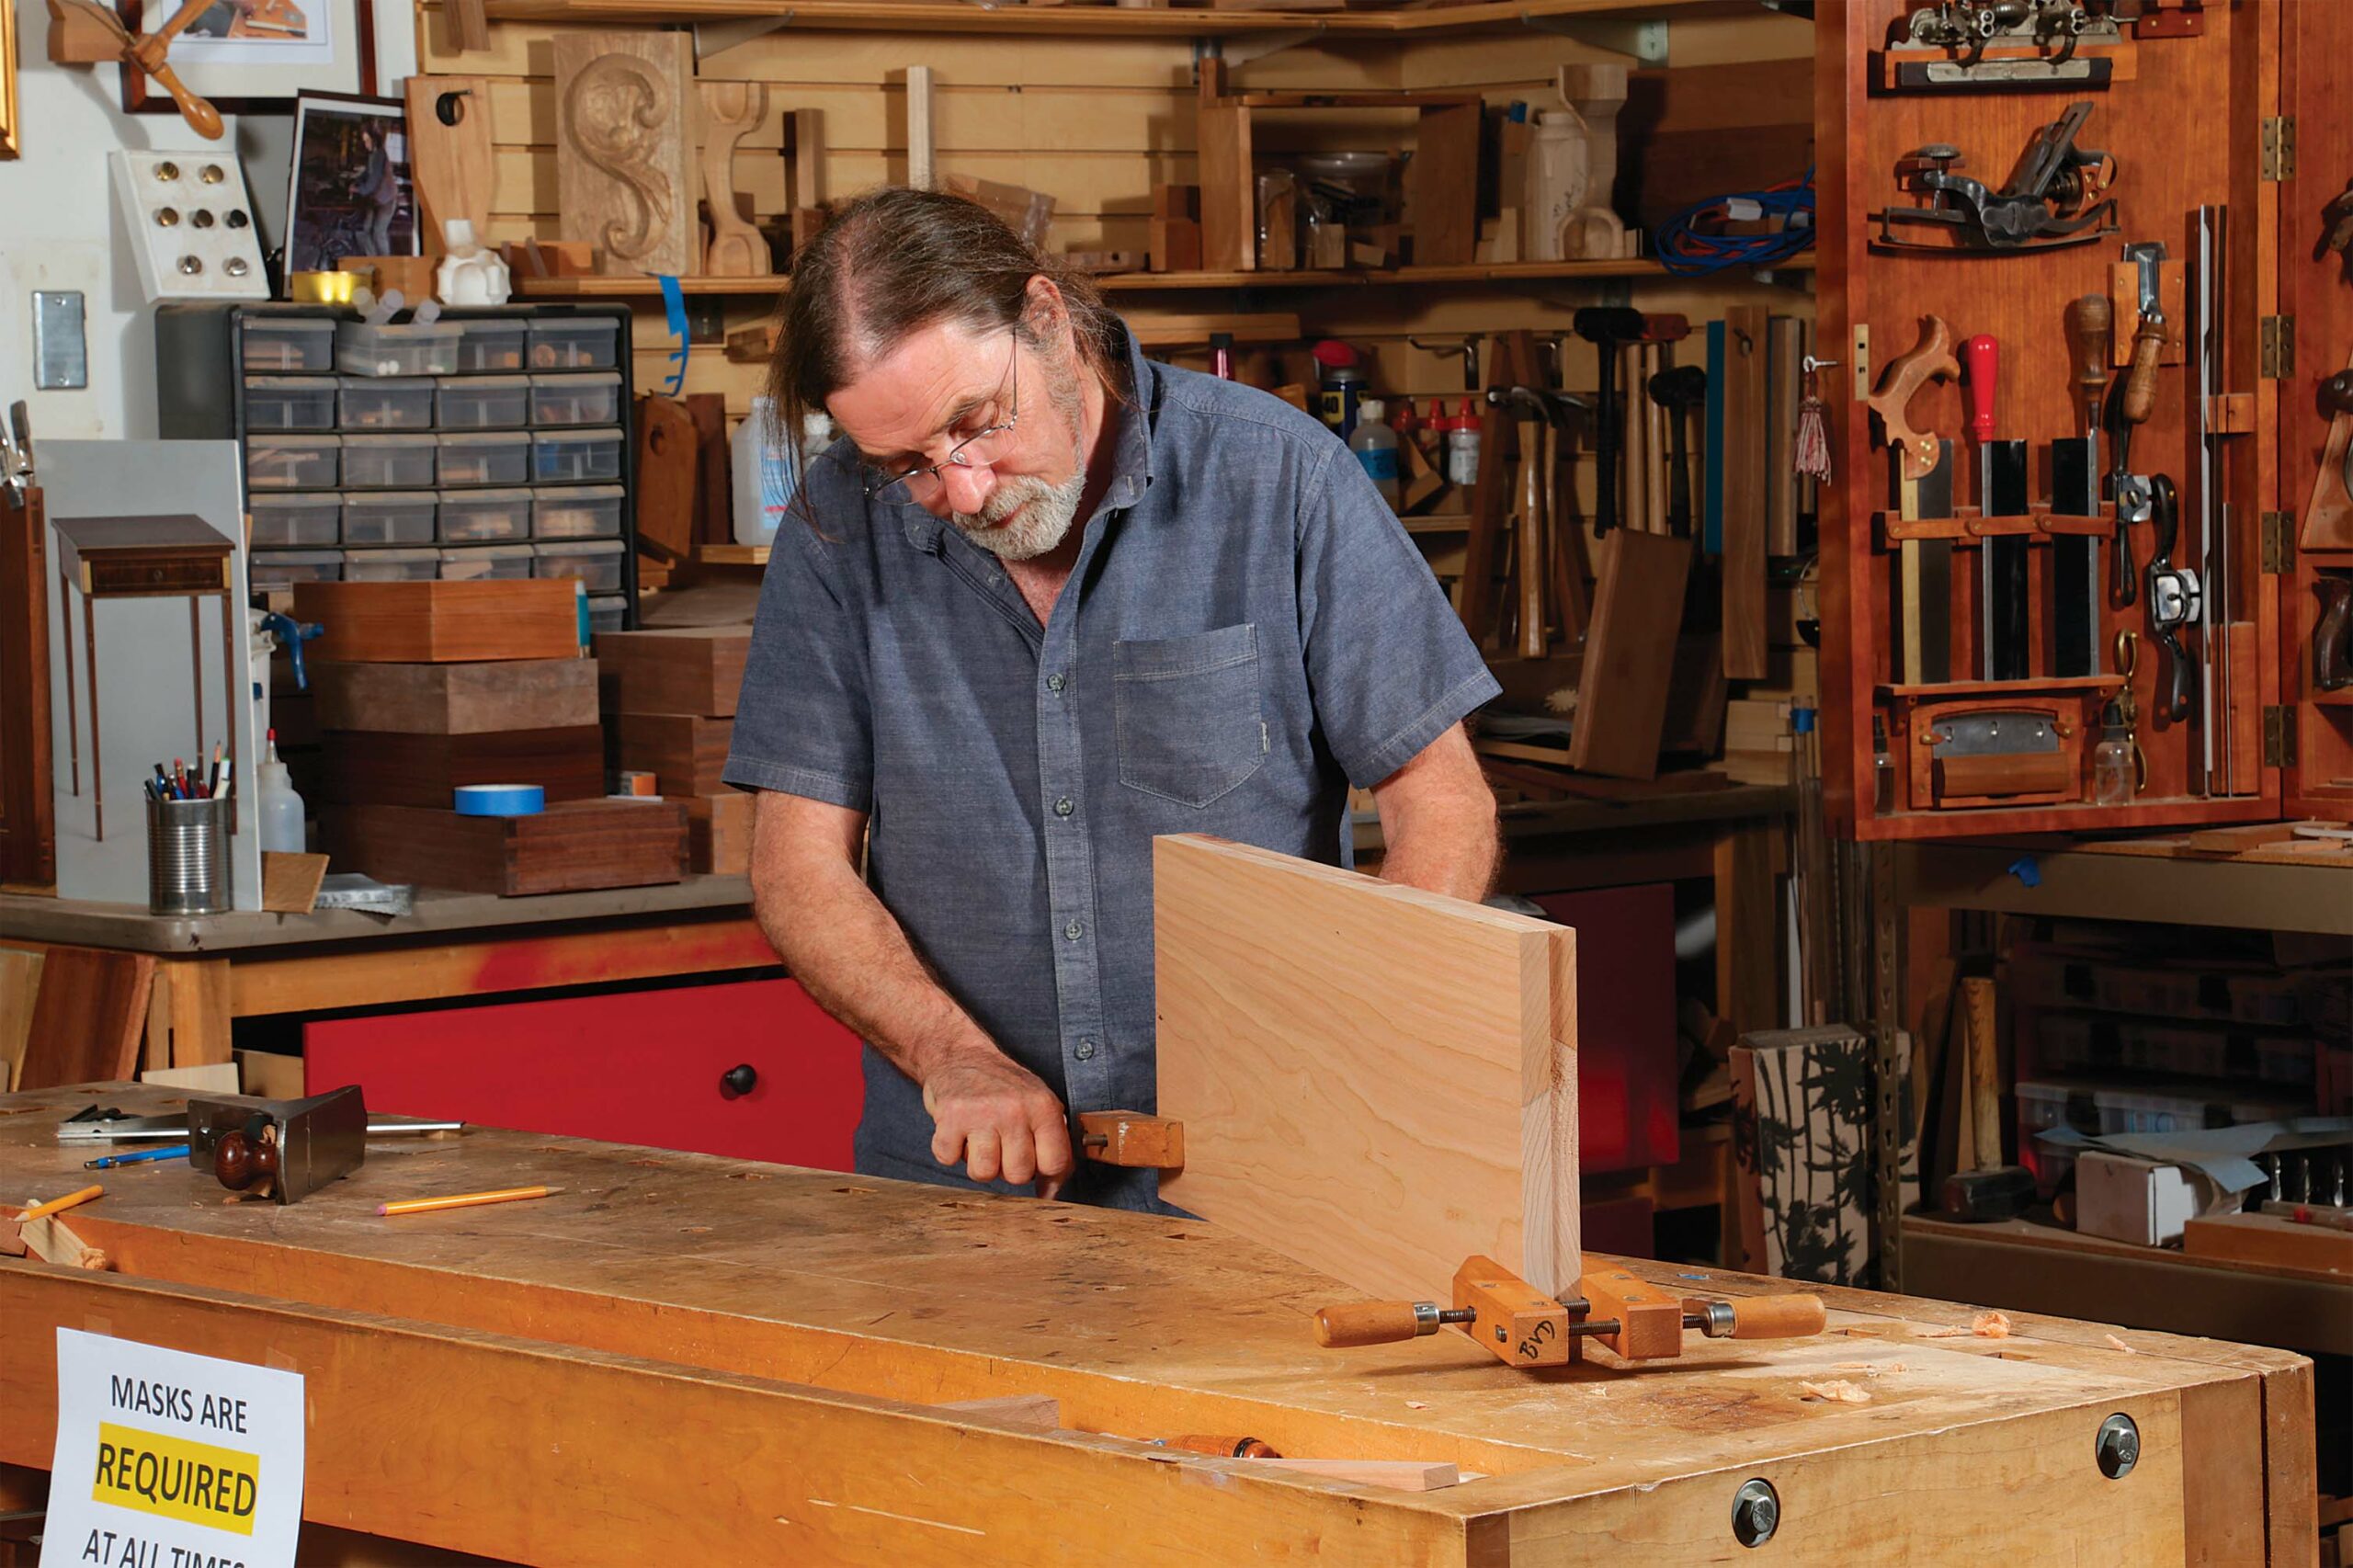
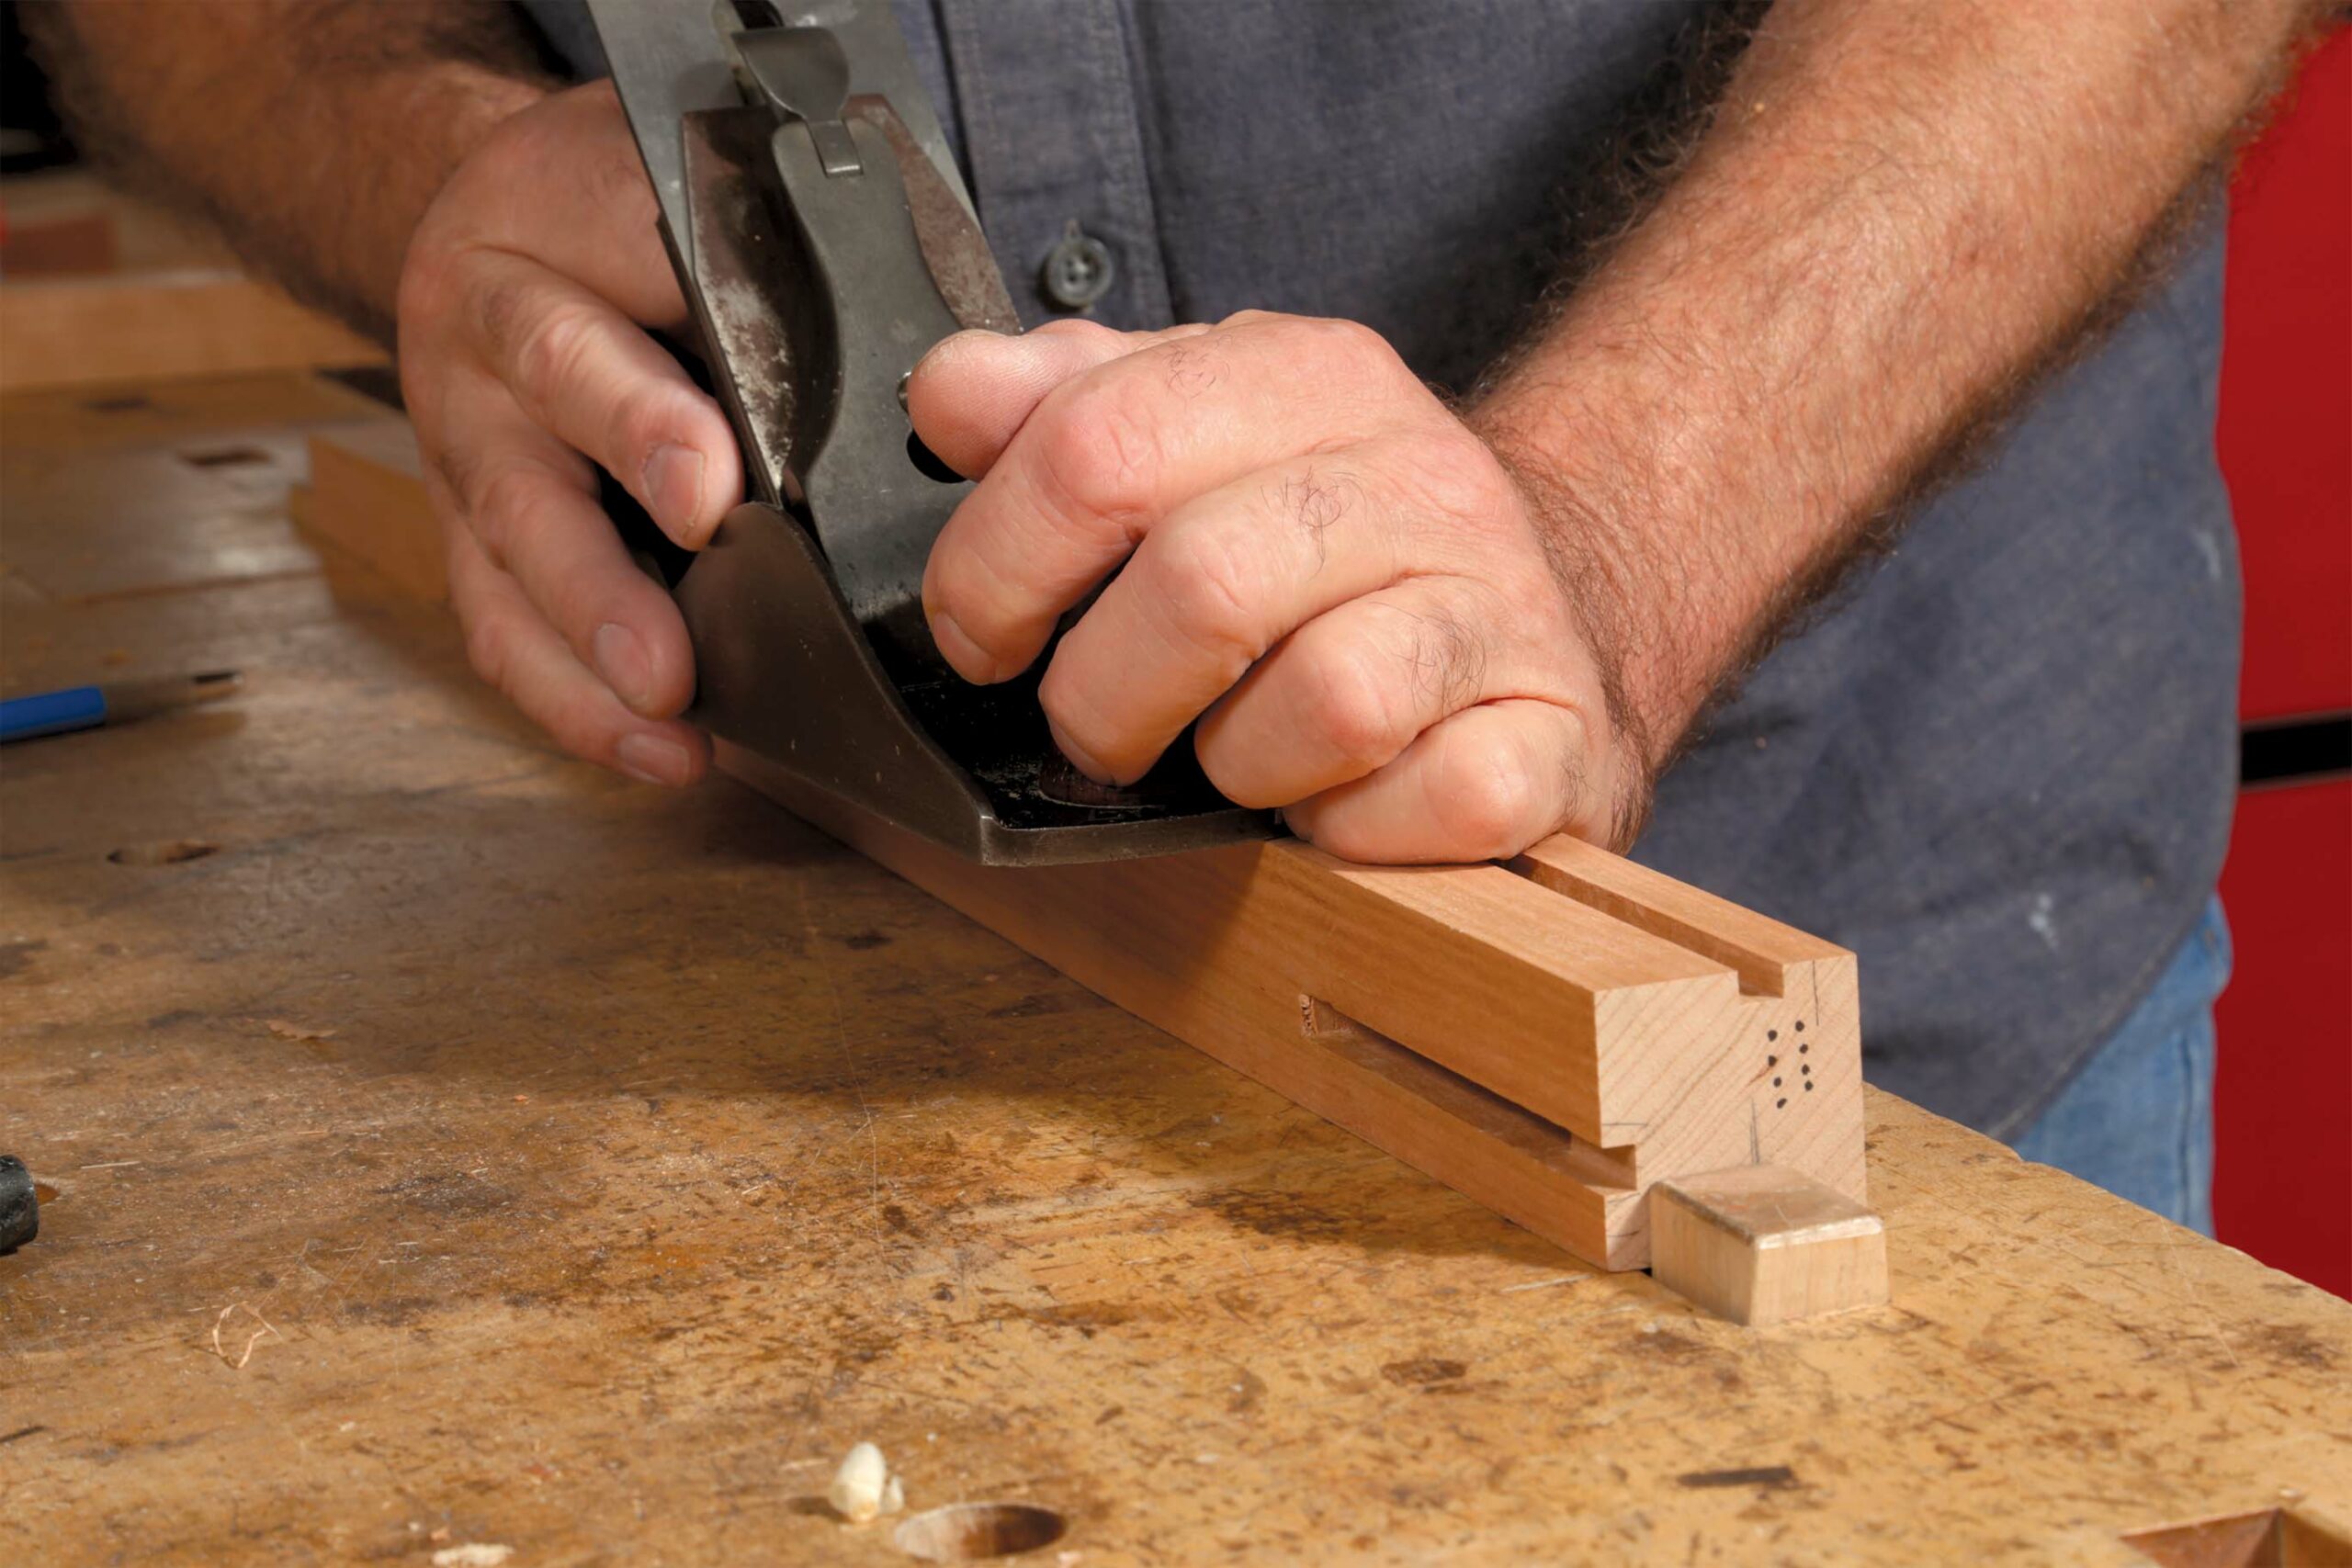
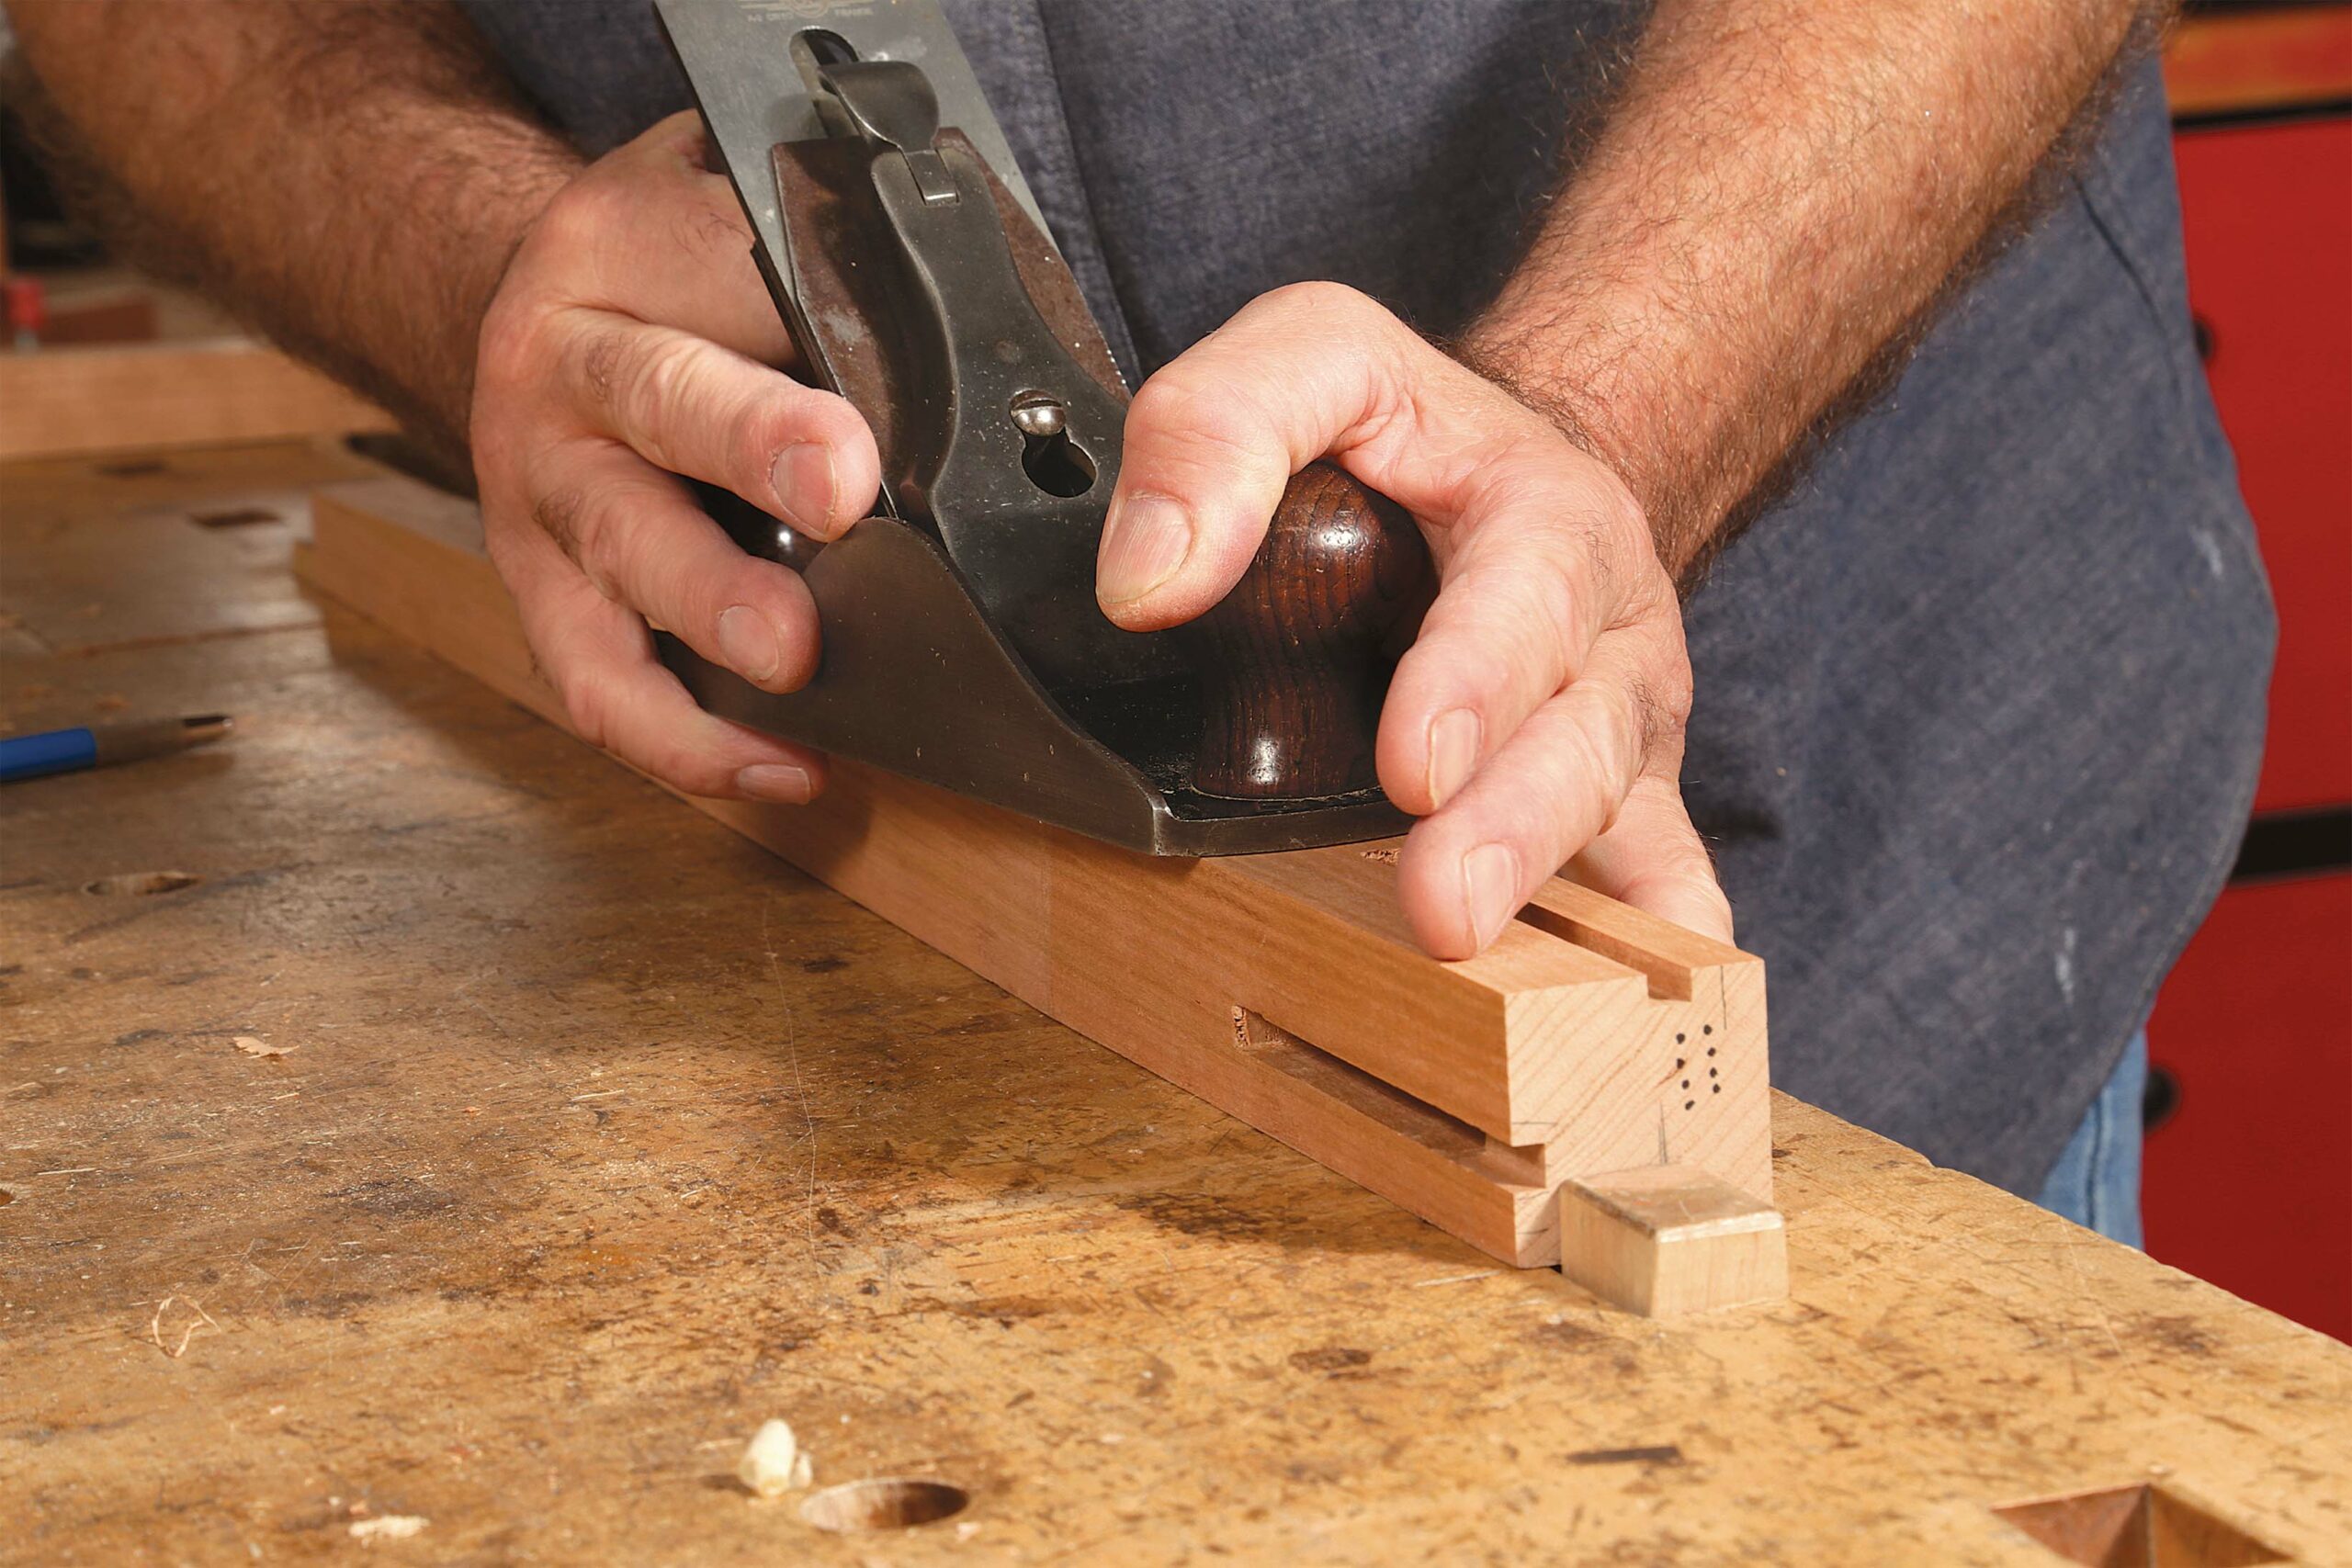
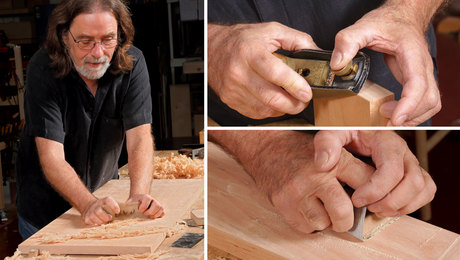
Planing technique is critical here. To begin the stroke, apply extra downward pressure over the plane’s front knob and only a little over the tote. Transition the pressure to the tote and release it off the knob as you reach the end of the stroke.
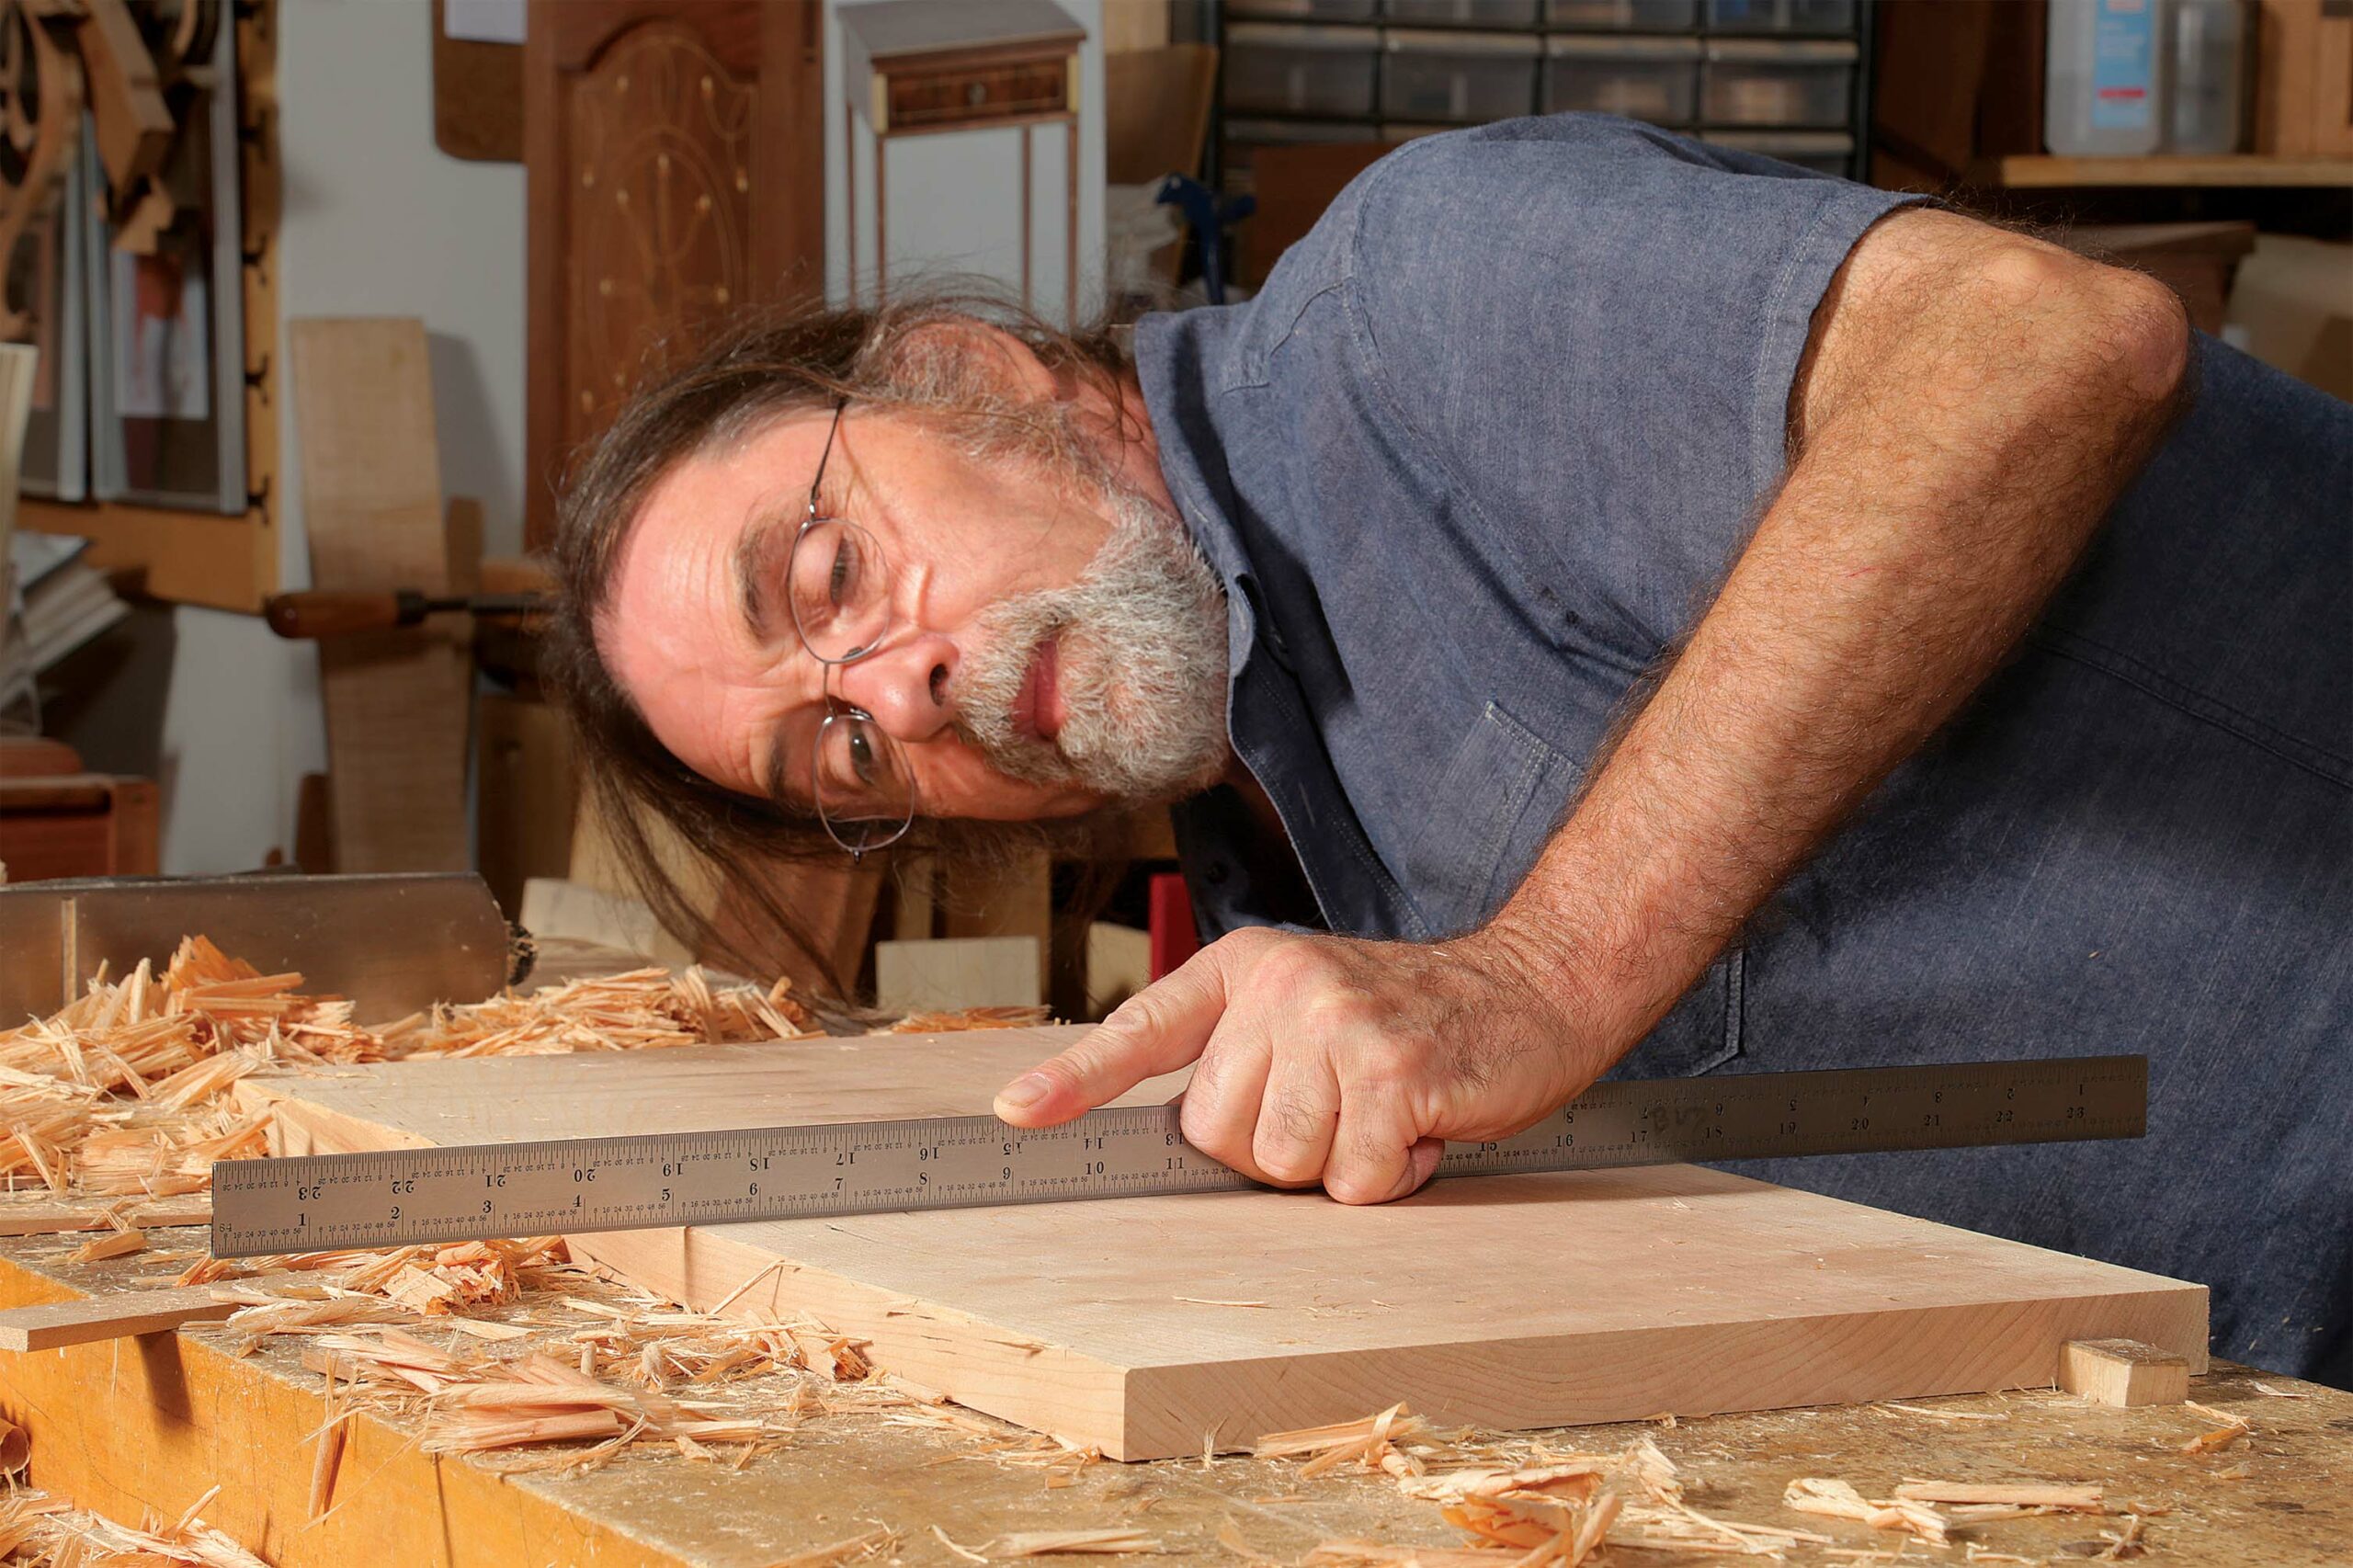
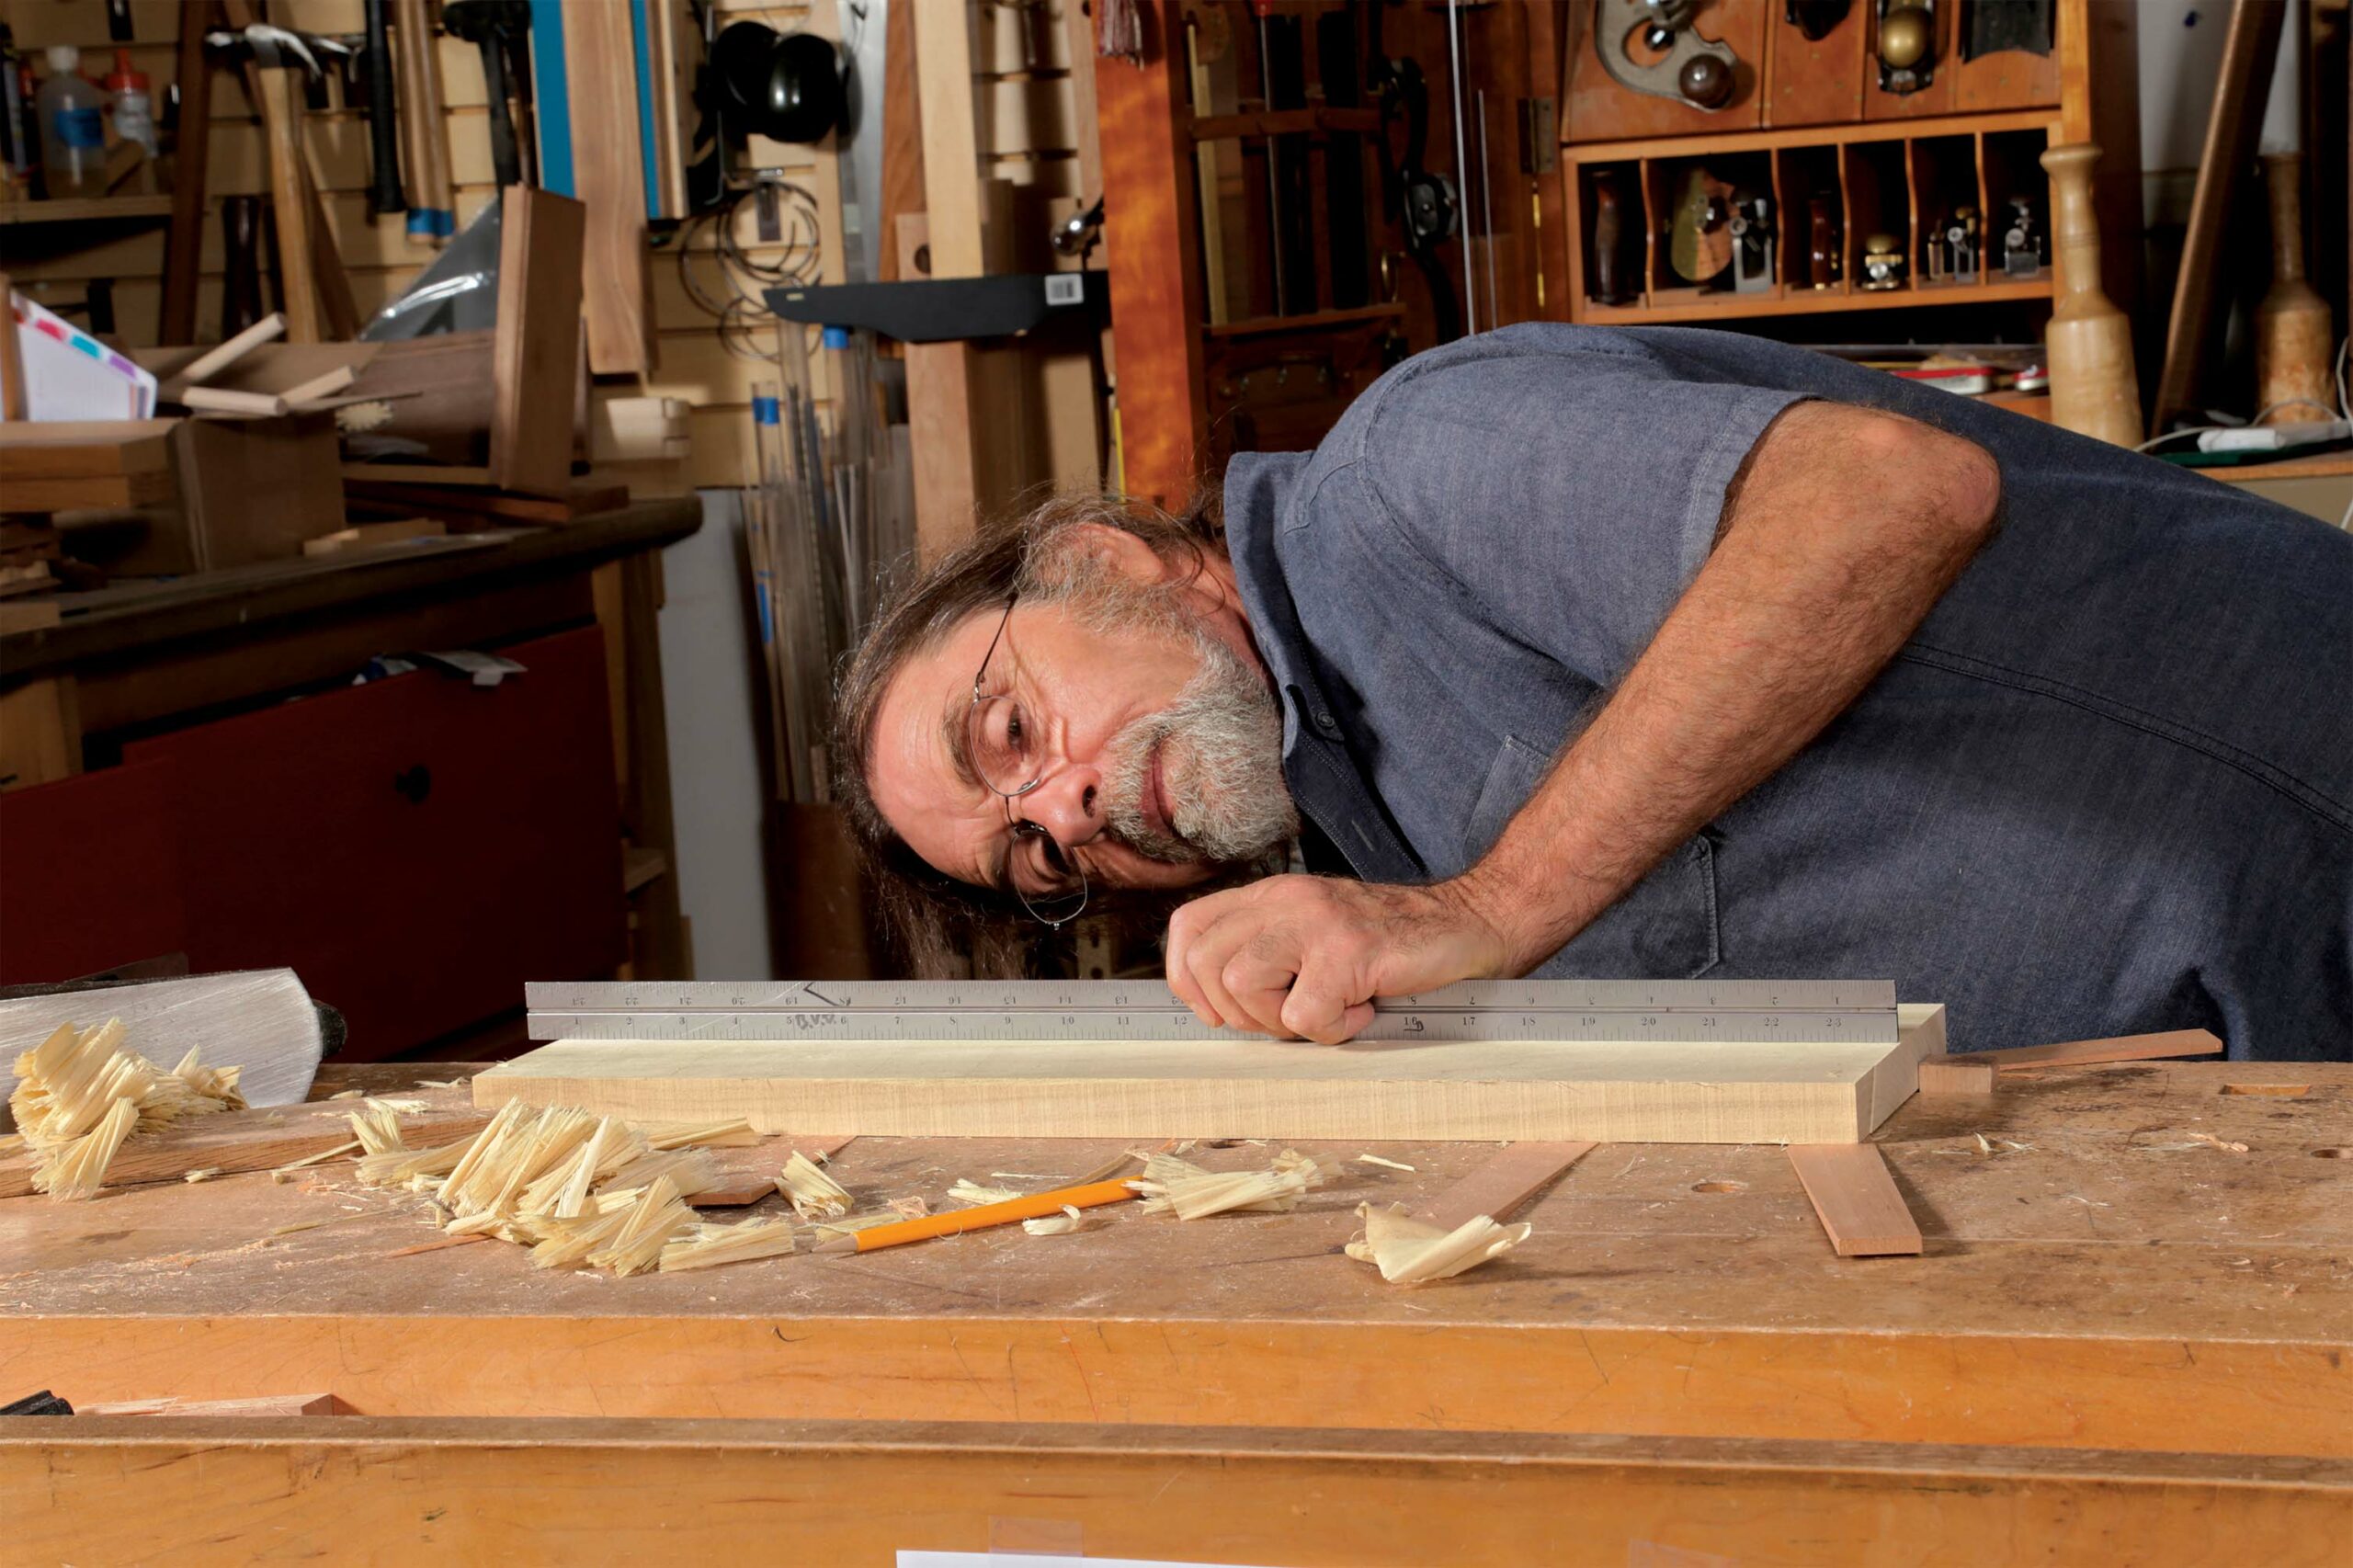
Test the joint by setting one board in a vise, planed edge up. Place the second board, planed edge down, on top of the first. You should be able to fit a dollar bill between the two at the center, but not much more. When you clamp across the middle, the pressure on the ends increases dramatically while the center of the joint closes.
If the joint’s not flush along its length, you get to use the most important benefit of this technique. Because the boards’ ends are tight while the center is not completely closed as you begin clamping, you can push the center of one board perfectly flush with the mating board while tightening the clamp. Properly glued up, the boards will be aligned well enough that any discrepancy is easy to remove with a final handplaning or card scraping when the joint is dry, eliminating the need for further thickness planing.
Joinery: Sneak up on a perfect fit
When it comes to furniture, precise fit is important. If an inset door looks out of square in its opening or a tenon shoulder does not close up, it can be easily fixed by counting strokes and taking successively longer or wider cuts.
Fitting a door— Frequently, a furniture part like a door or draw-er front needs to be tapered to fit in its opening. Both are handled the same way. After jointing one edge, I’ll hold it in the opening tight against the carcase to determine how much the bottom and top of the workpiece need to be trimmed to make it square to the opening. These cuts are usually done on the tablesaw with a sled and a shim to match the angle needed. After dialing in the top and bottom, you usually have to correct the other edge using tapering cuts.
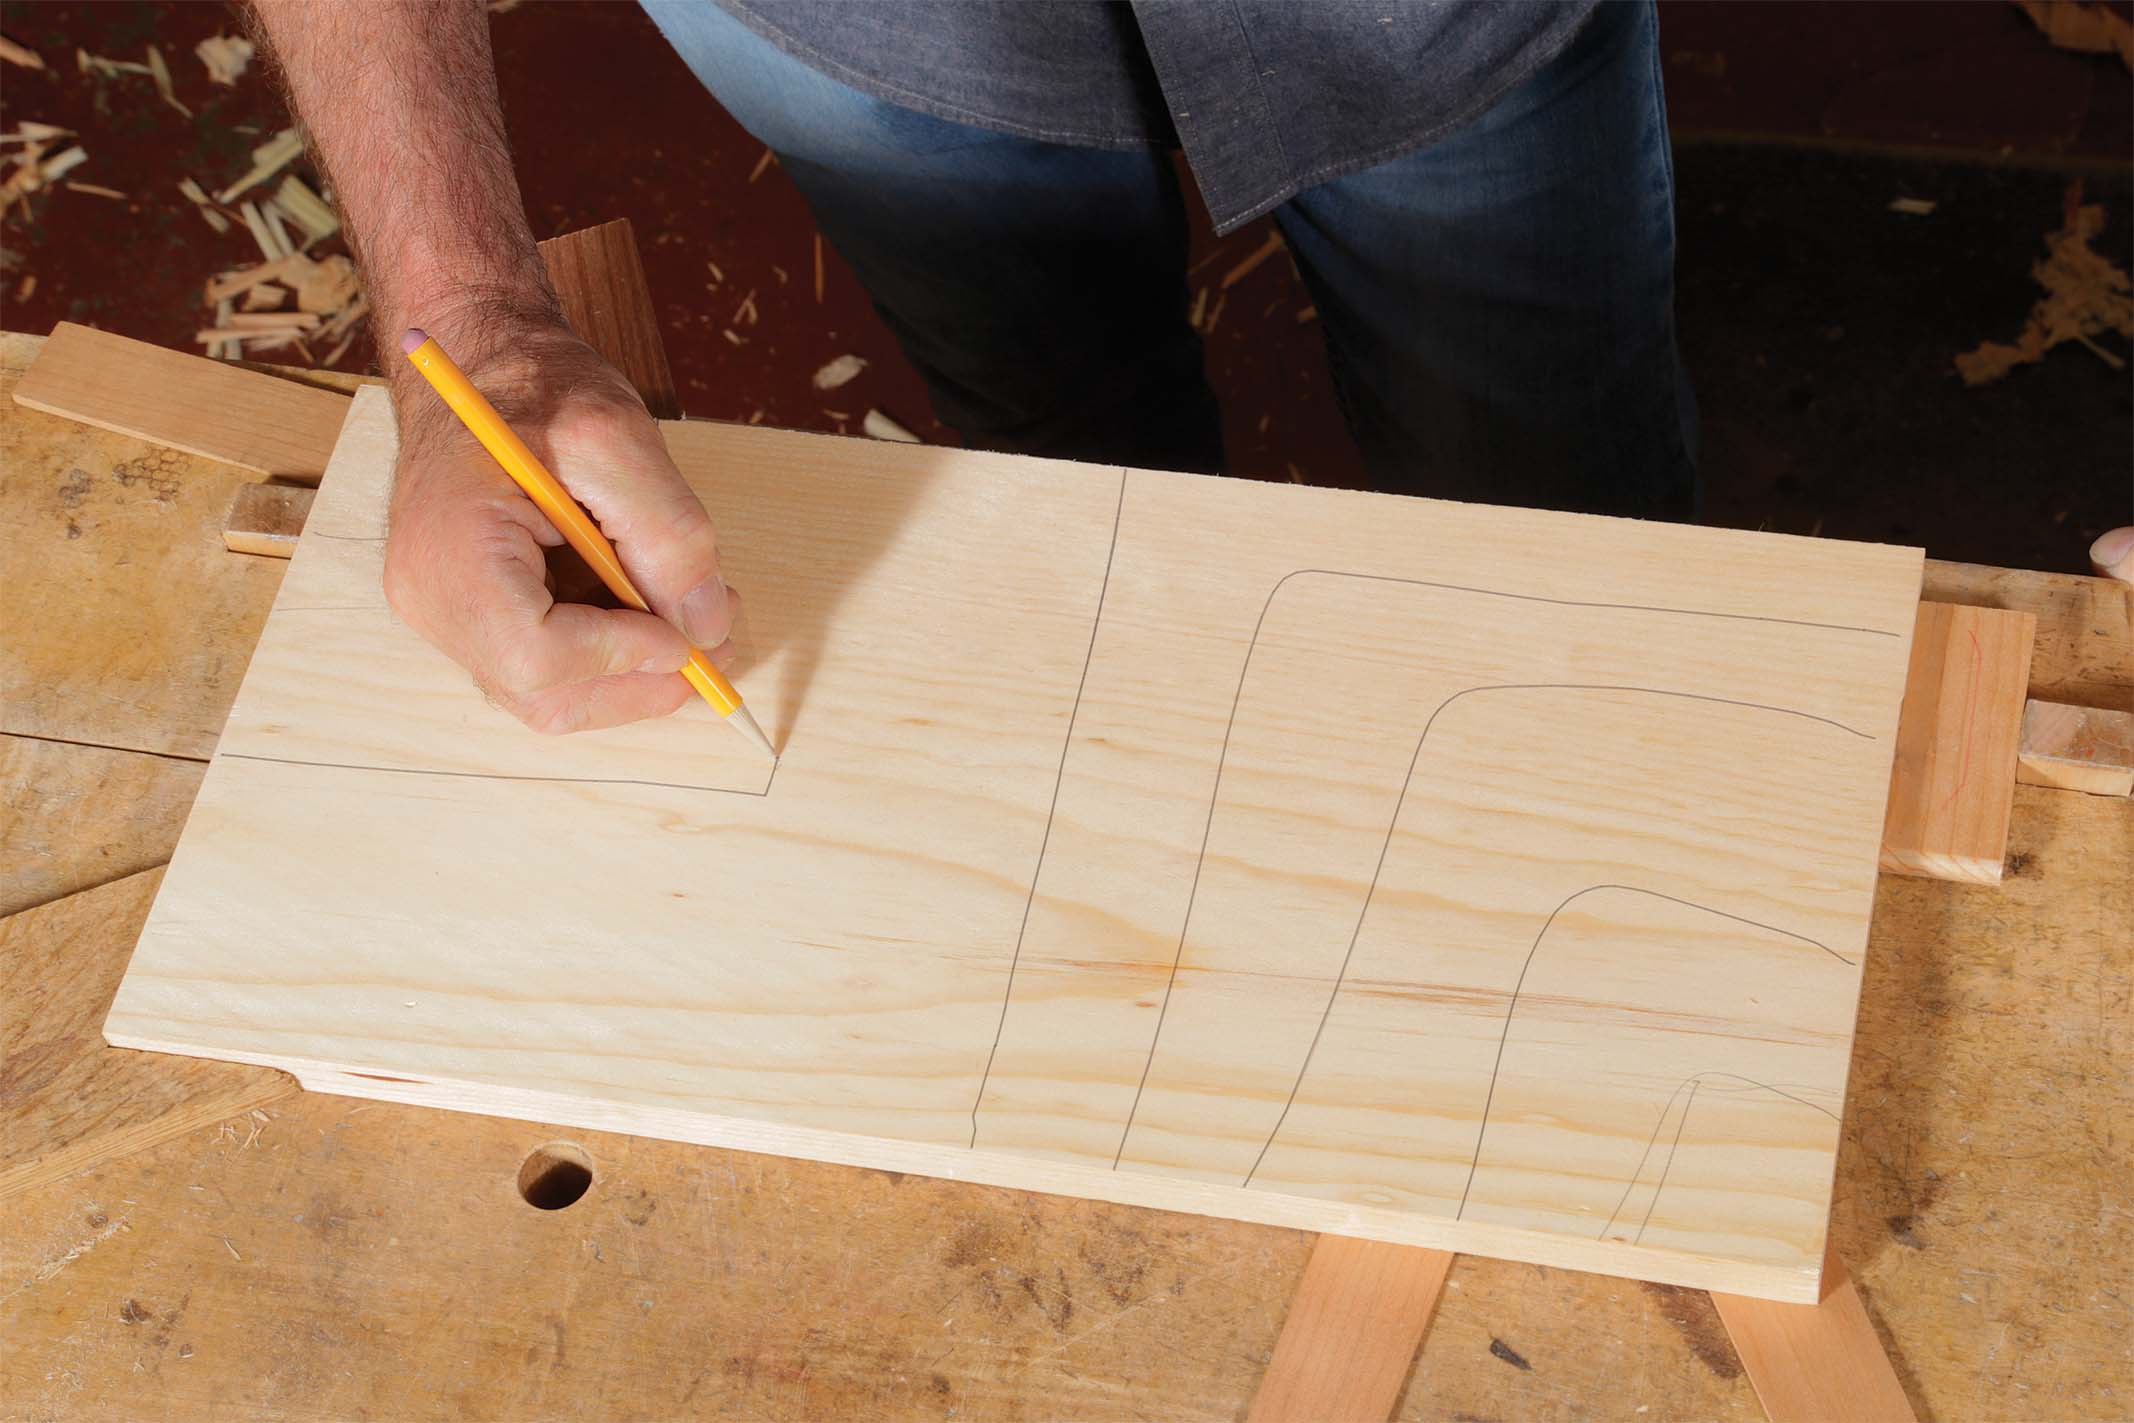
First determine which end needs the most material removed to create an even gap. Then, to map out your cuts, visually divide the workpiece into several sections of equal length. For reference, I’d break a 24-in.-long door into five sections.
Starting at the “widest” part of the workpiece, take a shaving the length of the first section. Then take a shaving over the first and second sections. The next shaving will include the third section. Continue until you have taken a continuous shaving over all five sections, or the entire length of the stile. The first section will have had five sets of thin shavings, while the last section will only have had one. But because you end with a full-length shaving, the edge stays straight. Need more of a taper? Do another set of shavings.
Fit a door
When installing a door, it’s common to find uneven gaps around the edges. A tapered cut along an edge can fix the problem quickly.
 |
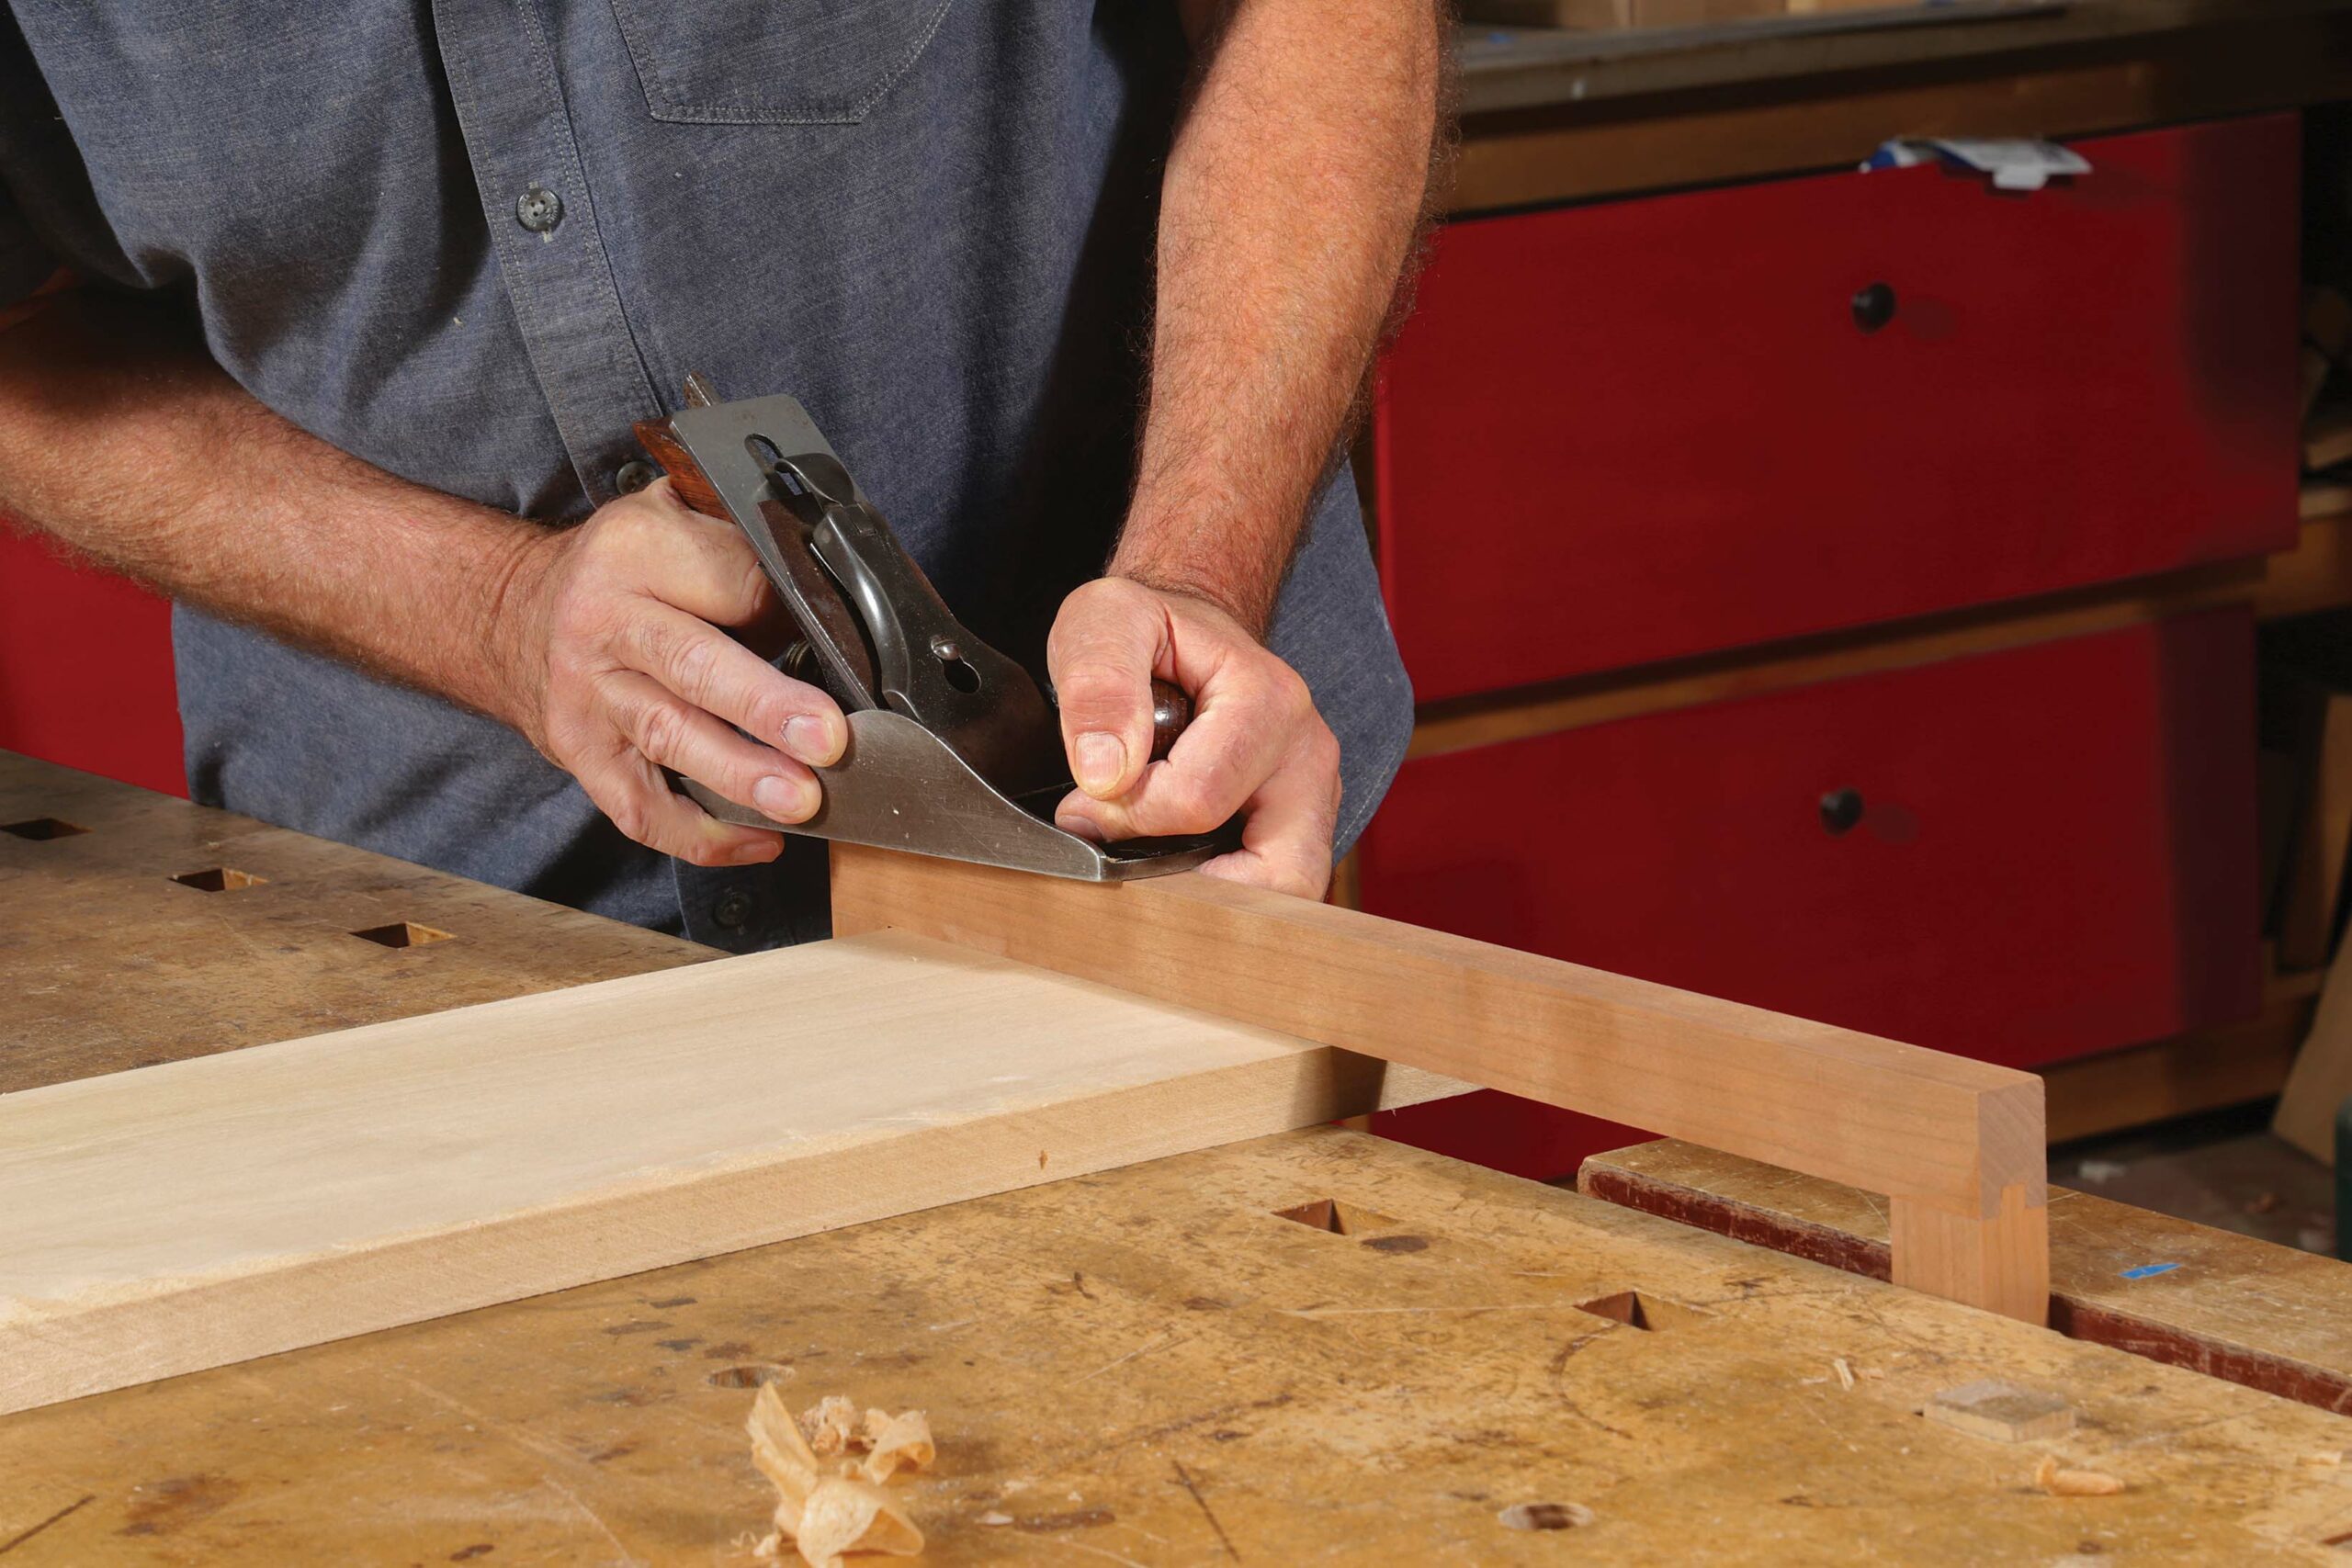 |
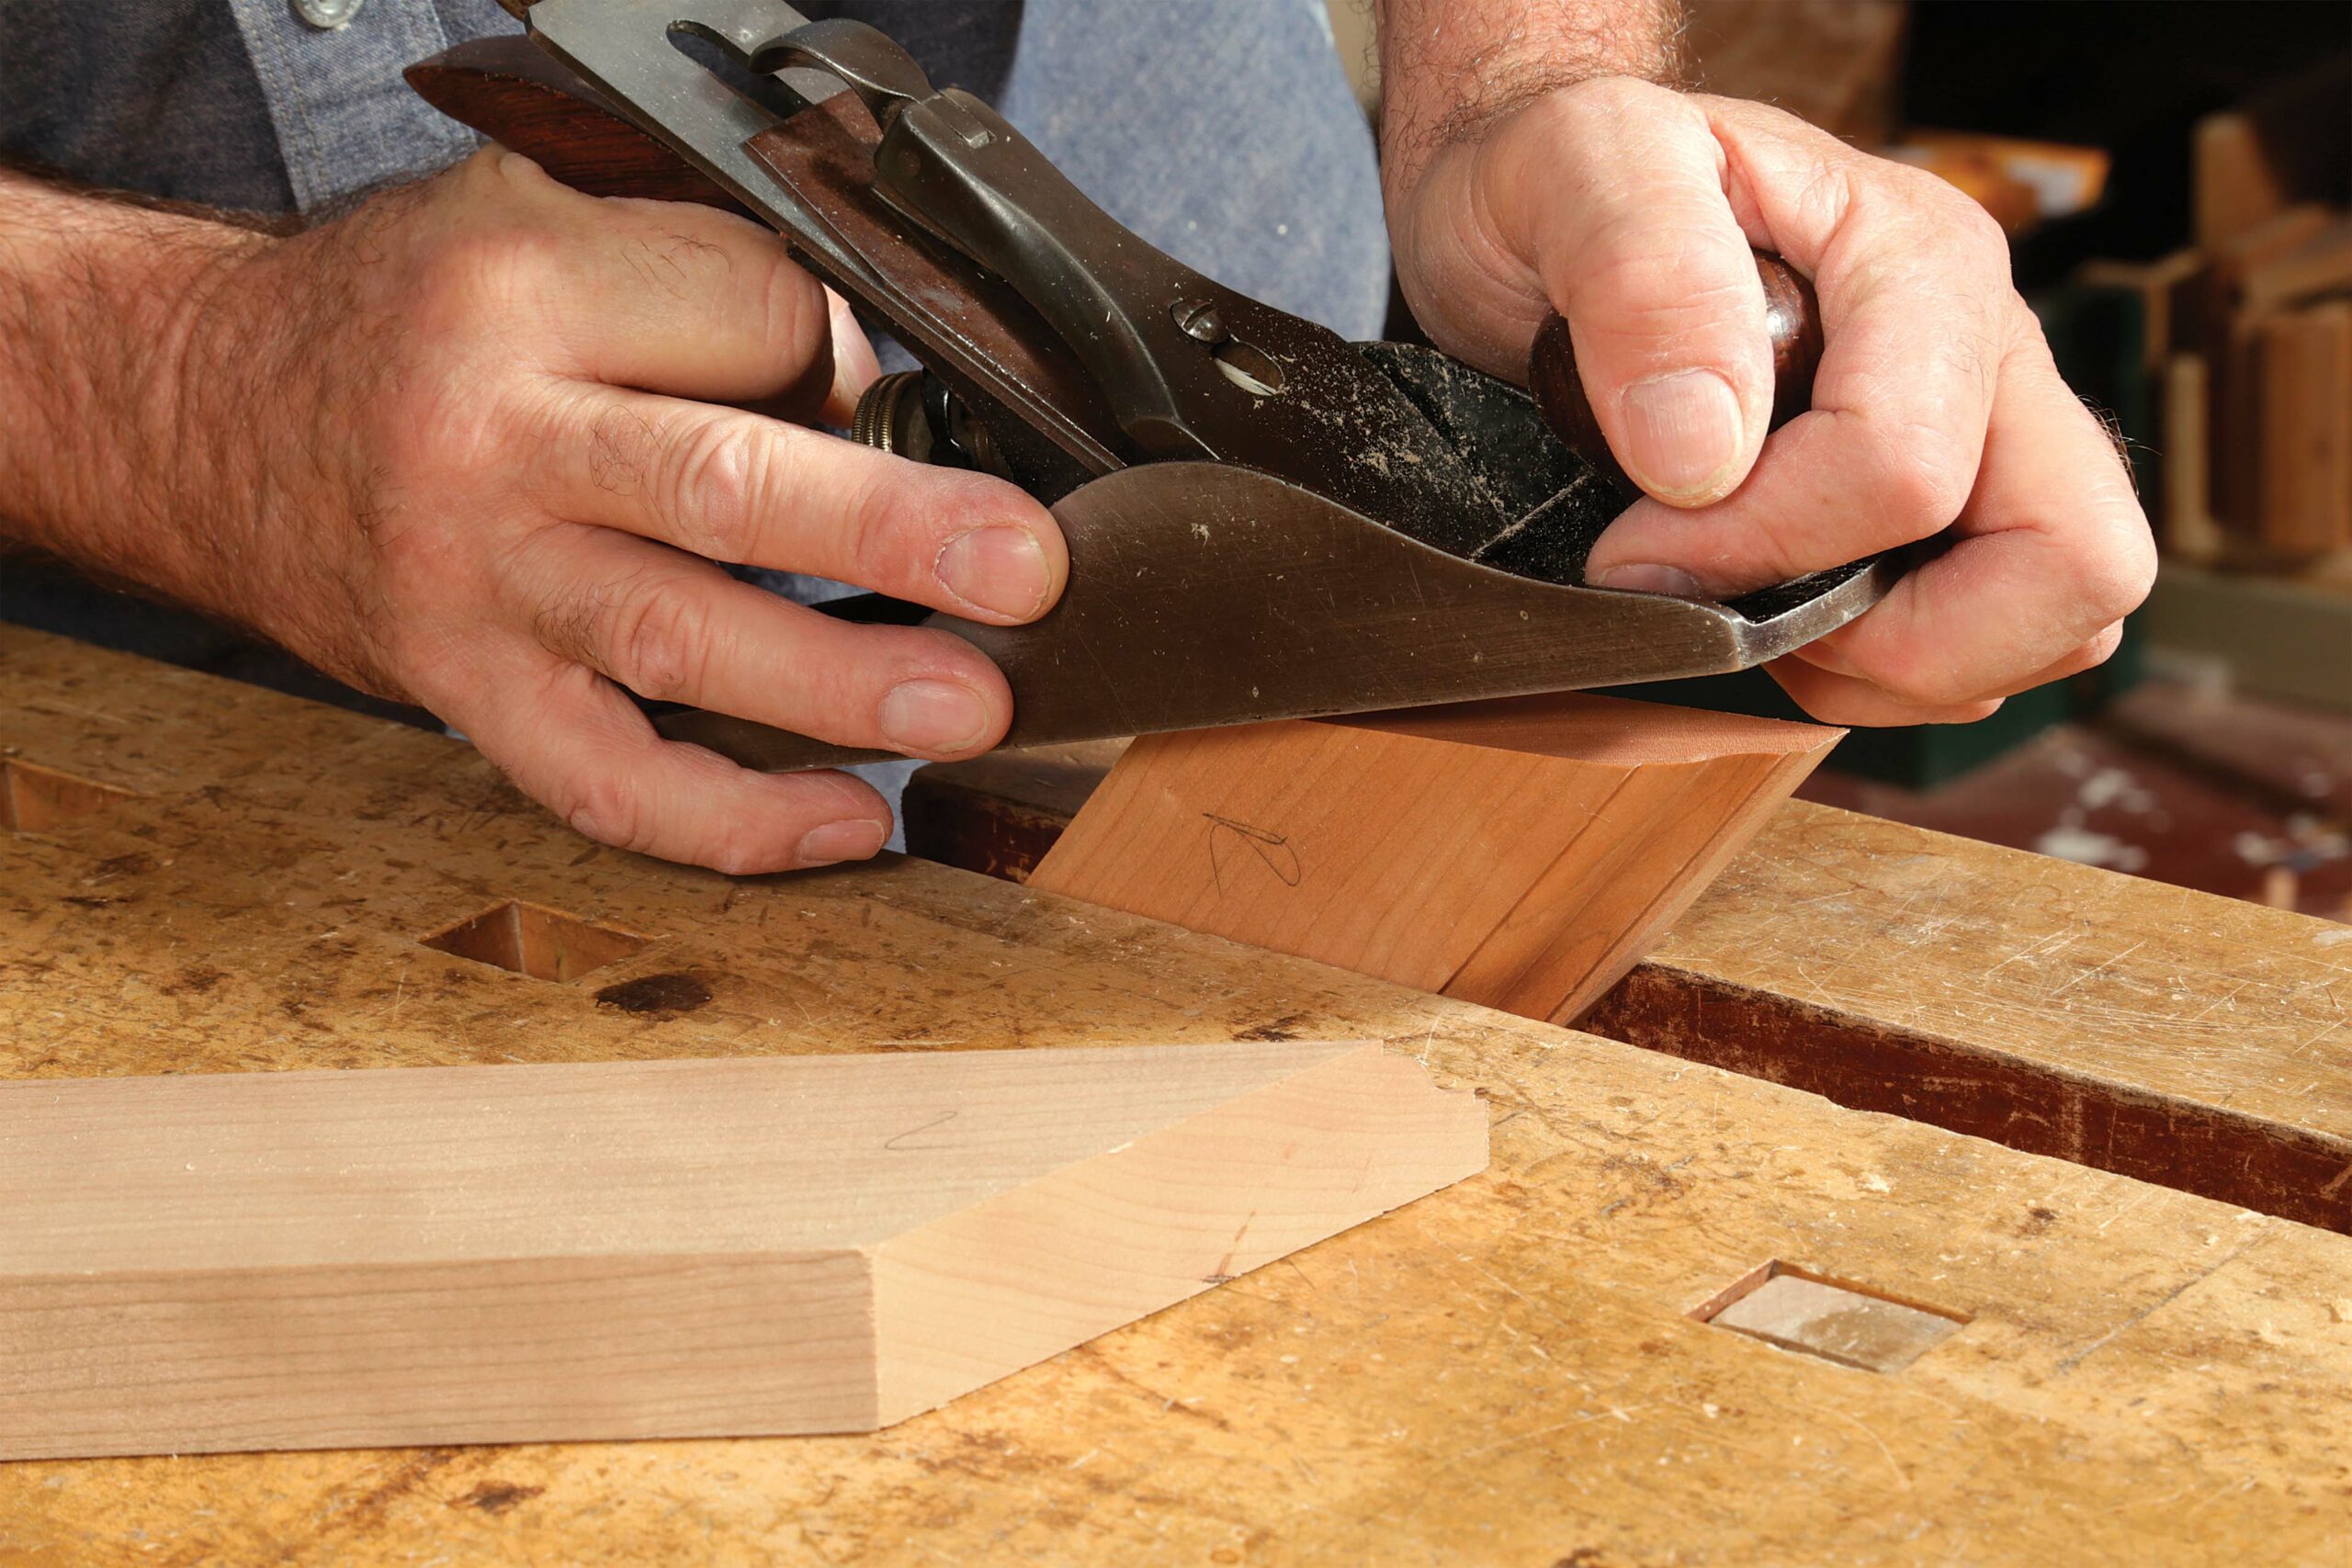
Squaring a leg— For seamless joinery, parts need to meet perfectly. This usually means parts coming together at 90°. Take a table, for example. If the square shoulder of an apron seats on an out-of-square leg, you’ll see a gap. Squaring a table leg uses the same high-to-low tapering technique as the door, but across the workpiece’s width rather than along its length.
Divide the leg’s width into four or five sections. Start by taking one narrow shaving off the highest section. The second shaving should be wider, comprising the first section and the second. Continue until you take a final full-width shaving that includes the last section. If the leg is still out of square, take a second series of cuts.
Fine-tune joinery
Overlapping shavings can work to close up gaps in joinery.
 |
 |
 |
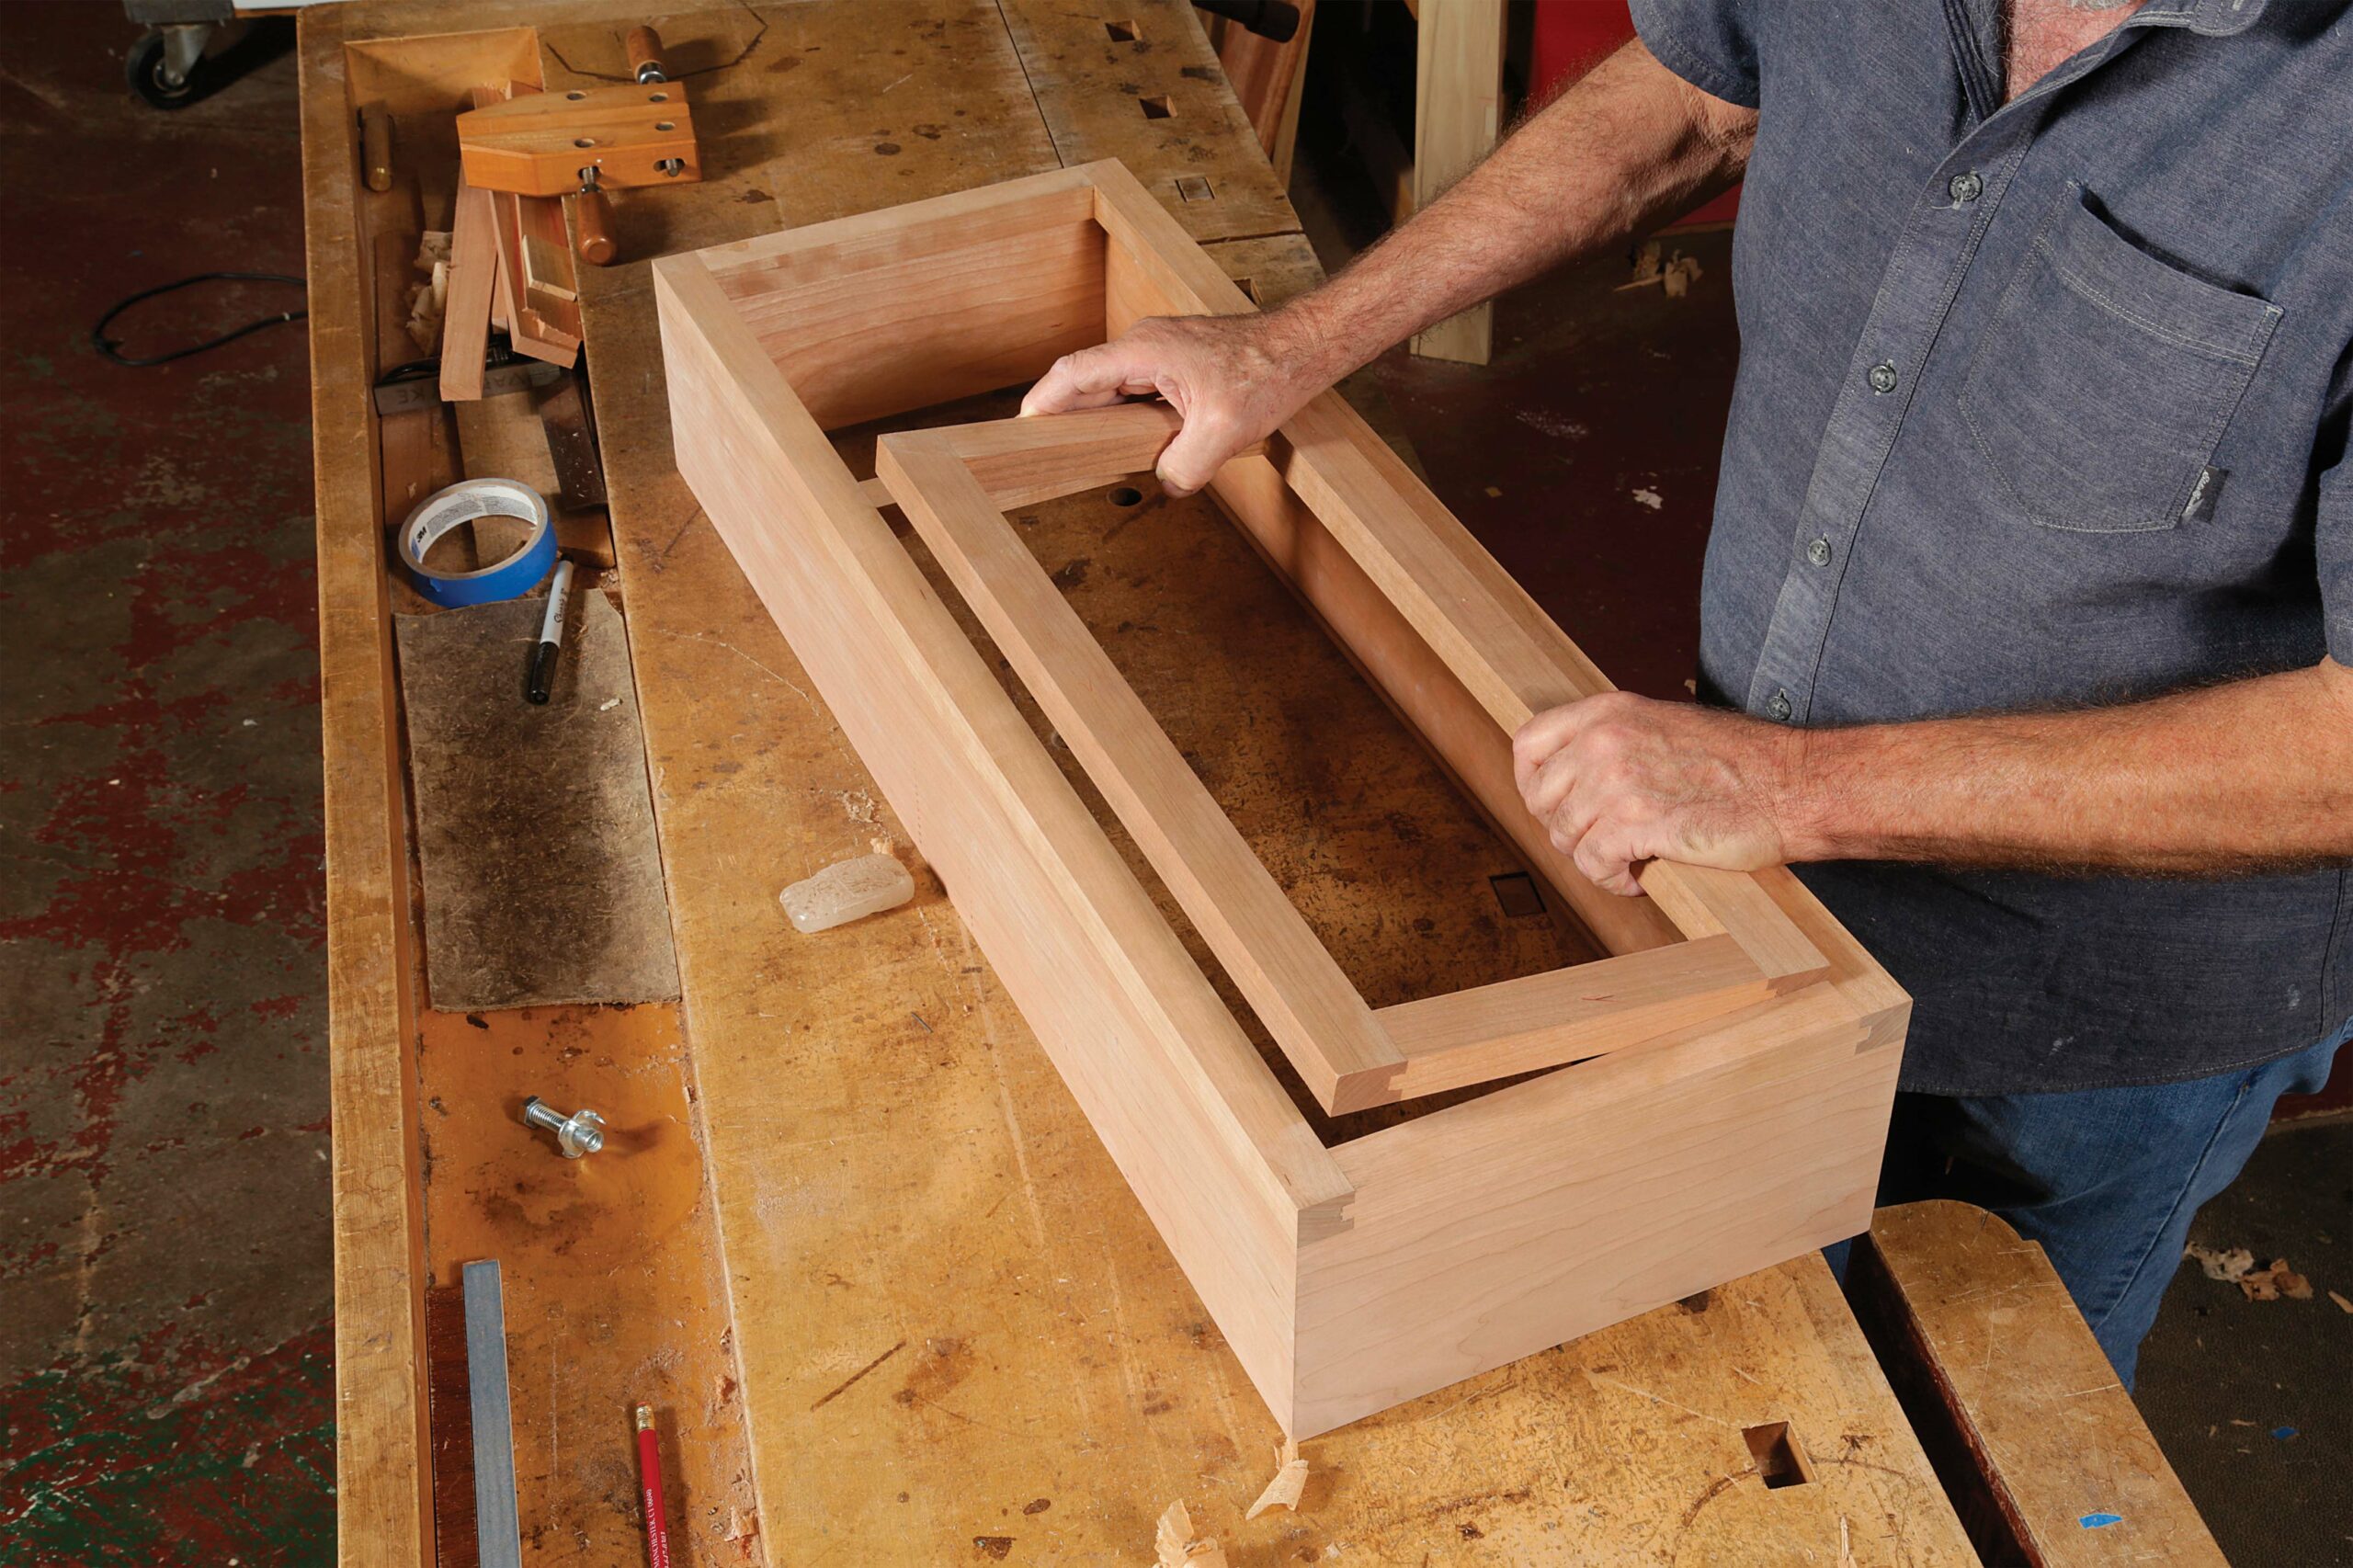
Adjusting a miter— There are a couple of reasons to plane a miter. For one, a hand-planed miter will always close tighter than one off the saw. Plus, a mitered furniture part frequently needs to be adjusted to match another furniture part, like a molded plinth base and its case above. These bases are typically just a little larger than the carcase, and it is critical that the reveal between them is even. To accomplish this, adjust the miters.
Start by planing the miters on the front piece, and then leave them alone. You’ll fit the side pieces, which is why I always leave these long. First, determine if the inside or the outside corner of the miter needs to be trimmed to fix the reveal.
Adjust these miters by taking three or four gradually longer overlapping cuts that start at the corner that requires the most material to be removed. End with a full shaving.
Take light cuts and check your progress frequently.
Adjust a miter
Use overlapping plane strokes to dial in the angle of a miter joint.
 |
 |
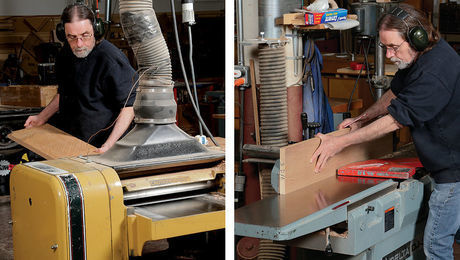
Flattening: Do it all with one plane
When flattening a board by hand, the typical techniques use at least two or three different planes to get the job done. With this method, you can fix bow, cup, and twist all with a No. 4. Again, you’ll plan your strokes while using the plane’s short sole to your advantage by targeting specific areas. If you think of the surface of the board as a series of mountains and plains, this method of overlapping cuts lowers the mountains to the level of the plains.
Your goal is to create a fully flat reference face, whether on a roughsawn board or a previously milled board that moved afterward, before planing the opposite face parallel by machine or by hand. The importance of these techniques is that you are not limited by the width of your electric jointer and you have to remove only enough wood to correct the problem.
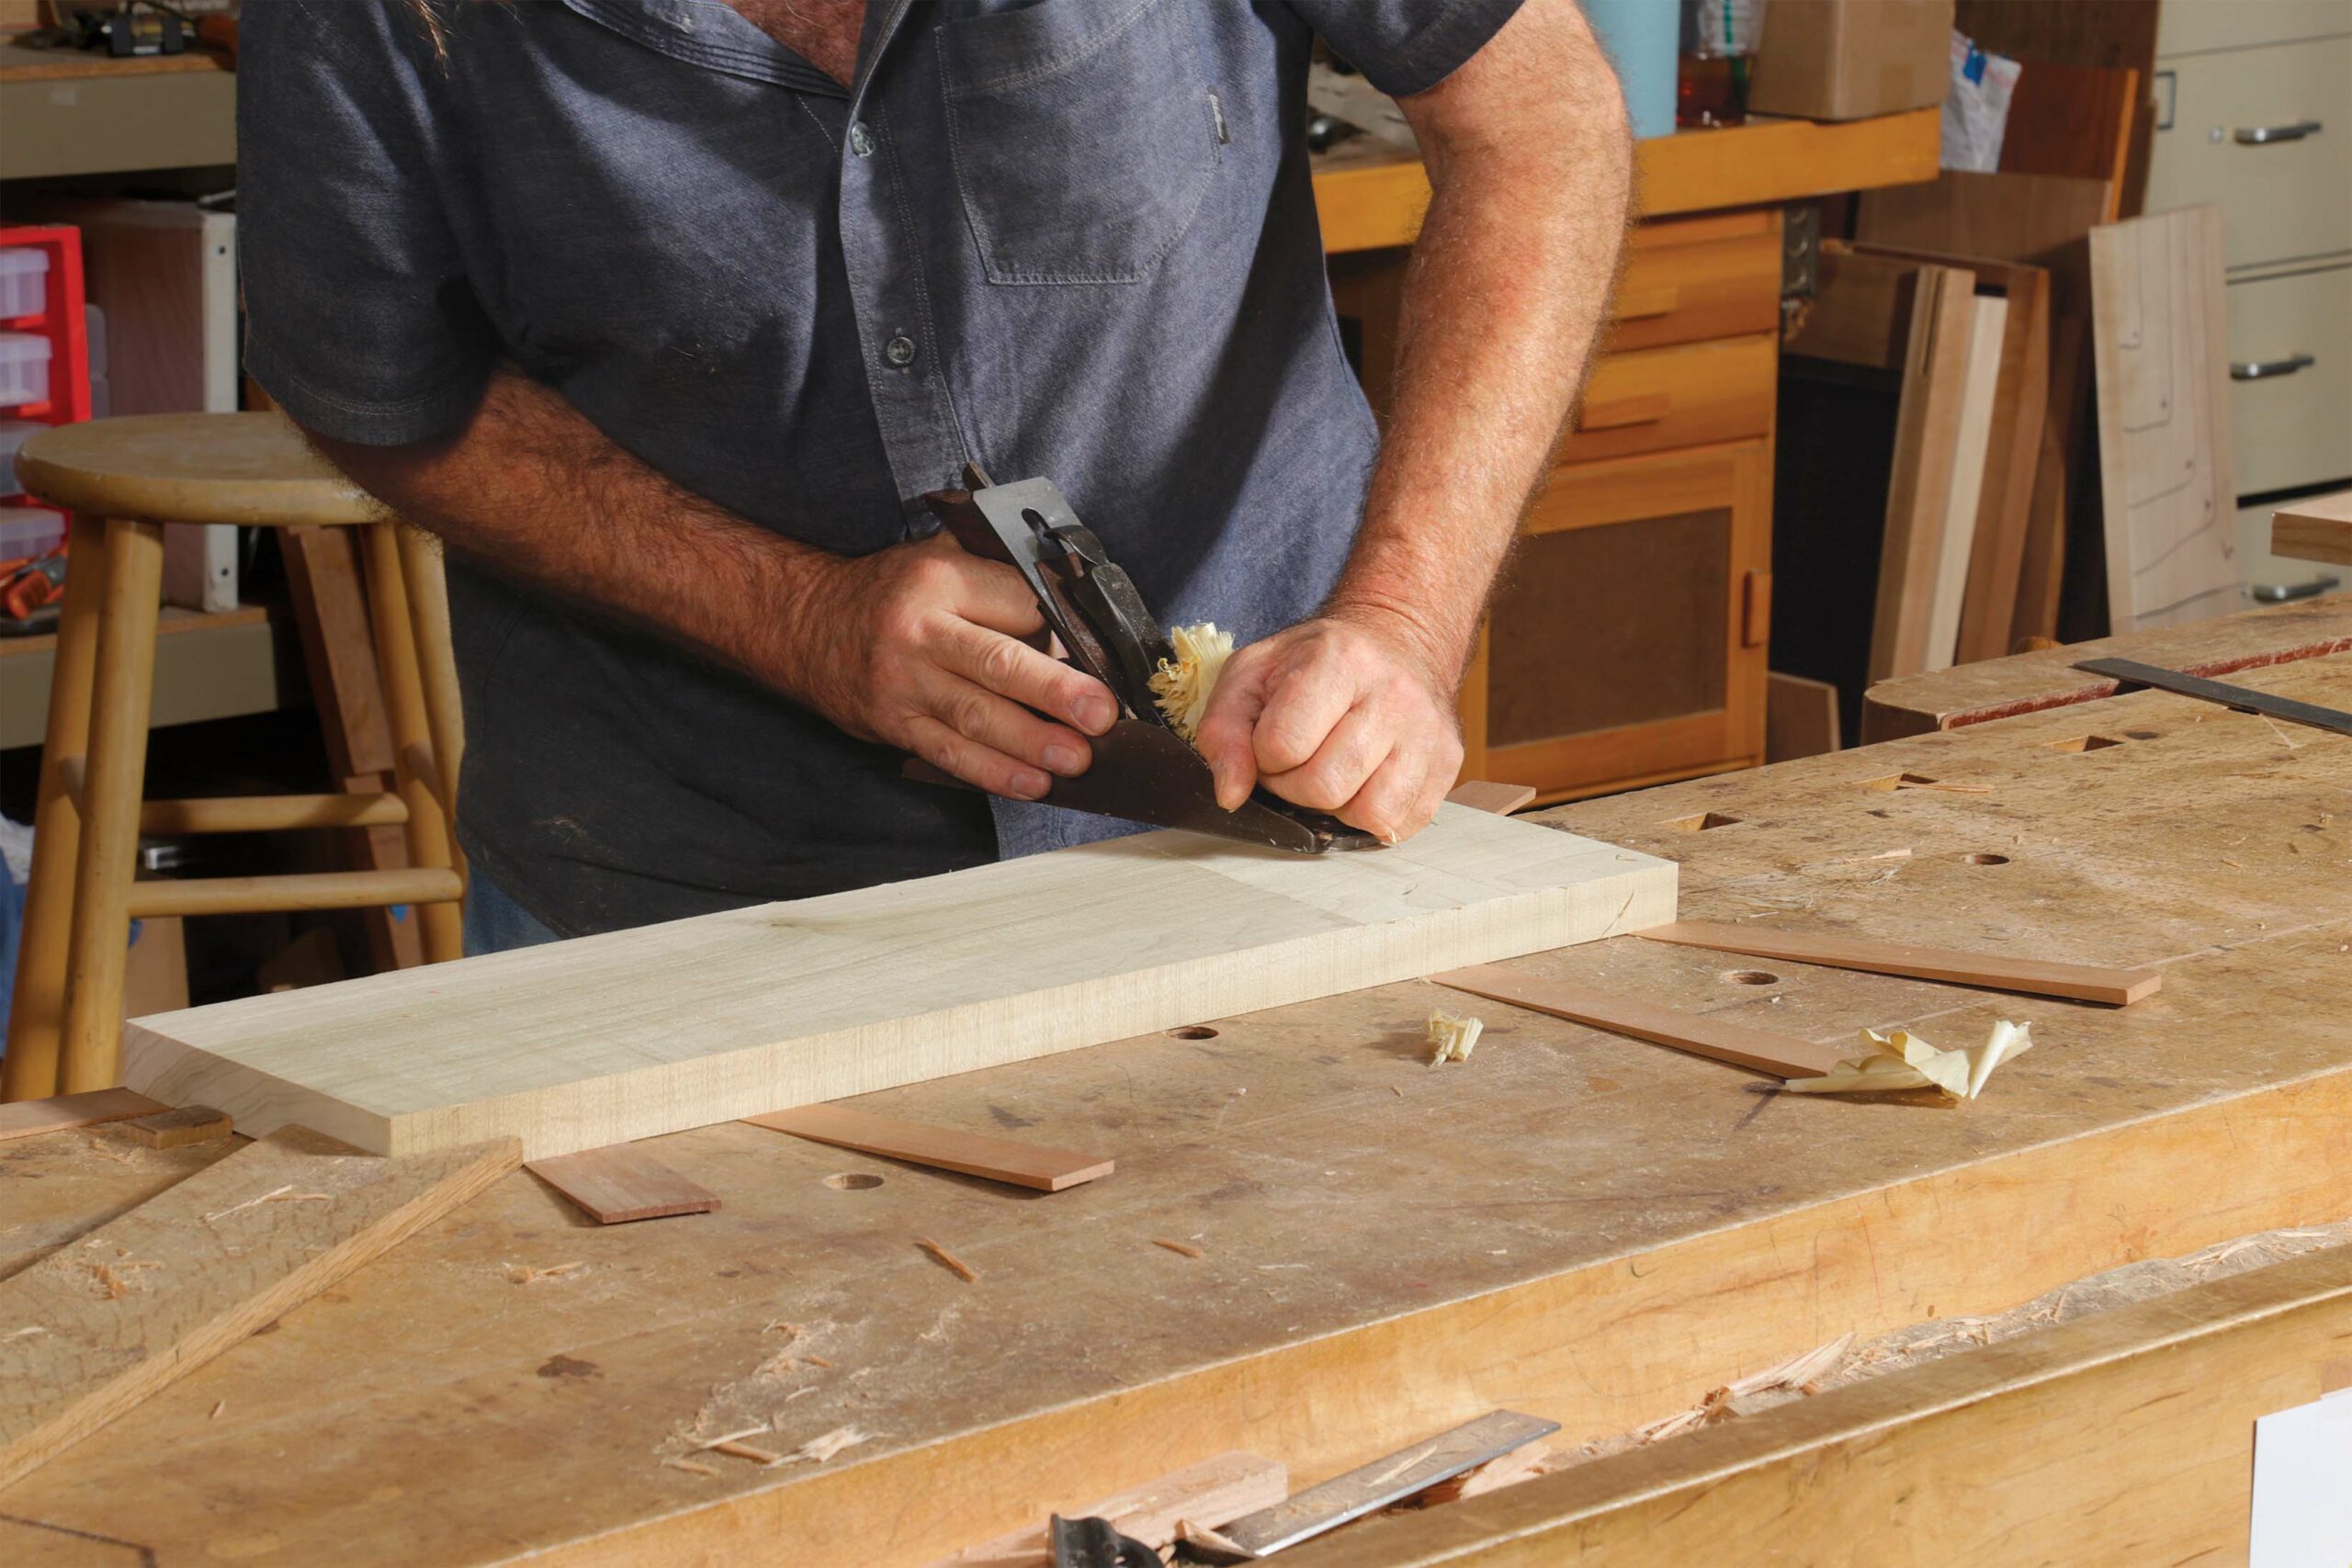
In all these flattening techniques, the major planing is all done across the grain. A sharp plane can easily take cross-grain shavings three times as heavy as it can with the grain. The final surfacing can be done with light smoothing cuts along the grain or with a card scraper and fine sandpaper.
Cup— My method for tackling cup works by making overlapping cuts beginning with the high spots (the edges) until they meet the low spot (the center).
Start with a series of cross-grain shavings 11⁄2 in. to 2 in. long, planing from the front edge toward the middle of the panel. Work your way from one end of the board to the other. Start a second series of shavings over the first series, but make this set a little longer. Continue until your shavings reach the middle of the panel.
Repeat the process on the far edge with the first set of shavings starting about 11⁄2 in. from the edge. Work along the whole length of the board. With each set of cuts, take progressively longer shavings until you are near the center of the board.
Now plane all the way across the board while moving down its full length. Gauge your progress with a straightedge.
Flatten a cup
For boards too wide for a jointer, you can flatten a face with a handplane by paying attention to your passes.
 |
 |
 |
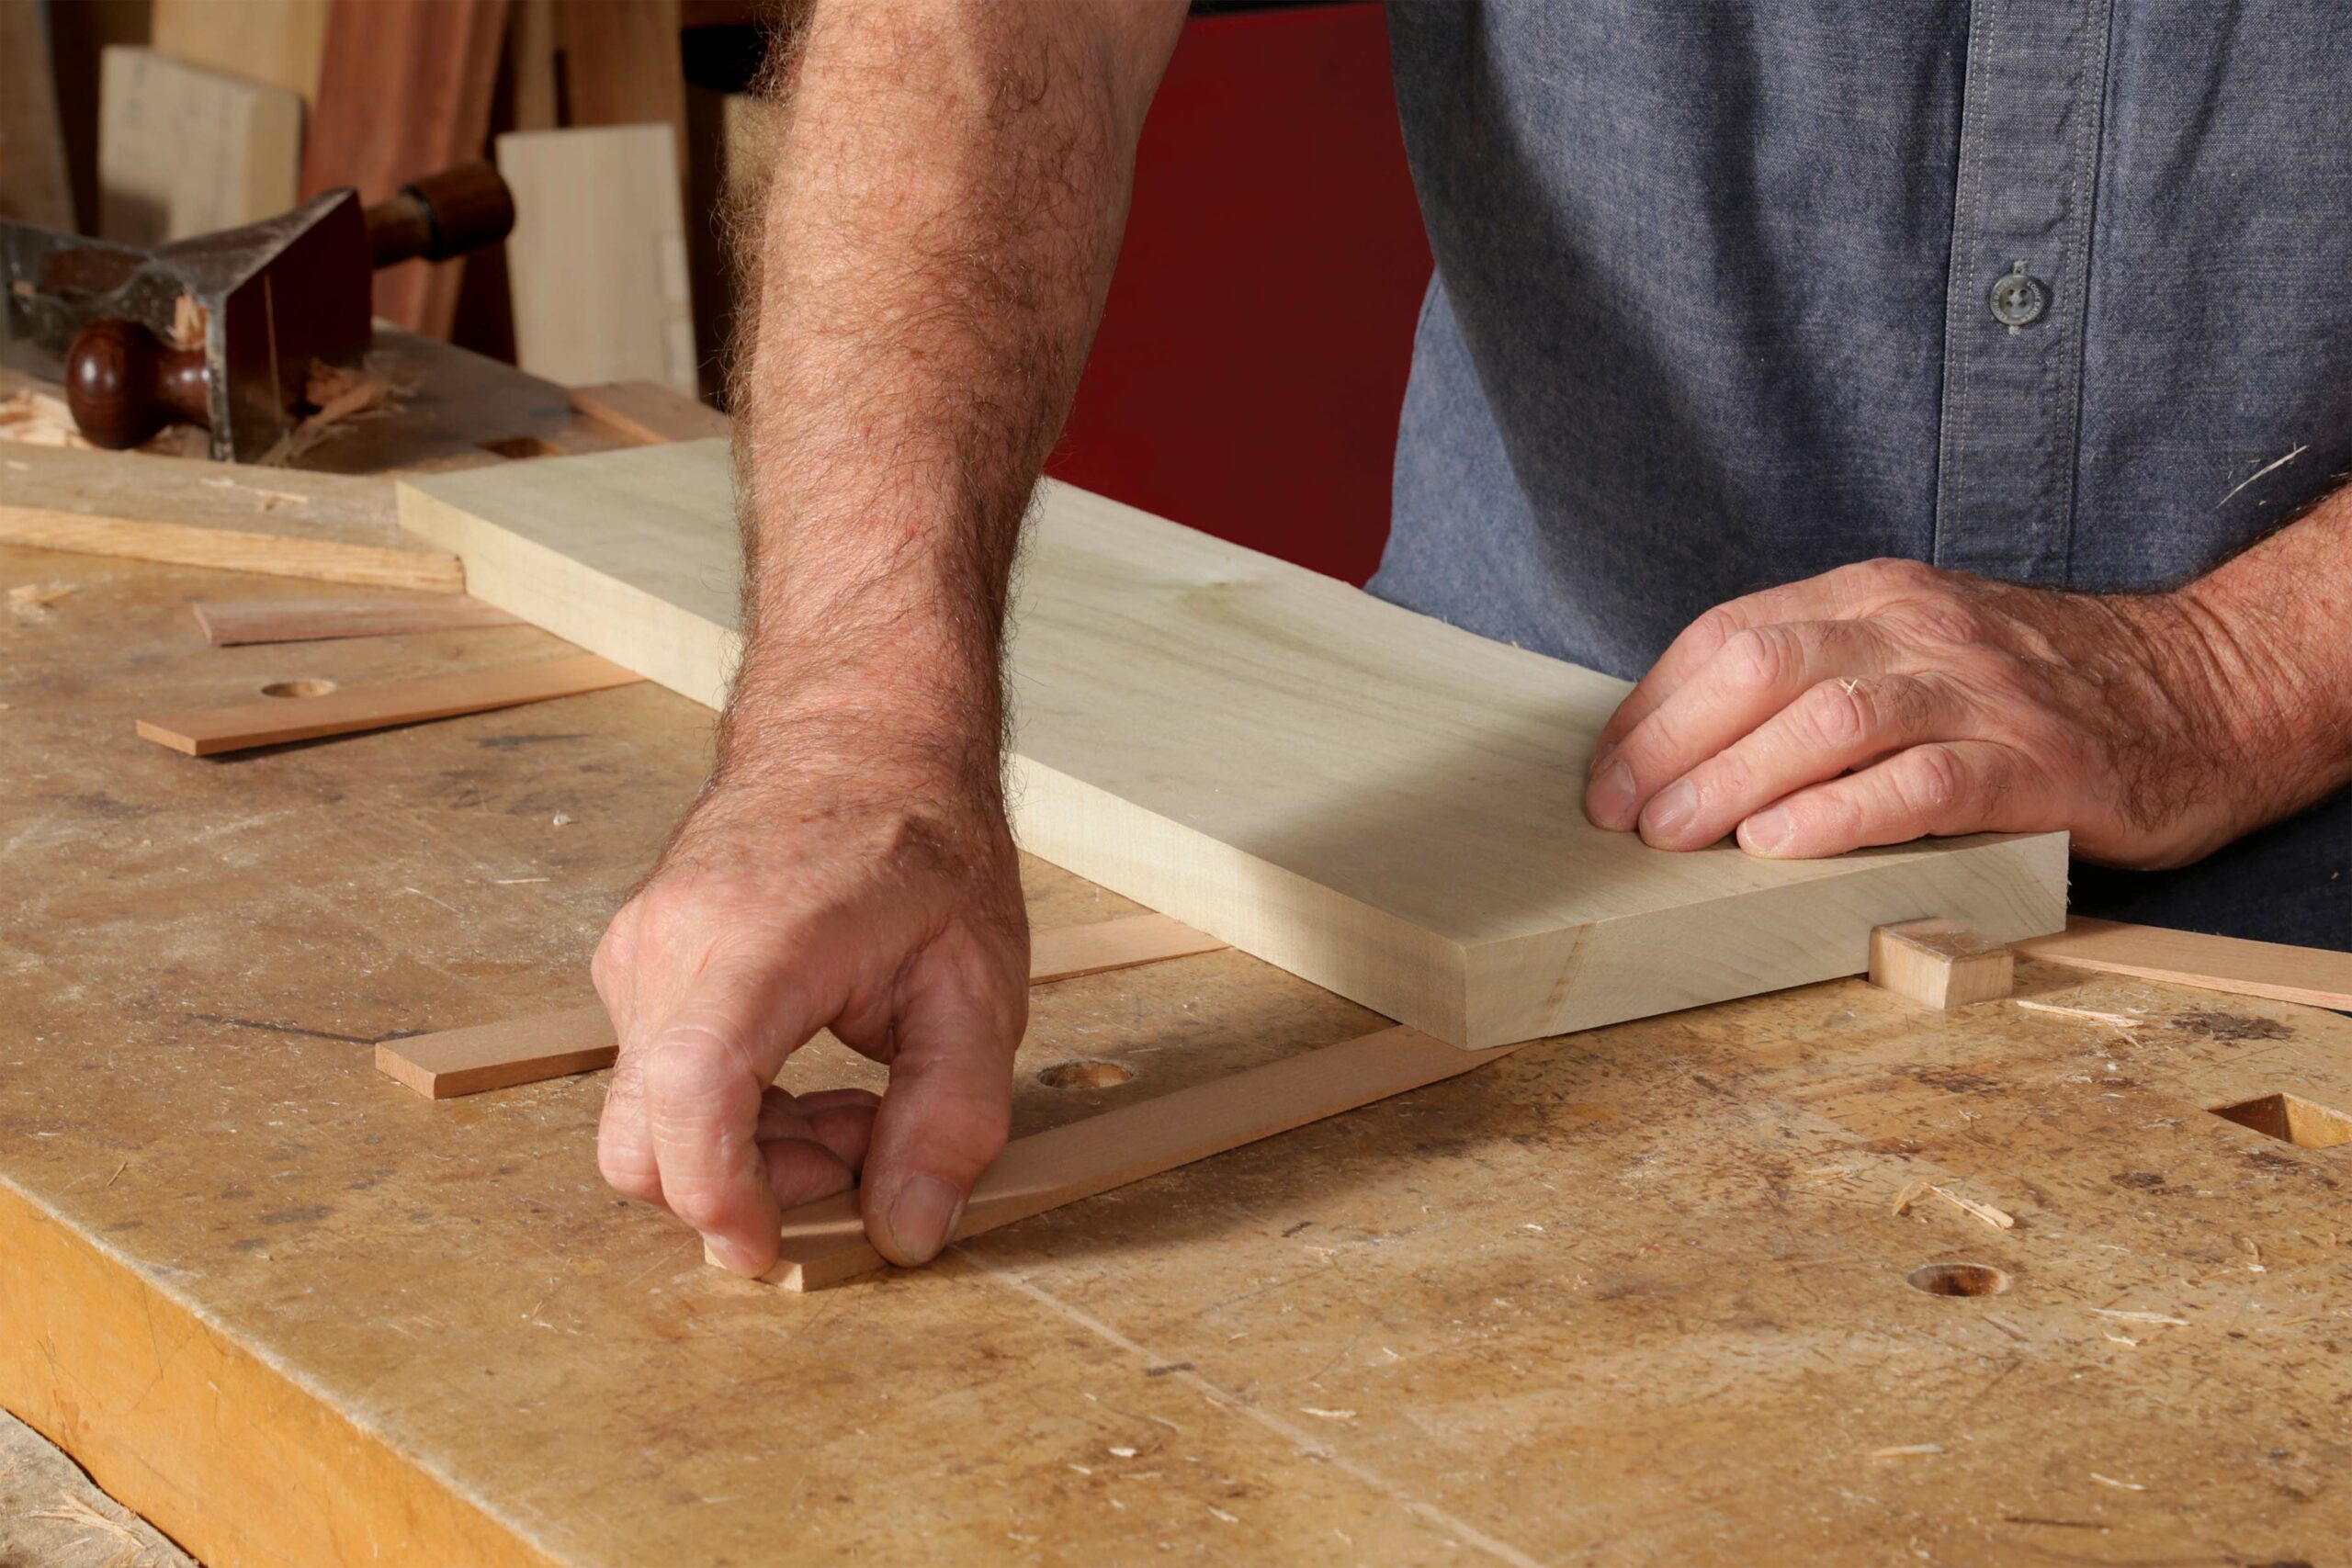
Bow— Hold the board on the bench with the bow up and place wedges underneath to stabilize it. Divide the length of the board into as many sections as seems reasonable. The more bowed the board, the more sections you’ll need.
Starting at the ends and working in toward the middle, take full strokes across the grain over the first section. Next, plane both sections one and two. Continue working in from both ends until you reach the center. The last set of shavings should march across the whole length of the board.
If there’s still bow, measure it and assess how many sections you should divide the board into this time around.
Fix a bow
With the concave side facing up, add wedges and plane across the grain starting at the ends and working toward the center.
 |
 |
 |
Twist— Correcting twist works the same way, lowering the high corners to the valley in the middle by shaving down overlapping sections. For this example, let’s assume that each half of the board has five sections. A larger or more twisted board might have more.
Working across the grain only, plane the first section. The next set of shavings will be longer and will overlap the first section. Continue planing, working along the sections until you reach the far edge of the board. That last set of shavings will go all the way across the width of the board. Repeat on the other half. Check your progress with winding sticks to see if you’ll need to repeat the process.
Remove a twist
To flatten the face of a twisted board, first determine which are the high corners. Start there and plane progressively larger sections until the face is flat.
 |
 |
 |
 From Fine Woodworking #287
To view the entire article, please click the View PDF button below.
 |
|
 |
|
 |
Fine Woodworking Recommended Products
Olfa Knife

Marking knife: Hock Double-Bevel Violin Knife, 3/4 in.
Starrett 12-in. combination square


Log in or create an account to post a comment.
Sign up Log in