Foolproof Recipes for 3 Favorite Finishes
Dyes and gel stains work better together.

Synopsis: Gel stains have come a long way in recent years. They are easy to apply — just wipe on and wipe off — and they don’t drip or cause significant blotching on most woods. Still, you do have to know their quirks in order to use them effectively. For example, they are not at their best on bare woods. And the colors are limited. Use gel stains in combination with dyes, however, and the possibilities grow exponentially. Used directly over dye, gel stains emphasize the grain and pore structure. Used on a sealed surface, they become a glaze. Here, learn three different finish recipes that will make gel stains a permanent part of your finishing arsenal.
Gel stains have grown in popularity in recent years. Their viscosity and wipe-on/wipe-off application method make them easy to master, and compared with penetrating oil stains, they cause far less blotching on certain woods. However, using them on bare wood is often not the best method. Because of the pigment in gel stains, multiple coats tend to obscure the wood grain. And they come in a limited range of colors.
A better way to use them is in conjunction with dyes. You can apply gel directly over a dye to emphasize the grain and pore structure, or you can seal the dyed surface first and then apply the gel stain. Known as glazing, this is one of the most versatile and forgiving steps in the finisher’s arsenal because it’s so easy to change or even remove the glaze before it dries. I’ll demonstrate on three popular woods— white oak, pine, and mahogany—and give finishing recipes for each.

Mission oak
Transform pale white oak into the rich, deep brown reminiscent of fumed oak without using hazardous concentrated ammonia
White oak is one of my favorite woods because it takes colors and finishes in a very predictable fashion. On this table, I’ll show you how to create a deep, rich brown reminiscent of fumed oak, the signature finish of so many Arts and Crafts pieces.
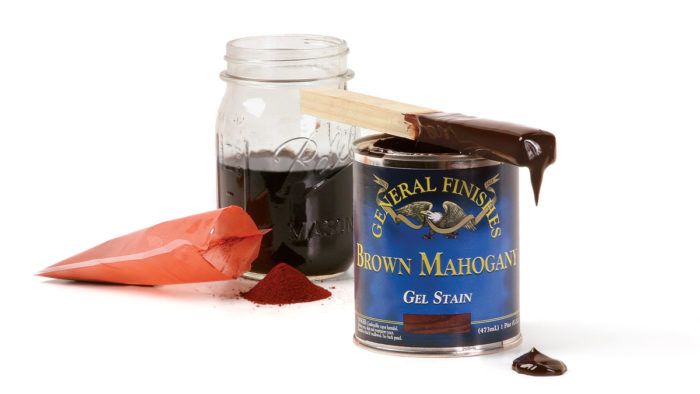
The process starts with a water-based dye, which is used to lighten up or subdue the base or background color of the wood. Waterbased dyes are economical and come in a huge range of colors. My choice for this table was Lockwood’s English Brown Oak, a cool, deep brown. Dissolve ½ oz. of powder in 8 oz. of warm distilled water, let it cool, and then filter it.
After sanding the table to P180 grit, blow the dust out of the pores, wipe the surface clean with a dry cloth, and apply the dye with a small pad. Use a brush to help dab the dye into corners. Be generous applying the dye, but wipe off the excess. Once the dye is dry, wipe on a coat of gel stain directly over it and wipe off the surplus after a couple of minutes. This helps make the grain and pore structure more pronounced, while leaving the rayfleck pattern pale. I used General Finishes Brown Mahogany, a deep, warm brown. This dye-and-stain combination results in a deep, aged brown like you’ll find on many antiques.
Allow the gel to dry completely (about 24 to 36 hours) before applying a topcoat.
 From Fine Woodworking #210
For the full article, download the PDF below:
Fine Woodworking Recommended Products

Foam Brushes

Osmo Polyx-Oil


Log in or create an account to post a comment.
Sign up Log in