Don’t Overlook Aerosols
Why these disposable spray guns belong in every woodworker's finishing kit.

Synopsis: Aerosols are in professional finisher Teri Masaschi’s arsenal and they ought to be in yours, too. There’s simply no reason to resist the convenience of aerosols when finishing small projects such as boxes and picture frames. Also, if your workshop isn’t set up for spray finishing, aerosols are a cheap way to get a topcoat with that flawless, off-the-gun finish. And they are available for almost every finish, from solvent-based nitrocellulose lacquers to stains and toners.
Is there anyone who hasn’t picked up an aerosol for some reason? Also known as rattle cans or spray bombs, they’re used for everything from air freshener to knocking out wasps’ nests. Yet when I tell woodworkers that I’m a frequent user of aerosols for finishing wood, most of them assume I’m either a bad finisher or somehow I’m cheating.
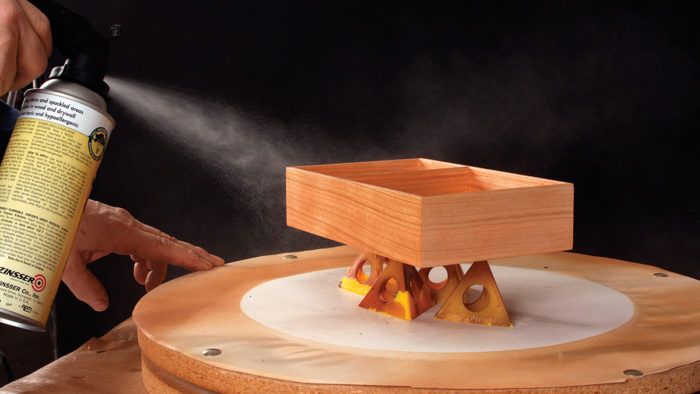
When finishing small projects such as boxes and picture frames, the canned convenience of aerosols is irresistible. It simply isn’t worth getting a brush dirty or filling a spray gun—the cleanup alone will take more time than the finishing. Also, if you aren’t set up to spray, aerosols are a cheap way to get a topcoat with that flawless, off-the-gun finish. And last, aerosols are available for almost every finish: solvent-based nitrocellulose or acrylic lacquers, shellac, oil-based polyurethanes, paint, stains, and toners.

How to get the best from an aerosol
An aerosol can’t compete with a spray gun in terms of flexibility, power, or endurance. However, if you select your projects carefully, you can get a flawless finish with an aerosol at a fraction of the cost of a spray gun and in a fraction of the time of a wipe-on finish.

You just need to understand an aerosol’s limitations. Whether brushing or spraying, you must apply a strip of finish while the adjacent one is still wet so that the two flow together. But aerosols apply finish fairly slowly; when combined with thin, fast-evaporating finishes, this makes keeping a wet edge almost impossible when you have to do long strokes across a very large surface. If you try, you’re very likely to get a striped effect where wet finish was laid down next to finish that had already dried. The top for a night stand is about the limit for fast-drying finishes such as shellac, solvent lacquer, and water-based finishes. You could probably finish a small coffee table if you use an oil-based polyurethane.
Some finishers recommend spraying across the grain and then immediately with the grain, a method known as cross-hatching, as a way of ensuring even coverage. I’ve found that unless you are working on a tiny surface, this technique will leave a checkerboard pattern when the finish dries. Instead, spray with the grain but overlap each stroke by 25% to let the wet edges blend together. Use back lighting to help you see this overlap clearly. You want to keep the can’s nozzle an even 6 in. to 8 in. from the workpiece. Don’t swing the can in an arc by pivoting from your shoulder or wrist; instead, move the can parallel to the workpiece, keeping your wrist stiff. I can’t give you an exact speed to spray at because different brands spray different volumes. Instead, go slow enough to just get an even, wet, shiny surface but fast enough to avoid puddles or runs.

From Fine Woodworking #221
To view the entire article, please click the View PDF button below.
Fine Woodworking Recommended Products


Foam Brushes

Bumblechutes Bee’Nooba Wax


Log in or create an account to post a comment.
Sign up Log in