The Right Edge for Your Tabletop
Go beyond router-bit profiles for custom edges that stand out.
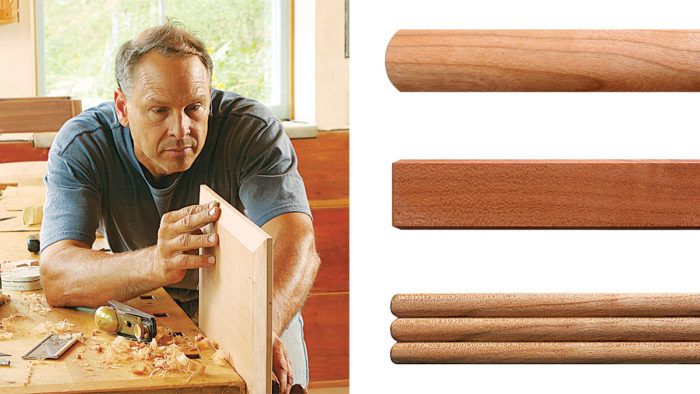
Synopsis: Garrett Hack spends a lot of time designing edges that add to the look of his tabletops. Not only must the edge of a table be tough enough to endure the bumps and bruises of everyday use, but it also must be attractive and pleasant to the touch. Many factors come into play, such as the size of the overhang, the thickness of the top, and the type of wood. Here, Hack explores different edge designs, from simple chamfers and bevels to different combinations of roundovers, beads, fillets, and other custom profiles.
I expect a lot from a tabletop edge. On one hand, I need it to be tough, able to endure a life full of bumps and bruises, even spills. Yet I want the edge to be attractive, with lines that are in keeping with the overall piece and with a profile that is pleasant to touch. It’s not an easy dance to master, but it’s a fun challenge.
I treat table edges with respect, spending a great deal of time on them. My goal is to design edges that are as alluring as the rest of the piece. I use the edges as a canvas to add detail or create interest by incorporating facets that catch light or add shadows. But make the edges too delicate, and they won’t hold up to the ruthless wear and tear of use. I look to soften sharp, square surfaces so that they’re friendly to hand and body. Subtle shapes can be very appealing, and less is usually more.
Consider the overall piece
When designing a tabletop edge, make the profile an important part of a cohesive design. Generally, simple furniture calls for simple edges while more intricate designs call for more elegant profiles. I consider the shape or aesthetic of the table and its function, the size of the overhang, the wood the top is made of, and how thick it is or how thick I would like the top to appear. You can make the top look thinner by shaping the underside of the edge with, say, an underbevel. You can accentuate thickness by using a simple bullnose or roundover, or using a beveled top edge.
Don’t overlook the overhang
The overhang is an important aspect of table design. Wide overhangs can accommodate seating and increase surface area, but they can hide aprons or drawers from standing view. Short overhangs tend to draw attention away from the top, blending it in with the overall lines of the piece.
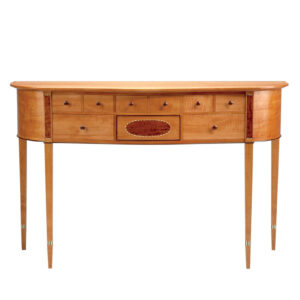
The overhang of a tabletop is a critical part of a table’s design. Dining tables may have wider overhangs to accommodate seating, while an overhang on a sideboard may be shorter to allow access to a door or drawer. The size of the overhang will have a direct impact on the width of the edge profile and the way it’s seen. Wide overhangs can be nice, but they partially conceal the aprons or any drawers from standing view. In such a case, you may choose an underbevel profile, which exposes details below the top. Shorter overhangs limit the size of the edge profile to the thickness of the top, such as a bullnose or beaded edge.
The overhang of a tabletop is a critical part of a table’s design. Dining tables may have wider over-hangs to accommodate seating, while an overhang on a sideboard may be shorter to allow access to a door or drawer. The size of the overhang will have a direct impact on the width of the edge profile and the way it’s seen. Wide overhangs can be nice, but they partially conceal the aprons or any drawers from standing view. In such a case, you may choose an underbevel profile, which exposes details below the top. Shorter overhangs limit the size of the edge pro-file to the thickness of the top, such as a bullnose or beaded edge
Hardwood vs. softwood tops
If you are really on your toes, you’ll choose a profile that works with your wood selection, whether soft-wood or hardwood, figured or plain.
Softwoods and hardwoods each have working characteristics that make them suitable for particular pro-files. Softwoods age to a beautiful patina, but they dent easily and don’t take or hold detail as well as harder woods. So for softwood tops, you may incorporate pronounced chamfers or bold profiles with less complex shaping and no sharp edges. The harder the wood, the better it holds detail, so harder tops are better for multifaceted edges. Finally, think about the figure; a tabletop with abundant figure or prominent grain may beg for a less-detailed edge that doesn’t compete for attention.
Custom edges that sing
Some woodworkers choose an edge profile based on the router bits they have. I avoid that approach be-cause I don’t want my furniture to look factory made. Production furniture has a certain look, with predict-able edges—perfect 45° chamfers, blunt bullnoses, and other recognizable profiles cut with routers or shapers. The edges are good and durable, but they don’t seem very creative or interesting.
However, when I create one-of-a-kind edges that fit my style, common router bits can be a starting point. They certainly make things easier. So I sometimes use a router to rough out the profile, then refine the machined edge with hand tools. Sometimes all it takes is delicate passes with a block plane or a spokeshave, or even scrapers and sandpaper.
From simple to complex, the edge profiles illustrated here can be used individually or combined to create dazzling designs.
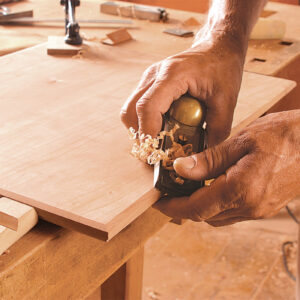
Chamfers—I often incorporate chamfers in my work to create light-catching facets along edges. A light chamfer is created by kissing the corner with a block plane. More passes with the plane create wider chamfers. The detail can be incorporated into any number of edge profiles. Chamfers can be cut at any angle, even a different angle on the top than the bot-tom. You also can cut multiple chamfers into an edge, creating a multifaceted surface.
Bevels—A bevel is simply a wide chamfer. Cut on the top edge or the bottom, they are often used to disguise or play up the thickness of the top. Steep angles generally accentuate thickness, while wider, sweeping bevels tend to play it down, especially when used on the bottom edge.
Roundovers—Though I think of bullnose-style roundovers as a rather unimaginative staple of the modern furniture industry, these edges work well at deflecting dings in a high-traffic area. One way to make an otherwise bland roundover more attractive is to reshape it so that it’s not just a radius or section of a circle; sometimes an asymmetrical roundover is best. Another way is to use just part of the full radius, so the roundover has hard edges. To add even more interest, I often lick the top and bottom of the profile with a block plane to create fine, light-catching chamfers. I also combine a roundover with other profiles, creating any number of elegant custom variations.
Complex profiles—High-style tabletops often feature complex edge profiles with multiple shapes. Here’s where I use a router to
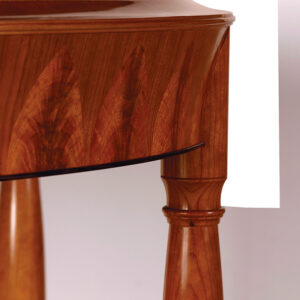
rough out the profile, and then planes or custom-made scrapers to refine it. When working this way, I often create a small wooden mock-up to dial in the profile and then use it to gauge my progress on the real edge.
Beads—I use beaded profiles in many ways: along table aprons, on drawer fronts, and on legs. But they also work well as part of a table profile. I prefer to cut beads with hand tools in order to create a fine quirk (the narrow indentation on the inside edge of the bead). Bead-cutting router bits leave a wide quirk. You can combine a bead with a chamfer to create an elegant edge with lots of light-reflecting and shadow-catching surfaces. You also can incorporate multiple beads for a traditional look.
Last, make it personal
Unless you are making a strict period reproduction, it’s difficult to say that one profile is better than another; it all depends on your design and taste. By adding subtle details to the basic profiles presented here, you can come up with a unique shape that fits your furniture. Explore the possibilities. For me, playing with the edges has become one more fun part of building special pieces.
Moldings give edges a lift
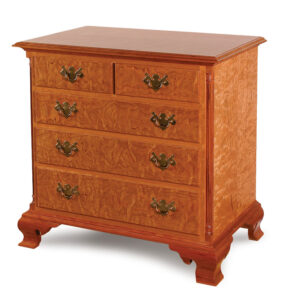
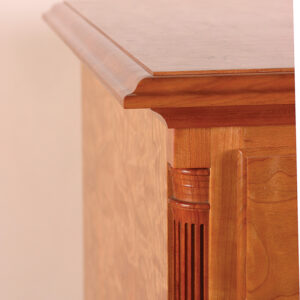
Moldings, usually applied under a shaped edge, are an easy way to add visual interest and weight to the edge. Design the molding as part of the overall shape of the edge, much like a built-up crown molding on a case. Because the tabletop gives it some protection, the molding can be more delicate. Allen Eason added a molding under the top of his Chippendale bureau. The molding mirrors the top edge and, combined with the fluted column, gives the appearance of supporting the top.
 |
 |
From Fine Woodworking #196
For the full article, download the PDF below:
Fine Woodworking Recommended Products
Drafting Tools
Compass

Dividers




Log in or create an account to post a comment.
Sign up Log in