Stylish Coffee Table with Sleek Lines
Low-key angles and a floating top elevate a simple design.
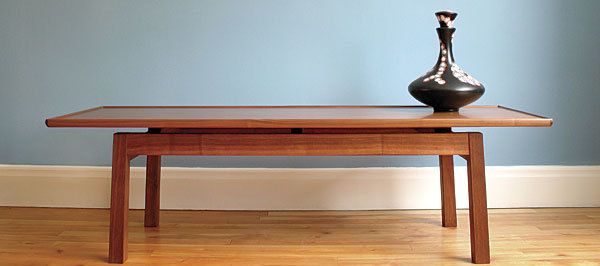
Synopsis: This coffee table draws design inspiration from the Danish mid-century period. Its floating top, pencil-roll edge and angled legs add pizzazz. The use of floating tenons speeds construction of the angled joinery, while doubling up the mortise-and-tenon joinery adds strength to the base. Because the inside faces of the legs are flush to the inside faces of the front and rear aprons, the side aprons and the cross rails are the same length, which keeps the design simple.
My goal with this project was to create a coffee table with style. While looking for inspiration, I was drawn to the uncomplicated styles of the danish mid-century period, so I incorporated subtle details like the floating top and pencil-roll edge from furniture pieces I liked. To create nice lines and natural movement, I angled the legs out a bit and gave them a little flare at the bottom, another mid-century trademark. What emerged was a table with elegant details that don’t overpower the design.
The base is constructed of rift-sawn solid black walnut. Using rift-sawn wood creates a unified look with consistent straight grain throughout. For a tabletop that will stay flat, I used 3⁄4-in.-thick black walnut plywood, with a pencil-roll edge of matching walnut.
Here I’ll show you how to speed up the construction process with slip tenons, cut the angled leg joints in the base, and make it rock-solid by doubling up the mortise-and-tenon joinery.
Start with the base
In addition to the aprons and legs, there are three cross rails in the base. Because the inside faces of the legs are flush with the inside faces of the front and rear aprons, the side aprons and the cross rails are the same length, which keeps the design simple.
When milling up the stock for the base, include some extra material to use for setting up the machines for the joinery cuts. The side aprons and cross rails are cut at 90°. The front and rear aprons and the four legs are cut to length at an angle, using a miter gauge at the tablesaw. To do this, set the blade at 90° and use a sliding bevel gauge to set the miter gauge to 94°. Make some trial cuts in extra material and then check your setup against the sliding bevel gauge. Cut out the parts and label them, and save the angled offcuts for later.
Pain-free angled joinery
Slip tenons make angled joinery easier by eliminating the need to cut and pare angled tenon shoulders. To create the strongest possible table base, the legs are joined to the aprons with two slip tenons, which doubles the glue surface for a big jump in strength. The joinery in this table is so strong that even I could sit on it.
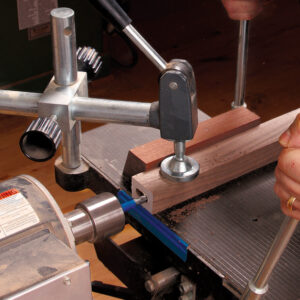
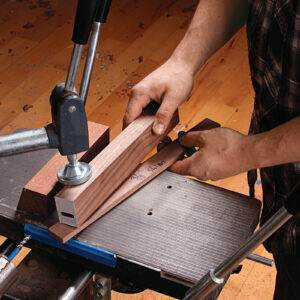
To cut the mortises, I used a horizontal mortiser with an X-Y table, but a router jig uses the same principles to position the twin mortises. Begin by marking out the mortises on the aprons. The front and rear aprons get 5⁄16-in.-thick double tenons, spaced 3⁄16 in. apart. This leaves a 7⁄32-in. shoulder on both sides. The side aprons have a single 1⁄2-in.-thick tenon.
A spacer block lets you cut the double mortises without changing the mortiser settings. To determine the thickness of the spacer, add the distance between the mortises to the thickness of one tenon. In this case, the spacer is 1⁄2 in. thick. Cut the outside mortise first, placing the inside face down against the X-Y table. Then insert the spacer between the workpiece and the X-Y table, still referencing off of the inside face.
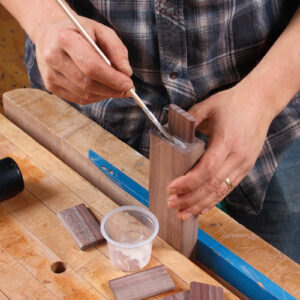
The cross rails get double 1⁄4-in. tenons with 1⁄8 in. between them, cut using a 3⁄8-in. spacer. when laying out the joinery on the ends of the cross rails, center the mortises in the lower inch. This will lift the upper 3⁄4 in. of the cross rail above the top of the aprons to give the top its floating look. Next, mill the tenon stock. Cut the tenons a little long, glue them into the rails, and trim them to length once they are dry.
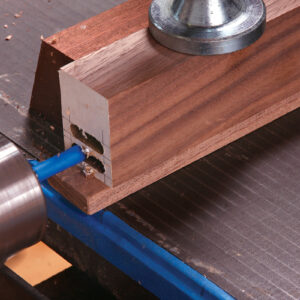
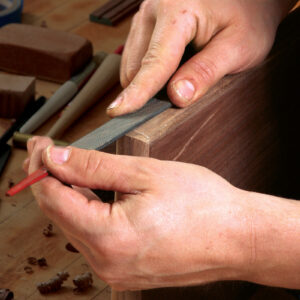
To create the illusion that the top is floating, I radiused the ends of the cross rails using the drill press. dry-assemble the frame, and mark the top of the apron on the ends of the cross rails. radius the ends of the rails with a 11⁄2-in. Forstner bit, using a few offcuts of cross-rail stock as a stop block and backer block to control blowout. Then dry-fit the base, flush the ends of the rails to the aprons using files, and smooth them with a scraper and sandpaper.
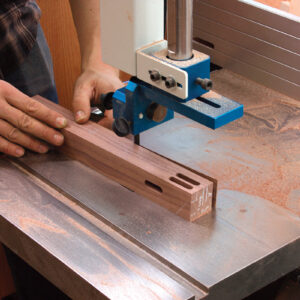
The top will be connected through the cross rails with wood screws and flat washers. Mortise the rails for the screw heads and washers at the drill press, using a 5⁄8-in. Forstner bit. Change to a 1⁄4-in. bit and drill the clearance holes.
After all the joinery is done, cut a 1⁄8-in. taper on both outside faces of the legs to make them wider at the bottom, and then clean off the sawmarks with a handplane. Save the offcuts to use later as clamping cauls. Plane the top edges of the side aprons to match the top angle of the legs, then dry-fit the front and rear aprons to the legs and plane them flush on top. Then dry-fit the whole base to check the joinery.
Finish and assemble the base
I like to pre-finish my parts before assembly, so I skim all the outer surfaces with a freshly sharpened plane and soften the corners with files. Finish prepping the surface by sanding the entire surface with P600-grit sandpaper, but be careful at this stage not to round over any edges of the joinery. Mask off all surfaces of the joinery with blue tape and pre-finish everything with danish oil. I wipe on three coats, rubbing in a small amount each time and wiping it dry, leaving behind a consistent, even sheen.
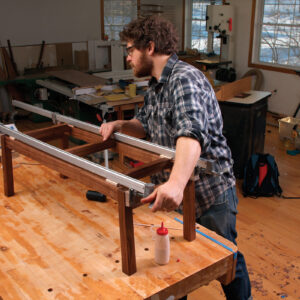
Glue up the base in stages using the angled offcuts as cauls. Start by gluing the three cross rails into the front and rear aprons—make sure to use a flat surface so the rails stay parallel. Next, glue the side aprons to the legs, doing each end separately. After these have dried, attach the side assemblies to complete the base. After the glue dries, remove any squeeze-out and finish softening the edges and blending the joinery together. go over the freshly sanded areas once more with danish oil.
Add solid edging to the top
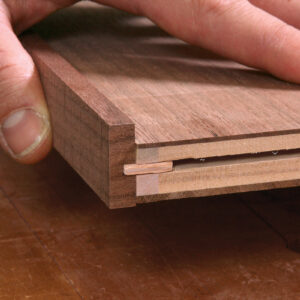
For the top, I used 3⁄4-in. walnut plywood. To hide the edges and dress it up, I added a solid-wood pencil roll around the rim. At the corners, I used butt joints, which simplifies the construction and gives the table a distinct look.
Cut the plywood top to size and mill the stock for the pencil roll, making it a little longer and wider than needed. Make some extra stock to use for setup, too.
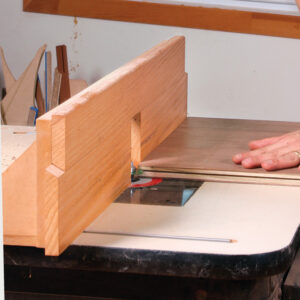
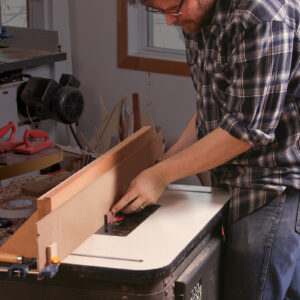
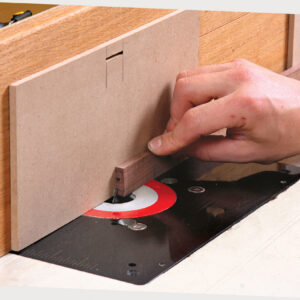
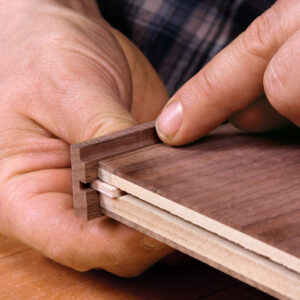
Get in the groove—The pencil roll attaches with 1⁄8-in.-thick plywood splines. Cut the grooves for it using a 1⁄8-in. slot-cutter in a router table. Start with the top and adjust the bit so that the groove height is about one-third down, or 3⁄16 in. from the top of the plywood. This will position the spline in the fattest portion of the pencil-roll edge. Set the depth of cut to 3⁄8 in. and rout the groove.
Now groove the pencil-roll stock. raise the bit height 1⁄32 in. and set the cut depth to 1⁄8 in. run the groove down the length of the two long edge pieces; the shorter end pieces have stopped grooves. Position stop blocks by marking the entry and exit points of the slot-cutter on the fence, then mark a line at each end of the workpiece about 1 in. from where the corner of the top will be. This lets you run a groove that’s 2 in. shorter than the plywood end. Using these lines as a reference, position the first stop block on the fence so that the first line on the trim corresponds to the line on the outfeed side of the fence, and the line at the back end of the trim corresponds to the line on the infeed side of the slot-cutter. If your fence is too short for these pieces, tape on a piece of 1⁄4-in. MdF to extend it.
Rout the profile—After the grooves are cut, dry-fit the pencil roll. Make a mark at the top of the plywood, and use that mark to set the height of the bit. I used a 1⁄16-in. radius core-box bit from whiteside (SC39). The profile for the pencil roll is cut just like the slots, with through-cuts on the long sides and stopped cuts on the ends. Make a test cut on some extra stock—you want the base of the profile 1⁄32 in. proud of the table-top. once the height is set, carefully mark your lines and set up the stop blocks, just like before.
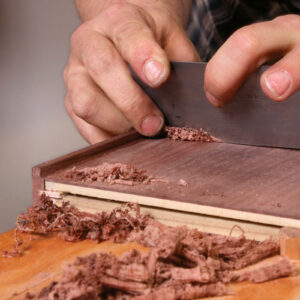
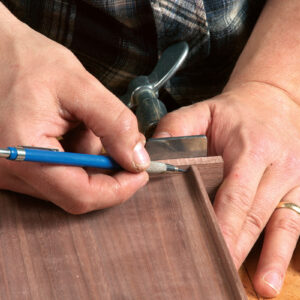
Attach it—The top is about to take shape, and now the fun really begins. glue the pencil roll to the long sides first. After the glue dries, flush the bottom edge of the trim with a block plane. Flush and finish shaping the pencil-roll profile on top using a customized card scraper. Shape a scraper by filing a corner to match the profile made by the router bit. when the pencil roll is almost flush, finish smoothing it by working up through sandpaper grits P280, P320, P400, and P600.
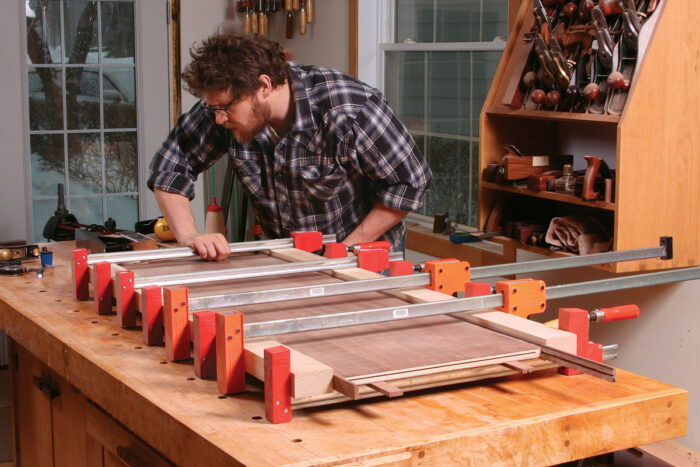
Draw the outside profile onto the end of the pencil roll and shape it with a smoothing plane, then trim the ends flush and plane them flat with a block plane to get them ready for the end pieces. Be careful not to damage the inside faces of the pencil roll.
Glue on the end pieces and flush the bottoms, and use your modified card scraper to clean up the pencil roll. To shape a nice radius in the inside corners, use a 1⁄8-in. gouge. once the inside is done, move on to the outside of the edge. Trim the ends off and flush them, complete the shaping, and apply the finish.
Attach the top and trim the legs
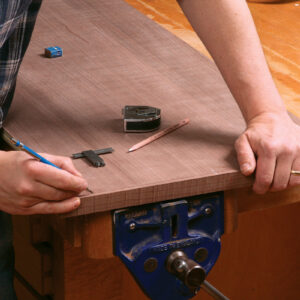
With the main components assembled and finished, attach the top. Place it upside down and center the base on the top. Mark the screw holes on the top using a drill bit, remove the base, and drill for the screws. Attach the top with the screws and washers.
From Fine Woodworking #242
Download the plans for this table from the Digital Plans Library. Plus, browse 100+ other plans available for members only.
For the full article, download the PDF below:
Fine Woodworking Recommended Products

Sketchup Class

Drafting Tools

Estwing Dead-Blow Mallet




Log in or create an account to post a comment.
Sign up Log in