Build a case with mitered dividers
Michael Pekovich's simple, versatile method yields fast, accurate results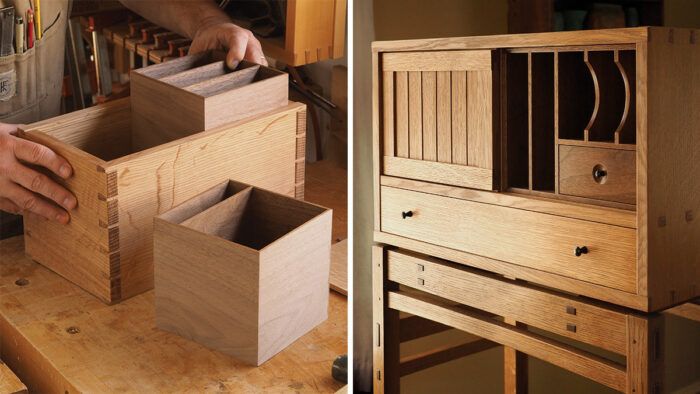
Synopsis: When faced with building a case that has a lot of internal dividers, a practical option is to build the divider assemblies separately. This allows for the use of thin stock and a variety of combinations of drawers, shelves, and vertical compartments without worrying about assembling everything at the same time as the case. Accurate miters are crucial to this method, so Mike Pekovich uses a shooting board to dial them in. He also covers sizing parts correctly, cutting V-grooves, mitering and beveling the dividers, gluing up, and installing them in the case.
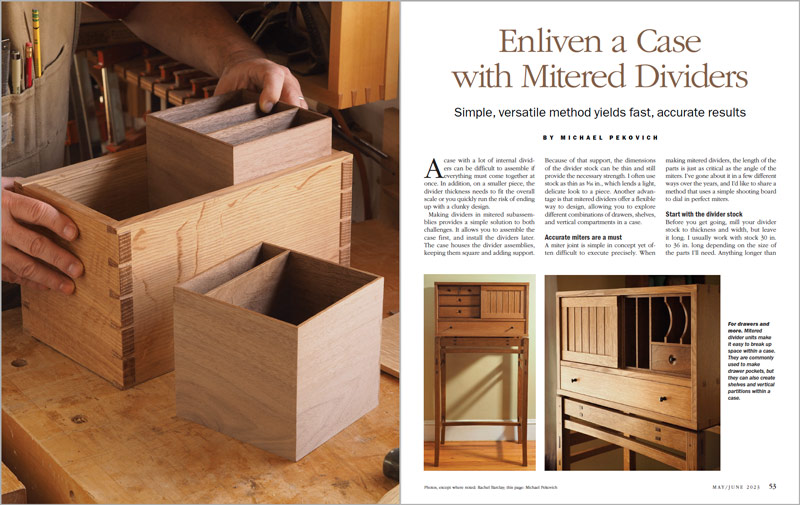
A case with a lot of internal dividers can be difficult to assemble if everything must come together at once. In addition, on a smaller piece, the divider thickness needs to fit the overall scale or you quickly run the risk of ending up with a clunky design.
Making dividers in mitered subassemblies provides a simple solution to both challenges. It allows you to assemble the case first, and install the dividers later. The case houses the divider assemblies, keeping them square and adding support. Because of that support, the dimensions of the divider stock can be thin and still provide the necessary strength. I often use stock as thin as 3/16 in., which lends a light, delicate look to a piece. Another advantage is that mitered dividers offer a flexible way to design, allowing you to explore different combinations of drawers, shelves, and vertical compartments in a case.
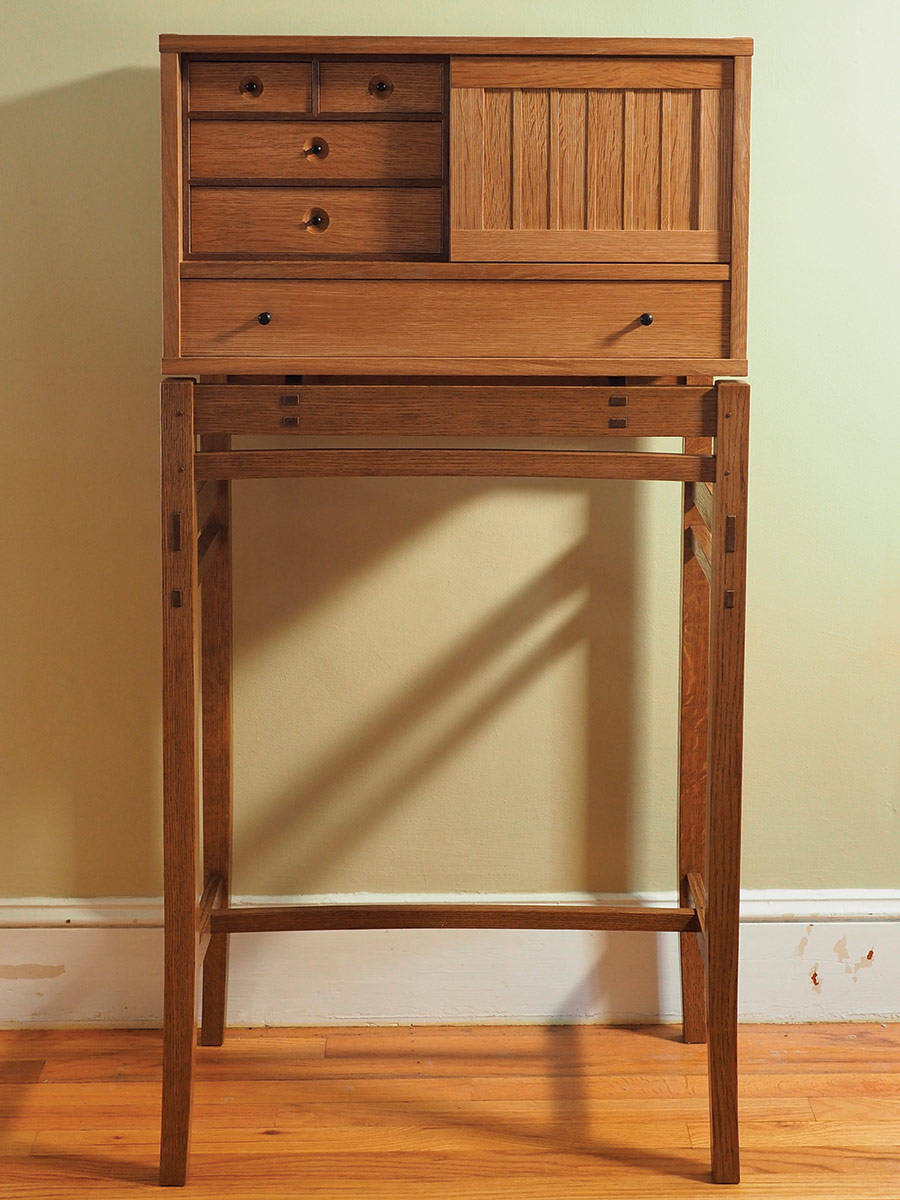
Accurate miters are a must
A miter joint is simple in concept yet often difficult to execute precisely. When making mitered dividers, the length of the parts is just as critical as the angle of the miters. I’ve gone about it in a few different ways over the years, and I’d like to share a method that uses a simple shooting board to dial in perfect miters.
Start with the divider stock
Before you get going, mill your divider stock to thickness and width, but leave it long. I usually work with stock 30 in. to 36 in. long depending on the size of the parts I’ll need. Anything longer than that gets cumbersome to handle. It might sound contradictory, but when milling thin pieces, I start with thick stock, usually 8/4 material if I can find it. When resawing a board into thin pieces, I find that the outer blanks tend to bow, while the remaining blanks tend to stay flatter. If you have access to air-dried lumber, that’s best. The air-dried lumber I’ve used in the past had very little tension and resulted in dead-flat divider stock.
It’s impossible to joint and plane a thin piece of stock by machine once it has been cut, so I joint the outer faces of the blank flat before resawing each strip. I then run the jointed face down when planing the stock to final thickness. I install a 1/2-in.- thick MDF platen in my planer to help ensure good results when planing such thin stock.
Shoot the parts to length
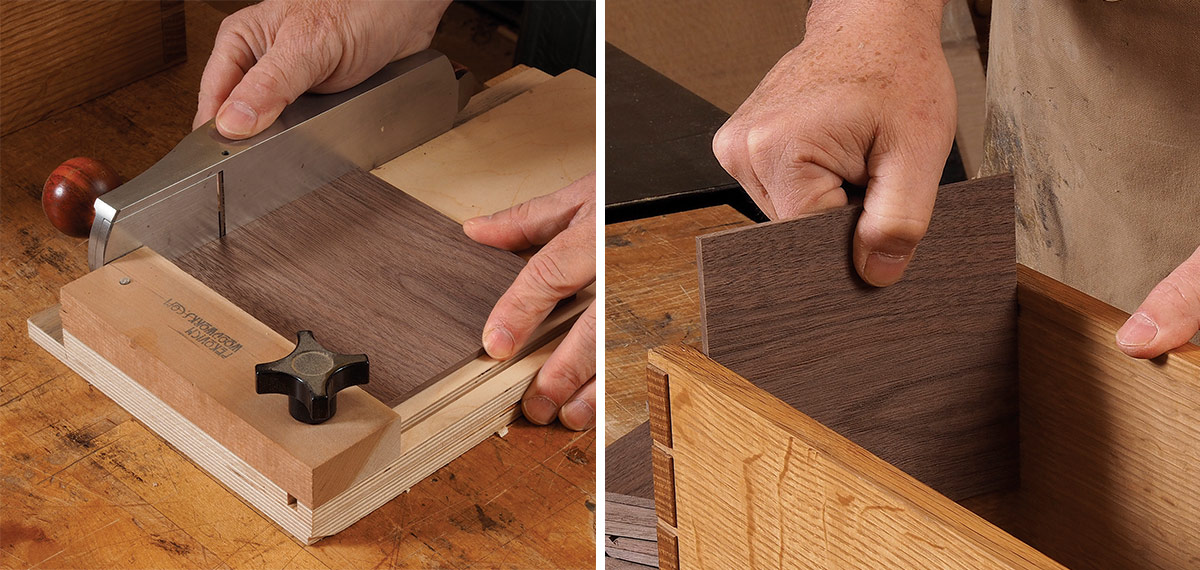
The key to success with this technique is taking an extra step that might seem odd at first. Rather than mitering the parts as I dial in their precise lengths, I start by cutting square ends on the parts when fitting them, and turn to mitering only after they are at the proper length.
The process begins with parts cut slightly overlong. It’s not critical how you go about it since you’ll square each end using a hand plane and shooting board. I prefer not to leave too much work to do at the bench, so at the table saw I cut the parts just slightly overlong, not more than 1/16 in.
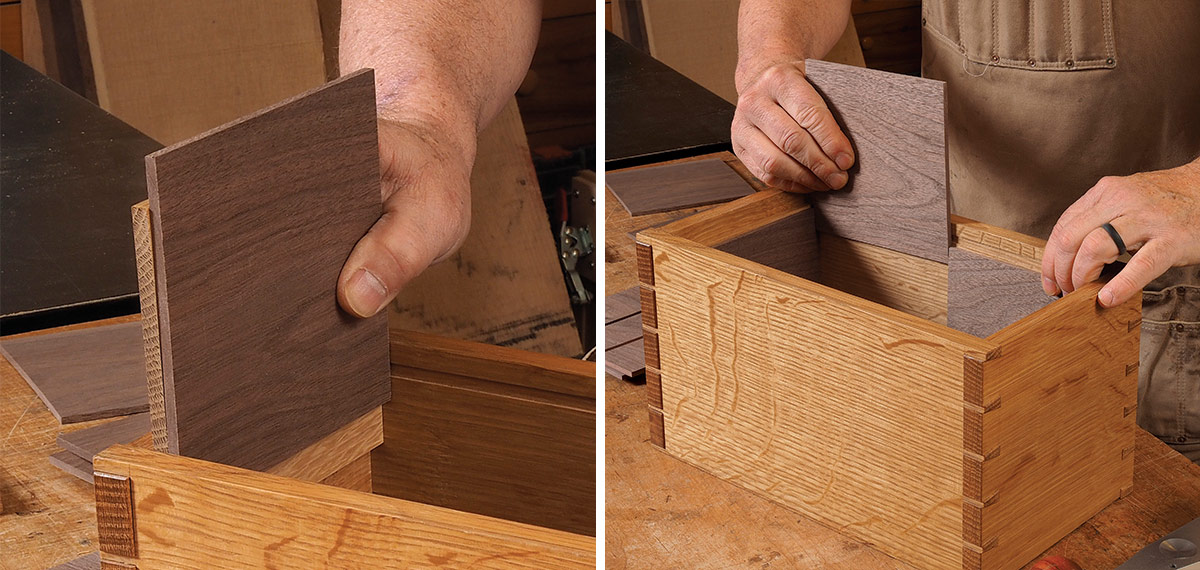
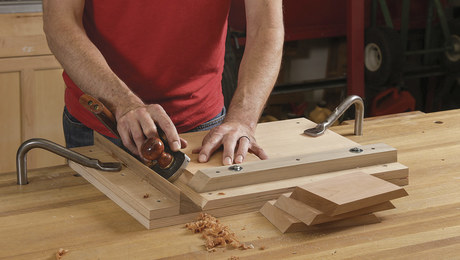
The next step is to plane one end square. A shooting board with a square fence is essential. The one I use has an adjustable fence that I can square up before every job (see 6 Essential Bench Jigs, FWW #258). Try not to remove too much stock on the first end; the part must still be overlong when you start on the second end. Once both ends are square, check the fit against the case opening. Aim for a snug fit that doesn’t require too much force to slide into place. If the case will have a center partition, insert the partition along one side of the case and trim a pair of parts until they fit side by side. Any internal dividers that fit into V-grooves need to be one divider thickness shorter than the case opening.
In addition to being editor and creative director of Fine Woodworking, Michael Pekovich teaches woodworking online and across the country.
Photos, except where noted: Rachel Barclay
To view the entire article, please click the View PDF button below.
 |
Video: A smart way to create dovetailed dividers |
 |
A shooting board for case miters |
 |
From the archive: Engineering a table with drawers |
Fine Woodworking Recommended Products
Pfiel Chip Carving Knife

Marking knife: Hock Double-Bevel Violin Knife, 3/4 in.
Freud Super Dado Saw Blade Set 8" x 5/8" Bore






Log in or create an account to post a comment.
Sign up Log in