All About Miter Joints

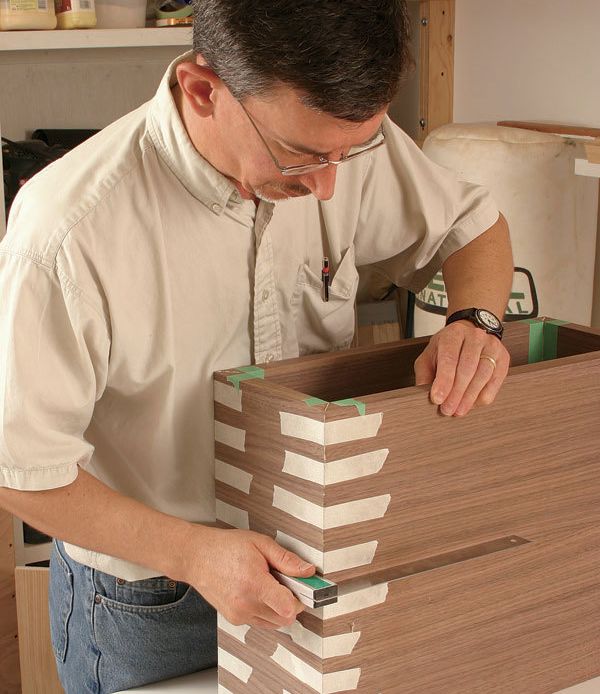
Anyone who has ogled a painting or stared into a mirror is familiar with the miter. This decorative joint is used on small boxes, frames, even to hold together a carcase. From an aesthetic point of view, the miter is an attractive way to deal with a corner. It can give the impression of continuous grain around the outside of the corner, as on a waterfall table, and it avoids the busyness of more complex joints, such as dovetails and box joints. Don’t be fooled by a miter’s visual simplicity, though. It is a sophisticated joint that requires a great deal of precision to execute well.
The Basics:
• Anatomy of the joint: A miter is the division, into two equal parts, of an overall angle created by intersecting parts.
• Precision is critical: Because the two parts must join to create the desired angle, precision cutting is essential.
• By hand or machine: Either way, you must guide a sawblade to cut the desired angle.
Anatomy of the miter joint
A miter is the division, into two equal parts, of an overall angle created by intersecting (frame) parts. Most frames and moldings meet at 90°, so the most common angle of a miter is 45°. If the frame members intersect at 120°, the miter angle would be 60°. In order for miters to be effective and look good, they must fit together perfectly. Any minute inaccuracy will affect both looks and strength.
Precision on miters is critical
Perfect miters require careful setup, often followed by tedious adjustments. The joint can be cut on a tablesaw or miter saw, also known as a chop saw. When miters are cut by machine, the cutting action generates forces upon the material, pushing it away from the blade. This force often causes the workpiece to move slightly and eventually affects the accuracy of the miter. There are after-market jigs and fixtures that can be used to control or diminish this effect.
No matter which method you choose, plan to spend considerable time adjusting and calibrating the machine, and then producing a number of trial cuts to test the accuracy of the (miter) angle. If the desired angle is 45°, the easiest way to check for accuracy is to use a miter (or combination) square. If each half checks out at 45°, the resulting joint should be square. Another method is to check the assembled joint for square (90°).
If the overall angle is other than 90°, bisect the angle and use a a sliding “T”-bevel set to half the overall angle.
Miters by hand or machine
If you choose, the miter joint can be executed entirely by hand. After measuring and marking out your workpiece for a 45° cut, use a miter box and a tenon saw to rough cut the angle. Then use a miter shooting board and a bench plane to dress the face of the miter and adjust for inaccuracy.

A miter shoot lets you to plane components for a perfect fit.
Once the miter has been cut and the angle checked for accuracy, you must decide on a method to align the two halves for gluing. The pressure applied to a miter will cause the parts to slip past each other unless there is some mechanical means of holding the two parts in place. Another reason for reinforcing the joint is that the glue surfaces (edges) of the joint are end grain and not capable of producing a strong glue joint. Once aligned, the parts can then be clamped.
The most common and effective means of registering and strengthening the mitered joint is with a spline set into a groove on the edge of each piece. However, for the best results, pay careful attention to the thickness, size, and grain orientation of the spline.
Additional Reading:
- A Shooting Board for Case Miters
- A Tablesaw Sled for Miters
- Video Workshop: Cutting Grooves and Miters on a Small Box
- How to Build a Perfect Picture Frame
- Adding Splines for Stronger Miters
Fine Woodworking Recommended Products

Festool DF 500 Q-Set Domino Joiner

Olfa Knife

Veritas Standard Wheel Marking Gauge


Log in or create an account to post a comment.
Sign up Log in