A Shooting Board for Case Miters
Build a shooting board that allows you to rough out case miters on the tablesaw and then plane them for a perfect fit.
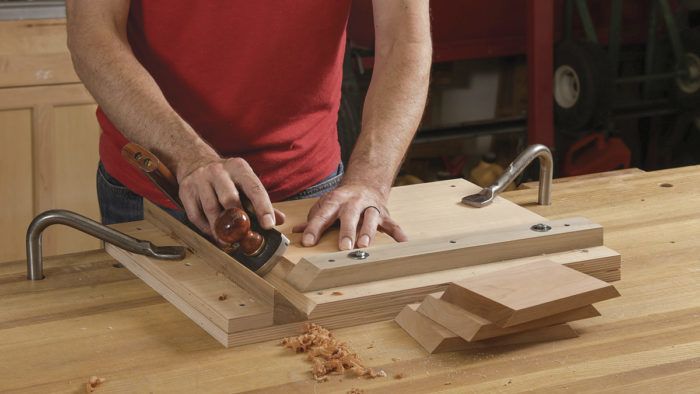
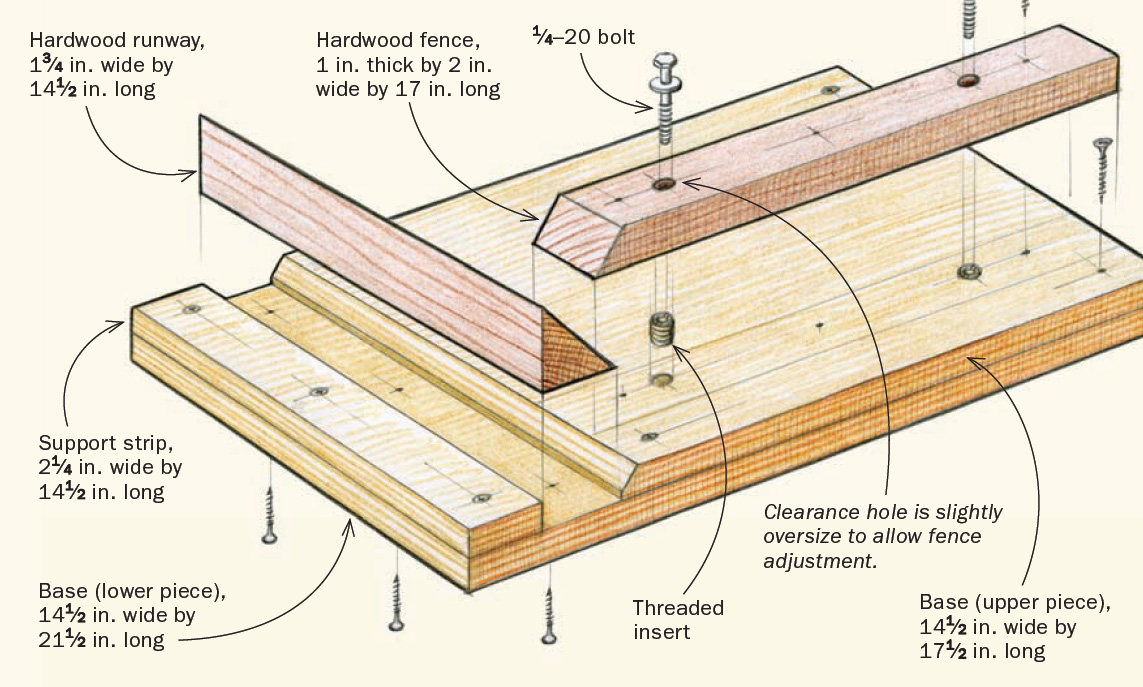
Synopsis: Build a shooting board that allows you to rough out case miters on the tablesaw and then plane them to perfection. It starts with a solid, stable base. Add a runway that’s exactly 45° and a fence that’s exactly 90° to the runway, and you are on the way to achieving perfect case miters.
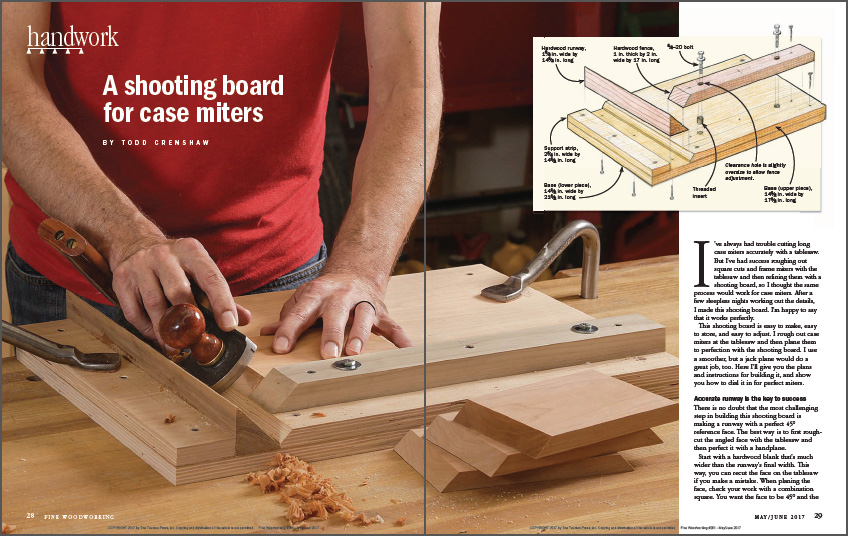
I’ve always had trouble cutting long case miters accurately with a tablesaw. But I’ve had success roughing out square cuts and frame miters with the tablesaw and then refining them with a shooting board, so I thought the same process would work for case miters. After a few sleepless nights working out the details, I made this shooting board. I’m happy to say that it works perfectly.
This shooting board is easy to make, easy to store, and easy to adjust. I rough out case miters at the tablesaw and then plane them to perfection with the shooting board. I use a smoother, but a jack plane would do a great job, too. Here I’ll give you the plans and instructions for building it, and show you how to dial it in for perfect miters.
Accurate runway is the key to success
There is no doubt that the most challenging step in building this shooting board is making a runway with a perfect 45° reference face. The best way is to first roughcut the angled face with the tablesaw and then perfect it with a handplane.
Start with a hardwood blank that’s much wider than the runway’s final width. This way, you can recut the face on the tablesaw if you make a mistake. When planing the face, check your work with a combination square. You want the face to be 45° and the runway to be flat along its length. After you’ve planed the runway’s mitered face to 45°, rip it free from the blank.
Dial it in for perfect joints
After you’ve made the runway, the rest of the shooting board will seem like a walk in the park, but you do need to spend some time ensuring that the fence is exactly 90° to the runway. I do this by making a series of test joints. If the fence isn’t square, I adjust it and try again. Here’s how I do it. Start with two workpieces that are at least 6 in. wide. Rough out a miter on the end of each one, then use the shooting board. When all of the sawmarks are gone and the plane takes a full-length and full-width shaving from the miter, place the two workpieces flat on the shooting board and pressed against the fence. The points of the two miters should touch with absolutely no gap between them. If there is a gap, adjust the fence. Repeat this process until the two miters align with no gaps.
From Fine Woodworking #261
To view the entire article, please click the View PDF button below.
Fine Woodworking Recommended Products

Olfa Knife
Tite-Mark Marking Gauge

Starrett 12-in. combination square



Comments
How do you prevent the plane from cutting away at the base or fence? I'm familiar with a regular shooting board where your first swipes initially cut the base and fence as much as your blade protrudes then stops cutting because of your plane sole edge but does this make the same trench initially?
Yes it does, I just built my version yesterday and the first few times you pass the plane through it-the recess is created equal to the projection of the blade. It works just great.
What plane is Todd using in this image? It looks like a Veritas BU smoother, but it's got the shooting horn attached to it? How is that possible?
Really great clear instructions, with dimensions!!! I'm in the process of building mine now.. I'll let you know how it works out..
Thank you
He modified the plane himself.https://www.toddswoodwork.org/turn-hand-plane-shooting-star/
I made this shooting board several years ago, and use it often. However, there's no way I would have made it as described. It was way too imtimidating to make a perfect 45 reference surface... by hand.
I used my 8" jointer. Like most jointers, it has a fence that tilts, with a handy 45 degree stop, even. I had never used the fence on anything but 90, but if ever there was a time, this was it.
I roughed the hard maple runway on the TS, and then fed it across the jointer. It was weird pushing the workpiece with the fence crowding over it, but the result was PERFECT.
I will summarize what may or may not be obvious: To make a jig for making long (case) miters: First, make a long (case) miter.
Log in or create an account to post a comment.
Sign up Log in