Build a cedar planter with a bench: A beginning woodworking project
This simple project can transform any outdoor living space.
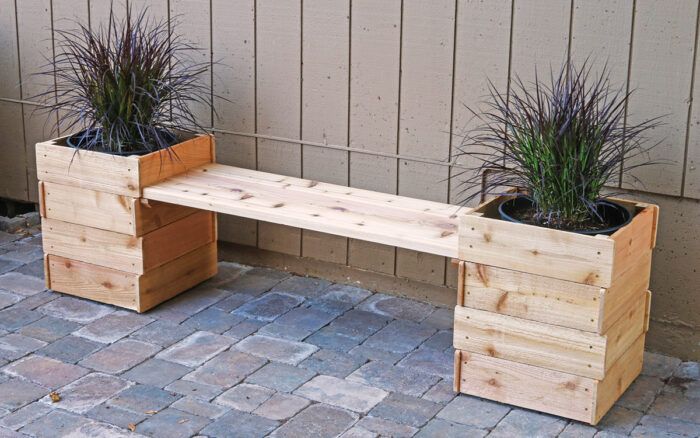
One of the great things about building stuff is your ability to customize it. Design it the way you like, make the dimensions work for you, and use whatever wood you want. Build your world. In this case, the planter boxes can be made tall, with a seat suspended between them, or shorter and placed on their own, wherever they fit.
The key move with planters is not to ask them to hold dirt, which is full of water and bacteria and will ultimately win its battle with the wood. Instead, start with plastic planter containers, whether long boxes or big pots, make sure they have holes for drainage, and build wood boxes to hide them.
In this case I started with big 16-in.-dia. pots (actually a tad bigger than 16 in.) from my local home center. The planter boxes are beyond simple: just roughsawn cedar fence boards screwed onto square posts hidden on the inside. I broke my cedar rule and used pressure-treated wood for the posts. It’s a bit cheaper, but it’s also harder and holds screws more tightly.
The roughsawn boards are nice, but most of the charm comes from an overlapping corner detail. To give the appearance of traditional joinery, I simply cut half of the boards a little long, rounded their corners, and overlapped them at the corners of the box.
Joinery is an old-timey word for the various ways wood can be cut so it interlocks and forms strong joints. When you see dovetails on the outside of a box or drawer, or tenons emerging from their mortises (as they do on the outdoor bench), that’s called exposed joinery, and it always turns heads. There’s something about seeing the construction and craftsmanship that is pleasing to people. This overlapping detail is a nod to exposed joinery, but it’s dead-easy to execute. Pretty/easy, my favorite combo.
Materials & Supplies
The amount of materials you’ll need will vary depending on the plastic containers inside and which version of the planters you build, so you’ll have to do some measuring and figuring.
- Side boards: Roughsawn cedar fence boards, roughly 5/8 in. thick by 5-1/2 in. wide
- Posts and cleats: Pressure-treated wood, 1-1/2 in. square
- Seat boards: Cedar, roughly 1-3/8 in. thick by 5-1/2 in. wide, with rounded edges
- Deck screws, 2 in. long
- Deck screws, 3 in. long
- Two plastic planting containers, 16 in. diameter (actually 16-1/4 in.)
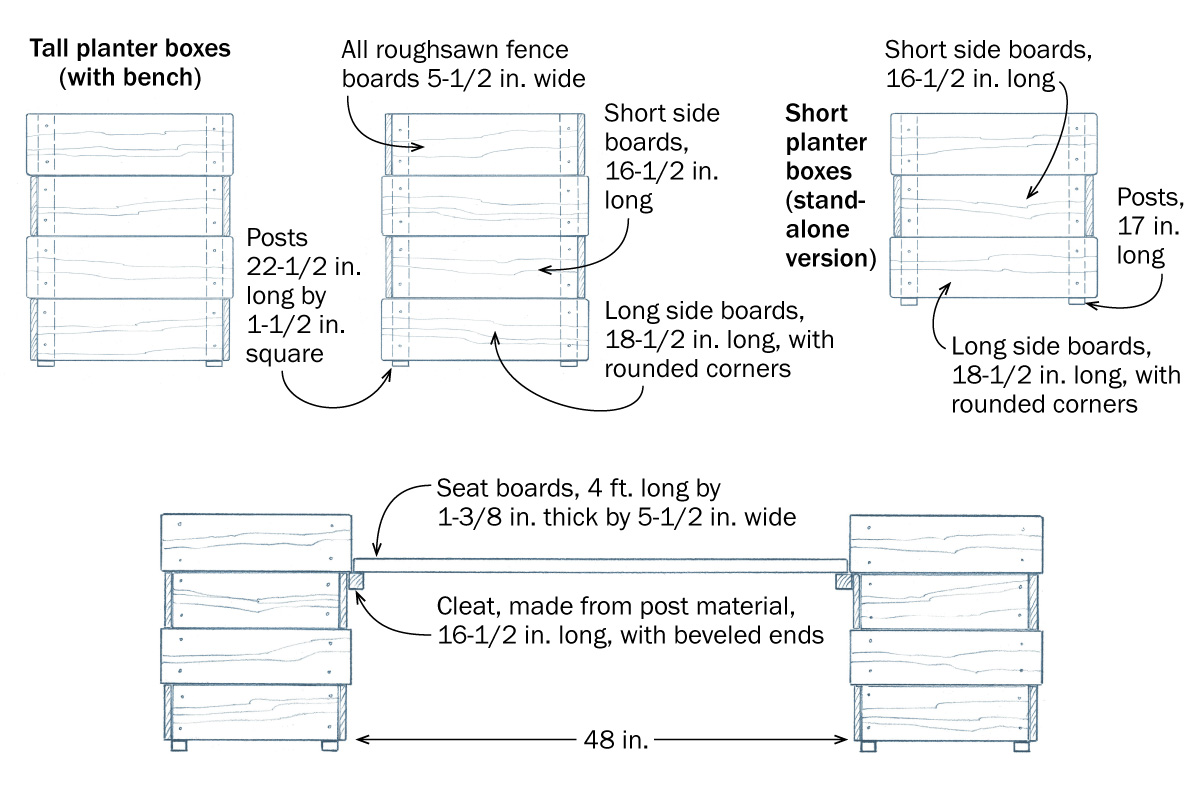
If you want the full planter–bench array, make the planters full size, four boards tall, and screw on cleats to support the seat. That’s the way I’ll build the project in the photos that follow. To make the planters stand alone, I would make them shorter, three boards tall instead of four. They just look better that way on their own. But other than using shorter posts and fewer boards, the how-to is the same.
Prep the parts
This project is all square cuts, with the side boards getting a quick roundover on each corner from your sanding block, so this stage goes fast.
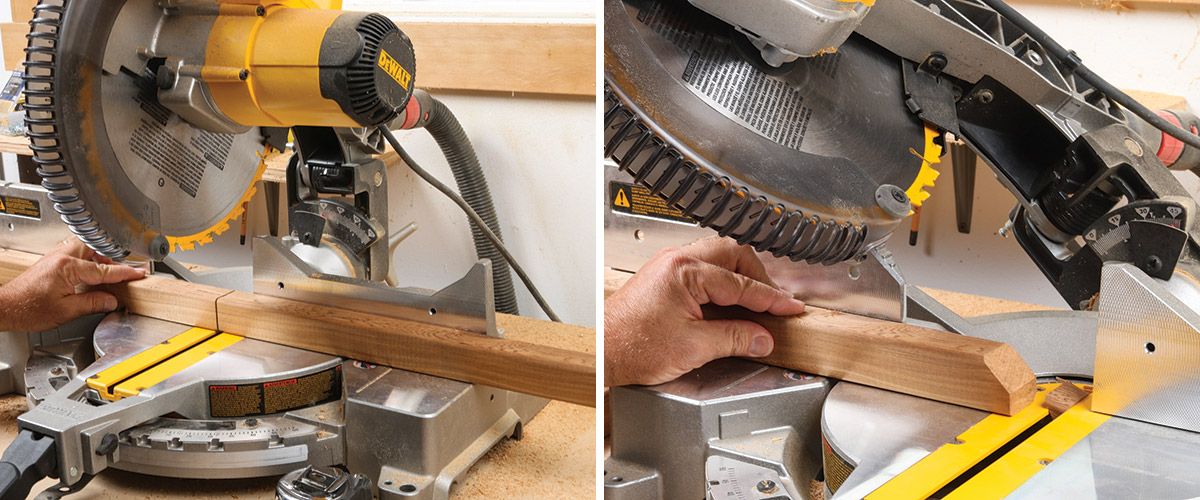
1. Chop all of the parts to length. Cut the posts to length, and then the side boards. (See the sidebar on how to set up the stop shown here.) When cutting the side boards, note that you need an equal number of slightly longer and shorter ones. Also, make sure your planting container will fit, or adjust the lengths of the side boards.
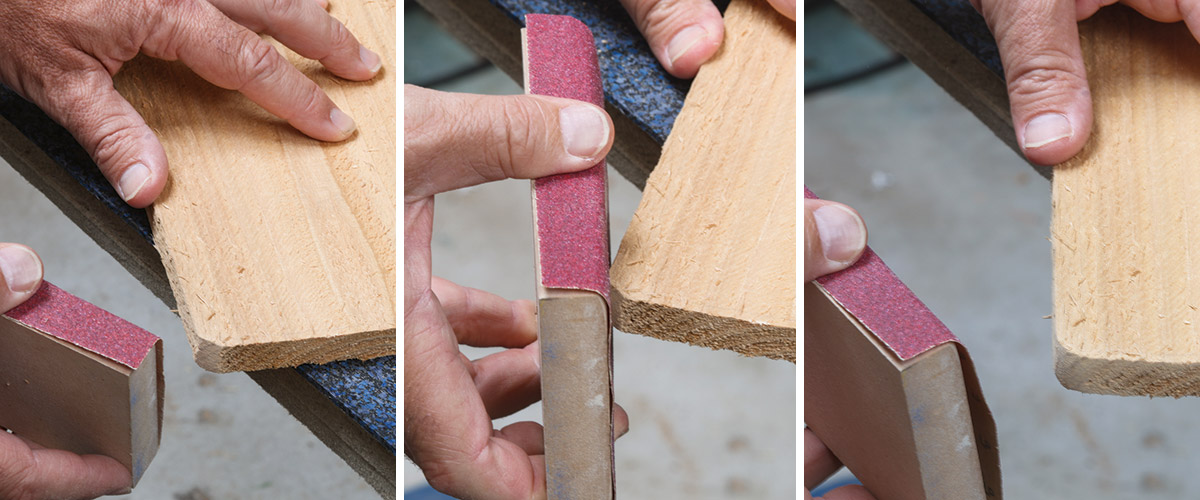
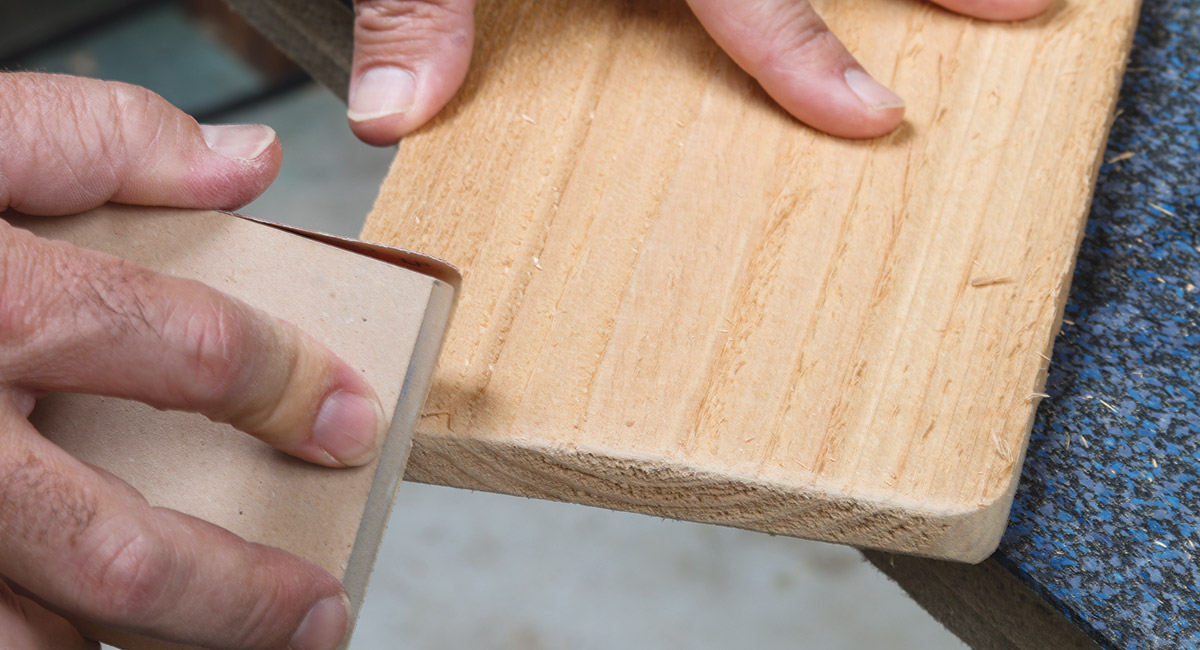
2. An easy way to round the corners. You want a roughly 1/4-in. to 3/8-in. roundover on the corners of the long side boards. To do that quickly and easily, use your sanding block and 80-grit paper to make a big bevel on the corner. Shoot for about 1/4 in. wide, but just trust your eyes. Then just sand the points at the ends of the bevel to create a smooth roundover.
3. Finish by breaking the edges. Sand the ends and roundovers lightly to remove any whiskers and soften the edges.
Use a Stop for Repeat Cuts
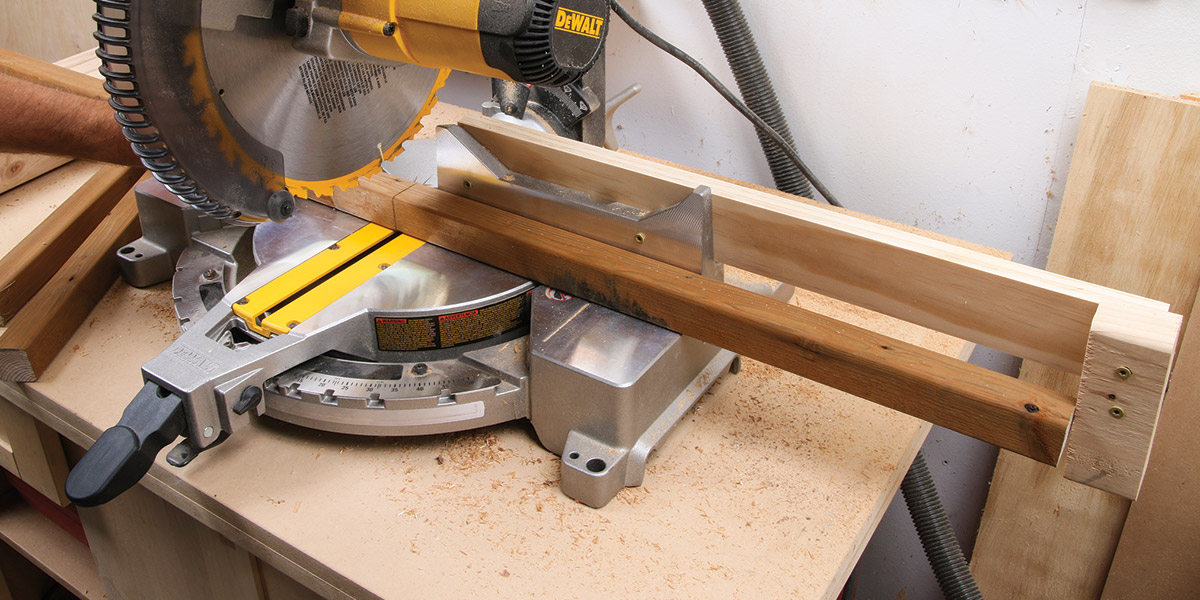
On any stationary power tool, like the miter saw, you can set up a stop when you need to cut a lot of pieces to the same length. It’s a great timesaver that adds accuracy, too.
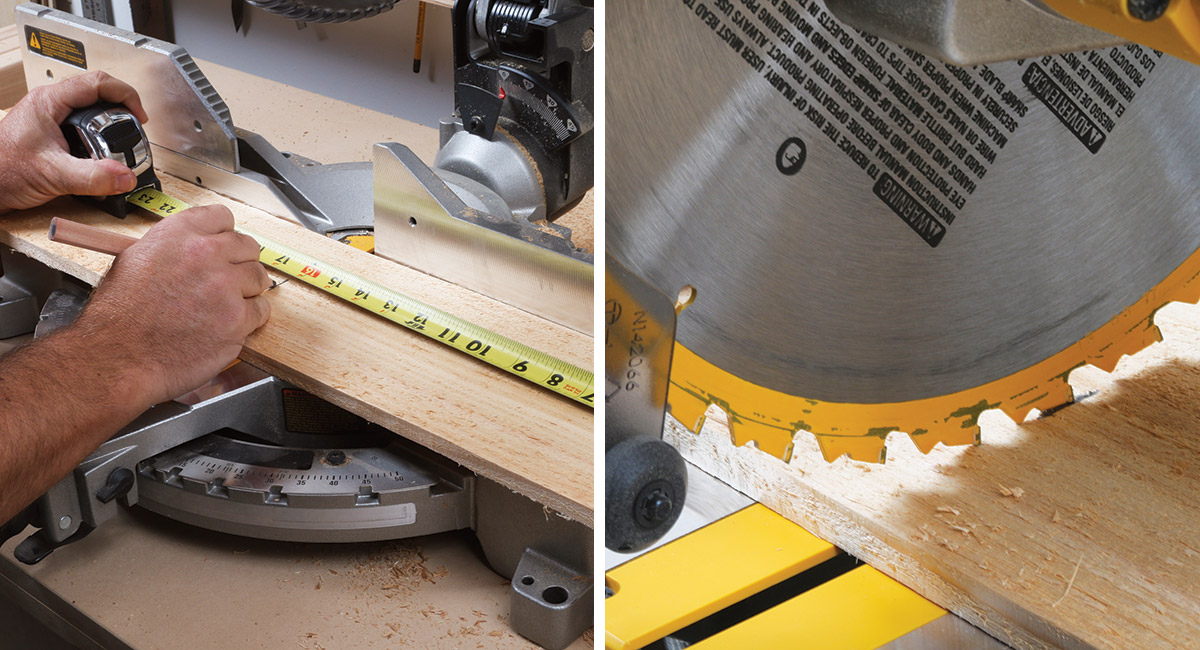
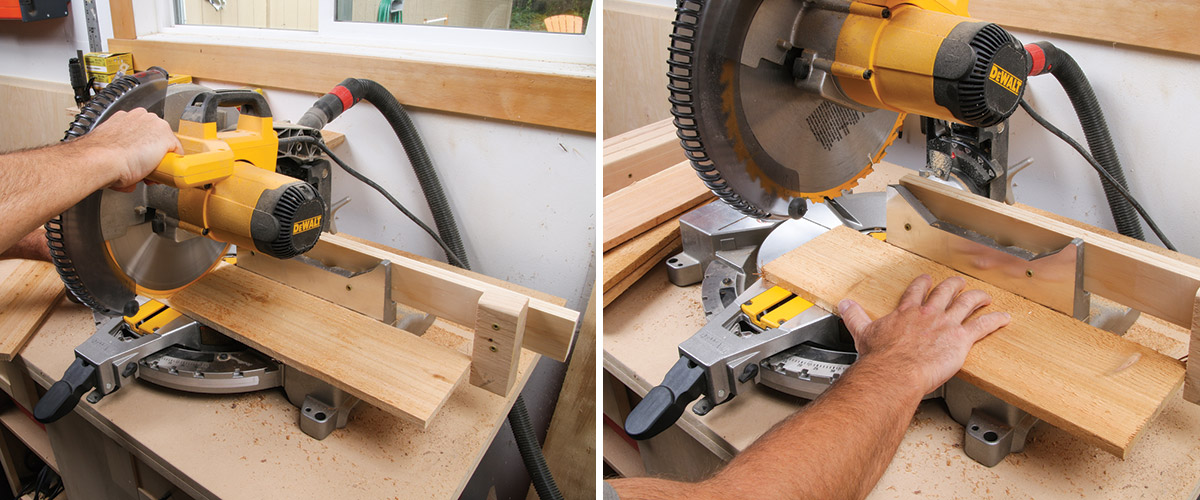
1. Measure just once. After making a clean, square cut on the end of the board, mark the length you need. Then align that mark with the blade of the saw and keep the board right where it is.
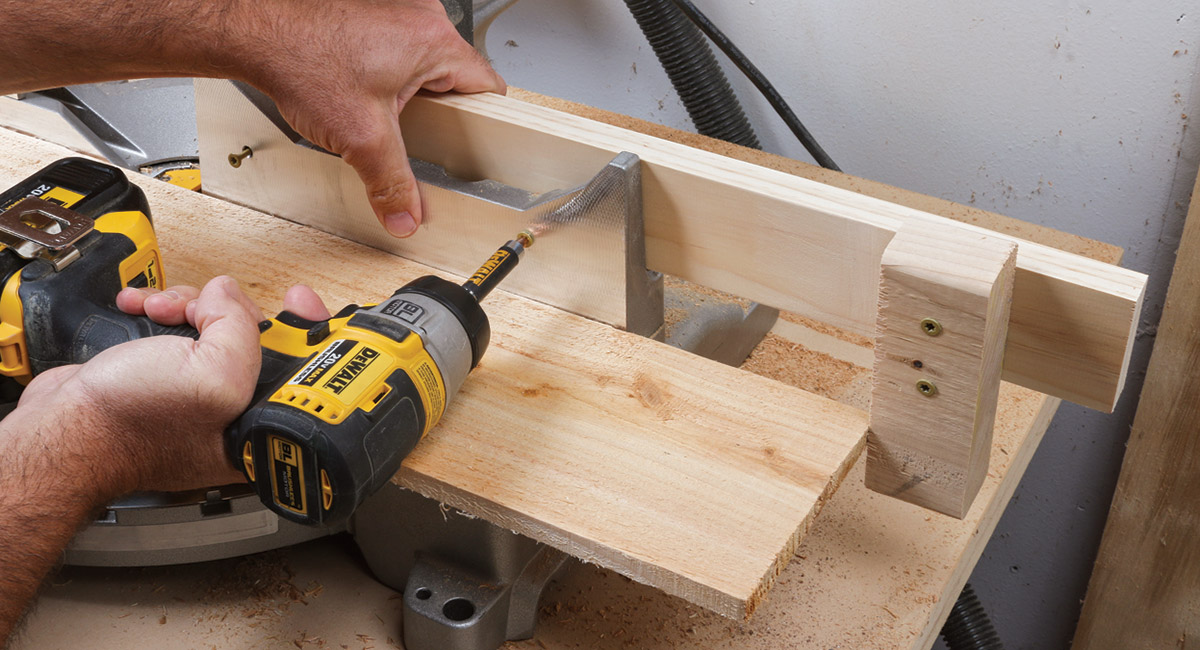
2. Set up a stop. Screw a block to the end of a long thin board to create the type of work stop seen here, and then attach the stop to the fence of the miter saw. Most fences have holes for screwing on a stop as shown. If not, you can use clamps to attach the stop.
3. Now cut a pile of matching pieces. Just bump the board up against the stop and cut with no measuring. In a minute you’ll have a pile of perfect pieces. Note: To hold down a workpiece on the right side of the saw, it’s safer to switch hands than cross your arms.
Attach the short boards first
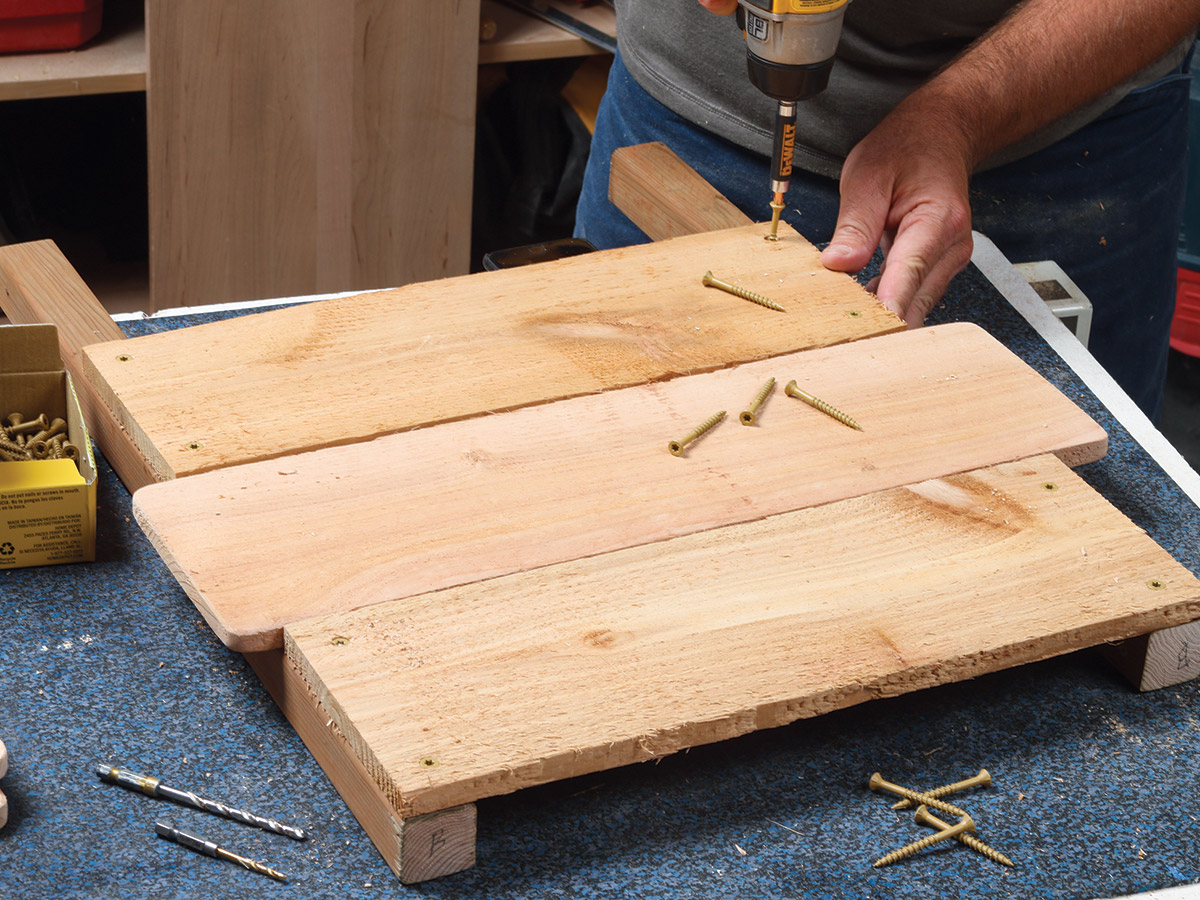
To assemble the planter box, start by making two opposite sides, which are identical. The short boards should end right at the outside edges of the posts to set the overall width of the planter box, so attach those first as shown. Be sure to drill clearance and pilot holes to give the screws their best grip and avoid splitting the wood.
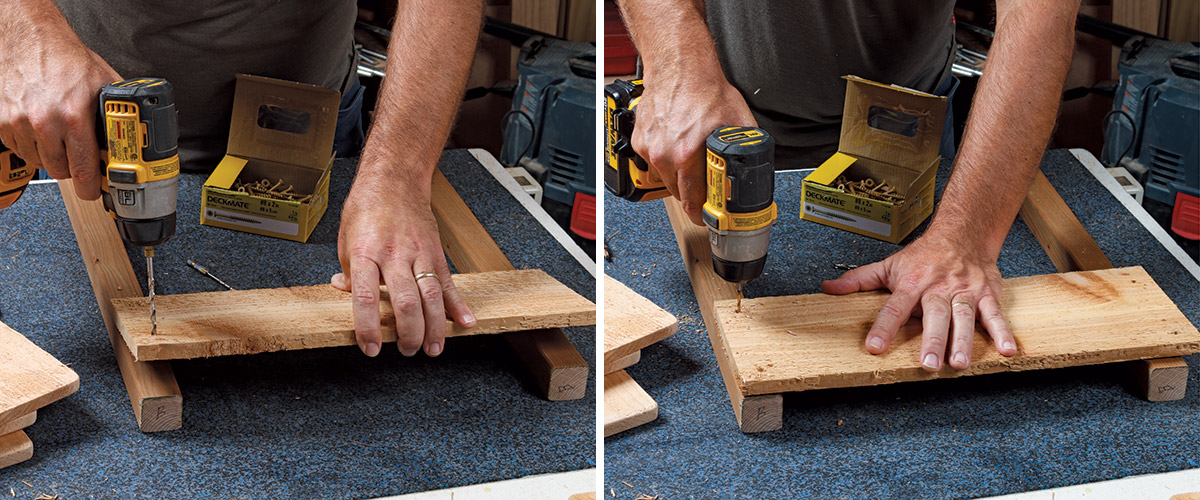
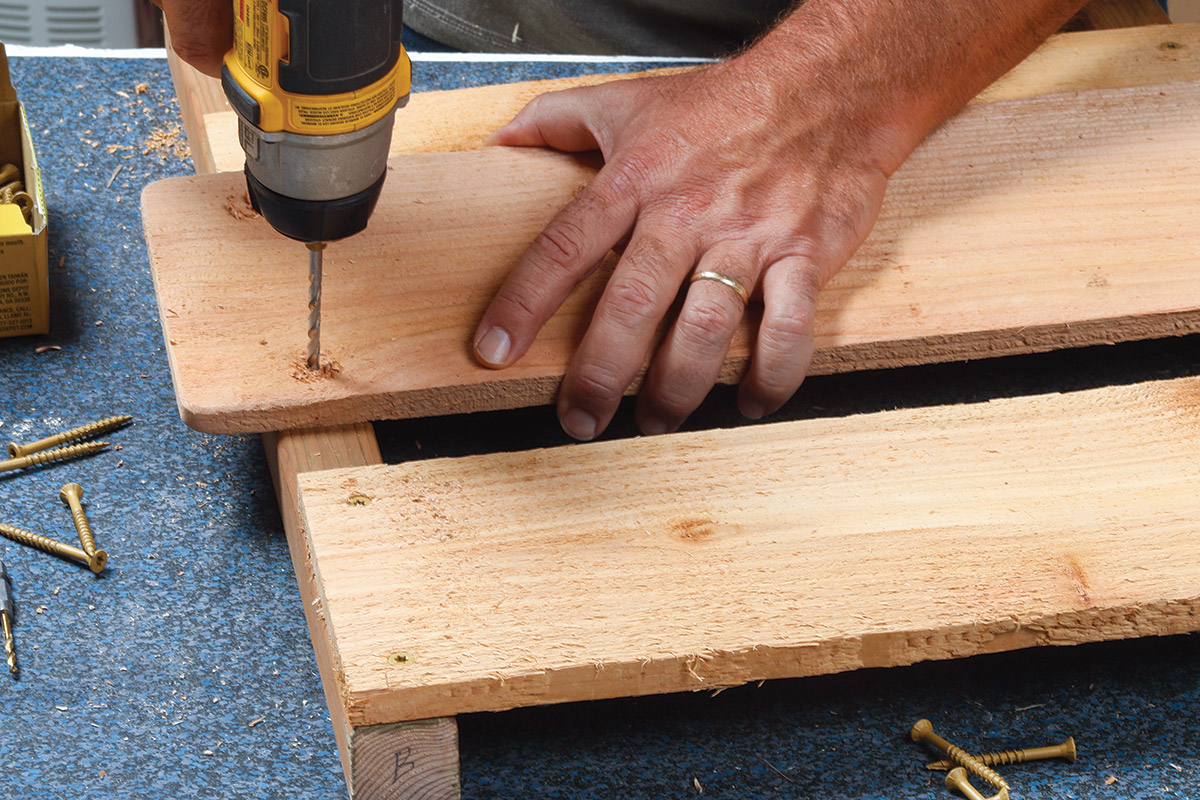
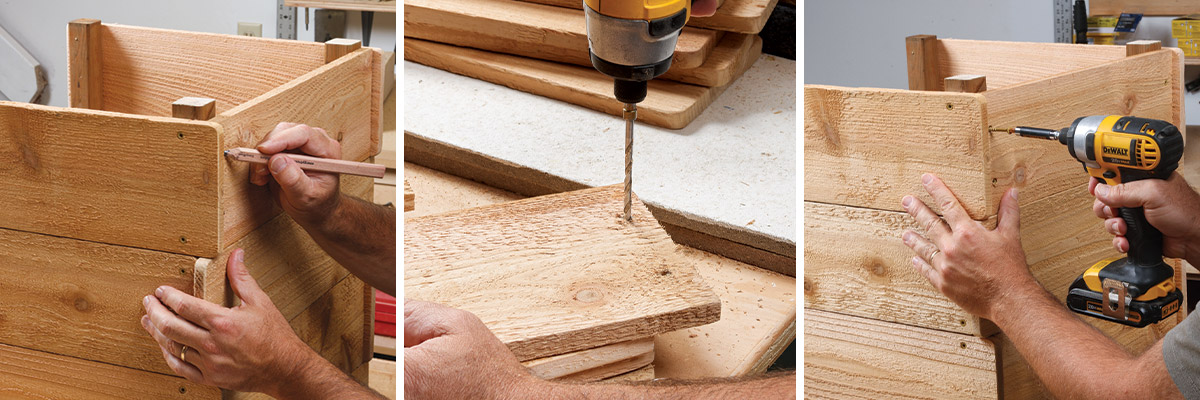
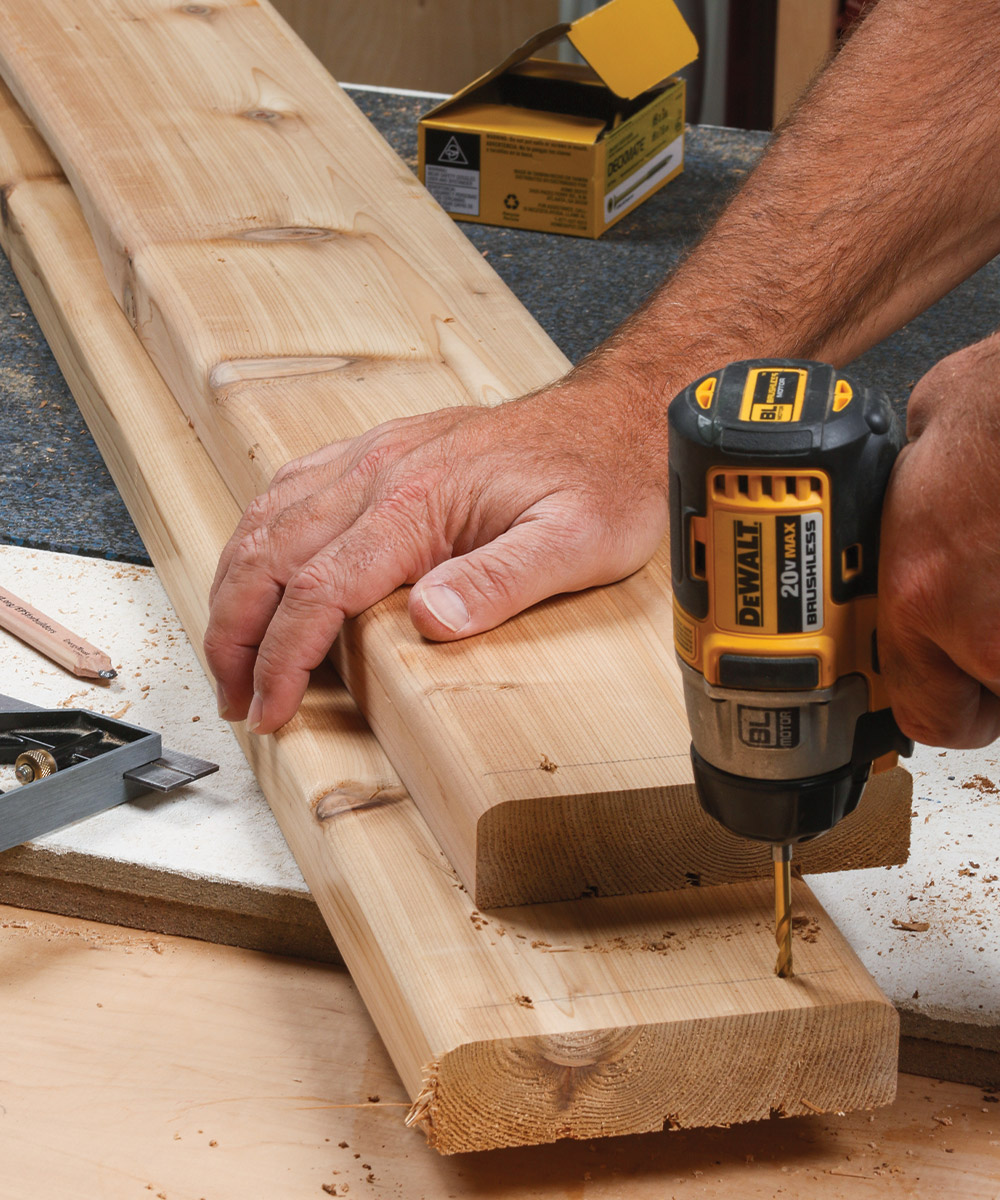
1. Drill clearance holes and pilot holes as usual. Roughly locate the board to see where to drill clearance holes in it without drilling into the posts. Then place it precisely, with the ends even with the sides of the post and the top edges flush also, and drill smaller pilot holes into the post below. If your smaller drill bit won’t reach far enough to do a full-depth hole, just dimple the post, take the board away, and finish the job.
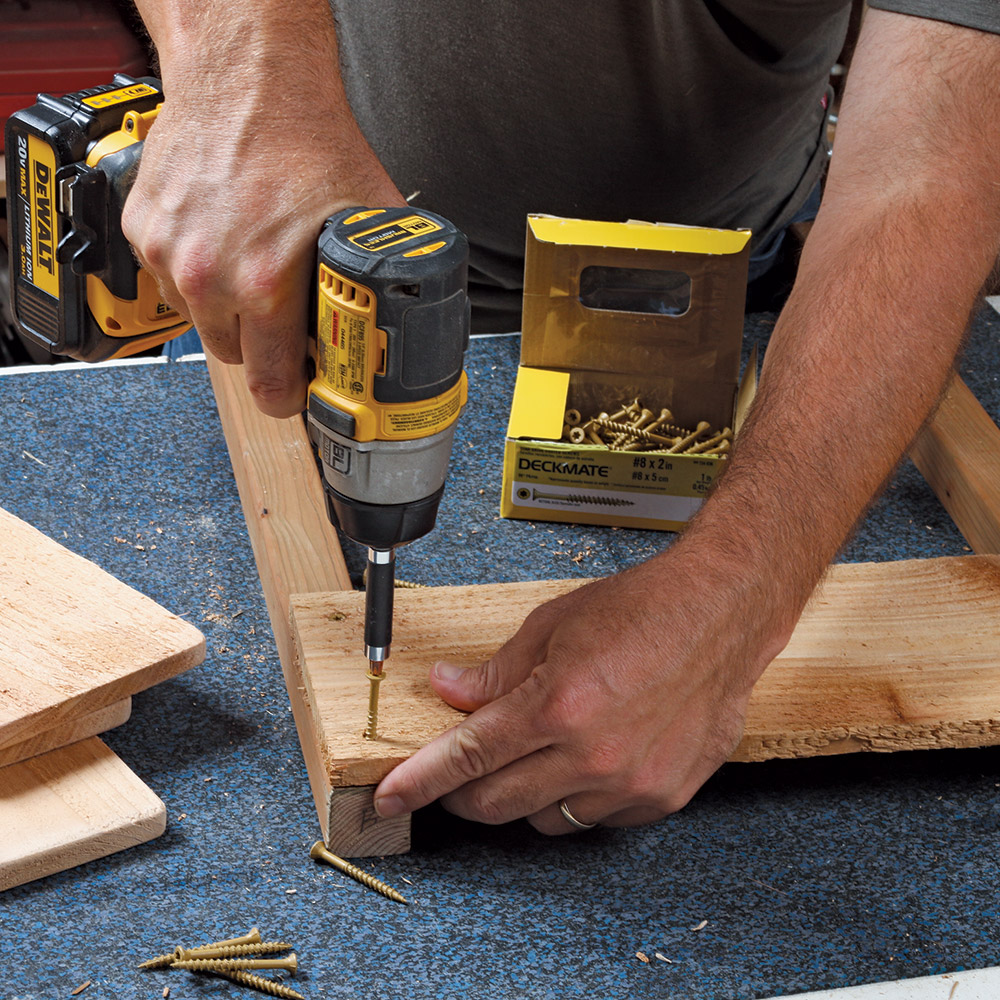
2. Screw it down solidly. Making sure the edges of the board are still aligned, drive 2-in.-long deck screws through the boards and into the posts.
3. Attach the second short board. Using one of the longer boards as a spacer, but without screwing it down, align the next short board with the outside of the posts, drill your clearance and pilot holes, and screw it down to lock the posts in the right position.
Long boards next
These go on the same way, except you have to be sure to even out the overhang at each end. The last board will not quite cover the bottom ends of the posts, which are intended to stick out a bit at the bottom of the planter box.
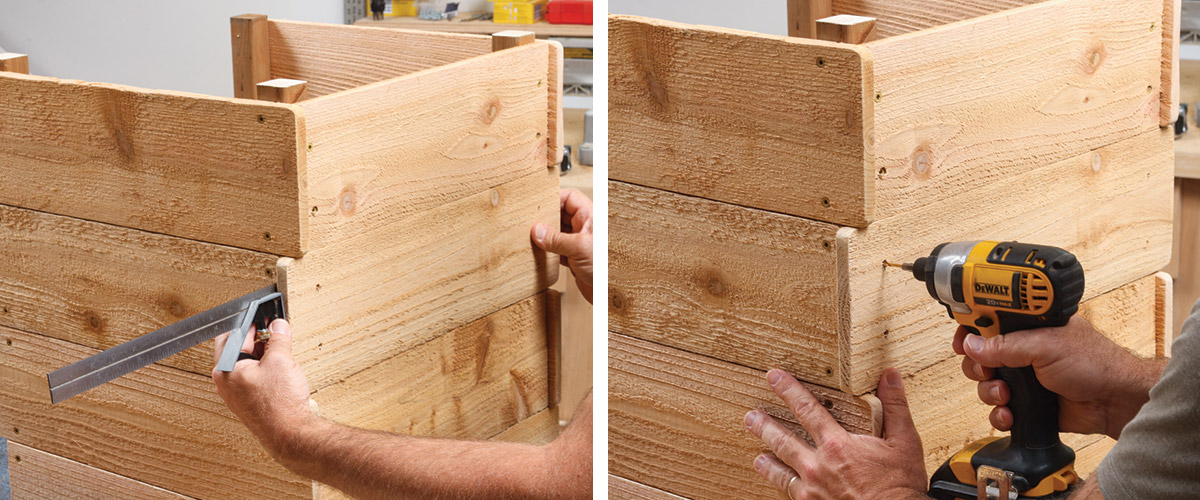
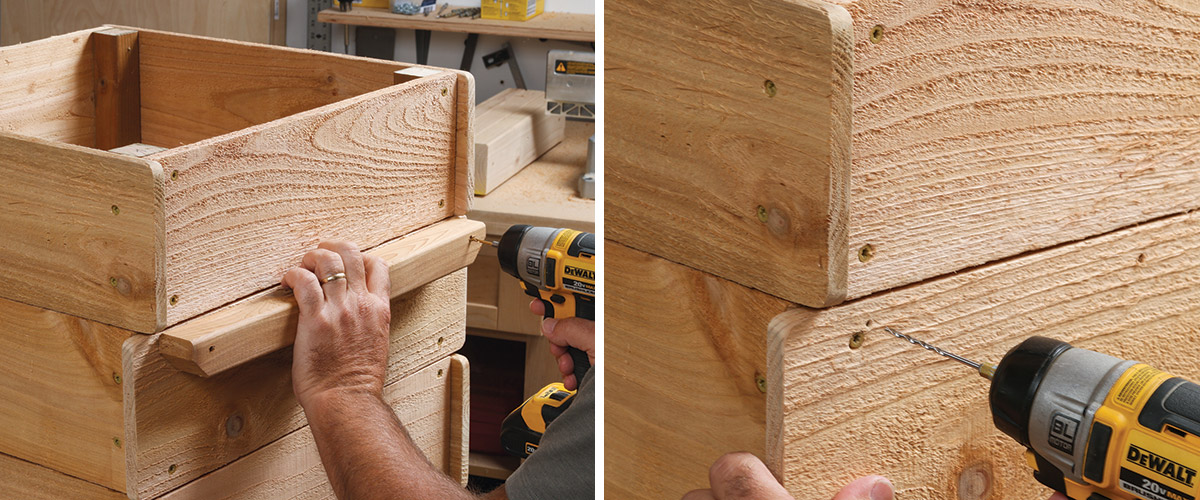
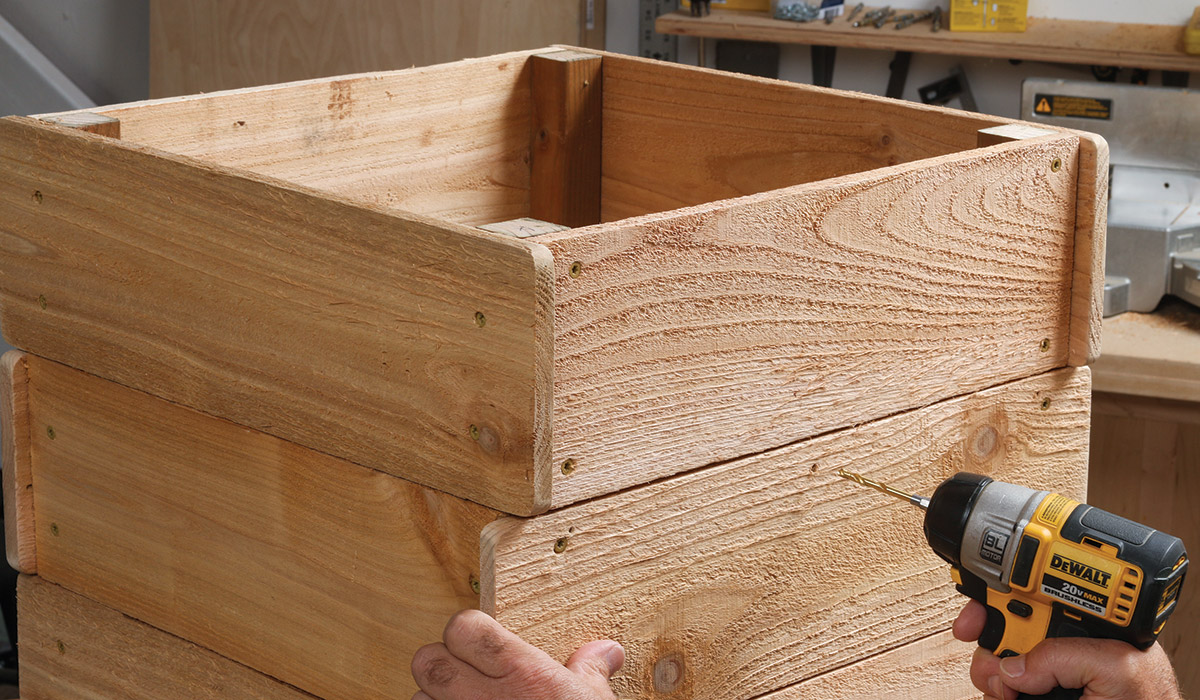
1. Clearance holes first. Again, locate the boards roughly to see where to drill the clearance holes, but raise the boards a little so you don’t drill into the posts below.
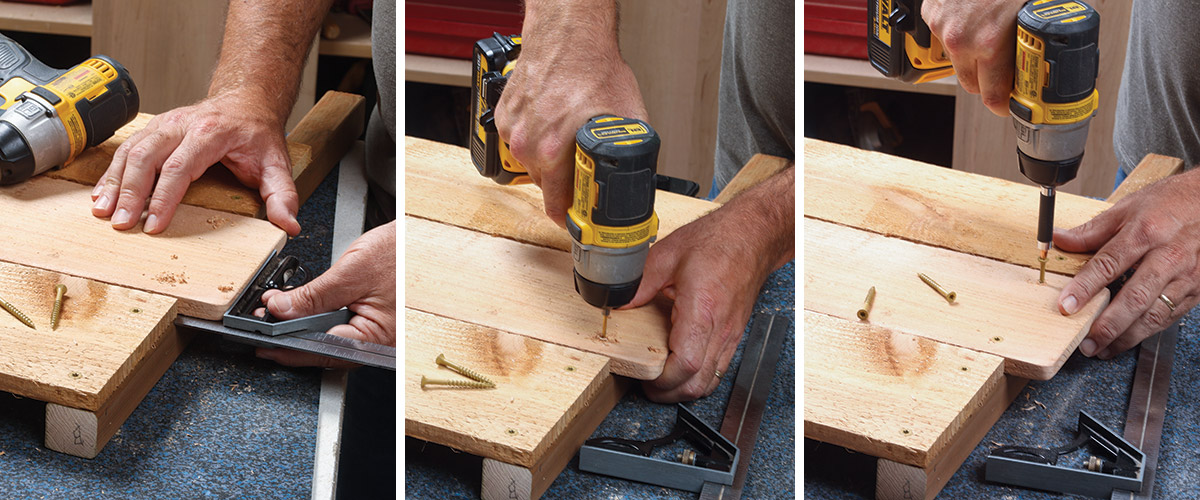
2. Even out the overhang. Use your combination square to make sure each end sticks out the same amount, roughly 3/8 in., and then drill your pilot holes and drive screws.
Now connect the sides
With two sides done, you can attach the rest of the boards and complete the box. Be sure to even out the overhang of the extra-long boards and butt the ends of the short boards tightly against their neighbors when attaching them.
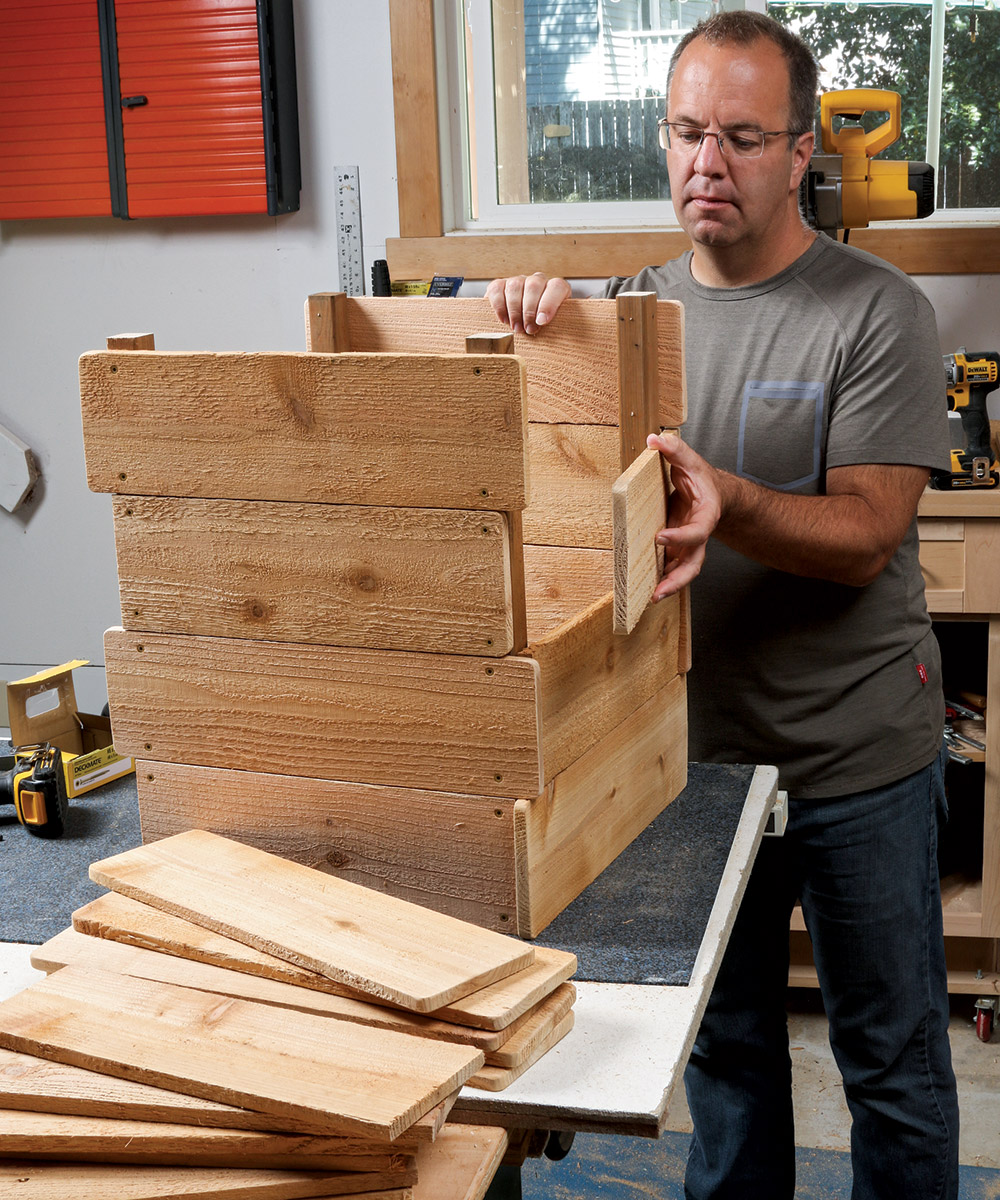
1. Weave in the other boards. Flip over the two sides you already assembled so they are standing on their top ends. Notice how the feet stick out a bit. Then weave in the remaining boards to hold everything in place temporarily.
2. Bottom boards first. Screw on the bottom board to hold the box together. Mark the hole locations, making sure they will clear the screws in the board on the adjacent side. Then drill clearance holes, put the board back in place with its ends tight, drill pilot holes, and drive screws.
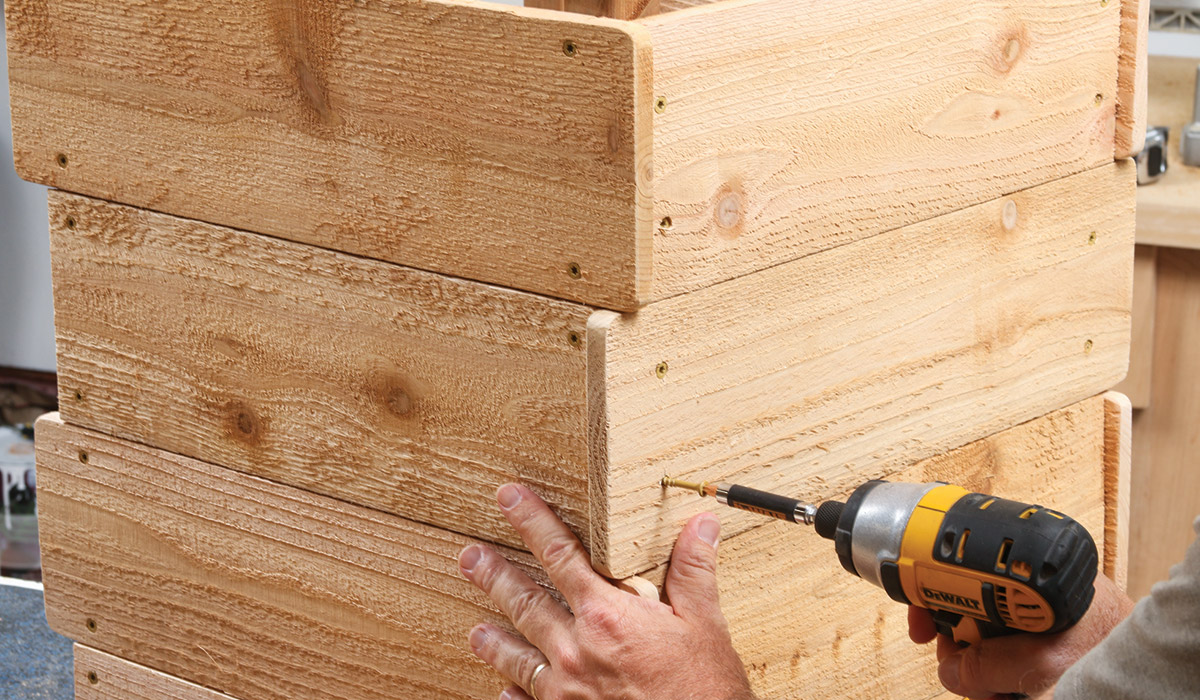
3. Work your way down. Now you can attach the rest of the boards, one by one. On the long boards, mark clearance holes, drill them, and even out the overhang before drilling pilot holes.
4. Screw on the rest of the boards. Drive screws to attach this board, then follow the same steps to attach the ones below.
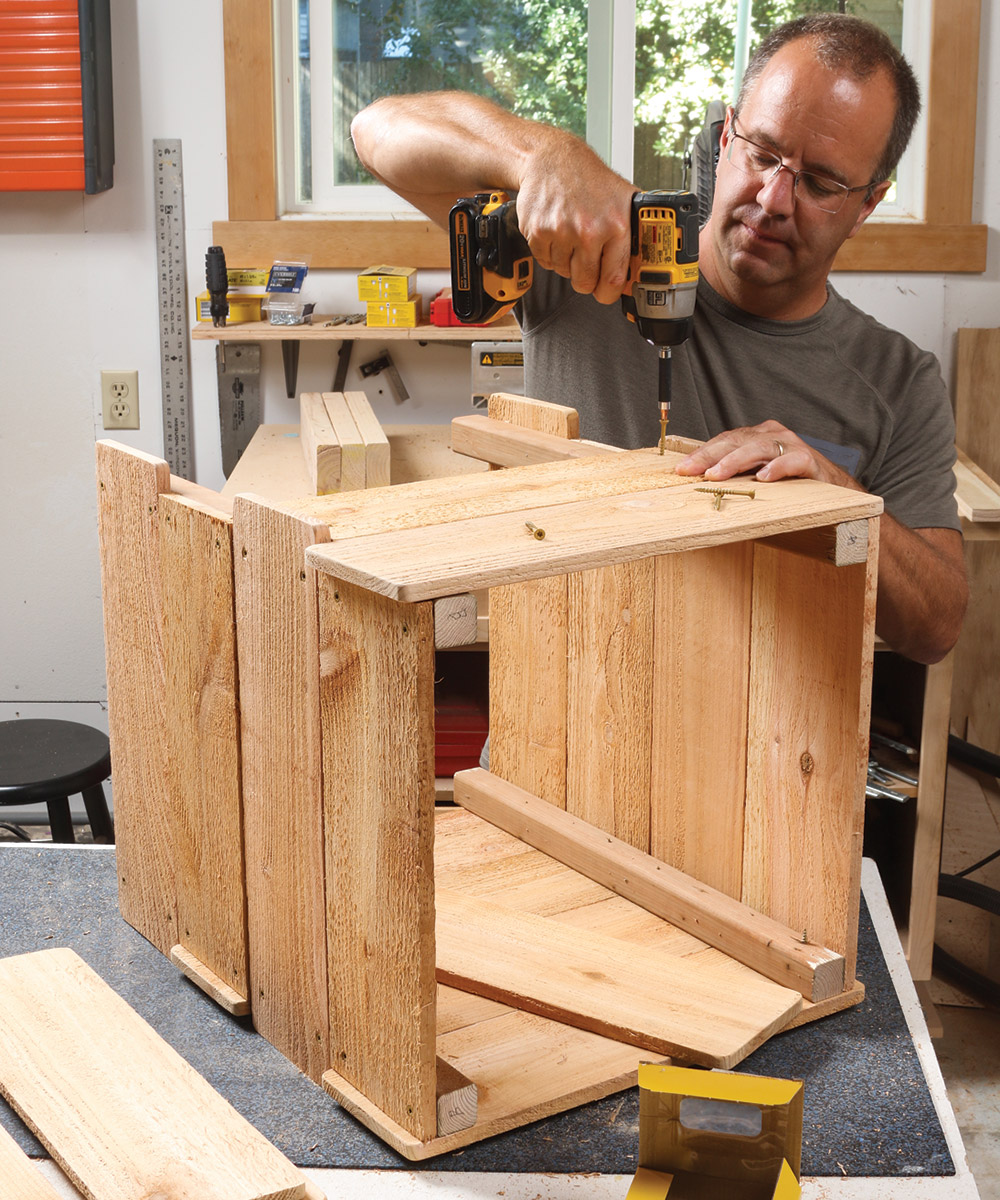
5. Flip the box to finish the job. You can lay the box on its side to attach the remaining boards—the same way as all the others.
Turn the planters into a bench
It’s easy to attach a few seat boards and turn your planters into a little oasis.
1. Cut a couple of cleats. Use some leftover post material to make two cleats. Bevel their ends so they won’t show as much under the seat.
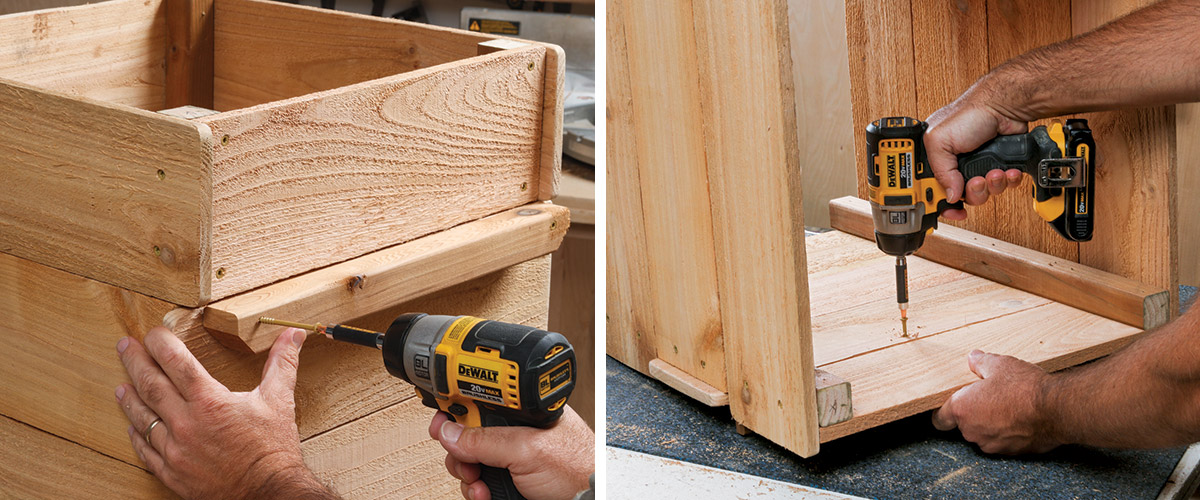
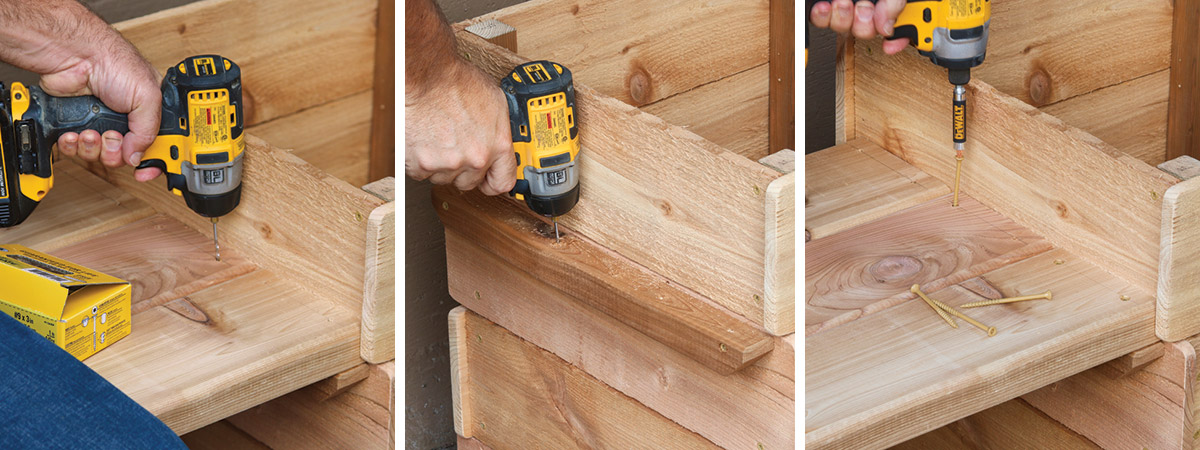
2. Attach the cleats. Drill clearance holes in the cleats first, locating them about 1 in. from the ends and roughly 1⁄4 in. to 3/8 in. from the top edge. The cleat is aligned with the top edge of the third board and centered side to side. Use the clearance holes to align the pilot holes, drilling as far as the small bit will allow. Then remove the cleat to finish the pilot holes. If they don’t miss the screws used to attach the side board, you can pull those screws. The cleat screws will do the same job.
4. One last hole. This one is a clearance hole so you can drive a screw into the cleat from inside the box.
5. Attach the cleats. Use 3-in.-long screws to attach the cleats, then drive shorter screws (1-5/8 in. if you have them) from the inside to add additional strength. Be sure to drill pilot holes first
6. Cut and drill the seat boards. After cutting the three boards to length (48 in. each), drill clearance holes for the screws that will attach them. Note the lines I drew to show where to drill so the screws would be centered on the cleats below.
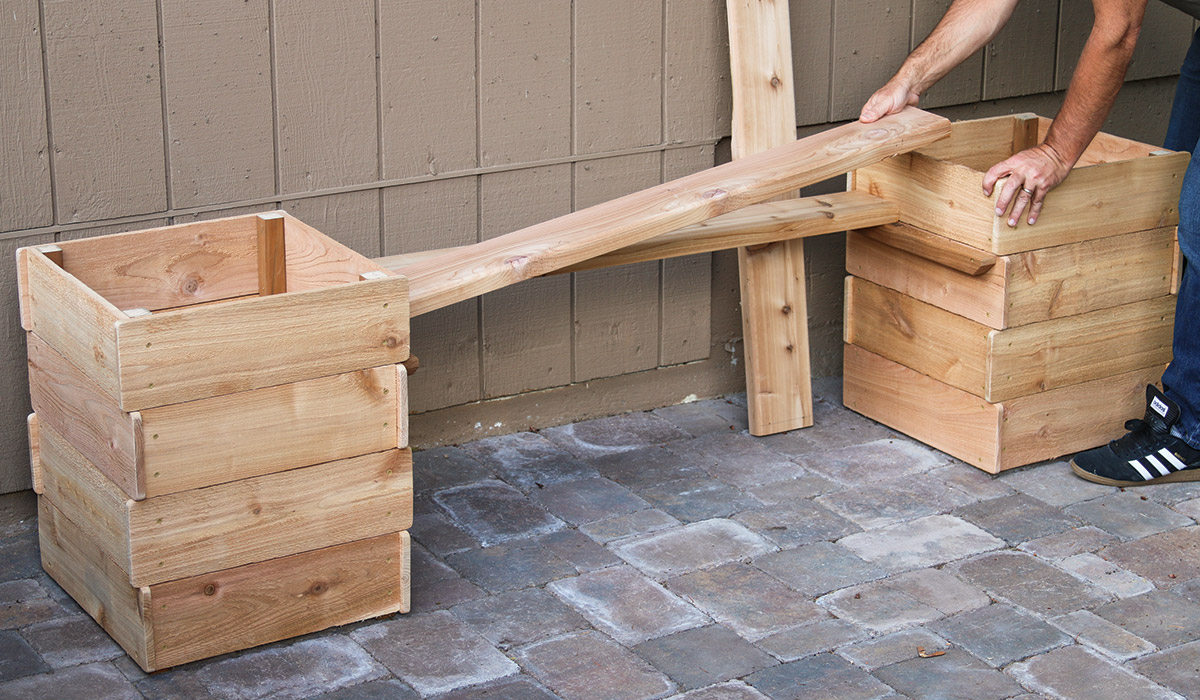
7. Drop them in. Space the planter boxes the right distance apart and drop in the seat boards.
8. A few screws make them permanent. Drill pilot holes down into the cleats. The small bit won’t reach far enough, so remove the seat boards to finish the job. Then screw them down permanently with 3-in.-long screws.
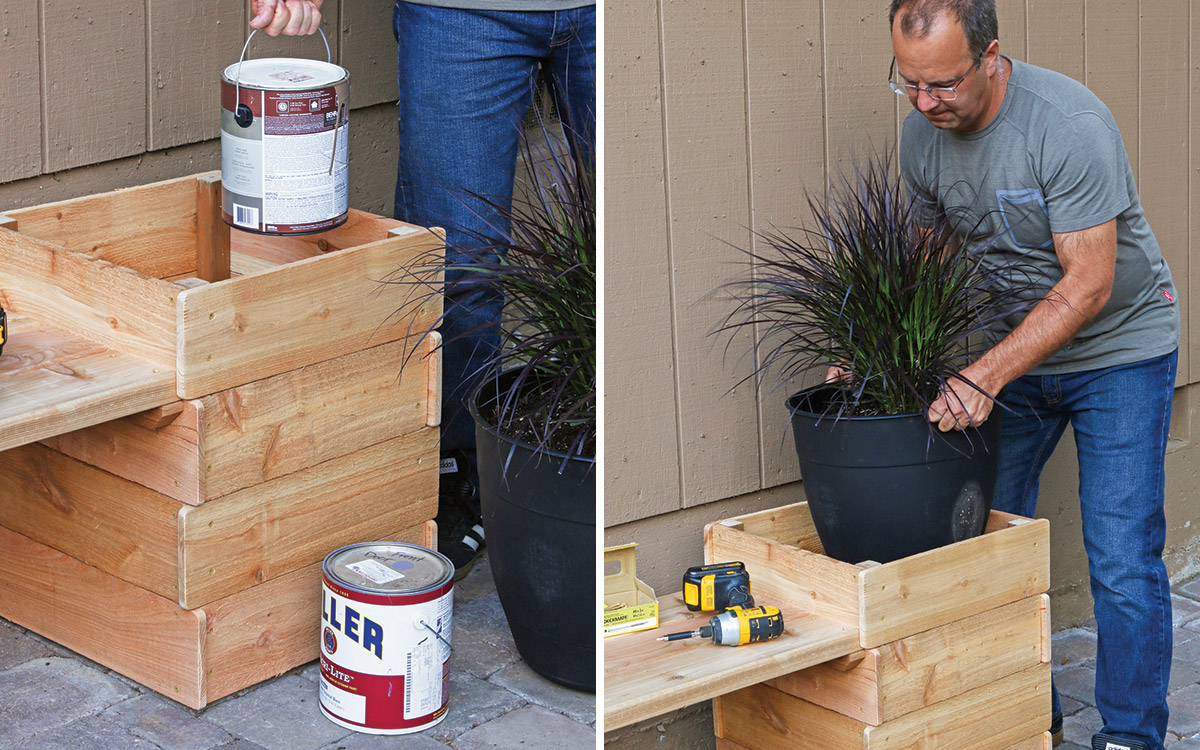
9. Plants need a boost. The plastic pots were too short for these tall planter boxes, so I gave them a boost with a few old paint cans. Then the plants dropped in at the right level. You don’t need to do this with the shorter version of the planter boxes.
Fine Woodworking Recommended Products

Starrett 12-in. combination square

Estwing Dead-Blow Mallet
Dustopper Pro



Log in or create an account to post a comment.
Sign up Log in