
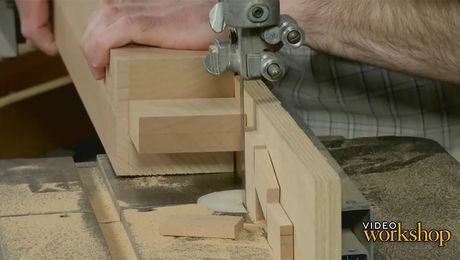
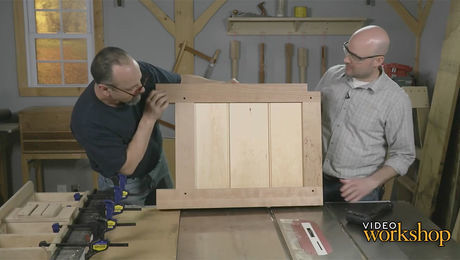
Prepping the Base for Glue-Up
Apply milk paint to the panels, fashion some drawbore pegs, and you're ready to glue up the base of the bench.
 Oct 28, 2015
Start your 14-day FREE trial to watch this video
Plus, access more than 500 video workshop episodes when you become a member
This site is protected by reCAPTCHA and the Google
Privacy Policy and
Terms of Service apply.
Videos in the Series
-
 How to Build the Ultimate Shaker WorkbenchOctober 28, 2015
 -
 In Search of the Perfect WorkbenchOctober 28, 2015
 -
 Building the Base for the Ultimate Shaker WorkbenchOctober 28, 2015
 -
 Make Beaded Panels for Your WorkbenchOctober 28, 2015
 -
 Prepping the Base for Glue-UpOctober 28, 2015
 -
 How to Install the Benchtop and ViseOctober 28, 2015
 -
 Building a Web-Frame Drawer Box for the Base of the BenchOctober 28, 2015
 -
 Assembling the Bench DrawersOctober 28, 2015
 -
 How to Install a Sliding Deadman on a WorkbenchOctober 28, 2015


Comments
I purchased the plans for this workbench. I notice in the video series that the drawbore holes were made as through holes. The plans suggest differently. Through holes became an apparent necessity during the glue up when one peg needed to be driven out. I also noticed drawbore pegs were used for the mullions. This was also a departure from the plans. I'm wondering what the thought process was for using through holes and drawboring the mullions as well.
Log in or become a member to post a comment.
Sign up Log in