4 Bench Jigs for Handplanes
Accurate handwork is easier with these clever workbench jigs.

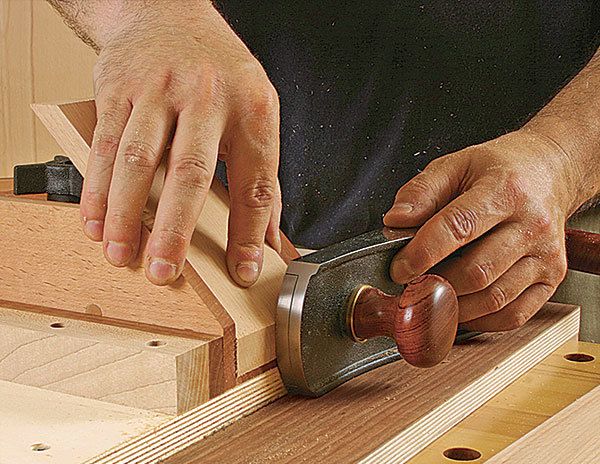
Synopsis: Norman Pirollo discovered the joys of woodworking with hand tools a few years ago. And while he relishes this quiet, hands-on approach to the craft, he’s had to find ways to make handplaning more efficient. This series of jigs is one way he does it. Designed with 3/4-in.-dia. dowels that fit into dogholes in his workbench, these jigs-a planing stop, a bird’s-mouth stop, a planing board, and a shooting board-help make it easier to plane the ends, edges, and faces of boards, fit perfect miters, and work with small, narrow, or oddly shaped workpieces.
Like many woodworkers, I began with hand tools but quickly progressed to using machines for almost every aspect of my work. A few years ago, as I developed my woodworking business, I decided there must be a less dusty and more peaceful way to make furniture. I took courses at a woodworking school whose philosophy was all about hand tools. This experience opened my eyes; you might say I became a born-again woodworker. Safety was also a factor in my transformation. For example, it can be dangerous to machine small parts on a tablesaw or bandsaw.
Now, instead of hearing the drone and whine of machines and breathing dust all day, I listen to classical music and sweep up shavings at the end of the day.
While I do use machinery sparingly, productivity remains the key to any business, so I’ve had to make my handplaning efficient without sacrificing quality. I use a series of jigs for different planing situations. The jigs have 3/4-in.-dia. dowels that fit into dog holes in my workbench. If your bench doesn’t have dog holes already, you need to drill only two or three because all the jigs are interchangeable. The jigs and techniques I’ll describe are by no means new—handplanes have been used for centuries—but I’ve added my own modifications. One of these is that I’m left-handed, so you’ll need to flip the plans if you’re a righty.

1. Planing stop
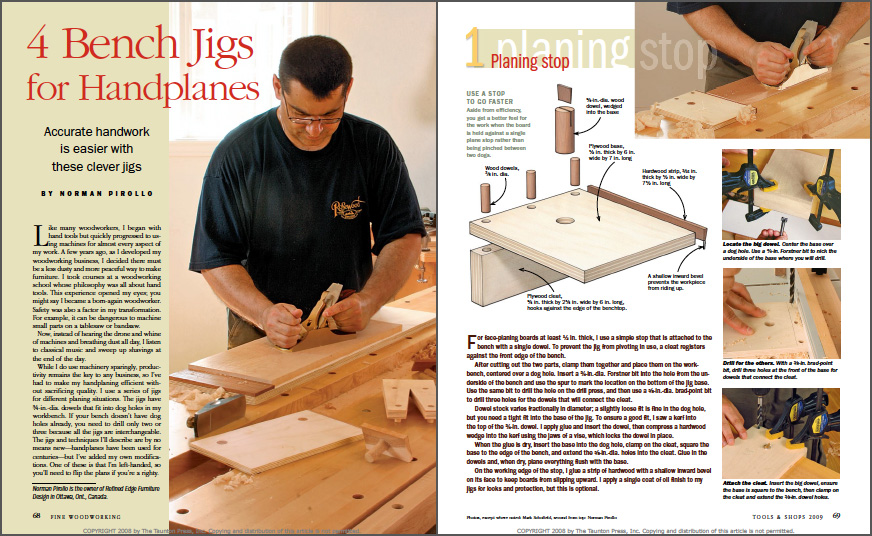
For face-planing boards at least 1/2 in. thick, I use a simple stop that is attached to the bench with a single dowel. To prevent the jig from pivoting in use, a cleat registers against the front edge of the bench.
After cutting out the two parts, clamp them together and place them on the workbench, centered over a dog hole. Insert a 3/4-in.-dia. Forstner bit into the hole from the underside of the bench and use the spur to mark the location on the bottom of the jig base. Use the same bit to drill the hole on the drill press, and then use a 3/8-in.-dia. brad-point bit to drill three holes for the dowels that will connect the cleat.
Dowel stock varies fractionally in diameter; a slightly loose fit is fine in the dog hole, but you need a tight fit into the base of the jig. To ensure a good fit, I saw a kerf into the top of the 3/4-in. dowel.

From Fine Woodworking #202
To view the entire article, please click the View PDF button below.
Fine Woodworking Recommended Products

Incra Miter 1000HD

Starrett 4" Double Square

Olfa Knife


Log in or create an account to post a comment.
Sign up Log in