Sanding on the Drill Press
Custom-made sanding drums let you smooth any curve.
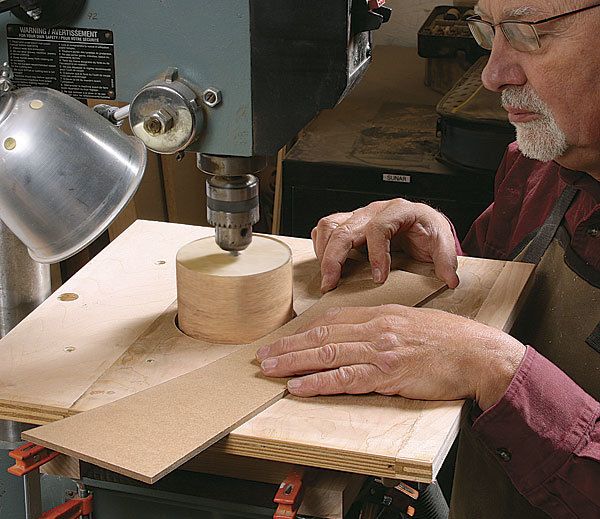
When I bought my first drill press, I discovered that those sanding drums that go in the chuck and accept abrasive sleeves let me sand all sorts of inside curves, whether on templates or actual workpieces. But the sleeves were available in a limited range of grits, the abrasive wore out quickly, and they weren’t cheap. And the drums were too small in diameter for a lot of my needs.
So I make my own drums out of plywood disks and wrap high-quality cloth-backed sandpaper around them, attaching it with spray adhesive. I can make them any size and they work beautifully.
The larger the drum, the more surface area, and the longer the sandpaper lasts. Larger drums also leave a less bumpy surface. I’ve made drums up to 8 in. dia., though most are closer to 4 in., fitting a wider variety of curves while still leaving a relatively smooth surface.
By the way, while the bearings in a drill press are not designed for heavy sideways pressure, as they would be in a true milling machine, they handle light to medium lateral pressure just fine.
For the sandpaper, I buy 80-grit sanding belts, made for belt sanders, from my hardware store and cut them as required. I sometimes use a lower grit to remove stock more quickly or a higher one for a smoother finish.
Sanding curves is just the beginning for these shopmade drums. I’ll show you how I turn the drum into a thickness sander for thin strips, and a pattern sander for flawless curved parts. But let’s start with the drum itself.
Make your own drums
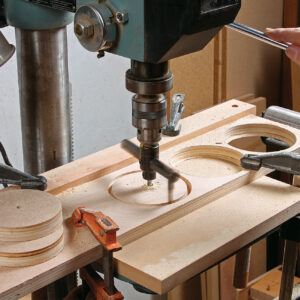
To make the drums, I cut a series of disks from 3⁄4-in.-thick plywood. I’ve had good luck with a circle-cutter made by General Tools. Be sure to turn the tip the right way for cutting disks (vs. cutting holes) and use a very slow speed, under 500 rpm, if possible.
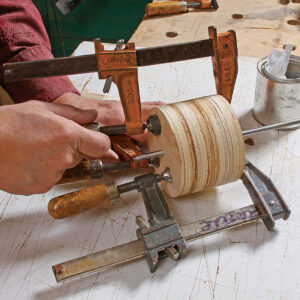
The circle-cutter leaves a 1⁄4-in.-dia. hole through the center of each disk. To align the disks as you glue them into a stack, insert a 1⁄4-in.-dia. rod or drill bit through the hole. Wax the rod to make it easier to remove once the glue is set.
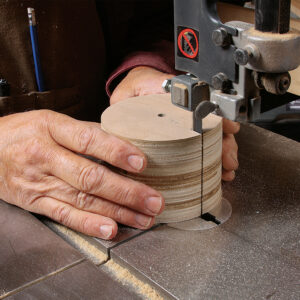
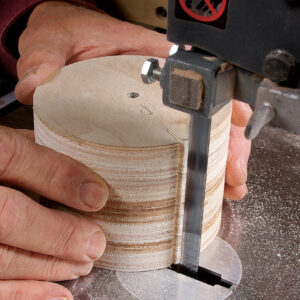
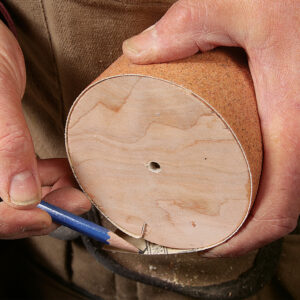
The sandpaper goes into a small bandsawn slot. You need to slightly round the leading edge of the slot, so the sandpaper rolls smoothly into the leading edge without a bump.
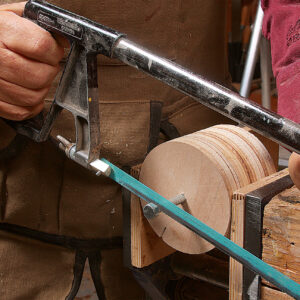
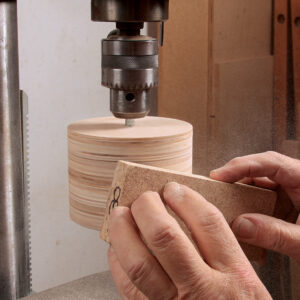
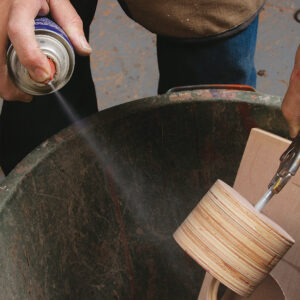
Add the shank and smooth the outside of the drum as shown in the photos on p. 39. Last, varnish the outside of the drum, making it easier to clean off the spray adhesive that will attach the sandpaper.
Bang out the drum
Cut and stack a few plywood circles to make any size sanding drum. Large drums work well for smoother curves, while smaller drums get into tighter spaces.
Sandpaper goes on easily
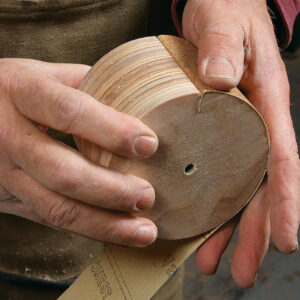
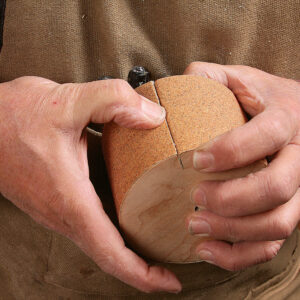
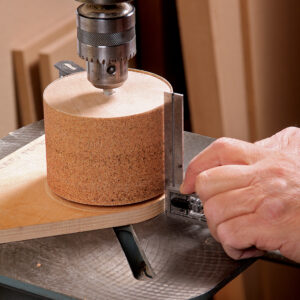
Cut a strip of cloth-backed sandpaper the same width as the drum. Always turn sandpaper upside down to cut it with a knife. Slip one end of the paper in the slot, wrap it around the drum, mark it, and cut it to length.
Use spray adhesive, or contact cement, following the manufacturer’s directions, to affix the paper snugly to the drum. When the paper wears out, just peel it off and remove the old adhesive with lacquer thinner.
Add a simple sanding table
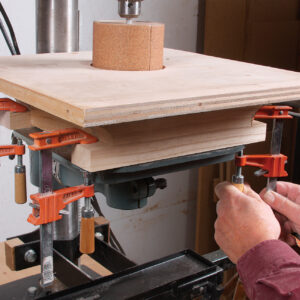
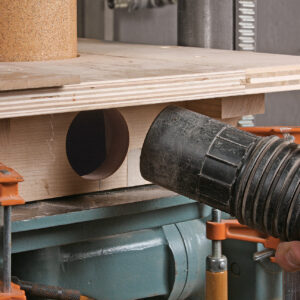
Some drill-press tables have room for a drum to drop below the surface, but usually not far. My auxiliary table allows the sanding drum to be positioned at a variety of heights so the entire surface can be used, extending the life of the abrasive.
Cut a hole in the center of a plywood panel, just larger than the largest drum you’ll use. Next, screw on two runners that have cutouts for clamp heads. Adding two more plywood pieces, one with a large hole for a shop-vac hose, creates an efficient dust-collection system.
Get set to sand
Attach the sandpaper
Fortune uses 60- and 80-grit cloth-backed sandpaper, harvested from sanding belts and attached with spray-on adhesive.
Make a new table
An auxiliary table with a hole for the drum allows you raise and lower the drum to use the entire width of abrasive.
Add a fence for thin strips
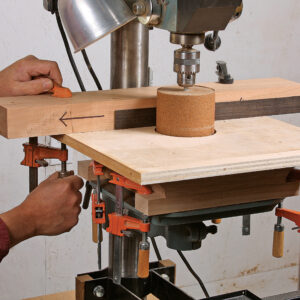
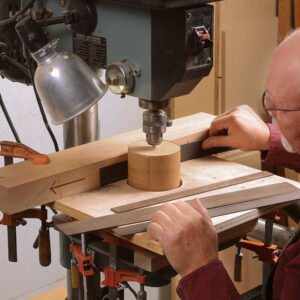
Not long after I began using the sanding drum, I realized I could put a fence behind it to create smooth inlay material. Thin strips are fed into the space between the drum and the fence, always against the rotation of the drum.
The parts should be bandsawn very close to the finished thickness, say just 1⁄64 in. thicker, or the sandpaper will clog or burn. Use the lowest speed and 100-grit paper. After the inlay is glued in, take a first pass with a paint scraper to remove a layer of wood and any sanding grit along with it.
Turn the drum into a pattern sander
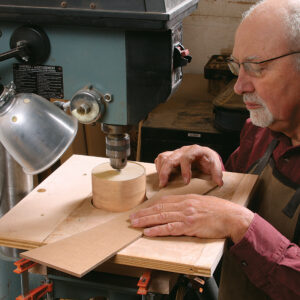
Before I owned a shaper, this is how I did all of my curved parts. Just cut the curve close on the bandsaw and then finish the job on this simple jig, which registers against a pattern. If you set it up carefully, the jig will also finish-sand a routed surface.
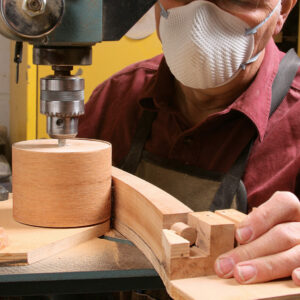
The pattern is attached to the workpiece in any number of ways, from toggle clamps to double-sided tape. The pattern guide is clamped to the table. Its nose has the same diameter as the drum, and it can be moved in or out to adjust the amount of wood removed.
For the smoothest surface, always choose the largest possible sanding drum (and pattern guide) that will follow the shape of your workpiece. The plywood drum will create a square, accurate edge.
Beyond the basics
Plane thin strips
Clamping a simple fence to your sanding table lets you drum-sand material that is too thin for the thickness planer. Glue sandpaper to the bottom of the fence to keep it from shifting under pressure.
Sand to a Pattern
Add a template guide under the drum, and it becomes a pattern sander, helping you duplicate curved parts the way a shaper would.
Michael Fortune is a contributing editor.
From Fine Woodworking #254
For more on using a drill press:
Fine Woodworking Recommended Products

Craftsman Random Orbit Sander
Ridgid EB4424 Oscillating Spindle/Belt Sander

Stanley Powerlock 16-ft. tape measure




Log in or create an account to post a comment.
Sign up Log in