
Get More From Your Drill Press
The right bits, jigs, and techniques turn a metalworking tool into a versatile machine for woodworking.

Synopsis: Traditionally a machinist’s tool, the drill press has evolved into a valuable piece of woodworking equipment. But in order to get the most from this machine, some refinements are needed. Contributing editor Roland Johnson gives step-by-step instructions for basic troubleshooting on the drill press, plus designs for simple jigs and tricks that help you to support and stabilize large and small workpieces in precise, repeatable positions. Central to this article is Johnson’s simple, shopmade auxiliary table, and advice on an essential set of bits for woodworking.
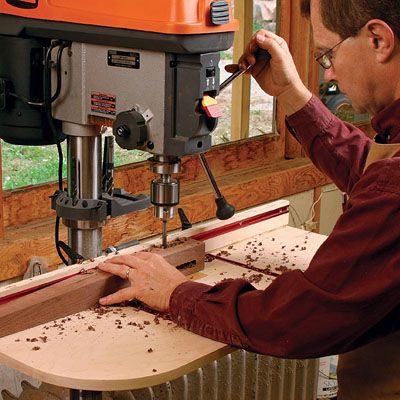
Originally designed as a tool for machinists, the drill press has become a standard fixture in woodworking shops. It is capable of drilling both small and large holes more accurately and safely than a handheld drill, and it has a built-in depth stop. The rack-and-pinion pressing action of the machine gives easy leverage for boring large holes in hard material. Throw on a simple, shop-built table and fence, and you add the ability to support and stabilize large and small workpieces in precise, repeatable positions.
Most woodworkers are familiar with the basic function of a drill press, but not everyone knows how to squeeze the greatest versatility and performance out of this woodworking mainstay.
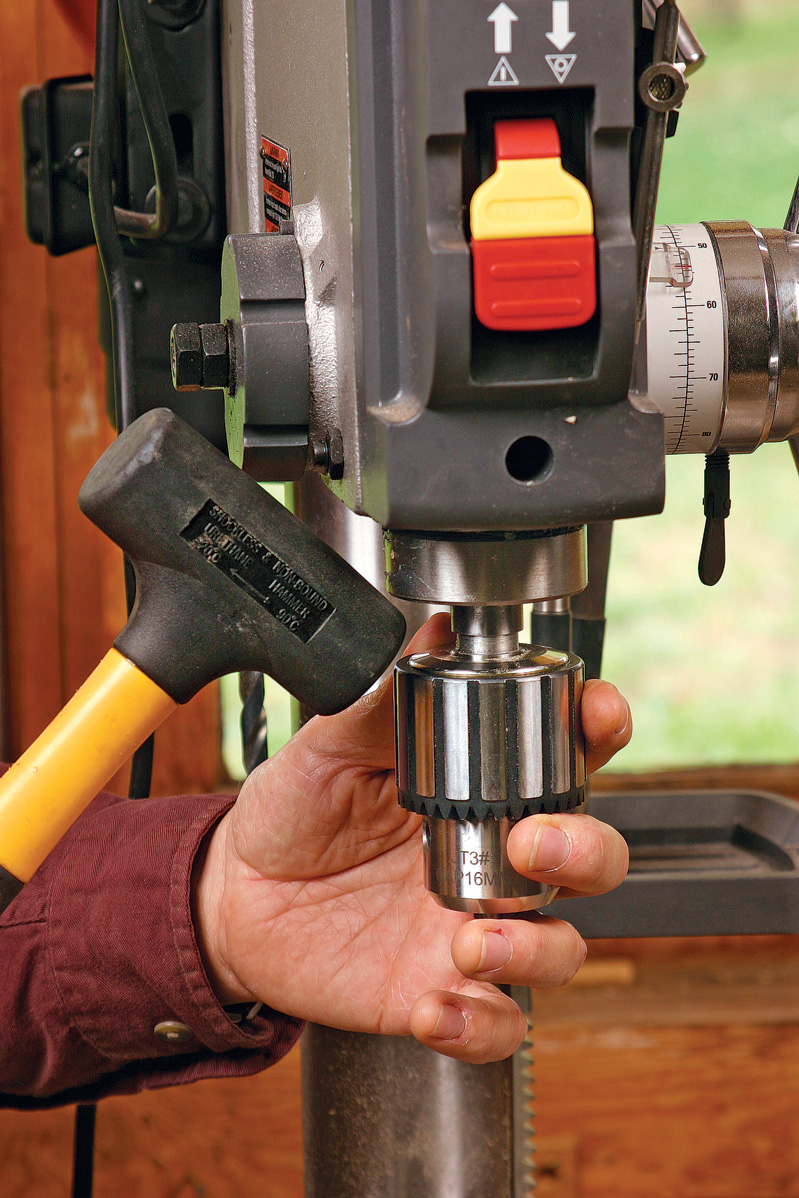
The first step is to make sure the machine is drilling holes that are straight and true, perpendicular to the table. For basic troubleshooting on a drill press, you’ll need an accurate square, a deadblow hammer, a dial indicator with a magnetic base, and a length of drill rod (available at machine shops and many hardware stores, as well as by mail order).
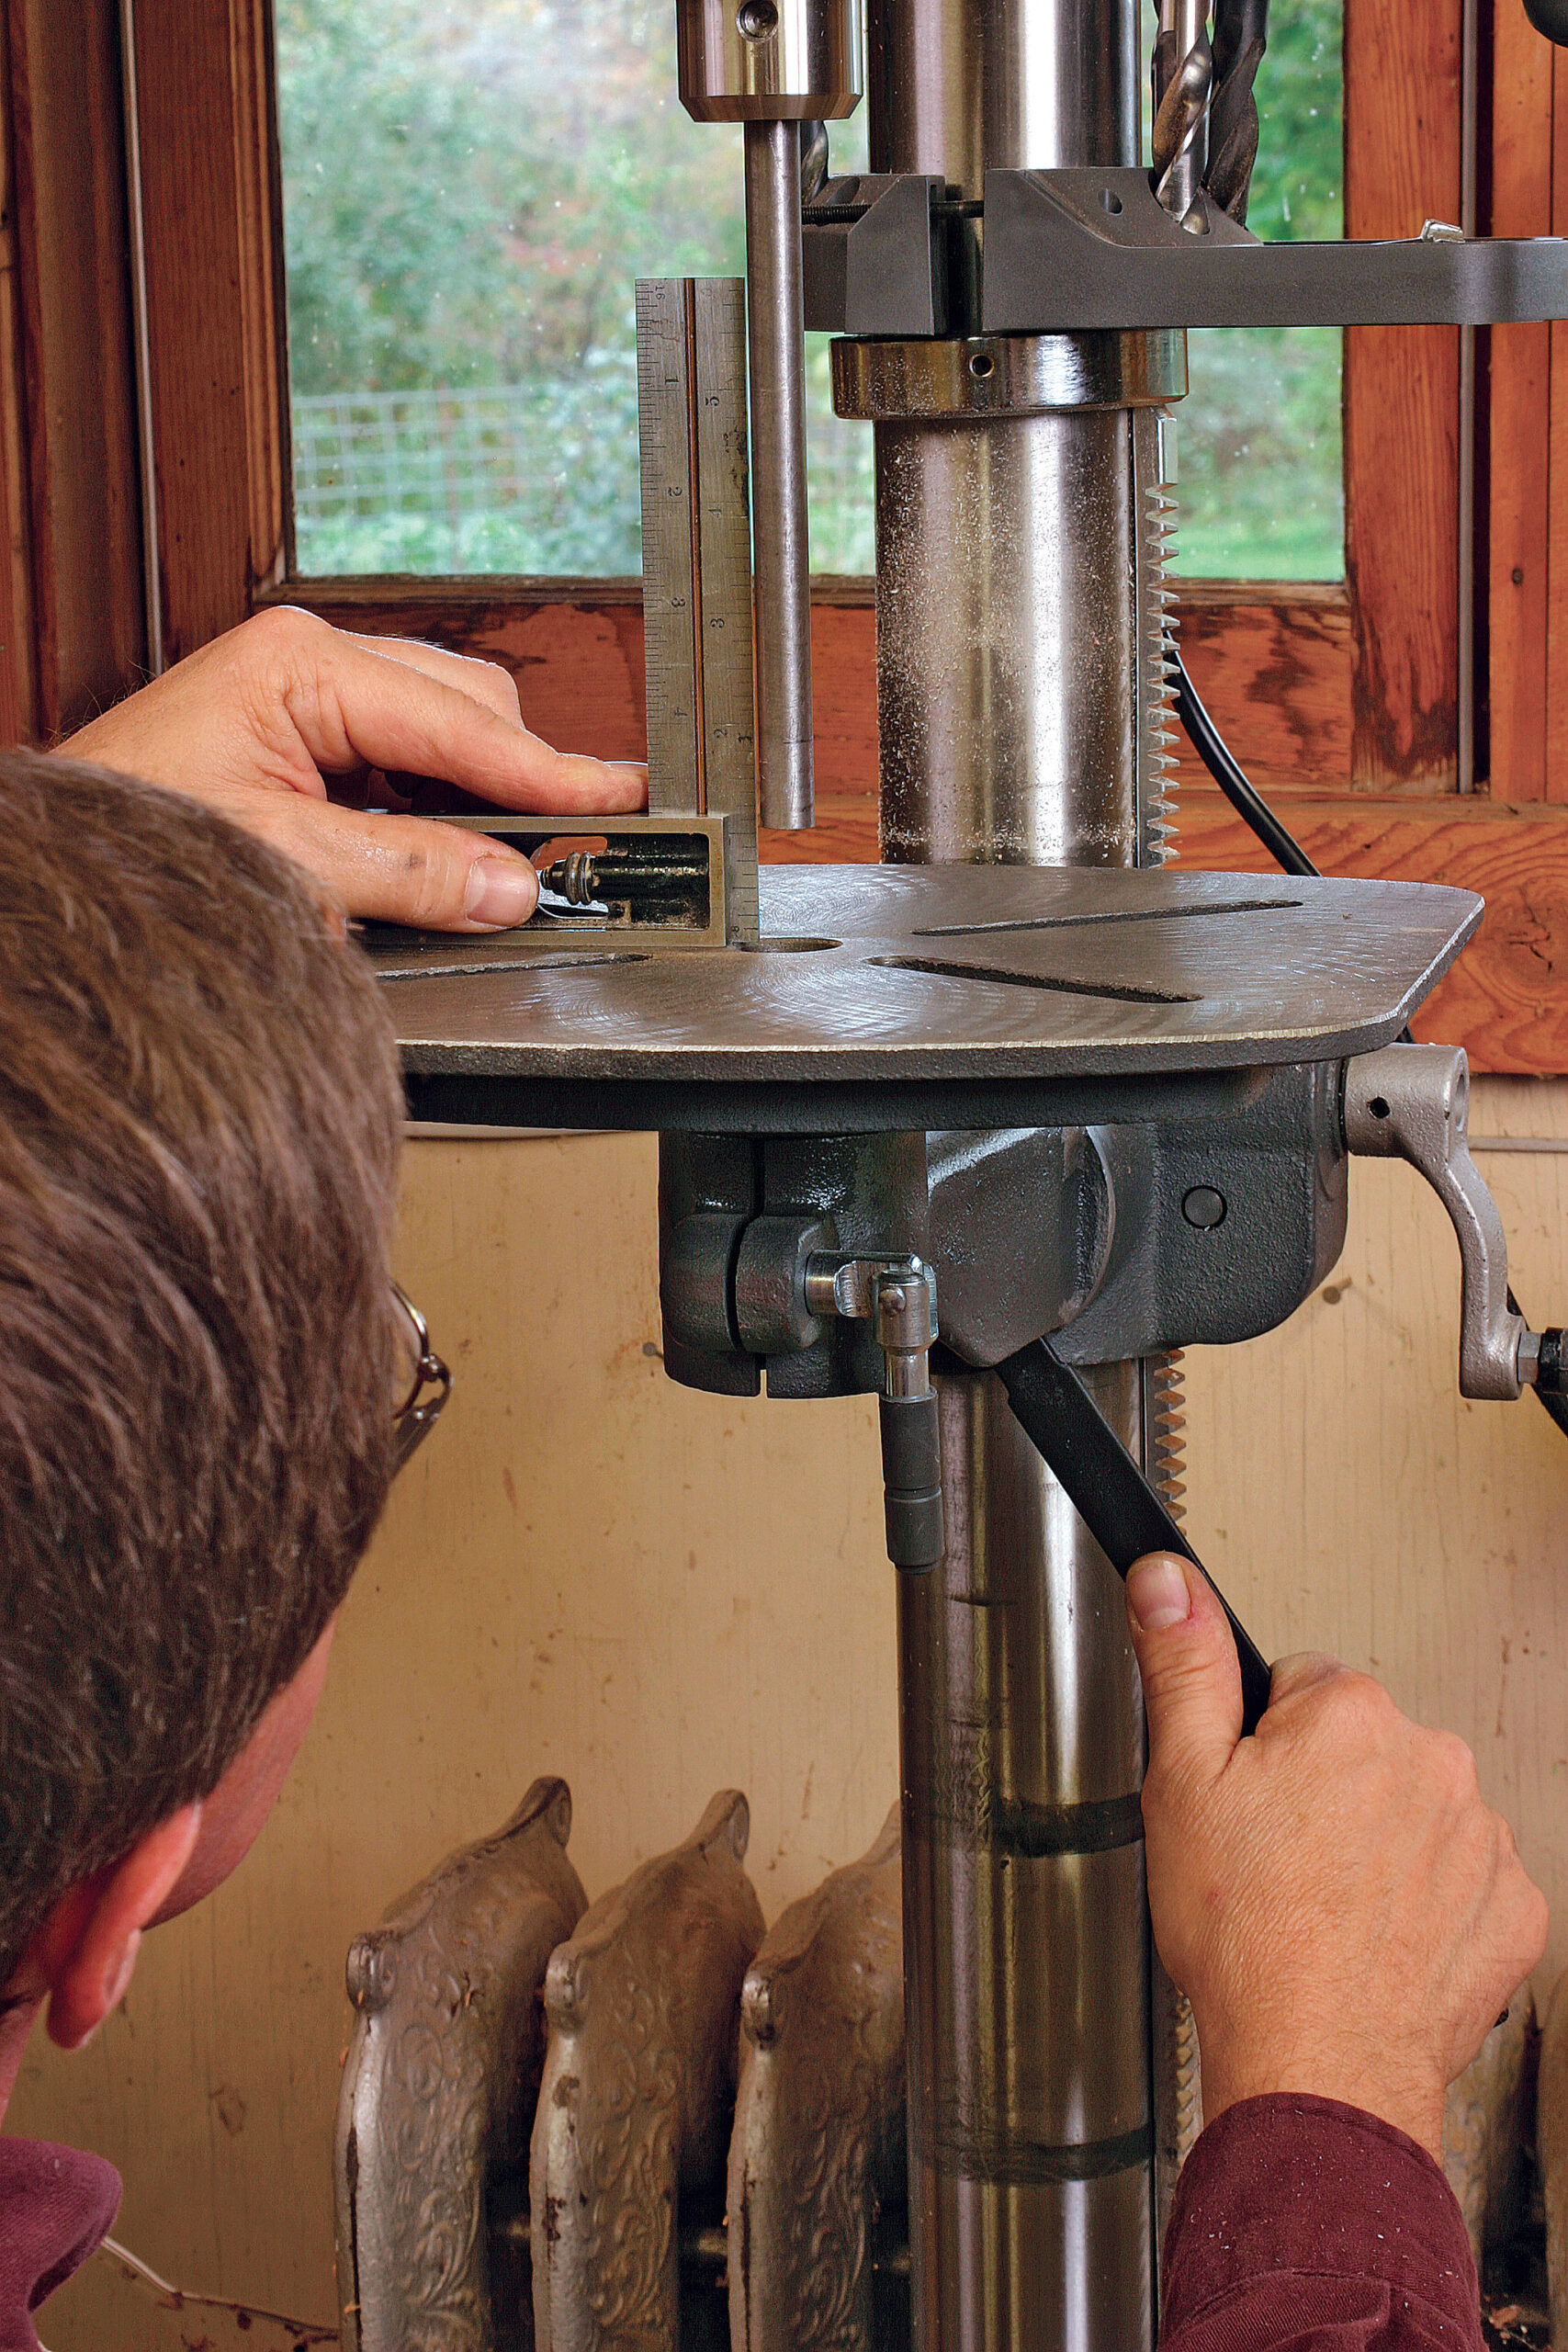
The most important factor for accurate drilling is the squareness of the table to the bit. Use the square to determine if the table is perpendicular to the chuck. If the table is out of square from side to side, fixing it is a simple matter of loosening the bolt that secures the table, making an adjustment, and tightening the bolt. If the table is out of square from front to back, the auxiliary table (described on pp. 62-63) can be shimmed to compensate.
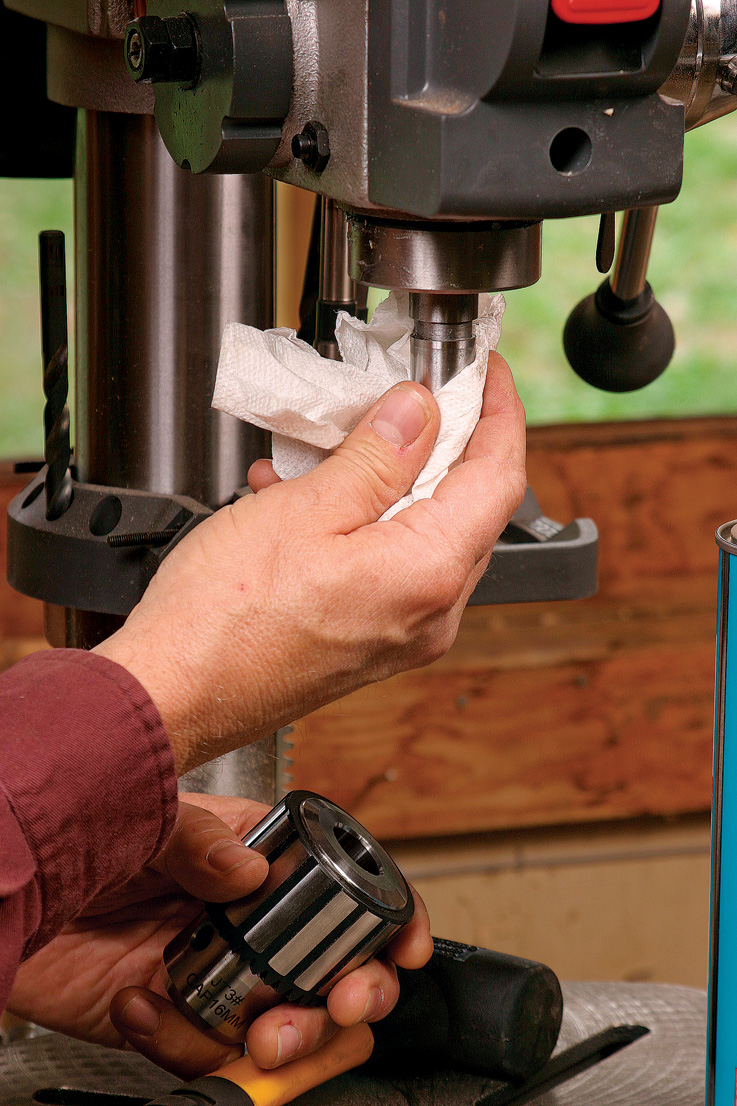
If you have a dial indicator, use it and the length of drill rod held in the chuck to check the chuck for runout. Any wobble should be less than 0.005 in. measured at 1 in. from the jaws. If there is any more wobble than this, bits will tear the rim of a hole upon entry and re-entry. If the chuck is not concentric to the shaft, use a deadblow hammer to knock the chuck free of the shaft, and check the taper to make sure it’s clean and smooth. Use a rag and some solvent to clean the taper. Anything more abrasive than steel wool will change the taper and will weaken the bond. Replace the chuck and recheck the runout.
When reinstalling the chuck, you can angle the hammer blow to get it to seat properly on center. At that point, if you are still measuring too much runout, remove the chuck and check the taper itself. You might have to contact the manufacturer to replace that shaft.
If you are a bit more ambitious, the rest of the drill press comes apart for cleaning and lubrication, which will smooth out any sticky action. Also, if you notice excessive vibration when the press is running, it may be caused by poor-quality or old V-belts. These can be replaced with segmented belts.
Note to lefties: Many machines can be set up for left-handed crank operation simply by swapping the return spring and handle assembly side-for-side.
Tune-up is quick but crucial
|
|
|
|
An auxiliary table is a must
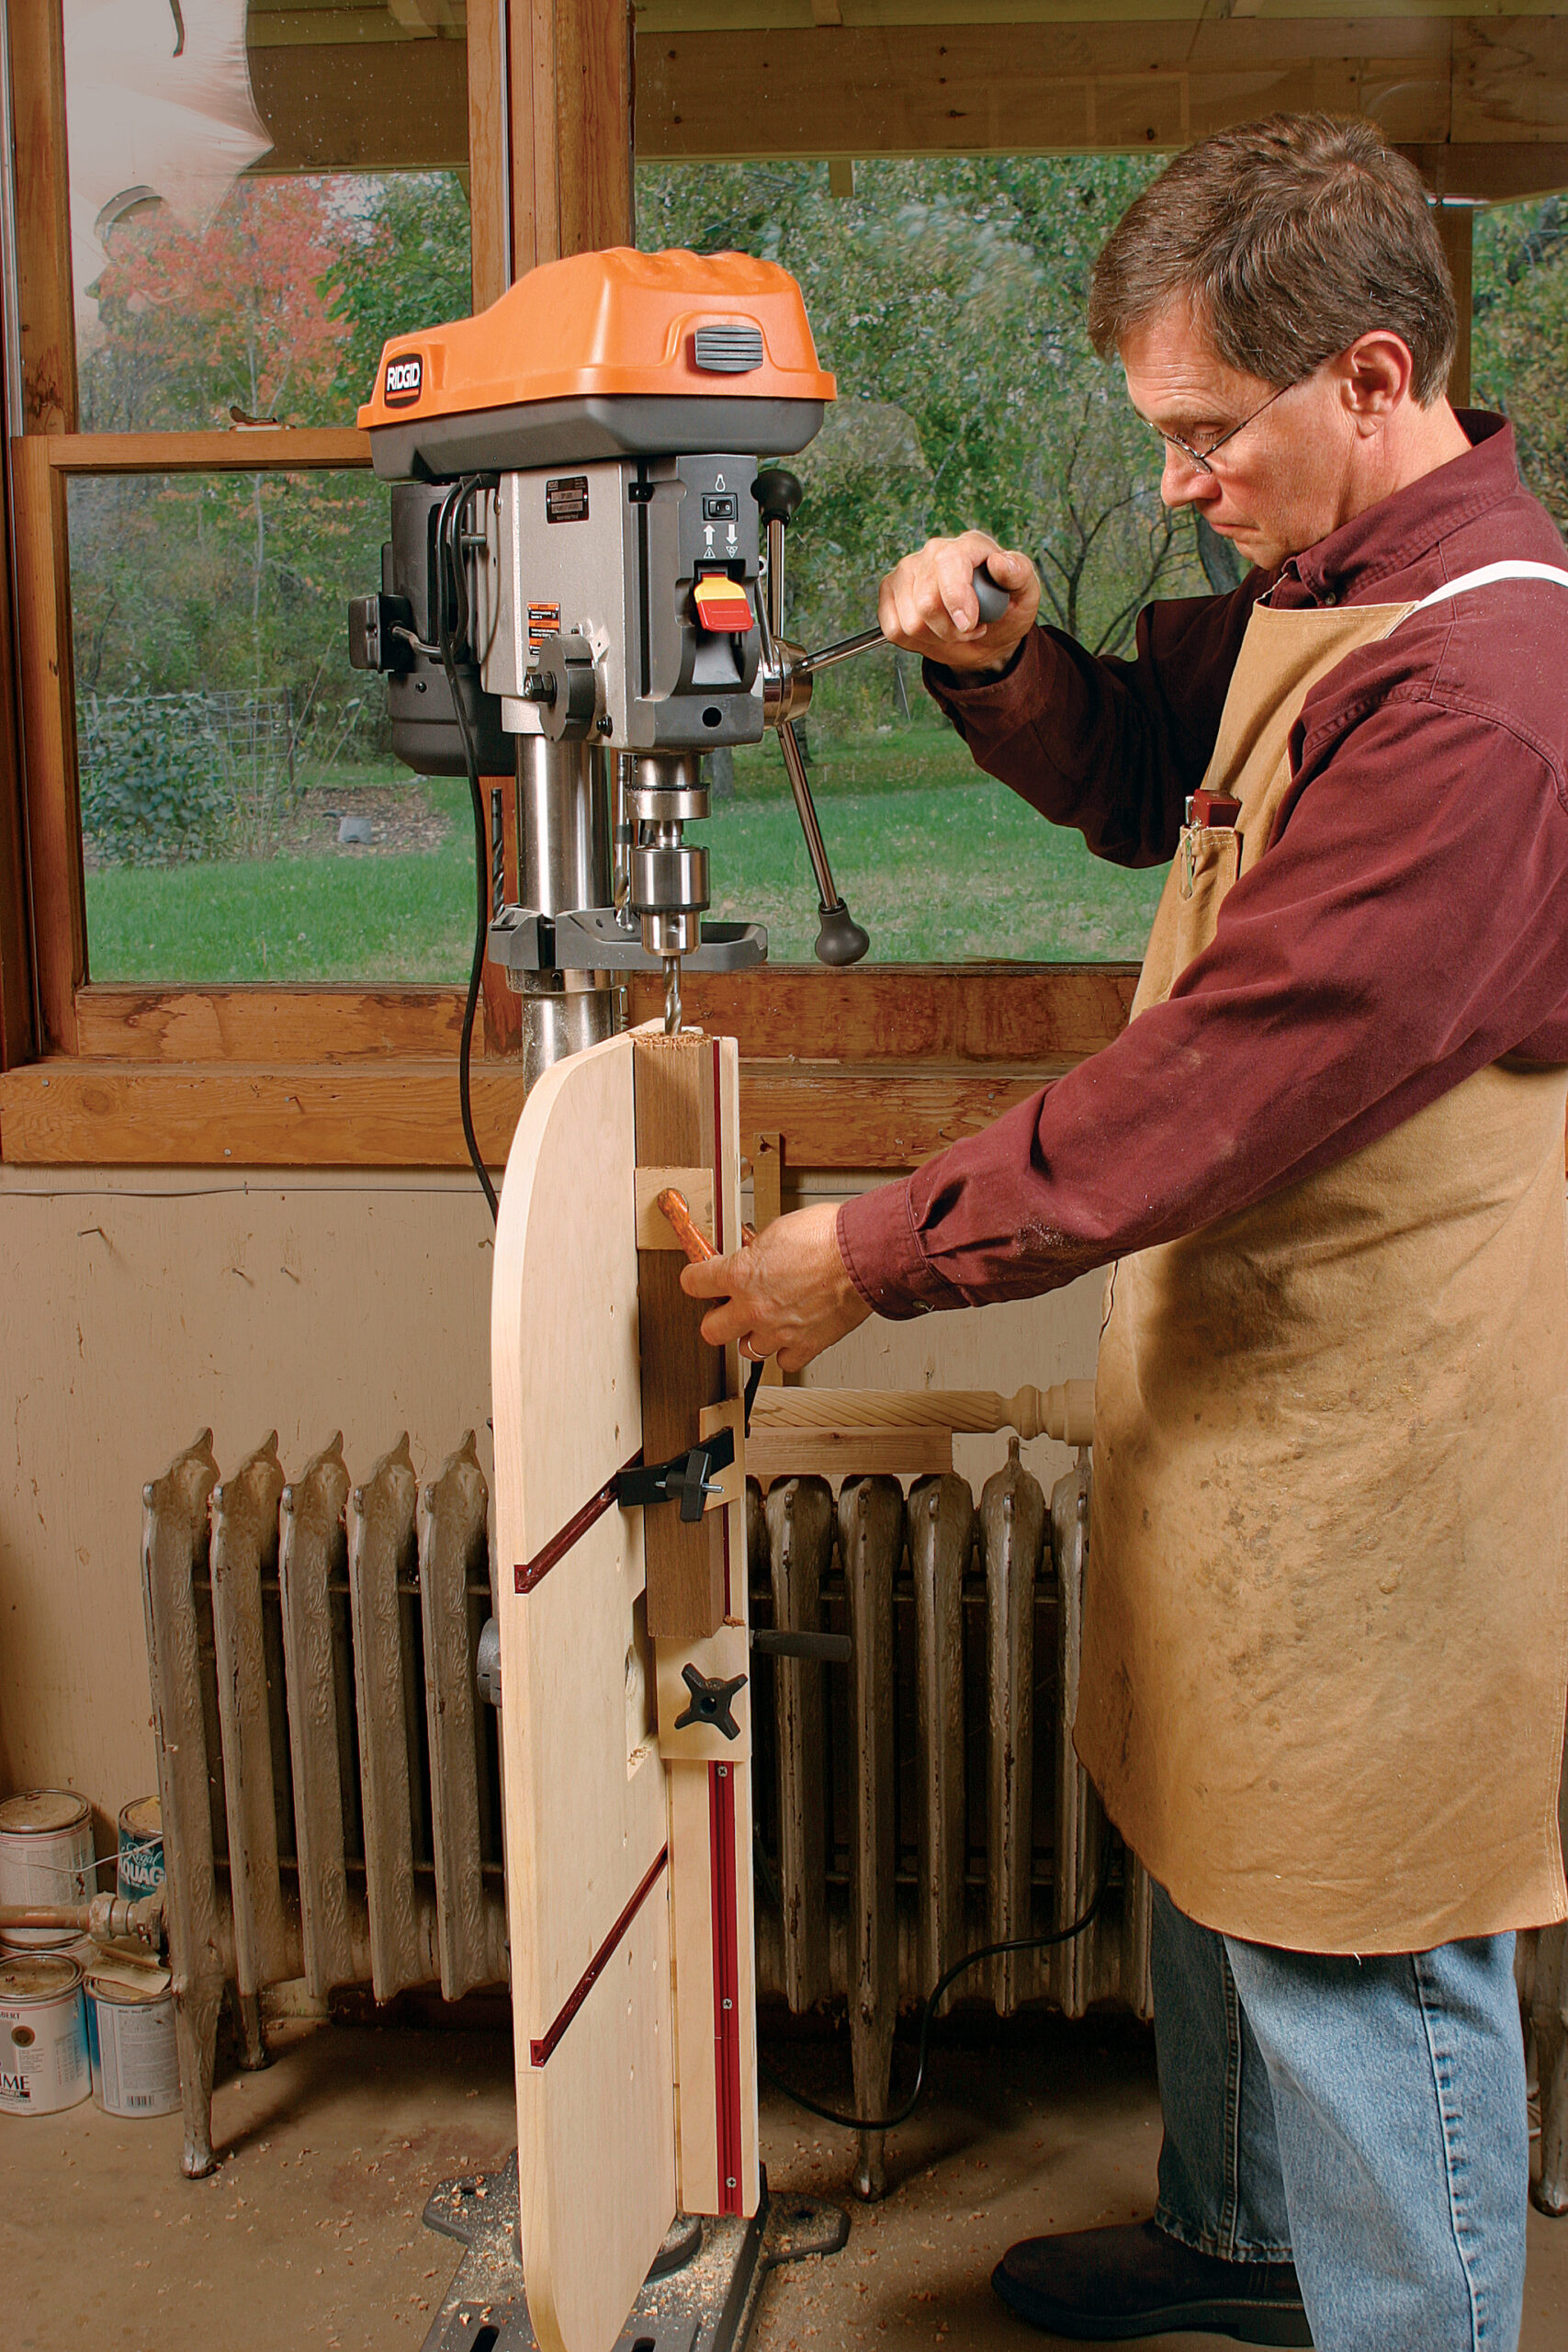
Even though many drill presses are used exclusively for woodworking, they still are equipped with a machinist-oriented table that tends to be too small for many woodworking operations. An auxiliary table that bolts to the drill-press table greatly enhances versatility and safety. A wood or melamine surface is also kinder to workpieces. My version consists of a 3⁄4-in. piece of veneer-core plywood, with aluminum T-tracks inset to accommodate a fence and various hold-downs.
Through-holes will tear out without a fresh backer board below the hole. I inset a small, sacrificial piece of plywood into the auxiliary table. For critical holes, flip or rotate the board to find a clean area, and replace it when it is riddled with holes. The replaceable insert also allows the bottom end of a sanding drum to be set below the table surface.
Four basic settings
There are a few simple settings on a drill press. You’ll need to understand and use them all to get the most from the machine. The most frequent adjustment you’ll make is tightening and loosening the drill chuck. Use all three tightening locations to be sure each jaw is well-seated, especially with big bits. This also can help to center the bit.
To accommodate various thicknesses of workpieces and various lengths and types of tools, you’ll adjust the table quite often. Usually this means cranking the table up and down a gear rack on the support column, and locking it in place. Most tables also can be tilted for angled holes.
It also is important to match the speed to the bit. For woodworking, this does not have to be an exact science. Basically, you should not run any bit faster than 3,000 rpm, and you should slow the speed considerably for bigger bits. For example, a 1-in.-dia. bit should run at 300 rpm to 500 rpm in hardwood. On moderately priced drill presses, you’ll have to turn off the machine to change speeds by moving the belt(s) across stepped pulleys. Some heavier-duty machines offer infinitely variable speed that can be changed on the fly.
Last, you occasionally will use the depth stop. On many drill presses, this is a rotating collar located behind the feed handle. Higher-end machines have a better system: a vertical rod that travels with the quill, with stop collars setting the depth.
Safety: Spin and climb are the enemies
Two nasty events that can occur when drilling holes are spin and climb. If a bit grabs the wood—from too fast a feed rate, a dull cutting edge, or a sudden change in density of material (think plywood)—the work can go from zero to the drill’s rpm in an instant, a potentially dangerous situation.
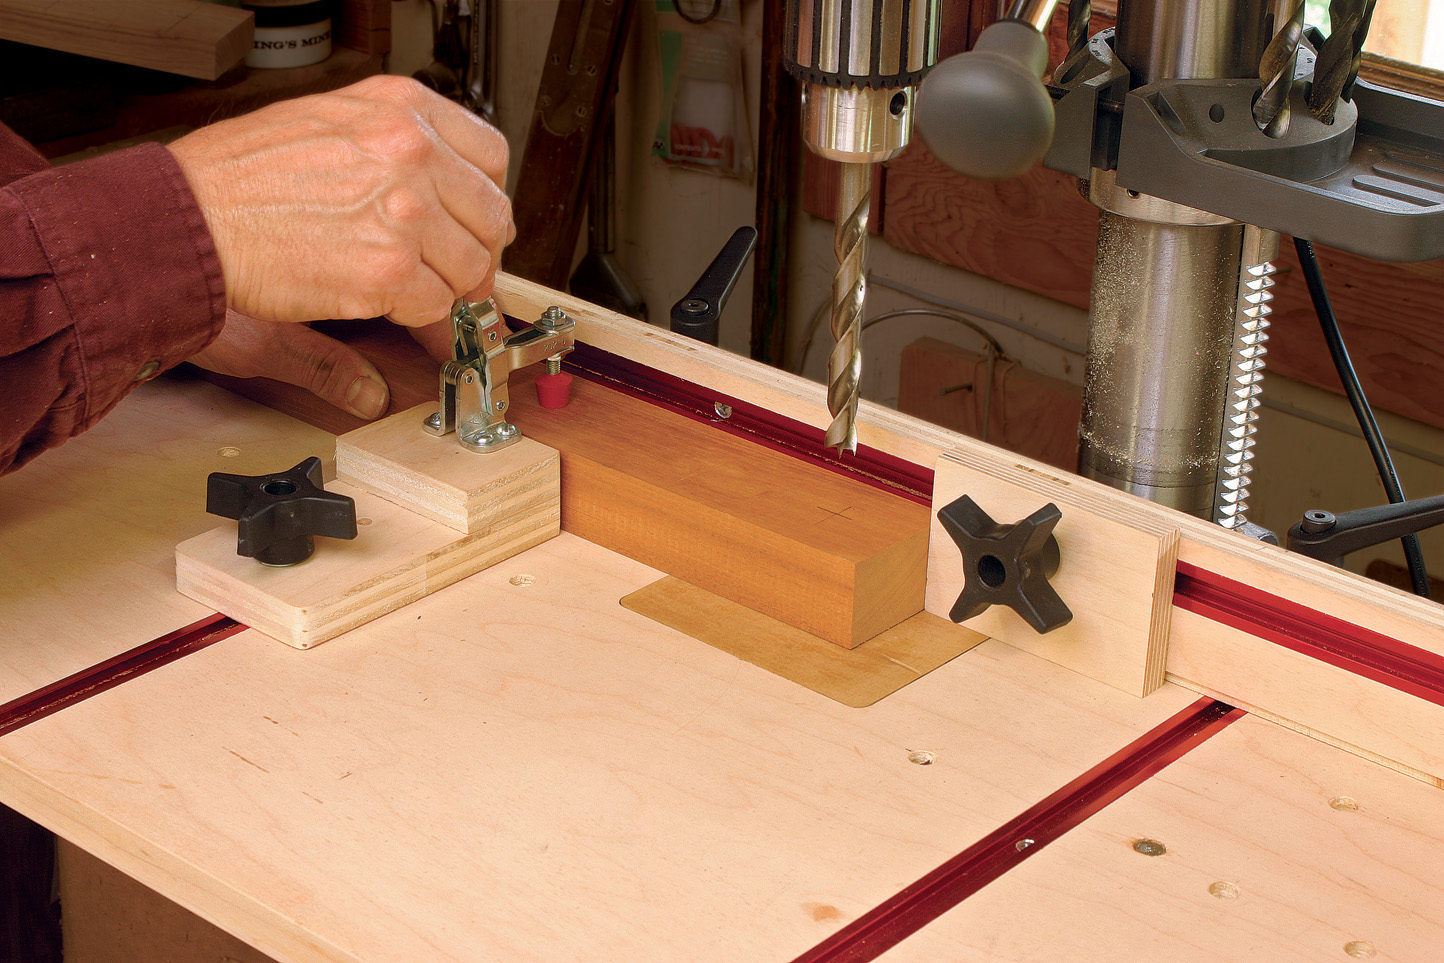
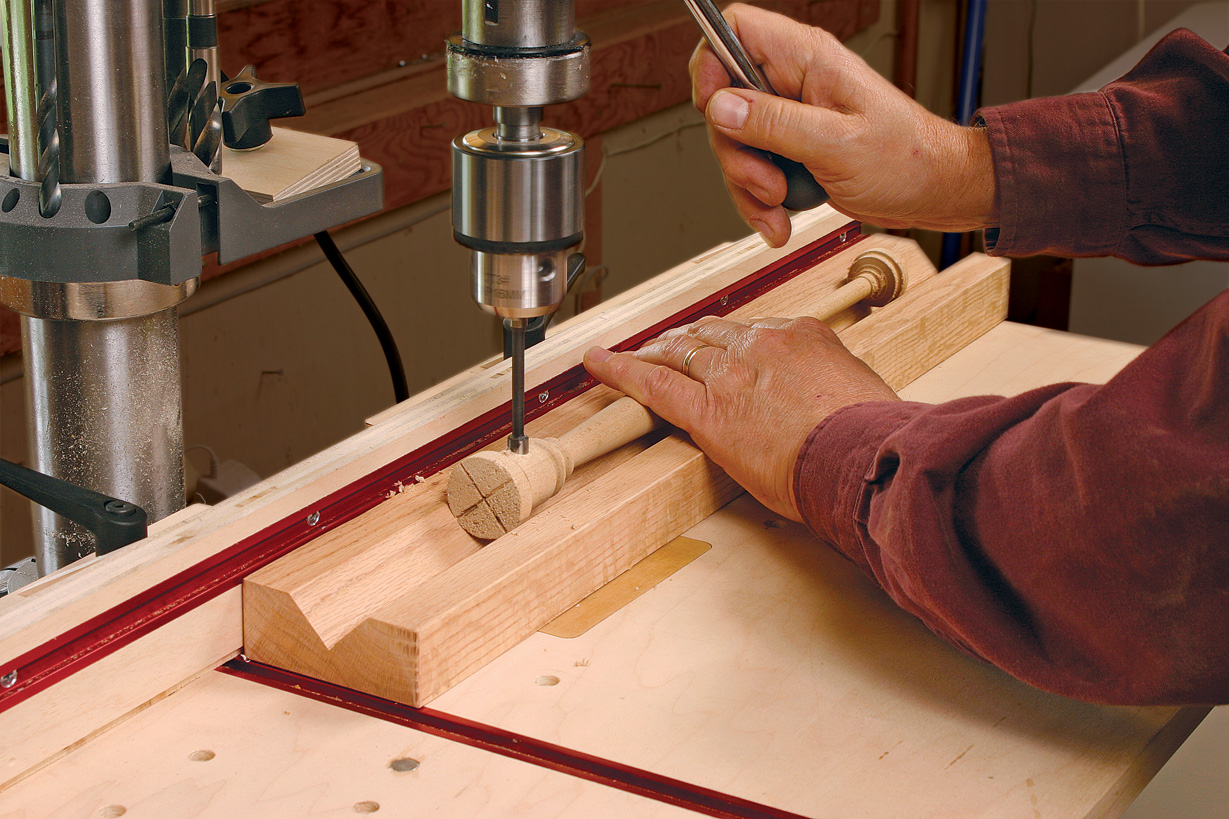
Almost any type of stop will prevent spin. I drilled a series of 3⁄8-in.-dia. holes in my auxiliary table, into which I simply drop a doweled stop. It works quickly for pieces of almost any size and shape. Just be sure that the work is against the stop when you begin. A fence will give the same protection, but it sometimes is not as quick or convenient to use, especially with odd-shaped pieces.
Drill-bit climb is another danger. This occurs as a large bit breaks through the back surface of the wood and jams in the hole, creating a reverse screw action. This causes the work to climb the drill bit until something stops it. If the workpiece clears the stop or fence, climb quickly can lead to spin. The cure is to clamp the piece to the tabletop. I prefer to use a small toggle clamp mounted to the T-tracks in my auxiliary table. I also use these clamps on special drilling jigs that I make for repetitive tasks. They can be mounted on tall wood blocks for clamping thicker or taller items.
Using the table
|
|
|
|
|
|
Drilling clean, accurate holes
Experience will give you a feel for the proper feed rate, but as with any machine, don’t push too hard. Let the bit cut, pulling on the crank handle just enough to keep chips coming steadily.
For deep holes and also for certain bits (such as Forstners), it is important to clear chips often. Do this by lifting the bit until it almost, but not quite, leaves the hole. Pulling the bit all the way out of the hole can tear the top edge on the way out or in.
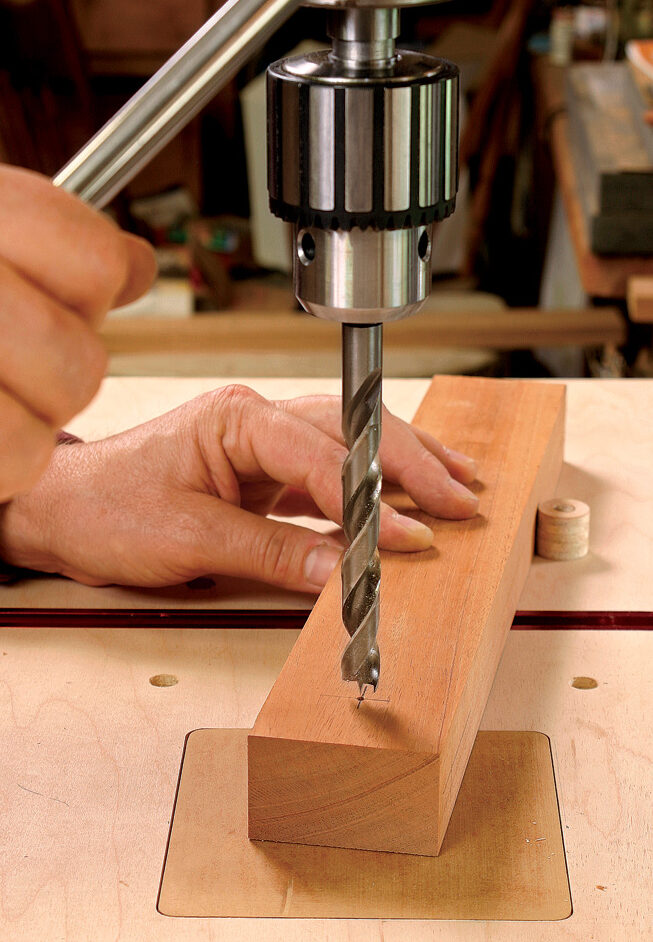
For the ultimate accuracy in locating a hole, use careful layout with a sharp pencil, and then use a center punch to place a divot where the crosshairs meet. On most bits, the tip will gravitate to the center of the divot. When this happens, to avoid bending the bit or drilling a crooked hole, allow the workpiece to move slightly into a better position.
Use a V-block to drill round stock—A simple V-trough cut into a piece of heavy stock will keep round stock from rolling while being drilled.
Angle the table or make a jig for angled holes—If you angle the table, the small scale will offer a fairly accurate reading. If a precise angle is needed, make a setup block on the tablesaw at the exact angle, and use it to set the drill-press table to the desired angle with the drill bit. Forstner bits work best for drilling angled holes, because the cutting rim will keep the bit from wandering.
Pivot the table for end-grain drilling—To drill into the end grain of a long workpiece, such as when drilling bedpost sections, pivot the table to 90° and use hold-downs to attach the workpiece to the table. Twist bits work better than brad-point or Forstner bits for drilling into end grain.
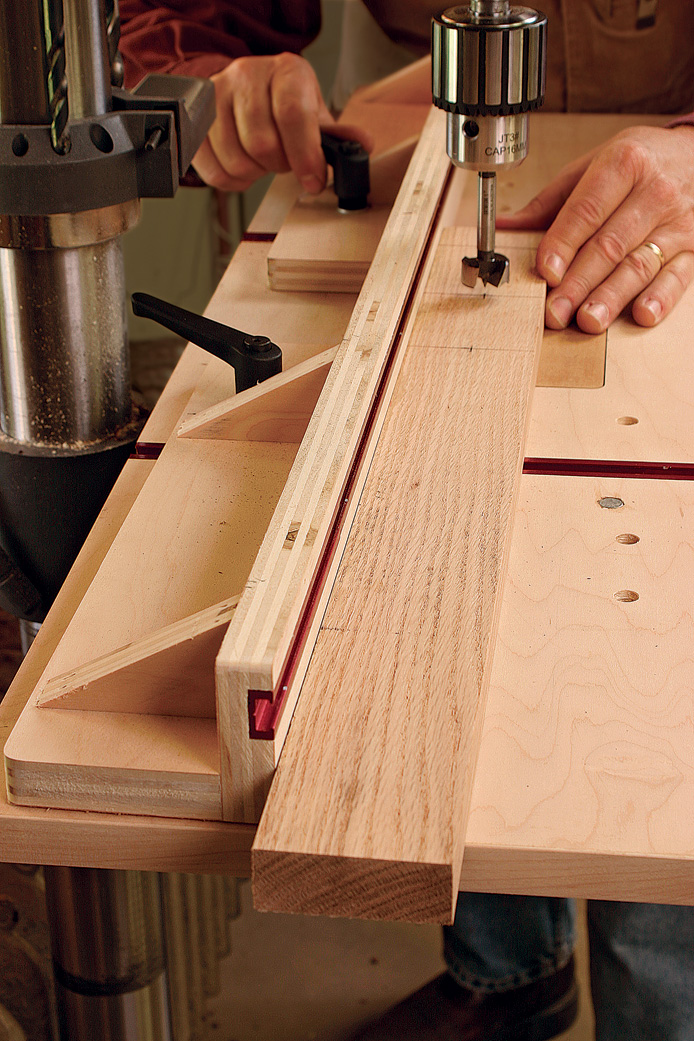
Use the fence when drilling mortises—To bore the sequential holes that rough out a mortise, use a Forstner bit and overlap each successive hole by about 25% (see photo, p. 60). This leaves little to clean out with a chisel, creating a quick, accurate mortise without the need for a hollow-chisel mortiser.
Use hole saws for large diameters—To cut a large hole easily in materials up to 11⁄2-in. thick, use a hole saw. Hole saws are pressed steel cups with saw teeth cut into the rim. They are available in many sizes, starting at 3⁄4 in. dia. and increasing in small increments to over 5 in., and they mount on an interchangeable arbor with a centering drill bit. The assembly chucks into the drill press. Use slower speeds for these tools.
The trick for plug cutters—Plug cutters work great for cutting edge-grain plugs that cover screw holes. There are basically two types: One cuts a tapered plug and the other cuts a straight plug. The best way to cut plugs is to use stock that is thicker than the plug length, cut to the depth of the plug cutter, and then make a resawing cut on the bandsaw to free the plugs.
Drill presses are great for sanding
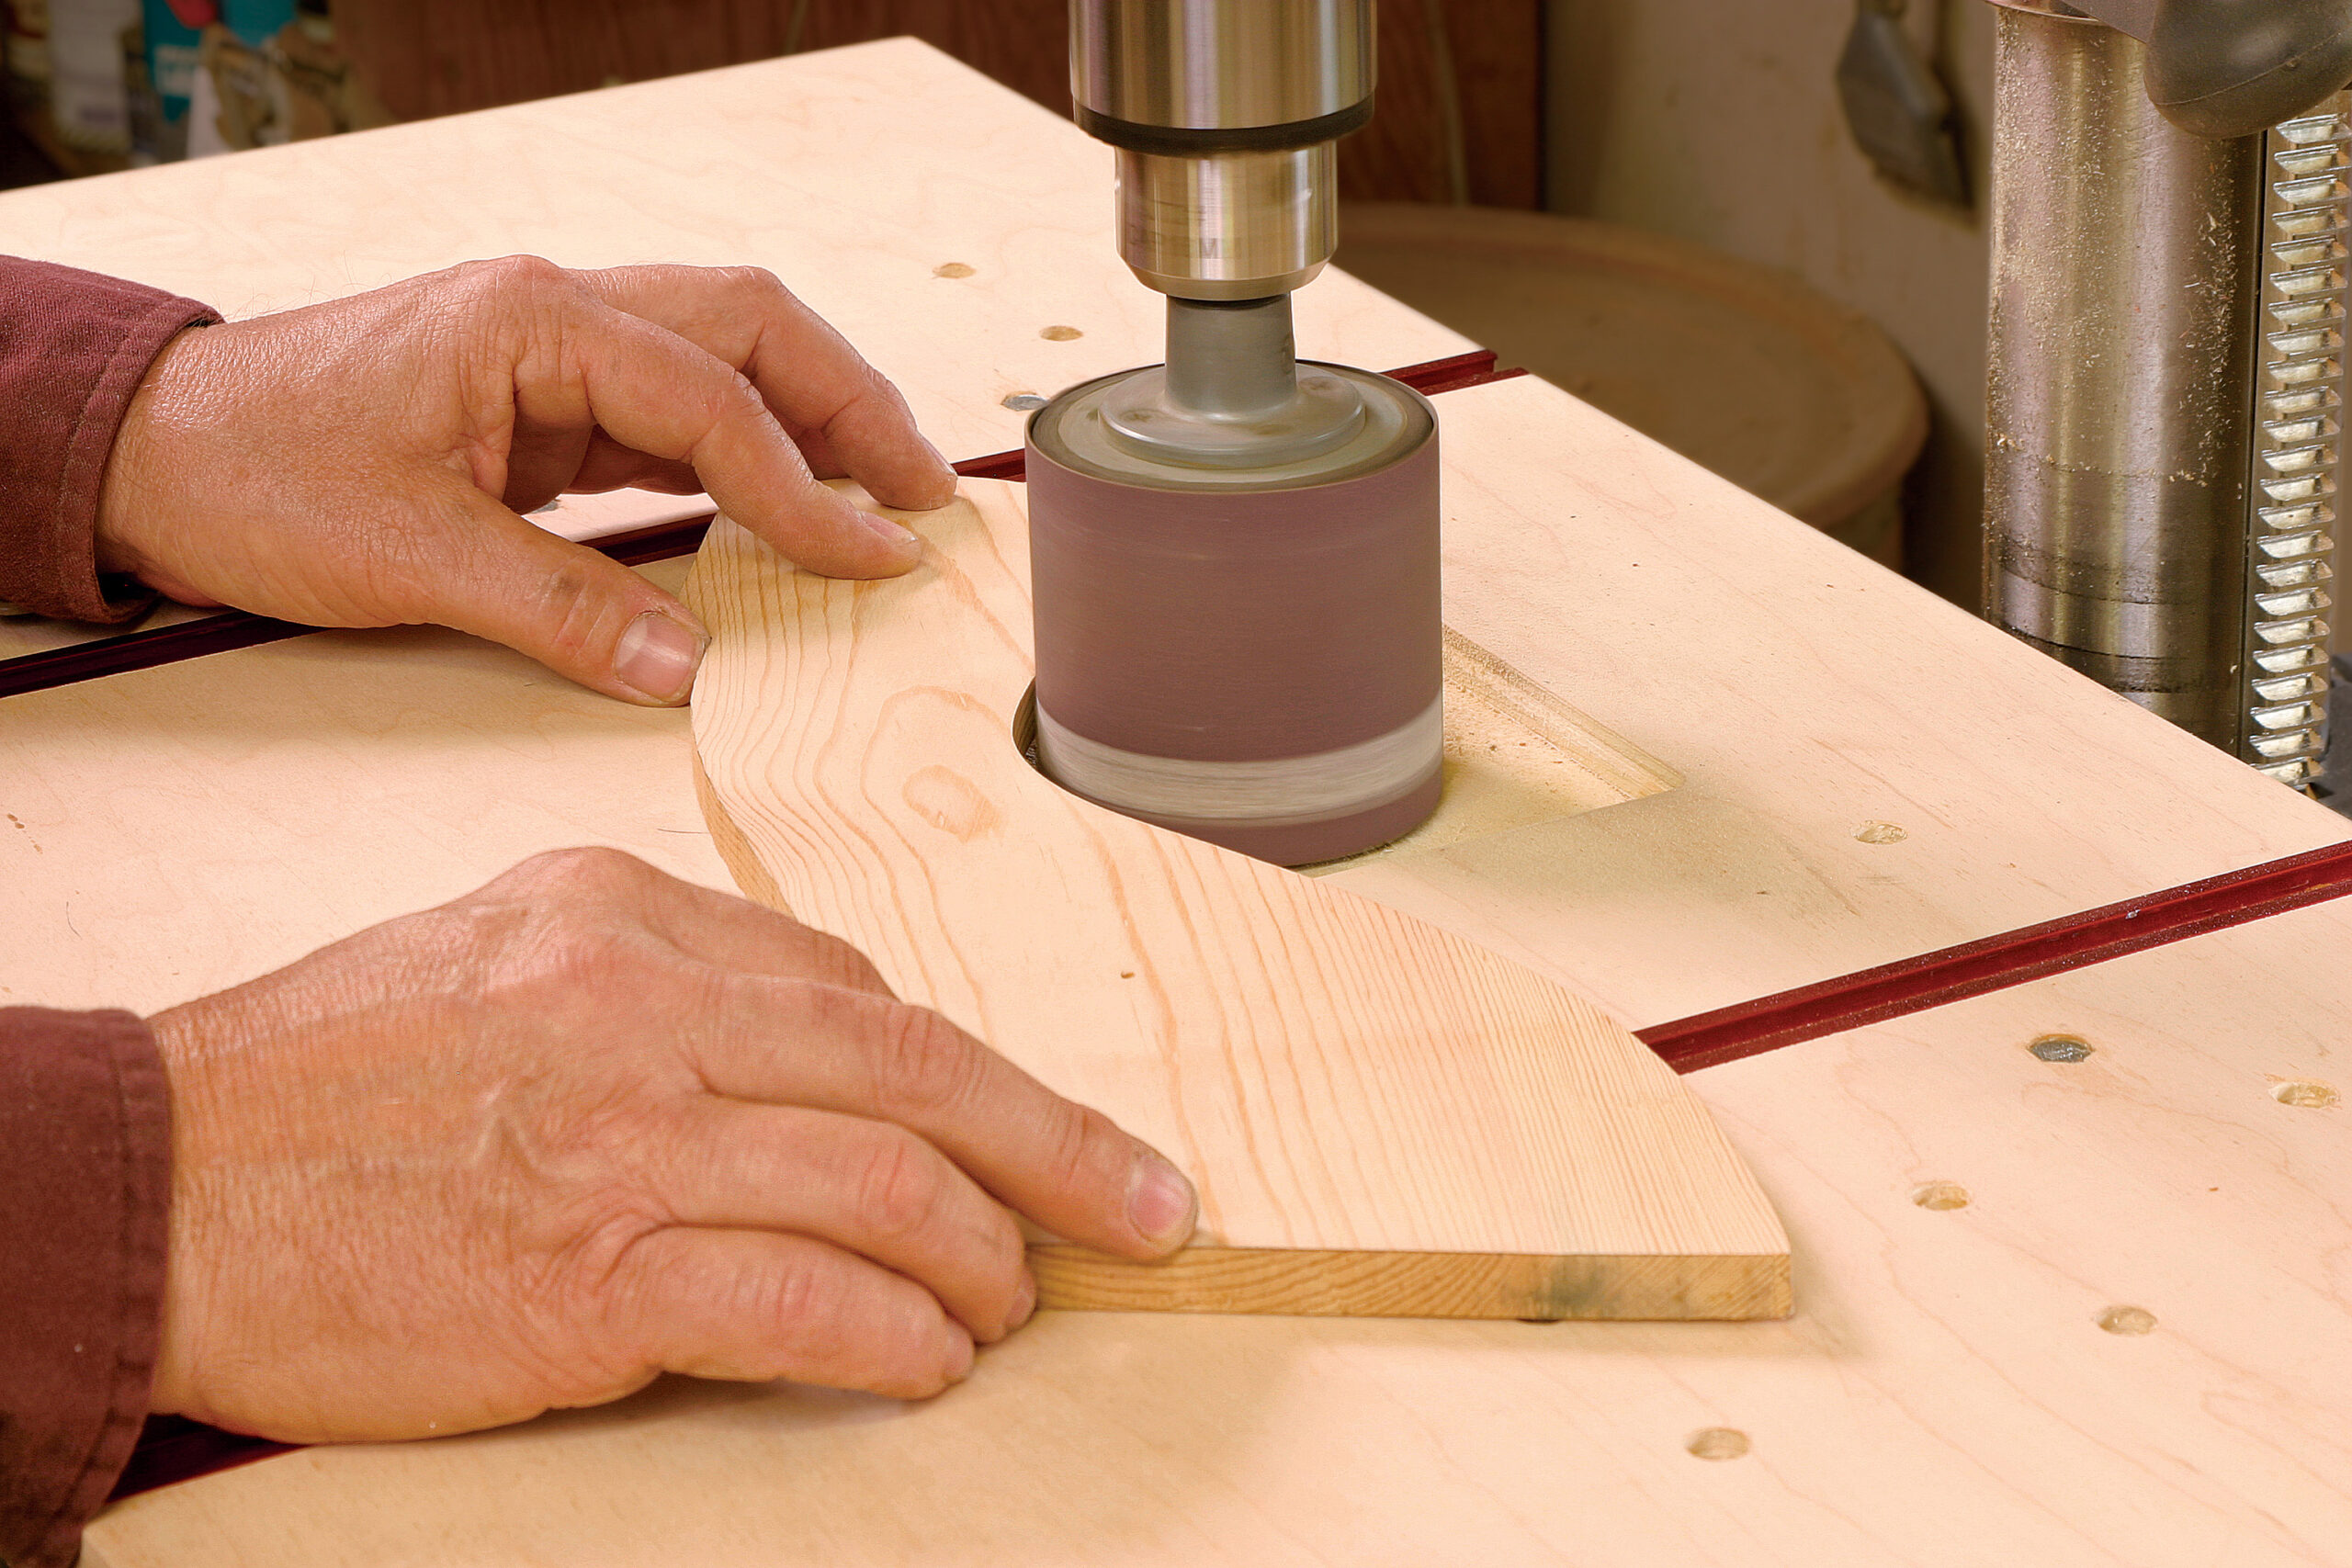
Sanding drums work well for edge-sanding, especially when the piece has an irregular or curved edge. For a smooth, fair curve, use as large a drum as possible, and keep the pressure light and the piece moving steadily. Drums are available in at least a couple of variations, one that takes cylindrical sanding sleeves and another that accepts flat sandpaper.
Other drilling techniques
|
|
|
|

Drill large, clean holes with a hole saw
|
|
|
|


Roland Johnson is a contributing editor.
From Fine Woodworking #182
For the full article, download the PDF below:


Comments
I recently built the drill press table in this article, but I found that the back portion of the table sags from side to side. The front edge is held flat by the hardwood support brace near the front edge, but the back portion, where the drill is, sags about 1/16" across the width of the table. The portion between the t-tracks is flat, but the portion outside the t-tracks is not. I think it's because half of the 3/4" plywood is removed to allow the t-track to sit flush with the surface of the table. Short of using a thicker table, has anyone figured out how to avoid this?
Log in or create an account to post a comment.
Sign up Log in