Mortising the ends of long boards
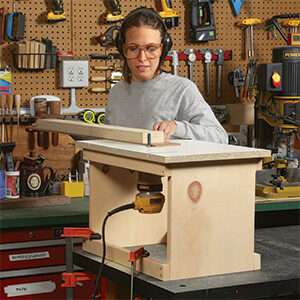
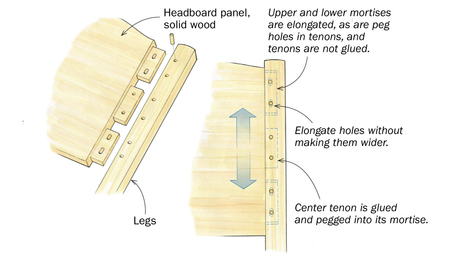
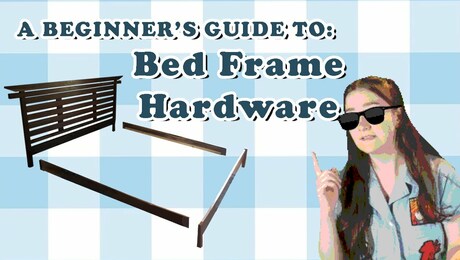
Whether it's for bed hardware or floating tenons, mortising long boards isn't easyIn Fine Woodworking #268, Michael Cullen builds a contemporary Arts and Crafts bed. In it, he uses simple brackets to attach the headboard and footboard to the side rails. It got me thinking about how I would mortise the end of an 81-in. board to receive the bed hardware. I asked Michael how he did it, and he told me he used his multi-router, a very expensive horizontal mortiser. Well, that’s great if you’re one of the masters and have a multi-router, but what about us mortals? I did what any woodworker with easy access to Mike Pekovich would do and asked him how he’d go about the difficult task. It shouldn’t have shocked me when he suggested using a router fitted with a bushing and a shopmade guide.
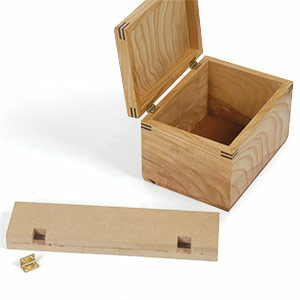
Until this point I’d never used a router bushing, even though I’ve owned a set for a few years now. Making the jig to utilize the bushing never seemed worth the effort for one or two mortises. Well, after making the first mortise with this rig I was kicking myself. Using Jeff Miller’s article, Add Bushings to Your Router Kit, as reference, the jig couldn’t have taken more than 20 minutes to build, and it allowed me to easily make mortises in the end of a long board accurately and consistently. In this video, I show you how simple a difficult task is made with the right tools and preparation.
More on FineWoodworking.com:
- Add Bushings to Your Router Kit – These inexpensive accessories increase control and make the router even more versatile
- Tenoning Jig for the Sophisticate – Cut tenons and sliding dovetails with an MDF jig that clamps to your workbench
- Floating-Tenon Joinery – Simple jig works with a plunge router to make quick, strong joints
Don’t forget to check out the full-size plans for Michael Cullen’s contemporary Arts and Crafts bed.






Comments
Slot mortiser, baby!
Watch for potential parallax errors when using the jig. Would be better to transfer those centrelines on the face of the jig, through the router slot, to where they would easily line up on the side rail (long board) centrelines.
Great point Suburbanguy! You can't see it clearly in the video, but there are knife marks that extend down.
Domino or Stanley doweling jig is how I handle it.
How would either of those help with this situation, bed hardware?
Good tip Ben, thx.
What about the so-called L bracket? That needs to be pretty solid to support the template and the router. Is it just glued on? Do you just saw and sand to remove it and rely on the fact that it's attached to the inside face of the board where appearance is less important?
tried and failed to delete my comment. insert forehead slap emoji here...
Skeptical about using this technique for deeper mortises like for floating tenons. Fighting gravity with a heavy router. Even on the multi-router it must have been a challenge because that machine moves the wood.
Why should we ever need to cut mortices in end grain? There are traditional ways to make that joinery. Tenon anyone?
Ely
Ely
How about a chisel and a mallet?
Nice tip Ben.
A simple, elegant, and straightforward tip for the one-off situation presented. For me, watching these types of tips helps my future problem solving when similar situations arise.
A chisel and mallet would work (which would most likely be my first thought), but end grain is tough to work. Doweling and Domino-ing would only work in situations where the joint did not need to come apart easily in the future - since they would rely on glue.
I am facing this exact situation (no slot Mortiser, need to cut slot) with a bed project. It’s kind of like cutting a recess to receive a deadbolt on a door, except rounded on ends and longer, in which case I have just used a chisel. Here, you might want more control on depth and I wonder about other hand tool options like a router plane. Hand tools preferred of course because there’s more time to listen to shoptalk 8-)
Nice video and tip!
I used this method a few days ago and it worked flawlessly. Just had to chisel the corners for the rectangular brackets, and they fit like a glove. Jig took about 20 minutes to make, let the glue dry overnight while working on other elements.
Excellent tip!
Well done!! I really appreciate this.
Nicely done. Although comments regarding Dominos or mortise & tenon joints are accurate, the key here is the use of hardware that allows the frame to be disassembled later. Great idea!
Great video Ben.
What method did you use to attach that sacrificial board to the side/end of the bed rail? Obviously it has to be sturdy enough to clamp the jig to, but also removable as it is only temporary.
Thanks
If I remember correctly, that was just two boards pocket hole screwed together.
I never even knew that this was possible to do so thank you to this 3 year old form for showing me
A good idea but on the underside of the router template, I would have fastened on a guide piece cut from plywood that would have registered the template against the rail. It would have made it super easy to clamp on without worrying if you were parallel. For the vertical positioning, just two pencil marks on the rail the same length as the template slot would be necessary…
another option to consider is mounting your router to the side of your table saw...everything is square and flat, the piece has plenty of support, and it is easy to do...see picture. Your big unwieldy piece rests on the tables bed, easy!
I have done this for stretcher dovetails.
sorry I added wrong photo!
Ben, thank you I was considering buying a slot mortiser, A router and a jig will do for the number of times we do this. It is a hobby, usually. A pro has got to go. By the way I make my jigs by setting table saw height for slot width and kerf cut, set fence limit to height of mortise. You can fit check the bushing before you attach them permanently.
Log in or create an account to post a comment.
Sign up Log in