Veneered waterfall edging
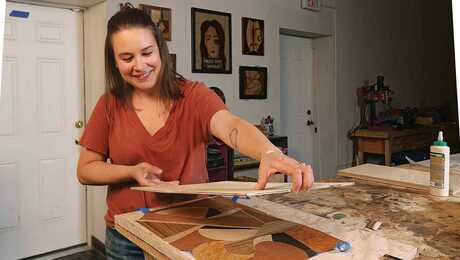
Craig Thibodeau demonstrates how to create crossgrain banding that starts on the face of a panel and flows outward, away from center, and over the edge.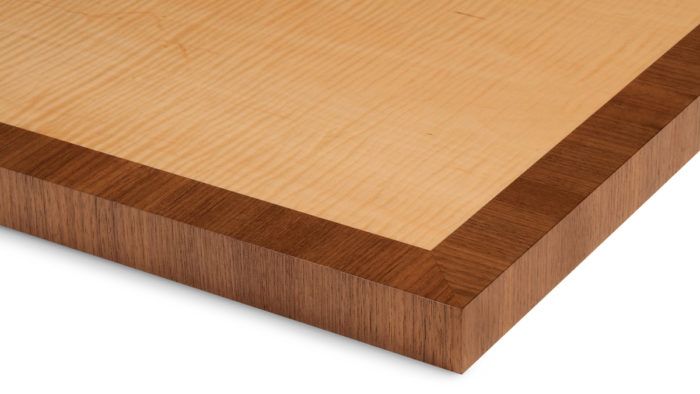
Synopsis: If you’ve ever wondered how to create the beautiful grain that seems to flow like water over the edges of veneered panels, now is your chance to learn. Craig Thibodeau explains how to create crossgrain banding that starts on the face of a panel and flows outward, away from center, and over the edge. It requires a bit more precision than other edge-banding methods, but it’s not out of reach.
If you love Art Deco furniture as much as I do, you’ve noticed the way the grain seems to flow over the edges of certain veneered panels like water. This is done with a combination of crossbanding around the top face and matched banding on the edges.
The key to the effect is lining up the grain on the face and edges. It requires a little more effort and precision than other edge-banding methods, but it is not as complex as you might think. I’ll show how to apply waterfall veneer on all four edges of a tabletop or door. On doors, I often veneer the back with a contrasting wood that matches the interior of the cabinet.
It’s difficult to pull off large veneered panels like these without a vacuum bag or press, but a basic pump and bag system is relatively affordable, and useful not only for veneering but also bent laminations.
 |
Polyurethane is Craig’s Go-to Glue |
Prep the panel
The classic waterfall starts with a crossbanded border on the face of the panel, with the banding’s grain direction flowing outward, away from the center. With this type of a border, the substrate has to be cut to final size up front. That’s because trimming the edges after veneering would alter the widths of the border pieces, making them uneven at their mitered corners.
For the substrate of this small tabletop, I used two pieces of 3⁄4-in.-thick Baltic-birch plywood, laminated in the vacuum bag. The layers in the plywood edges would telegraph through a single piece of edgebanding, so after trimming the panel to 1⁄8 in. under the final size, I edged it with 1⁄16-in.-thick solid mahogany. Any finegrained wood between 1⁄32 in. and 1⁄8 in. thick will work.
Cut the crossbanding strips
To make the edge banding a perfect continuation of the face banding, all of the parts are cut from the same sheet of veneer. Quartersawn veneer works best, because the straight grain is easier to line up.
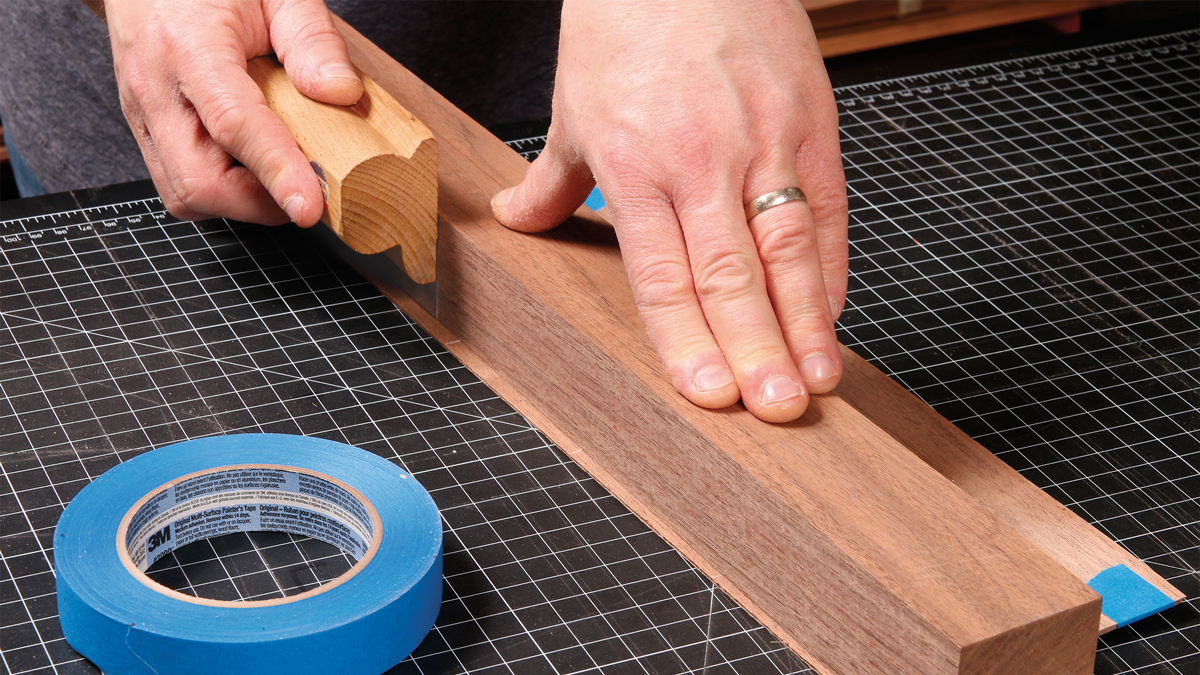
To get all the crossbanding strips I needed for my 20-in.-square tabletop, I cut a stack of four sheets of quartersawn walnut veneer, each a little over 5 in. wide by about 24 in. long, and stacked them. I taped the stack together at its ends and trimmed its sides straight (and parallel with the grain) using a sharp veneer saw with a wood block as a guide. Sandpaper glued to the bottom of the guide block kept it from shifting during the cut.
Then I taped the four sheets edge to edge and crosscut them to create the strips of crossgrain banding. With straight-grained veneer, I could cut the crossbanding strips 1⁄4 in. wider than necessary and trim them flush with the tabletop afterward, without interrupting the grain match.
 From Fine Woodworking #281
To view the entire article, please click the View PDF button below.
 |
|
 |
|
 |
Fine Woodworking Recommended Products
Bahco 6-Inch Card Scraper
Whiteside 9500 Solid Brass Router Inlay Router Bit Set




Log in or create an account to post a comment.
Sign up Log in