Build A Classic Sawhorse
Splayed legs and strong joinery provide a sturdy base for your workshop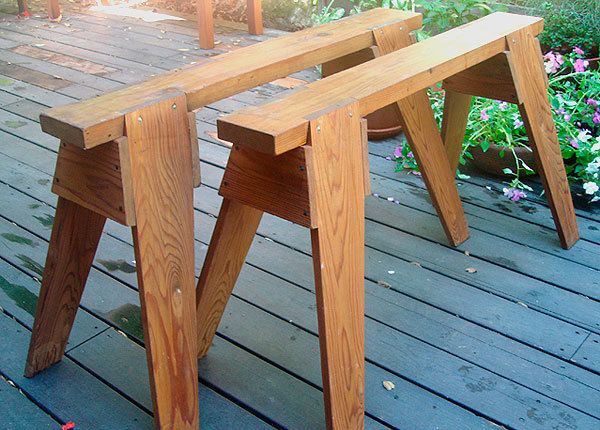
It seems I never have enough sawhorses. I use them continually around my home and inside the wood shop, and they are indispensable for supporting workpieces while assembling and finishing projects.
I built this sawhorse for the first time in 1987 based on an article in Fine Woodworking #24 by Sam Allen. I like it so much I have reproduced several more over the years. Even after considerable use they have proven to be reliable, comfortable, and effective. Also, the design is attractive and I am proud to own and display them in my shop.
CAD sawhorse plans save time
When this sawhorse was first featured in Fine Woodworking, the article offered vague plans and general dimensions so that readers could modify the design to suit their needs. However, after building several sawhorses for my shop, I’ve come up with a few useful construction tips, and created my own set of plans and templates to simplify cutting the joinery.

Complete list of sawhorse parts
For my plans I settled on a 75 degree angle for the splay of the legs in two directions, which makes these sawhorses stable and functional. After working out all of the complex angled joinery to meet this degree of splay, I was able to organize the project into a series of basic steps: produce the saddle, legs, and braces, and then assemble them.

Prepare the saddle first


Start by milling up your lumber. My top choice of wood for this project is redwood, which is readily available here in California. I like the light weight of redwood and its resistance to weather relieves any worries about leaving them outside. Also, since redwood is so soft there is less of a chance it will mark up furniture parts. If you can’t find redwood, any soft or hardwood will do.
Prepare the lumber by cutting each part to rough size on the tablesaw or bandsaw. Then joint each face, plane them to final thicknesses, joint one edge, and rip and crosscut them to their final dimensions.
I make the saddle first. This workpiece measures 42 in. long by 5-1/2 in. wide by 1-1/2 in. thick. Once cut to size, use the two supplied joinery templates to mark out and cut the leg joinery on the saddle.
Cut joinery with sawhorse templates

Download and print the supplied full-size, top and bottom templates and paste them to poster board to make them more rigid. With an Xacto knife, cut out the templates. (Note: this template is designed only for a 1-1/2-in. thick saddle.)
Remove the templates and use a knife and straight edge to deepen the marks. These knife-cuts will be helpful for positioning your chisel when it comes time to clean up the joints.
Using a hand saw, cut the shoulders of each joint. Then make several spaced crosscuts across the width of the joint, and use a chisel to clean up the waste in the notch. To prevent tearout, chop from the top and bottom faces toward the middle.
Produce the sawhorse legs oversized


The legs are prepared to oversize dimensions. Each end will be trimmed parallel to the saddle after the sawhorse is assembled.
Each leg measures 28 in. long by 5-1/2 in. wide by 3/4 in. thick. To cut the leg taper, measure 8 in. down from the inside top corner of each leg and make a mark. Then measure 3-1/2 in. from the outside bottom corner of each leg and connect the two points with a line.
Finally, cut to the line with a bandsaw or jigsaw, and clean up the edge with a hand plane to smooth out any roughness from the bandsaw.
Fastening legs to saddle
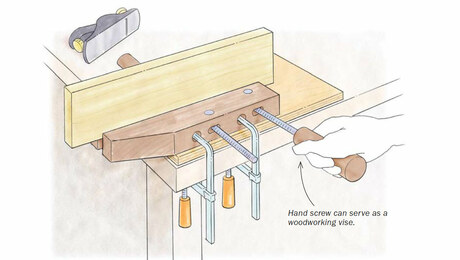
The legs are attached to the saddle with glue and nails. To aid with assembly, I clamped the saddle to the corner of my workbench.
 Before you apply glue, prepare four cauls from 1-1/2-in. thick off-cuts mitering one edge to 75 degrees. The cauls provide a flat surface for the clamps to register against and help pull the legs into the joint during assembly.
Apply glue to both workpieces where the saddle and legs join and then clamp the parts. Finally, nail the legs to the saddle with two 2-1/2-in. long nails. (I used Tremont Rosehead reproduction cut nails.) Use a wet rag to clean up any glue squeeze out.
Fasten the sawhorse braces to the legs


The last step is to prepare and attach the four braces to the underside of the sawhorse. I cut the parts entirely with a bandsaw. The top edge is beveled at 75 degree angle and is produced by tilting the bandsaw table.
The cauls are fastened to the sawhorse with four nails each. I did not use any glue on these connections but held the parts in place with my cauls and clamps while I drove the nails.
Trimming the sawhorse legs
After the glue has dried, use a hand saw to cut the top of the legs flush with the top of the saddle. Clean up your saw marks with a hand plane.
 Finally, trim the bottom of the legs so that the sawhorse sits flat on the floor. Place the sawhorse on a flat surface. Then, using a 1-in thick block of wood as a reference, mark a line around the the bottom of the legs and cut off the waste with a handsaw.
Tim Killen is a professional furniture maker in Orinda, California.
Photos and Drawings: Tim Killen
More from FineWoodworking.com:
- Folding Sawhorse Stows Away
- Sawhorse Mounted Outfeed Roller
- Build a Better Sawhorse
- 18th Century Style Sawhorses
Fine Woodworking Recommended Products
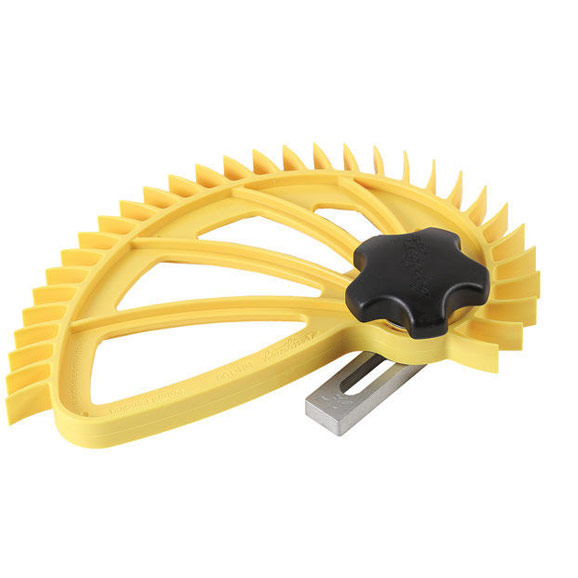
Hedgehog featherboards
WoodRiver Router Bit Storage Case
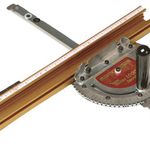
Incra Miter 1000HD


Comments
The link for the template is broken. Help, please?
I might be able to help
Better yet here is a link to template
http://web.archive.org/web/20120711013738/https://www.finewoodworking.com/uploadedimages/fine_woodworking_network/image_resources/web_only/Joinery_Template.pdf
I have built several pairs of these horses and they are really nice. I have even used them for timber framing, and they are amazingly strong. Best of all, they don't wobble back and forth when you are using a chisel or a hand plane because of the compound angle of the legs. I recall when I built my first pair from the original magazine article, all went well, except for the approximate 4 degree from square cut on each end of the gain cut in the saddle. (I cut in square, which created a small gap in the fit of the leg.) When I read Tim Killens articles, I was grateful for the information, but instead of cutting the four degrees in the gain, I ripped each edge of the leg with the tablesaw set at four degrees from square, mostly because if you leave the legs with square edges,when you fit the braces underneath the saddle, the outside ones will only touch the leg on the outer edge of the leg, and the inside braces touch only the inside edge, which bothered me more than my gappy gain cut. None of TIm's articles, or the original article deal with that, but the sketchup model will show that from underneath, if drawn correctly. The gain will have to be cut a bit shorter than the template dimension, but I just used the actual leg to scribe the length of the gain, The end cuts of the gain can be made square for a good fit, and the braces will bear fully on all the legs.
I've been happy with Norm Abraham's design: easier, quicker, and simpler. Ones I made over 30 years ago are still going strong.
Log in or create an account to post a comment.
Sign up Log in