Table Saw Fundamentals: How to Rip Safely
Mastering this fundamental task requires understanding and finesse.
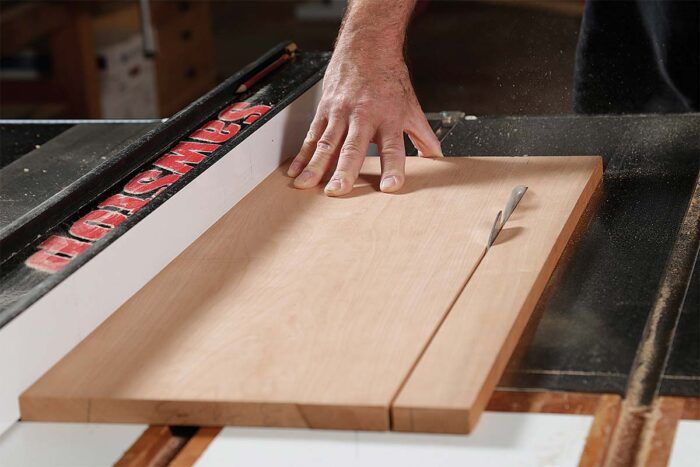
Synopsis: There are a number of things that can go wrong when ripping wood on the tablesaw, chief among them kickback. But ripping is a safe practice if you understand the mechanics of the task. Here, Bob Van Dyke explains a handful of techniques that will keep your rips true and your body safe from kickback. Chief among them are proper milling, understanding blade rotation, where to stand, how to position your hands correctly, when to use push sticks and pads, and how to handle oversize boards.
A tablesaw is the best tool for ripping a board’s edges parallel, but safe and successful ripping on the tablesaw depends on understanding a handful of essential techniques and practices. This article will explore and explain these factors so that you can master the mechanics of ripping.
One important concept to keep in mind is the rotation of the blade. Think of the blade as having a front and a back and remember that as they cut, the teeth in the front push the wood down onto the saw table. At the back, the teeth are rotating up away from the table, and if wood contacts these rising teeth, they’ll exert upward pressure, creating the possibility of kickback. Kickback happens when the back of the blade contacts the edge of the wood with enough force that it grabs the stock and propels it back straight toward you at great speed. I once saw a piece of molding shoot 20 feet across the shop before going completely through two pieces of 3⁄4-in.-thick particleboard. Fortunately, as long as certain practices are followed, kickback is easy to avoid and should never be common.
Another important concept is that ripping requires more force than crosscutting. Picture the board’s grain as a bundle of straws. Cutting across the bundle does not require as much force because once cut, the fibers don’t exert pressure against the blade.
When ripping, however, the blade cuts lengthwise through the straws. Because the grain is not always straight, picture a bundle of bendy straws instead of straight ones. This irregularity, plus the fact that these fibers are usually under tension, means that as the fibers are cut, the tensions within the board change and it can push against the blade, thus requiring more force to cut through the wood. To overcome this, install a more aggressive blade for rips, one that has fewer teeth (24 is standard for a rip blade) and larger gullets.
Stock must be flat and straight
For safe, clean ripping, the face of the board that rides on the table and the edge riding the fence must be flat and straight. If they’re not, the stock can easily move during the cut and kick back. Avoiding this is easy. Always use the bandsaw to break down roughsawn stock. And then joint the face that will be against the saw table and the edge that will be against the fence.
The adjustment of the saw’s fence is also crucial. Never assume that a saw coming from the manufacturer is correctly adjusted, and be aware that all saws can go out of adjustment over time. The rip fence must be parallel to the blade or heeled out slightly at the back.
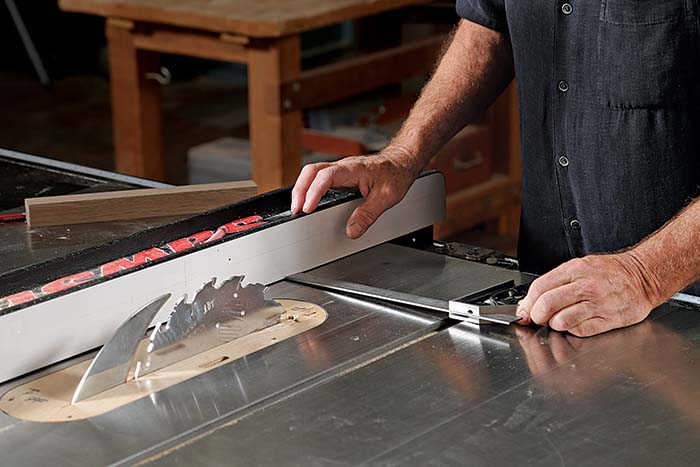
Essential equipment—The splitter or the riving knife (depending on the design of your saw) is the one critical safety device that should always be on the saw when ripping. Positioned directly behind the blade, it fits into the kerf and prevents the stock from drifting off the fence, which could result in kickback. It also prevents the kerf from closing up on the back of the blade—another common cause of kickback.
How to stand, hold, and push
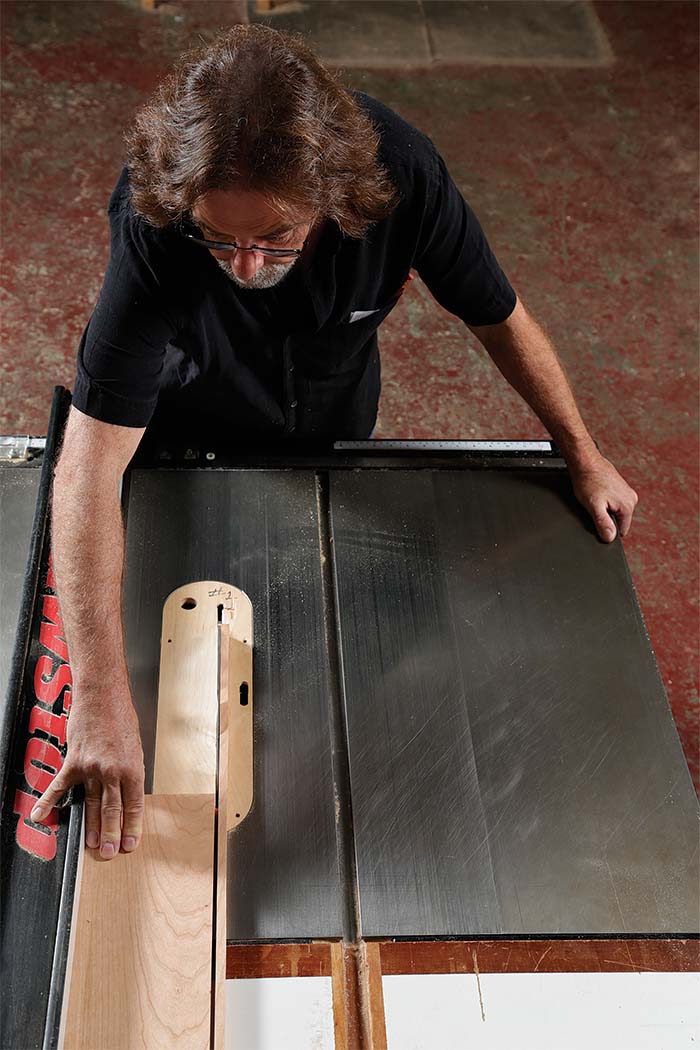
There is only one correct way to stand to easily ensure the edge of the board remains against the fence at all times: close to the front of the saw and a little to the left of the blade. This makes it easier to support the board as it enters the cut and easier to hold the board against the fence the whole way through the cut. Standing a little to the left also keeps you clear of a potential kickback.
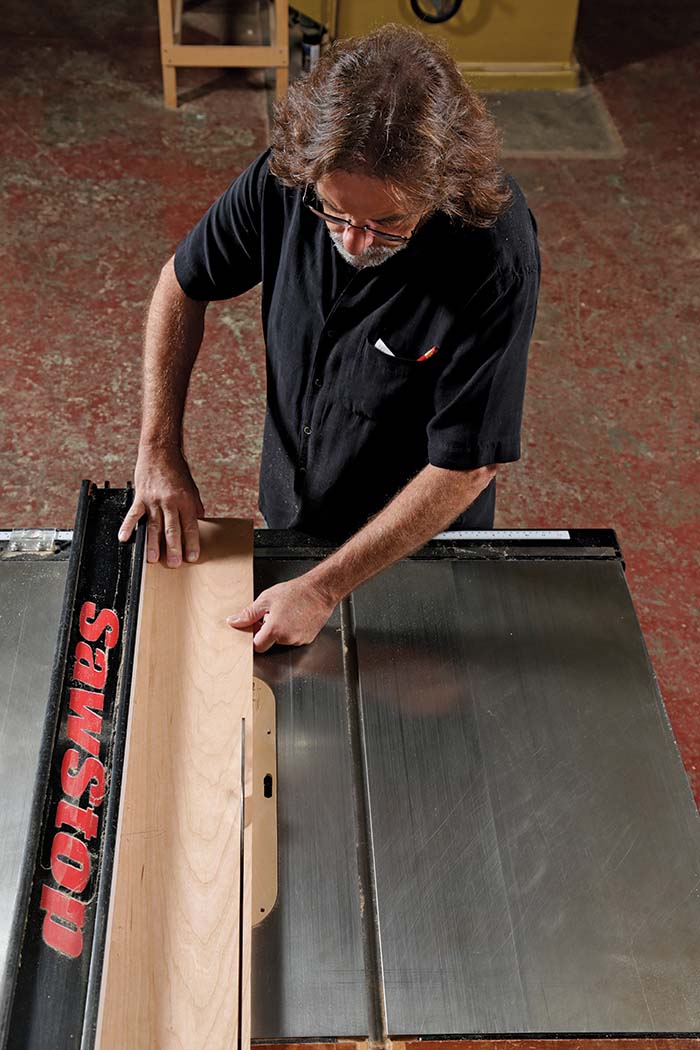
The left hand—The left hand pushes the board against the fence and down onto the saw table simultaneously. Position your left hand about 1 in. in front of the throat plate and keep it there until the cut is nearly finished. Never move your left hand beyond the front of the throat plate. When the end of the stock nears the plate, move your left hand to hold onto the left edge of the saw. Holding here gives you a very firm stance as you lean forward and move to the right to complete the cut with your right hand.
The right hand—At the start of the cut, cup the end of the stock with your right hand and push forward. When your fingers meet the rail, pivot the hand so your pinkie is on the fence, your next three fingers are holding the board down and toward the fence, and your thumb is on the end. Do not release the board until it is past the riving knife. When ripping a board wider than 8 in., have the whole hand on the board to keep it against the fence.
Essential accessories
While your hands alone give you the most control when ripping, there are times when some accessories are crucial.
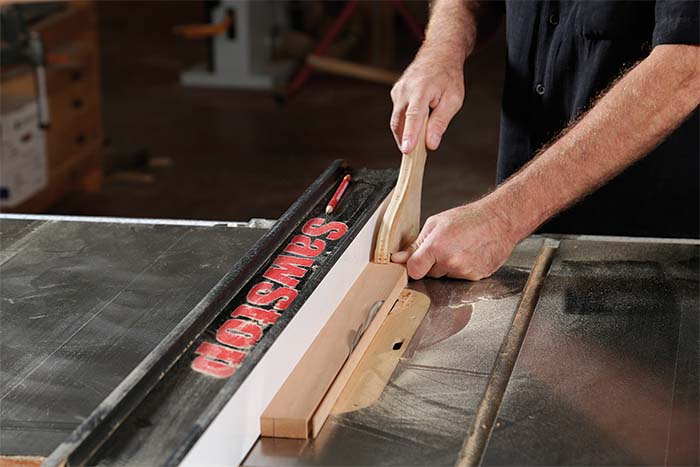
Push sticks—Push sticks keep your right hand safe when ripping narrow stock. Be mindful, though: While push sticks do a good job pushing, they can’t exert as much lateral pressure toward the fence as your hand. To determine if a cut requires a push stick, simply make a fist. If your fist fits between the blade and the fence (be sure to turn off the saw before making this test!), use your hand. If not, pick up a push stick.
Before the cut, make sure the push stick is next to—not on top of—the fence so it’s easy to grab. Never use a push stick while the end of the board is off the table, unsupported. Wait until the end of the stock is almost at the throat plate.
I make my own push sticks out of scrap plywood (see drawing, top left). These work better than the ones that come with saws, which are typically just a plastic stick with a small V at the end. And since my push sticks are made from scrap, I don’t have to worry about cutting into them during narrow rips.
Featherboards—Featherboards are designed to take the place of the left hand. Positioned in front of the blade, they hold the stock against the fence.
Featherboards are helpful when making repetitive cuts and when cutting large or awkward pieces. For more information about them, see my Fundamentals, “Work more safely with featherboards,” in FWW #224.
Special circumstances
Occasionally, the size or shape of the board being ripped will require you to change tactics.
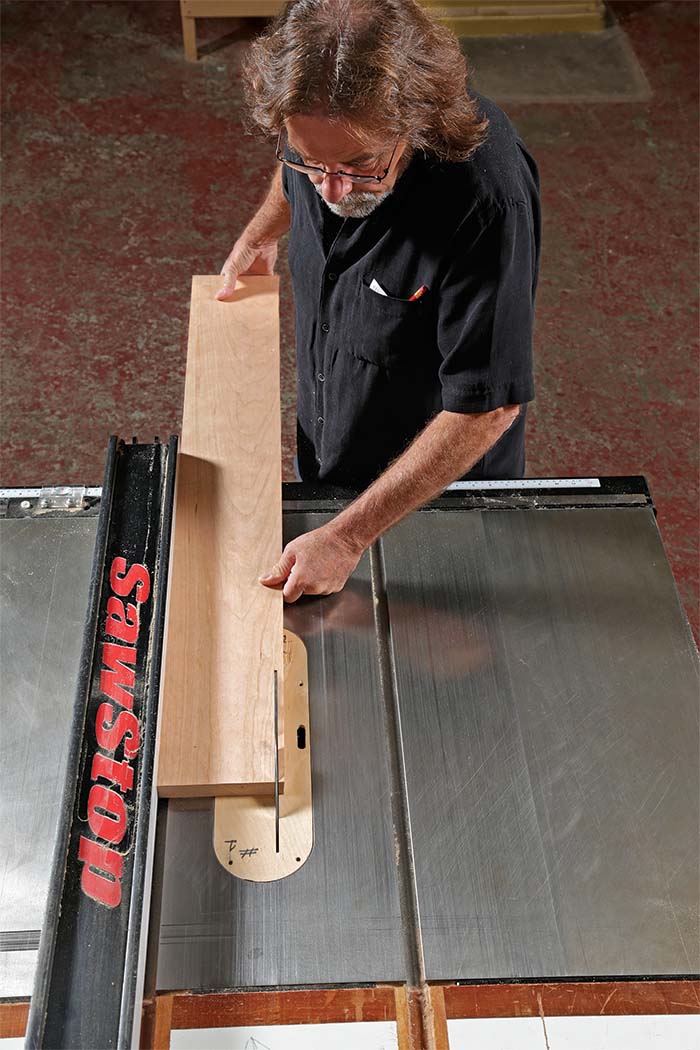
If the board is too long to comfortably hold on the end, your right hand should hold its right edge until enough stock has gone through the blade that you can comfortably move your right hand to the end of the board. I also like to use a removable infeed support for ripping long stock (see drawing, opposite).
As a rule of thumb, if you have a wide piece that is shorter than the width of the blade projecting out of the saw table, rip it using a sled or miter gauge. It is unsafe to rip these using the fence because the extra width will tend to drag the back edge of the board away from the fence and into the back of the blade.
Ripping plywood is usually a lot simpler than solid stock, as there is no grain direction to consider. Nevertheless, when ripping wide pieces of plywood, it’s easy for the stock to come away from the fence—which can cause a kickback that acts differently. Rather than heading straight back, it will arc across the blade, putting your right hand in extreme danger. Luckily, the riving knife or splitter prevents this situation. Also, a very effective aid for controlling wide plywood is a grout float. The spongy surface gives you a nonslip grip, making it a lot easier to hold the stock against the fence.
Ripping is a basic and necessary function on the tablesaw that requires your total respect and undivided attention. It should never cause paralyzing fear. If you simply understand that the board must stay against the table and rip fence, you will be on your way toward success.
Before you begin
Prep the stock

Set up the saw
Push sticks and pads
For rips narrower than your fist or wider than 15 in., pick up a push stick or push pad, respectively.
 |
 |

Push stick for narrow rips
 |
 |
Grout float handles wide stock. When ripping wide stock, Van Dyke uses a grout float as a push pad. Unlike some push pads sold for woodworking, its spongy pad is very grippy and enables him to exert lateral and forward pressure. To make sure he can reach it when necessary, he places it on top of the stock before starting the rip.
A helping hand for long stock
This removable infeed support, made from scrap, supports long stock so you can focus on ripping. Adapt the dimensions to your saw if necessary.

 |
 |
 |
Stable setup. Feeding long stock into a tablesaw can be difficult without the proper support, so Van Dyke uses a specially made infeed support (left) that holds his stock at the right height, leaving him one less thing to worry about. If a board is so long you can’t comfortably reach your right hand back to the end, grip the right edge of the board (center) and push until enough stock has gone through the blade that you can comfortably move your hand to the end of the board. Then the rip proceeds like any other (right).
Ripping 101
Standing in the right place and positioning your hands correctly will keep your rips true and your body out of harm’s way.
For the full article, download the PDF below:
Fine Woodworking Recommended Products

Veritas Precision Square
Grout float
Rockler Dust Right 650 CFM









Comments
great article. Thank you. But as an Engineer who has spent 15 years in the manufacturing industry here in Canada where the safety laws are extremely tough, I look at the pictures in the article and I see a number of glaring safety issues.
First- no safety glasses.
Second- no hearing protection.
Third - no gloves I am required at work to wear gloves for all non- office tasks. At first it was tough but now I will not even work at home in the shop without gloves.
If you are going to discus safety,you need to show the fundamentals first with having the correct personal protective equipment (PPE ).
thanks again
Hari
I appreciate your article for safety. I like your helping had for long stock, but will have to modify to actually cover long stock, 12 to 16 foot stock. The comment about never ripping rough stock was humorous though as I am straight lining and ripping through 8000 bd/ft of rough stock to prepare it for the planer and jointer. Thanks for the advice. Dan
Another thing I think is importamt, and maybe I'm wrong: When approaching the end of your cut, shouldn't your hooked thumb (of your right hand) or pushstick be a little left of center (between blade and fence?). I would think this would naturally cause you to continue pushing the board INTO the fence and forward. Thoughts...
Hari, I was taught never to use gloves around spinning blades, since they can get caught and pull your hands into the blade. Anyone know differently? I'd be happy to wear gloves if they were safer, due to splinters, better grip, etc.
Oh boy - explosive devices galore, but no blade guard. First things first, here. Use a blade guard, so that wood that eventually kicks back gets stopped immediately. And it serves as a perfect finger protection. Ground rule here: If you do not see the blade, it cannot hurt your finger! And no, there is no reason why you have to see the blade in action. The fence does the guiding work, you shouldn't be correcting the cut by force anyway - this is no bandsaw. And if there is no need for correction, you do not need to see the blade. So cover it with a blade guide and you are fine.
The Saw Stop thing would never have been a success story in Europe, because over there they do not act like a third world nation like the U.S., safetywise.
Log in or create an account to post a comment.
Sign up Log in