Do More with Your Dado Set
Stay safe and get better results from this versatile saw accessory.
Synopsis: The dado set is a great tablesaw accessory that is unmatched at a variety of operations-grooving, dadoing, rabbeting, and tenoning-but you must use it properly to stay safe. Steve Latta gives this tutorial on using a dado set for better, safer results. From making a set of zero-clearance inserts to using a crosscut sled and a variety of push sticks, Latta has tips that will ensure you are using your dado set like a pro.
I recently met a talented cabinetmaker who lost his thumb to a mishap with a dado set. Amazingly, doctors were able to put one of his toes in its place, and only a close look can detect the difference. Of course, his hand will never grip the way it used to. Lesson: Medical technology is advancing at an amazing clip, but you don’t want to test it by making a bad move in your workshop.
The dado set is a great tablesaw accessory that is unmatched at a variety of operations—grooving, dadoing, rabbeting, and tenoning—but it can be very dangerous. Staying safe requires proper use. Good techniques will improve your results, too.
A sandwich of blades and chippers
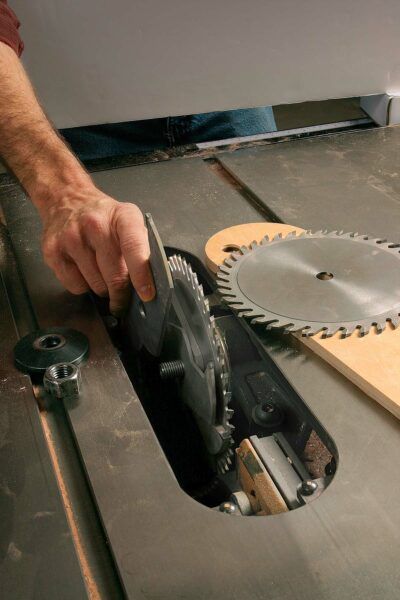
Most dado sets consist of two exterior sawblades, with chippers inserted between them to produce cuts of different widths. Chippers have just two or four teeth and come in standard thicknesses of 1⁄8 in., 1⁄16 in., and 1⁄32 in. A typical set stacks up to about 27⁄32 in. thick (just under 7⁄8 in.). Shims inserted between chippers can help fine-tune the width. Some manufacturers make adjustable dado sets that let you alter the cutter’s width without adding chippers or shims. To compare sets, visit the Tool Guide at FineWoodworking.com.
When mounting a dado set, the tooth points on the exterior blades should point outward. The tips on the chippers should be staggered evenly. Make sure the teeth don’t touch each other: You’ll get a false width measurement and damage the carbide when you tighten the arbor nut.
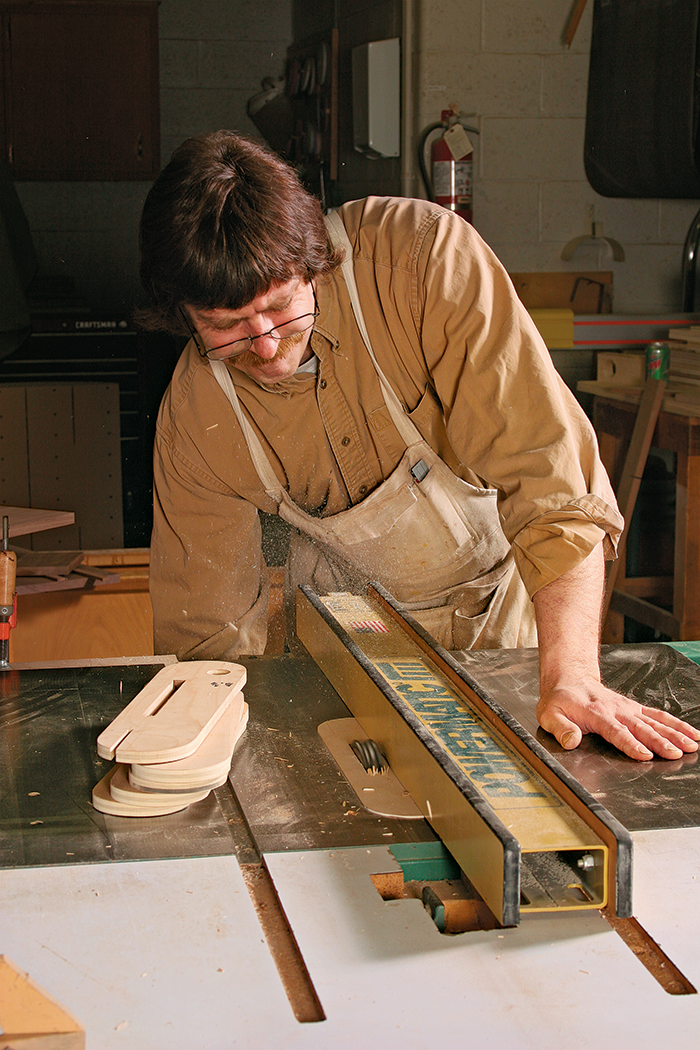
One of the first things you should do with a dado set spends a little time making a set of zero-clearance throat plates for standard dado widths. These plates reduce tearout by ensuring that the stock is supported where the cutters exit the work. They also increase safety by minimizing blade exposure and reducing areas where pieces can hang up. I make mine from 1⁄2-in. plywood with adjustment screws on the bottom to level the insert to the table surface. (For more on making these inserts, see Fundamentals: “Get safer, cleaner cuts on your tablesaw,” FWW #200.)
Grooves and dadoes are easy
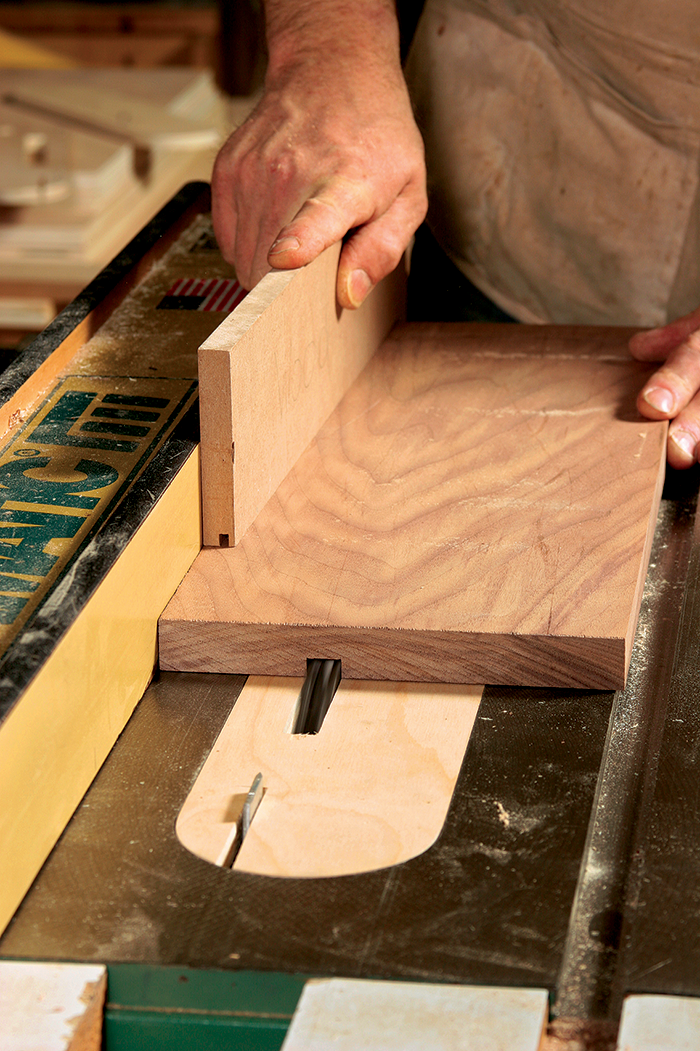
The dado set’s bread-and-butter is cutting dadoes (of course) and grooves. Both are square-bottomed channels with a wide variety of joinery applications. A dado cuts across the grain; a groove runs with it.
Because grooves typically run with the long dimension of the stock, it’s simple enough to guide the workpiece against the rip fence during these cuts. Use a long push stick to hold the work flat over the cutterhead and to keep your hands clear of the blades. If your saw’s arbor flange and fence are both on the same side of the blade, you can use a stub splitter to reduce the chance that the stock will drift off the fence and kick back. Whether the splitter is a metal one mounted to the saw or a wood version glued into the throat plate, be sure it sits slightly lower than the height of the blades and is aligned with the fence side of the dado set.
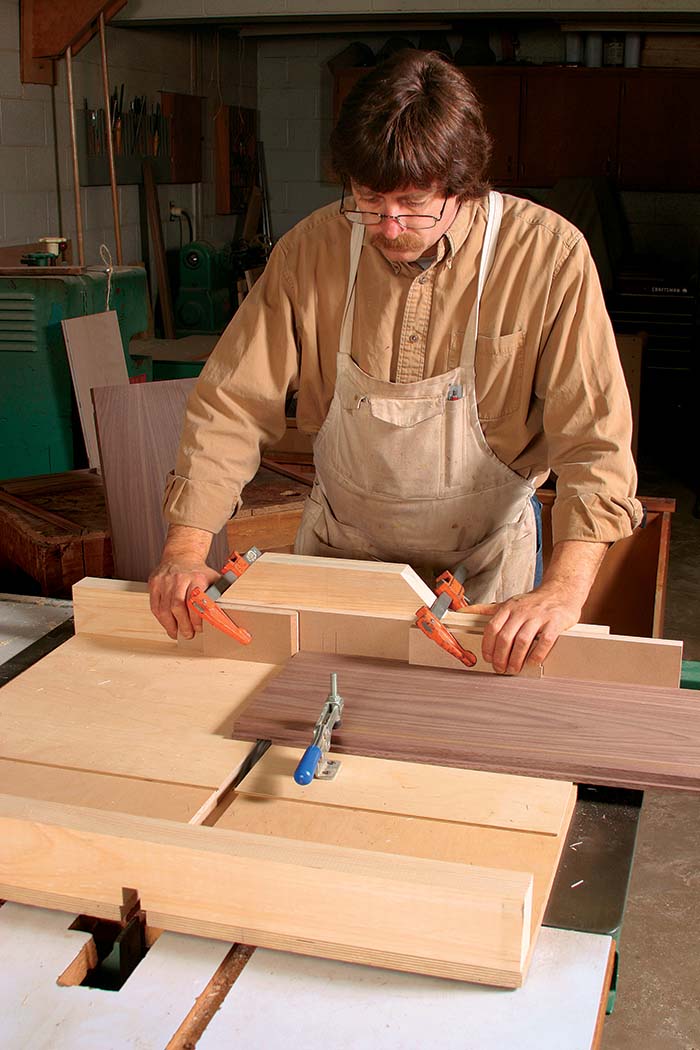
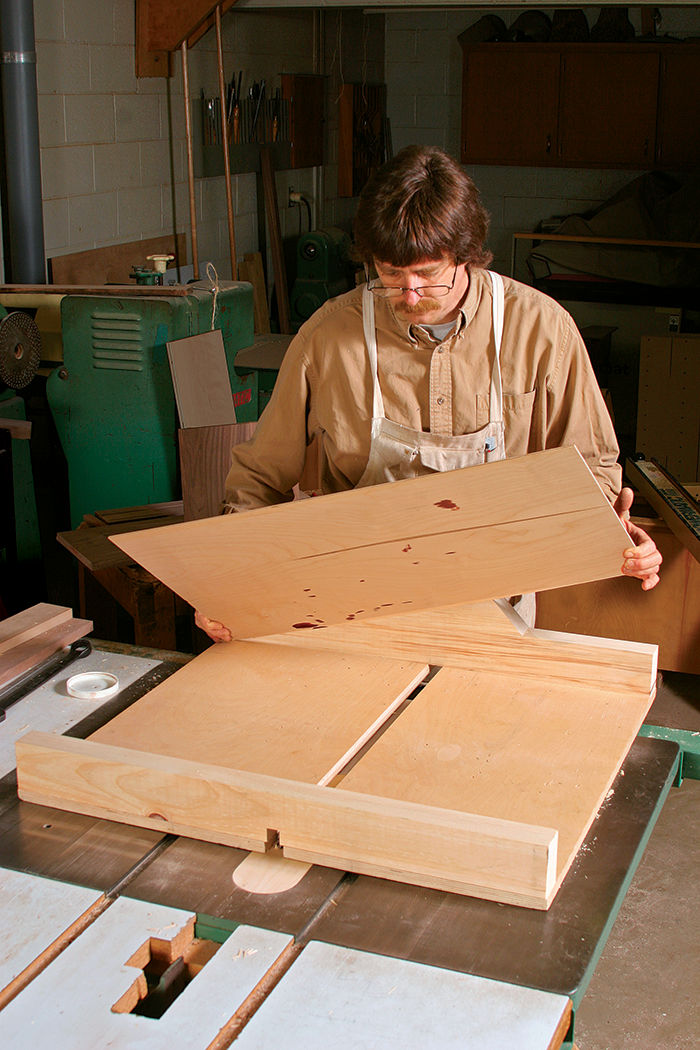
The safest and cleanest way to cut dadoes is with a dedicated crosscut sled. Mine is identical to a traditional crosscut sled in most respects. I cut the blade opening in the sled using the widest setup my dado set will allow. Then, when I want to cut a narrower dado, I tack down a scrap of 1⁄4-in. plywood to the sled’s deck and recut the opening. This creates a zero-clearance opening that will support the workpiece along both edges of the cut, radically reducing tearout. It also gives a definite reference point for locating the cut. To eliminate blowout at the end of the cut, I tack a 3⁄4-in. medium-density fiberboard (MDF) auxiliary fence along the back edge of the sled. Make this fence long enough to accommodate any stop blocks that you might need. Another crucial safety measure when dadoing is to always remove the workpiece from the saw before pulling back the sled. This eliminates the chance that the cutter will snag and throw the work during the return stroke.
In some instances—such as dadoing for large casework or kitchen cabinets—the workpiece will be too wide for the sled and too long for a miter gauge. These pieces must ride along the rip fence. This requires extra attention because the force generated by multiple cutters slamming into the stock can pull the workpiece away from the fence, creating a kickback danger. Again, depending on your saw’s design, a stub splitter in this setup can radically reduce the chances of this happening.
Rabbets need an extra fence
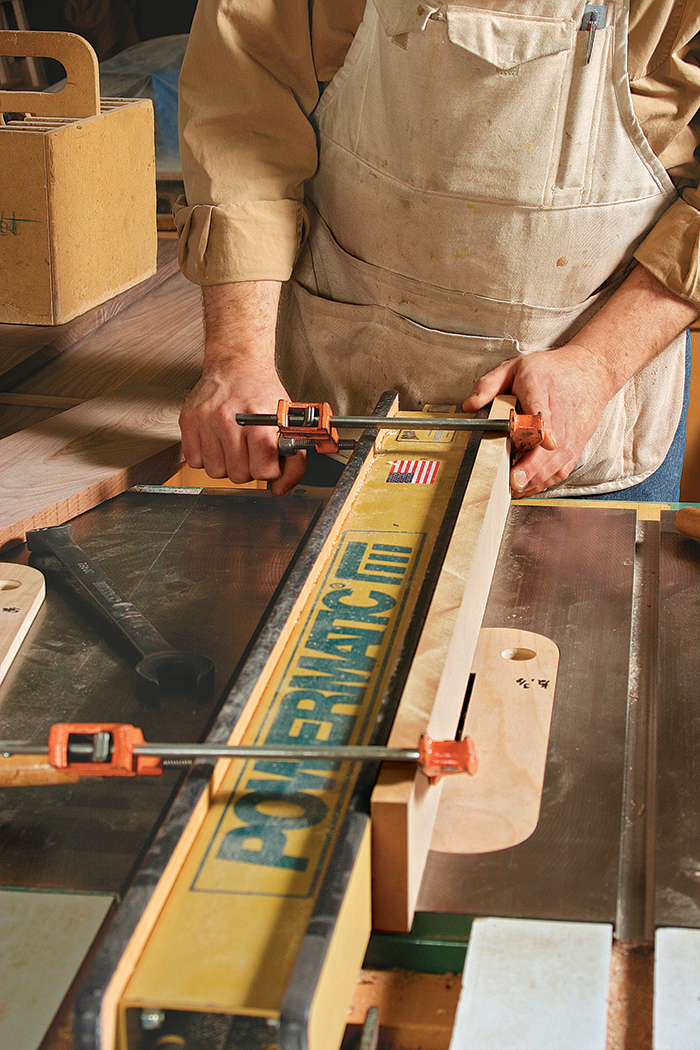
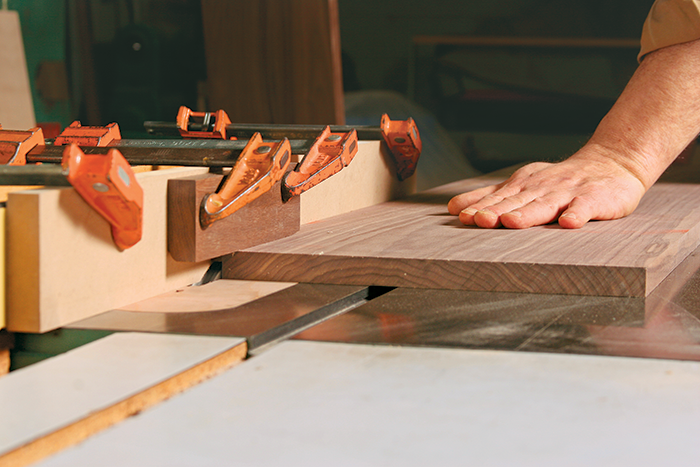
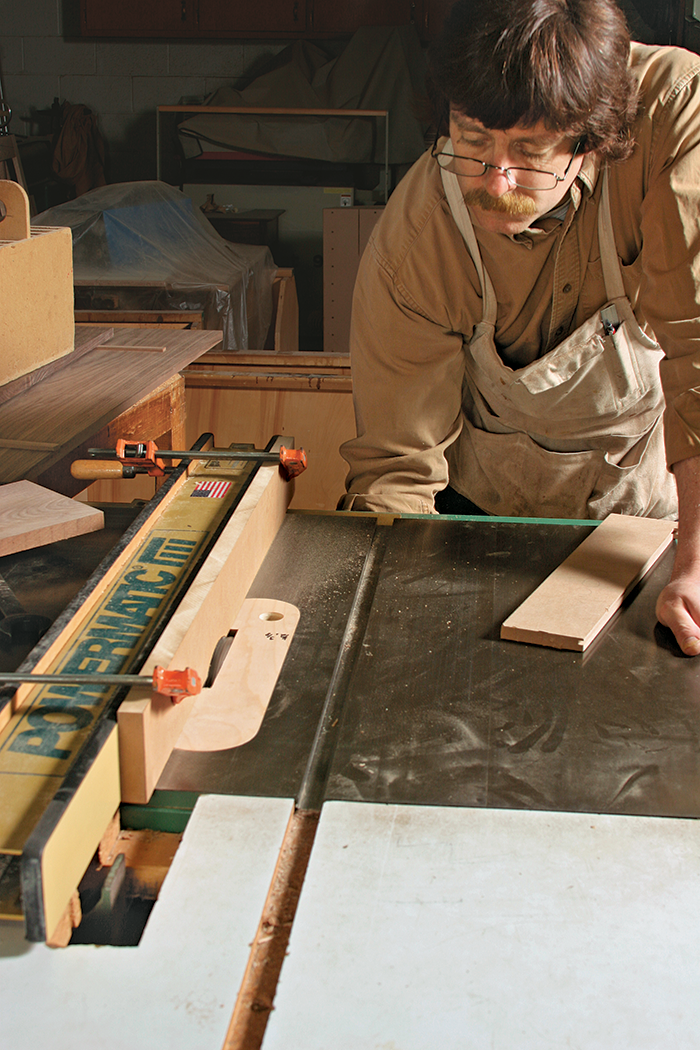
To cut a rabbet along the edge of a board or case back, the dado set always should be buried into an auxiliary fence mounted to the main rip fence.
Never try to rabbet an edge with the dado set mounted away from the fence and the opposite edge of the stock riding the fence. Why? Running the stock this way means you have an open cutterhead spinning along the stock edge. This is extremely dangerous! Should your hand make contact, it will be disastrous. Also, dust from the cutting action will be sprayed all over the surface of the saw, rather than landing in the base where it belongs.
In contrast, cutting rabbets against a sacrificial fence buries the cutter in the work and keeps hands at a safe distance. Also, stock that drifts away from the fence doesn’t get ruined, and you can rabbet workpieces of different widths without resetting the fence.
To make a sacrificial fence, use a 3-in.-wide piece of 3⁄4-in. MDF, about the full length of the rip fence. If the material is bowed slightly, clamp it so that it flattens out against the fence. Use a stack of dado blades wider than the rabbet you plan to cut. If you’re running a 3⁄8-in. rabbet, for instance, mount a 1⁄2-in. stack and bury at least 1⁄4 in. of it into the MDF to create the opening in the sacrificial fence.
To create the opening, first lower the dado set all the way. With a properly sized throat plate, there isn’t any guesswork as to where the head is, so move the auxiliary fence to straddle the opening. Turn on the saw and slowly raise the dado set to the desired height. Check the height by running a piece of practice stock and measuring. Once you’ve found the desired height, move the fence to set the width.
Whenever possible, clamp a piece of stock over the cutterhead to eliminate the possibility of a hand making contact with the head. Set the block to ride the top of the stock, but not too snugly. You don’t want to fight it when making your cuts.
If you can’t use a hold-down block, use a long push stick with a notched end. This holds the stock flat on the table, gives control, and keeps hands away from the cutter. Rabbeting narrow workpieces are dangerous. It’s much better to rabbet wider stock first and then rip it to final width.
Frame and panel made easy
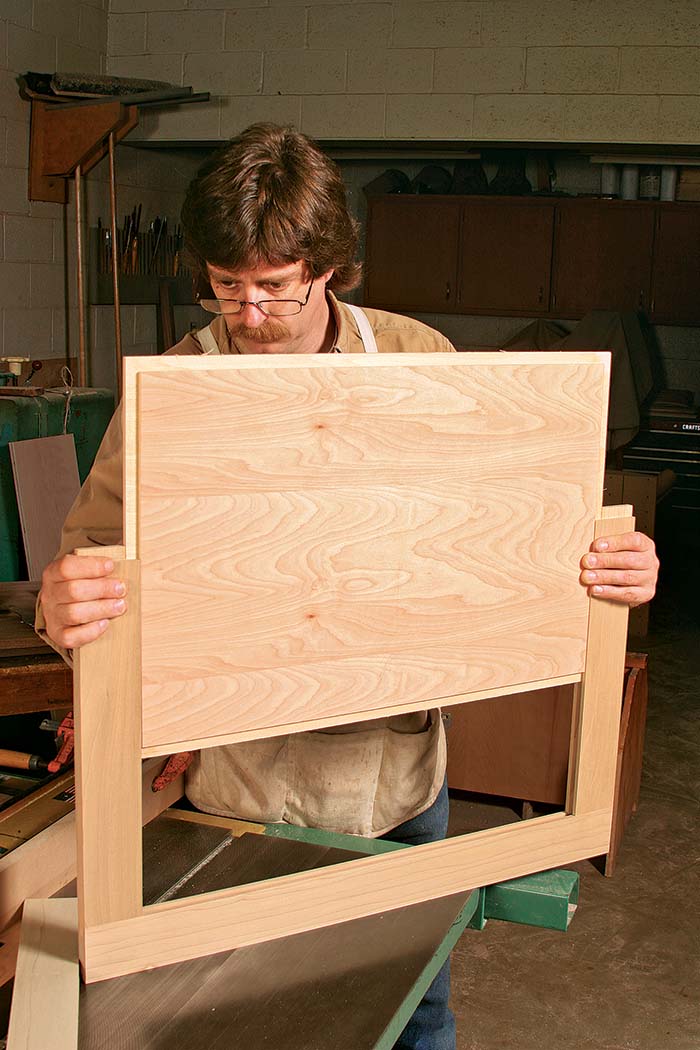
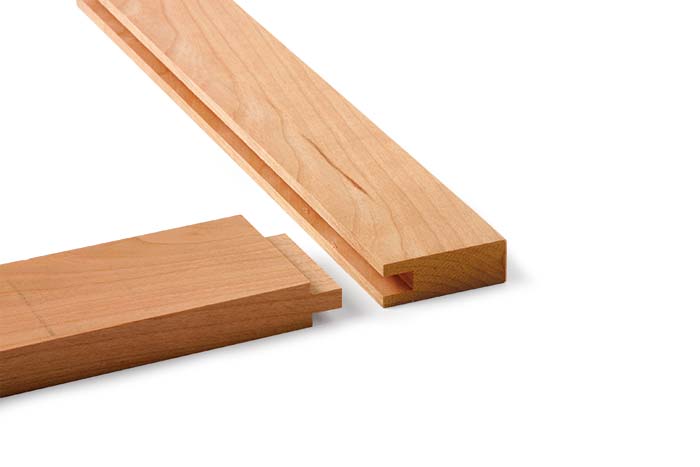
One very satisfying way to use a dado set is in creating a quick frame-and-panel assembly. With a floating, solid-wood panel, this assembly works well for lightweight doors, dust panels, and other light-duty applications. With a plywood panel glued in, the assembly will be strong enough for the most demanding situations.
A couple of different setups will let you make all of the cuts for the stub-tenon joinery. As one example, consider a frame of 3⁄4-in.-thick by 2-in.-wide stock combined with a 3⁄8-in.-thick panel. To make the frame, cut a groove, 1⁄4 in. wide by 1⁄2 in. deep, centered into the edge of the frame members. This can be done before or after the stiles and rails are cut to length. For efficiency and accuracy, it is very important that the groove is centered.
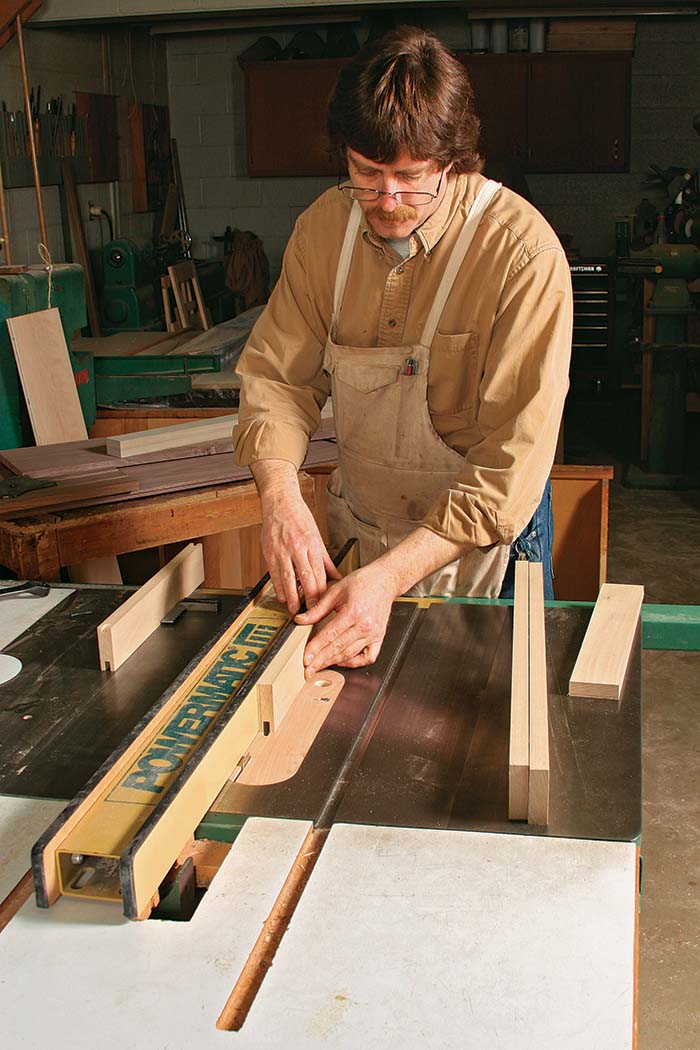
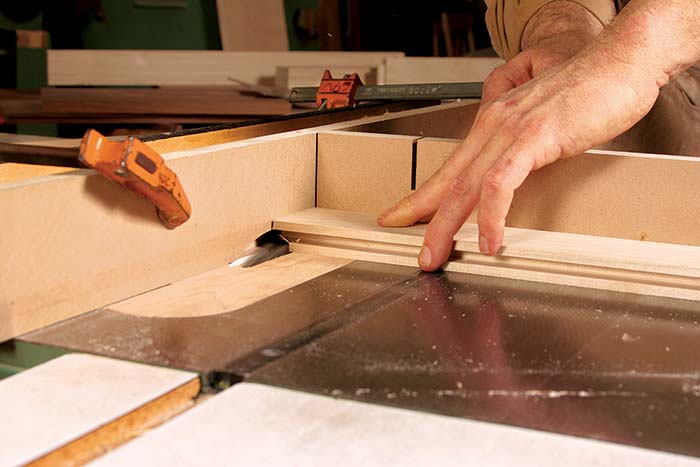
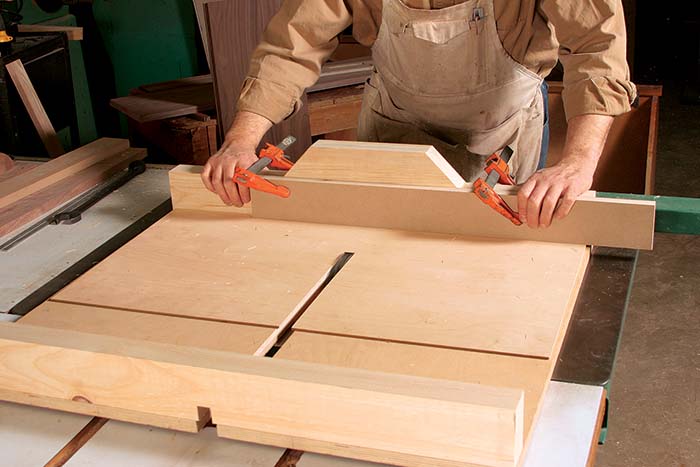
To cut the tenons on the ends of the rails, bury a 5⁄8-in. dado set into a sacrificial fence so that a little less than 1⁄2 in. is exposed. The tenons need to be a little shorter than the depth of the groove to allow for machining glitches and glue. Mount an auxiliary fence to a miter gauge so that it is just about rubbing on the sacrificial fence. Using some practice stock of the same thickness, make opposing shoulder cuts by pushing the stock through with the miter gauge until a snug-fitting tenon remains in the center. Tenon the rails. Dry-fit the frame and get the panel size by measuring groove bottom to groove bottom in both directions. Cut the panel to size, and rabbet it to fit the groove.
Grooves
For grooves, stock rides the fence
Dadoes
A sled for clean, safe dadoes
Large panel, large push stick
For applying firm downward pressure over a large area, Latta uses this push paddle. The rear cleat hooks over the back edge of the workpiece to help him push it forward.

Rabbets
If you bury the dado set in an auxiliary fence, any hitches while cutting a rabbet won’t cause kickback or mar the work. 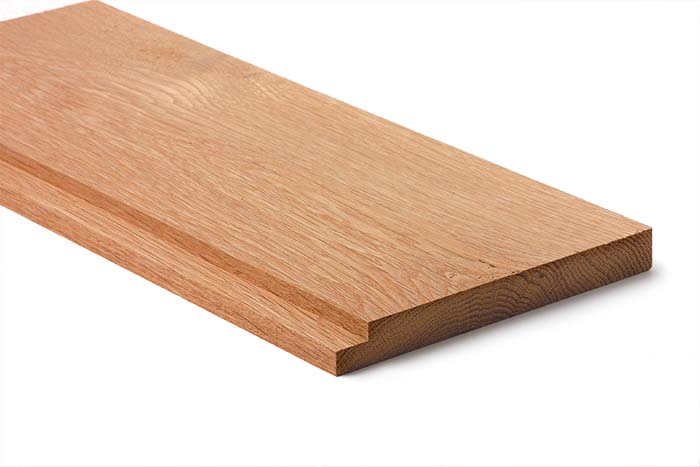
Use a sacrificial fence
Stub tenons
A quick frame and panel
 |
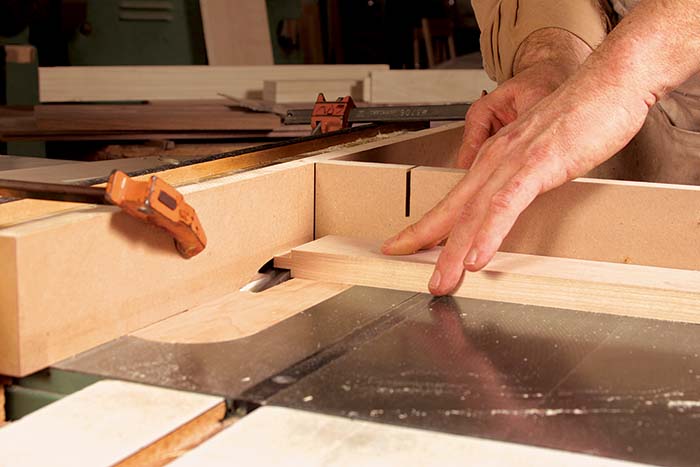 |
Cut the stub tenons with a rabbeting setup. Use a miter gauge with an auxiliary fence to bring the work to the cutter. This is one time you can use the miter gauge and rip fence at the same time.
Make an array of throat plates
Just as it does with a regular sawblade, a zero-clearance insert enhances safety and helps eliminate tearout. A full inventory of inserts will include one with a full-width opening and others with openings in 1⁄8-in. increments, from 1/4 in. to 3/4 in. Latta makes his plates from 1/2-in. plywood.
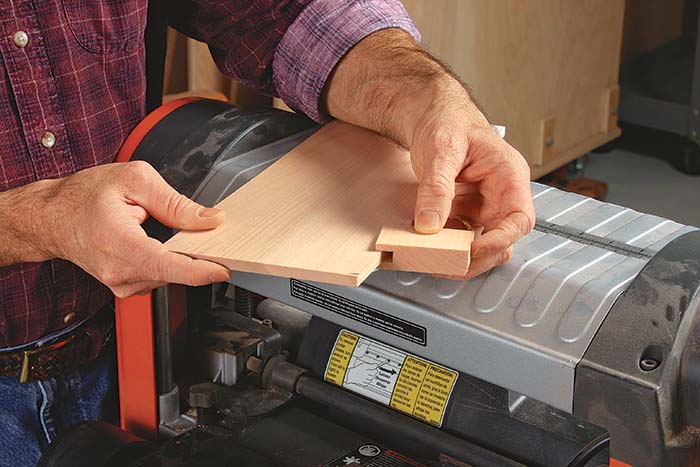
How to guarantee a great fit
In Solid wood
Mill the stock to fit the dado. One way of ensuring a snug dado in solid stock is to cut a test dado in a piece of scrap and use it to gauge the mating pieces as you mill them to final thickness.
In Plywood
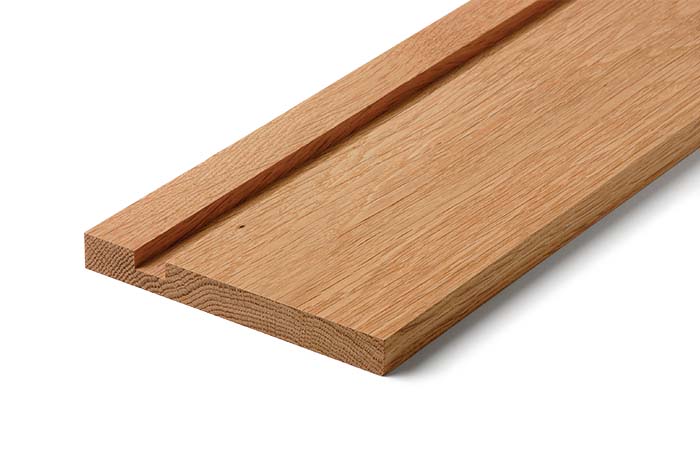
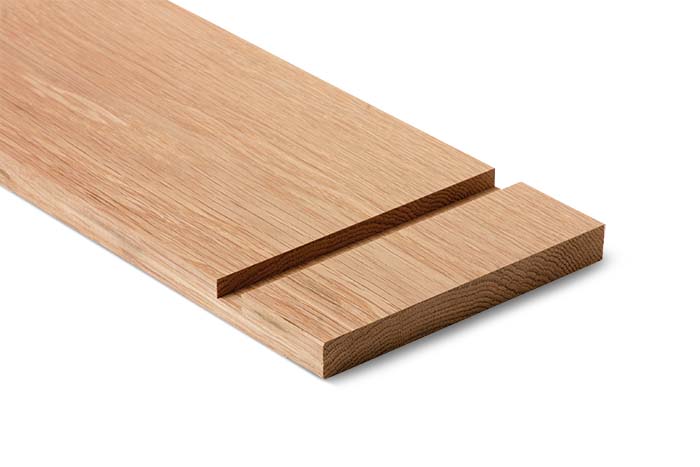
Plywood is typically thinner than its stated thickness, creating a loose fit in a standard-width dado. A simple and reliable path to a good fit is to cut a narrower dado and then rabbet the stock to fit. Orient shelves with the tongue on top.
For the full article, download the PDF below:
From Fine Woodworking #203
Fine Woodworking Recommended Products
Grizzly G0495X Industrial Helical Cutterhead 8-in. Jointer
Rockler Dust Right 650 CFM

Stanley Powerlock 16-ft. tape measure





Log in or create an account to post a comment.
Sign up Log in