How to Make Mitered Finger Joints
Master boxmaker Doug Stowe shows how to make a modified verion of the classic box joint, which combines strength and style with some extra design options.

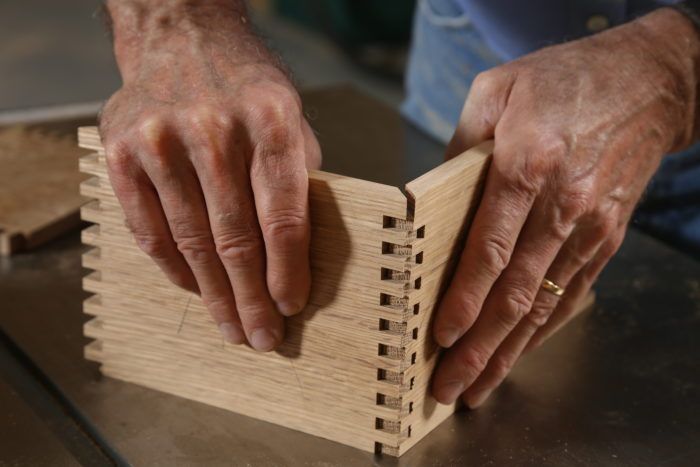
My article in Fine Woodworking #267, Simple Box-Joint Sled, explains how to make classic finger joints using a frills-free tablesaw sled. On boxes with this joint, the fingers run the length of the sides, which looks great but can limit design choices. That’s where mitered finger joints come in. These allow you to wrap the grain around the top of a box and even inlay decorative banding in the top edges before the sides are cut to length.
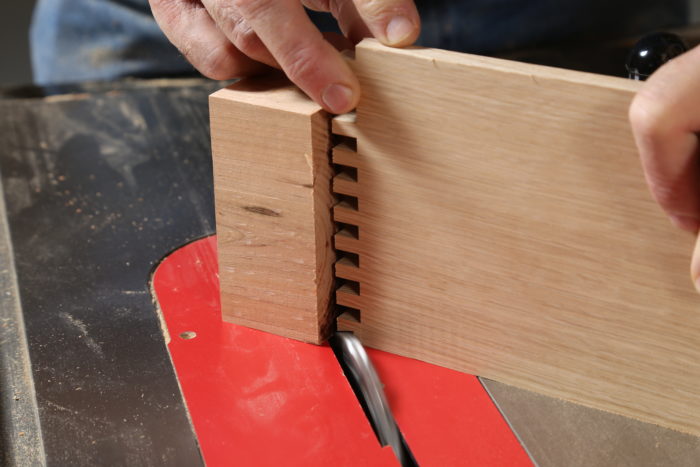
Making mitered finger joints is exactly like making classic finger joints—until you get to the top edges of the box. Using the sled from my article, begin by cutting the fingers on a board, but don’t form them all way across. You’ll want to stop earlier to leave enough material to miter. Remember to use the finger-jointed board as a spacer for later ones. The remaining, uncut fingers on two sides will be wider than those on the other two sides.

A miter gauge with definite, accurate 45-degree stops, which lets me go quickly from one side to the other with ease. Because the cut here is very small, the miter gauge and a stop offer sufficient accuracy; a dedicated sled isn’t necessary.
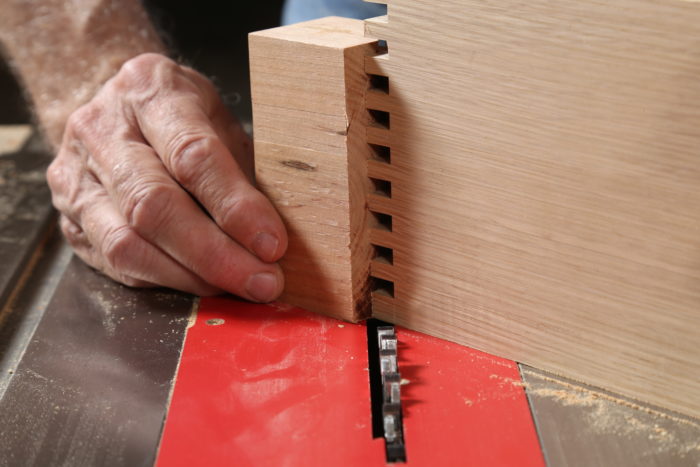
Set the miter gauge to 45 degrees and adjust the height of the tablesaw blade to cut through the narrower finger.

Next, use a marking gauge to delineate the inside shoulder of the fingers to help set up the stop. This will help you set up the stop—I use a hook fence—for the miters.
Now clamp a stop or hook fence to the miter gauge, adjusting it so the blade will trim the narrow finger without cutting beyond the fingers’ baseline.


I make the cut in two steps, with the first while holding the stock slightly short of the stop block. This is to prevent trapping material that could catch and jam against the stop.

When these cuts have been made on all four parts (the ends and front and back), you’re halfway there. Reverse the angle of the miter gauge, move it to the other miter slot, and reverse the position of the stop block. Again, use a marking gauge to form a line across the baselines of the fingers. Align this with the blade, and adjust the stop block to make the final cuts.

To glue this joint, I apply a bit to the inside edges of the fingers—where the parts slide together—so the parts distribute the glue as they slide together. I often find clamps unnecessary with will-cut finger joints, but if you do end up applying some clamping pressure, be sure to apply it close to the joints and not at the middle of the box, where it will flex and distort box sides.
From Fine Woodworking #267
More on FineWoodworking.com:
Fine Woodworking Recommended Products

Marking knife: Hock Double-Bevel Violin Knife, 3/4 in.

Leigh D4R Pro

Festool DF 500 Q-Set Domino Joiner


Comments
My favorite part of this article was when you never showed us the finished product.
I'd have to agree with WoodenC. Your first pic is little shy of a finished product. & it may be just me but on the whole, the instructions did not convey clearly. It's a great joint but I guess I need it broken down a touch more and maybe a clearer pic of the unjoined, but fully cut ends. Probably be clear once I do it.
Log in or create an account to post a comment.
Sign up Log in