A Dovetail Box with Wooden Hinges, Part 1
Practice your dovetail skills while you build this beautiful box.
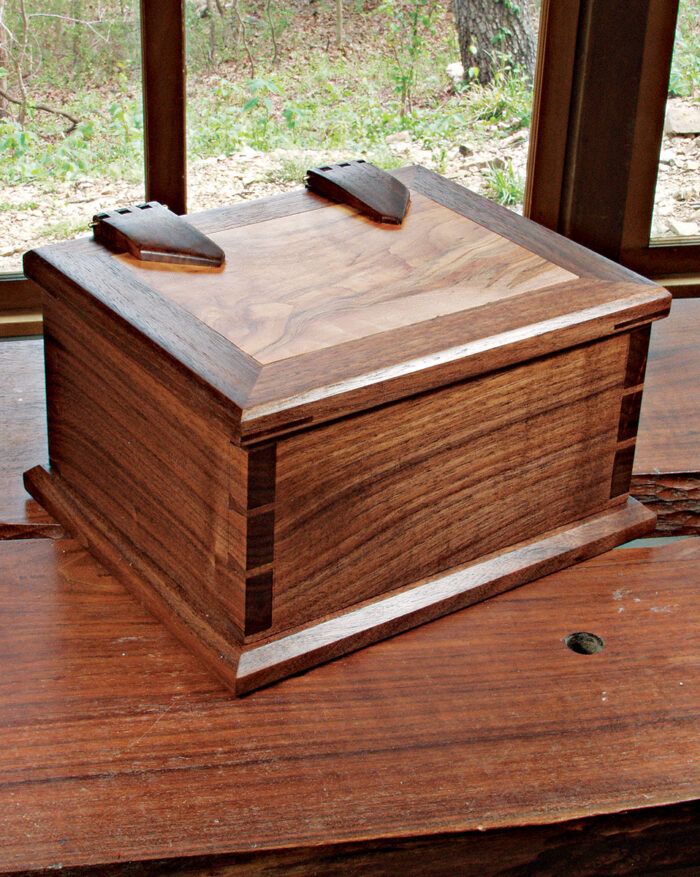
By tradition, dovetails are associated with only the finest craftsmanship. For many, cutting dovetails by hand is a woodworker’s rite of passage. Putting such egotistic notions aside, there is, in fact, a great deal of satisfaction in the quiet work of using traditional tools and techniques to gradually master a skill. From a practical standpoint, dovetails are an effective way to hold the parts of a box together and their presence is a sure sign of the time and attention of careful hands. Even if your dovetails are less than perfect, they will serve as evidence of your growth as a craftsman.
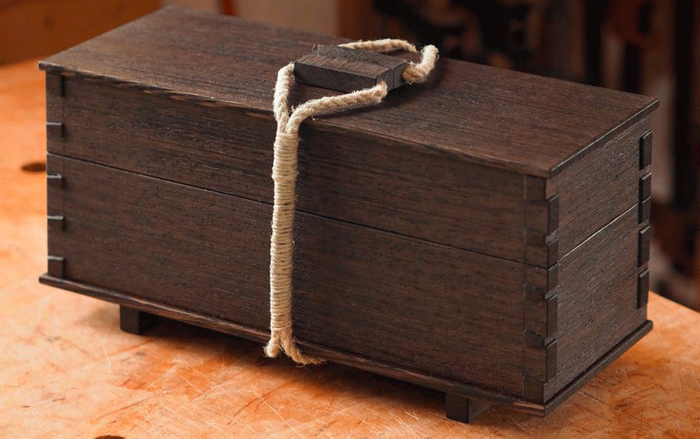
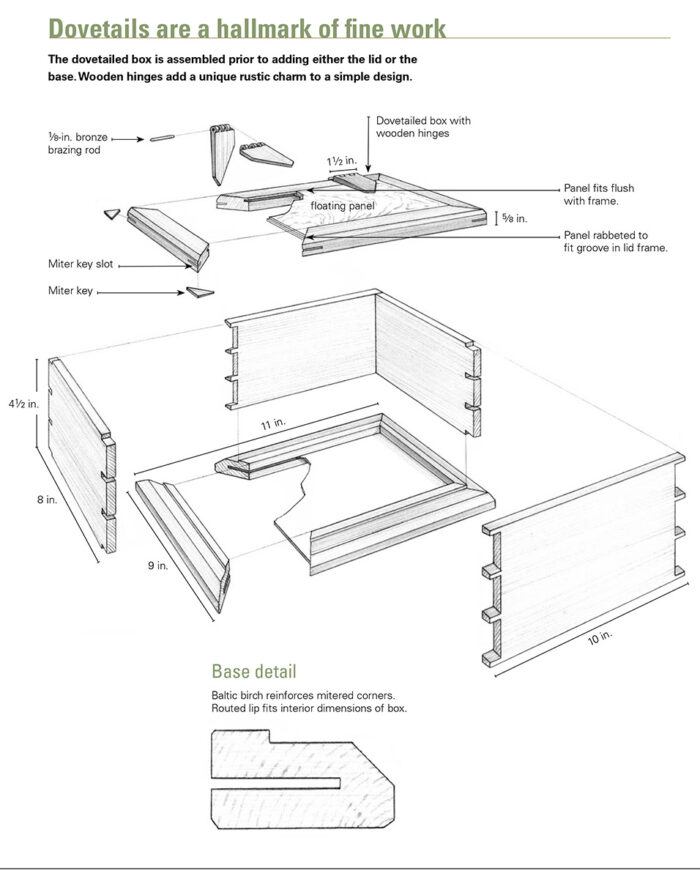
The oversize wooden hinges used in this box were inspired by the work of a British box maker, Peter Lloyd, whose rustic boxes are beautiful and engaging. They are fairly simple to make using a drill press, router table, and box-joint jig. This is the first article on how to make this box. The second article will show you how to assemble the box and make the hinges.
|
|
 |
Cutting Dovetails Starts with Tails
Once your stock is milled to thickness and cut to size, you’re ready to start cutting dovetails. I use very simple tools for cutting dovetails: a marking gauge, a sliding T-bevel, a machinist square, a Japanese dozuki saw, and a few chisels. My own dovetails are never perfect, but with a bit of cleanup and an occasional sliver of thin wood to fill unwanted gaps, they result in a handsome box.
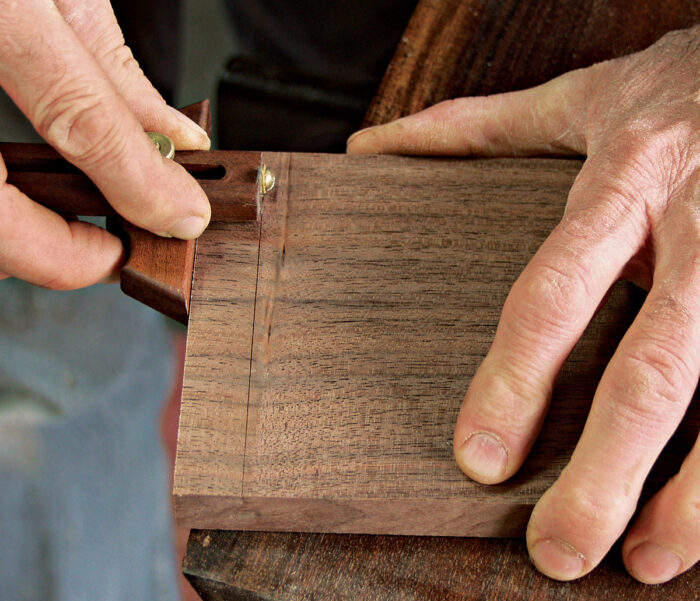
- Set the marking gauge about 1/32 in. wider than the thickness of the stock. Hold the marking gauge tight against the end of the stock, then pull it toward you to mark both sides of each end on all four box sides. A
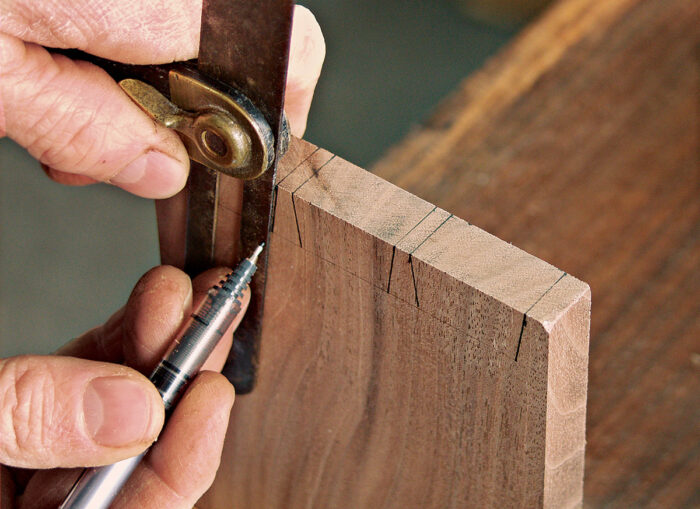
- In laying out the arrangement of the dovetails, there are both practical and aesthetic considerations. The space between the dovetails needs to be wide enough for your chisels to fit. Too tight a space leads to more work and a sloppy fit. On the other hand, a wide space between the pins is a look associated with dovetails cut by router jigs. On this box and many others I make, I laid out the dovetails with 3/16 in. of space between them (when measured at the outside corners). This allows a 1/4-in. chisel to be used to finish the cut. Lay your dovetails out in an even pattern. I chose to do three dovetails per side, with a 1/4-in.-wide half pin at the top and bottom of each side. Measure the location for your dovetails and then use a sliding T-bevel and pencil to mark the tails on one of the ends. I place the tails on the ends of the box and the pins on the front and back. B
- Transfer your markings from the first marked end to the others. This is faster and less confusing than measuring the tail locations on each ends of both pieces. C
- Use a square and a pencil or pen to mark the cut lines for each dovetail on the end of the stock. D
- Cut along the marked lines, stopping at the marking-gauge lines on the front and back of the stock. Begin by cutting with the saw angled in toward the marking-gauge line facing you. Then gradually change the angle of the saw until it is level and the cut reaches the marking-gauge lines on the back of the stock. E
- Use a chisel to remove the waste from between the sawcuts. To keep the edges of the stock crisp, your first cuts should be made slightly shy of the marking-gauge line. When the bulk of the material has been removed from between the tails, place the chisel in the line and give it a few taps to finish the cut. Chisel in from each face of the board, meeting in the middle of the stock. F
A
 |
B
 |
C
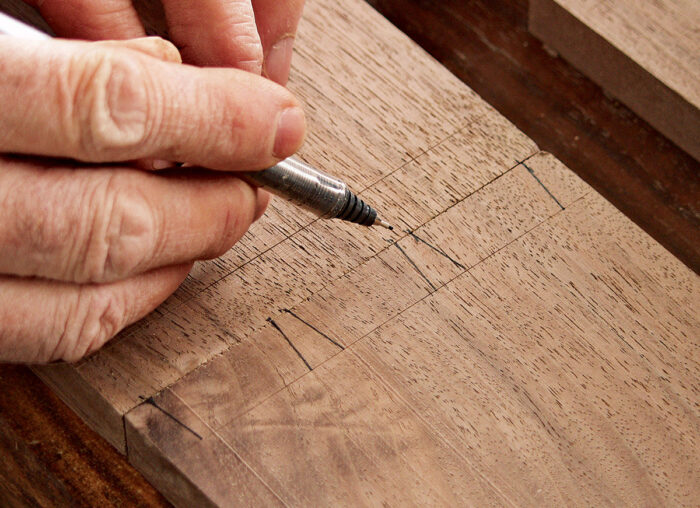 |
D
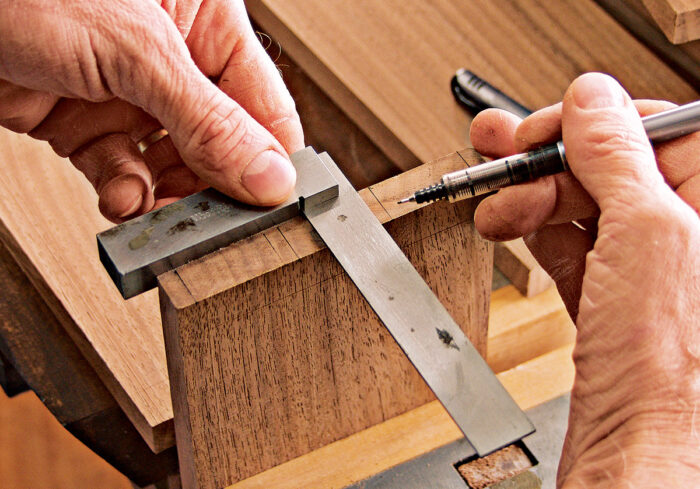 |
E
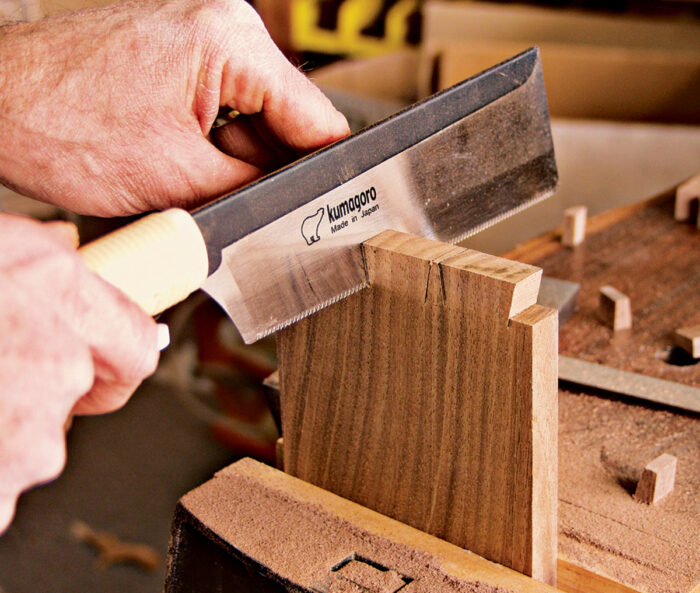 |
F
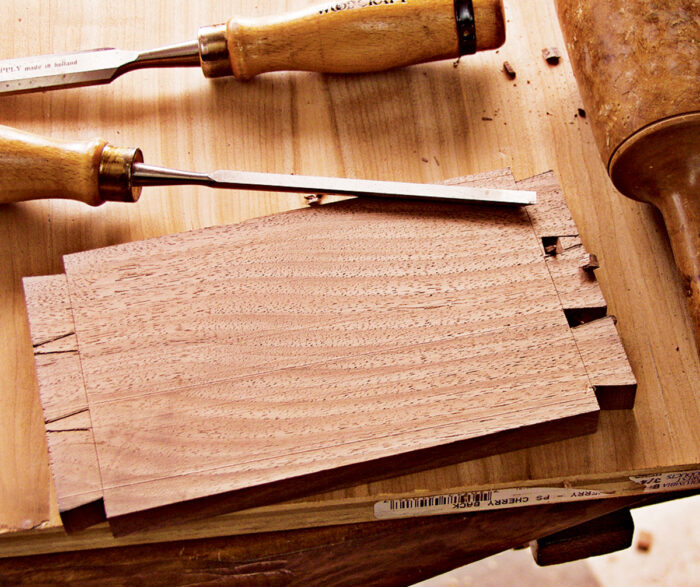 |
Mark and cut the pins
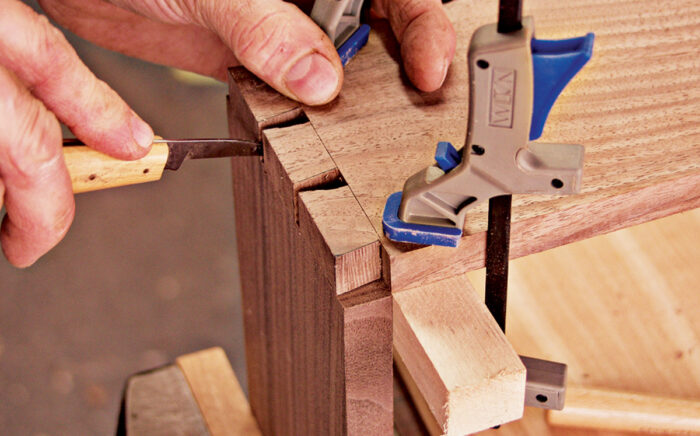
- Marking the shape of the tails onto the mating pin boards is more accurate if you use a marking knife. Clamp a piece of wood along the marking-gauge line to help hold the dovetailed stock in place. A
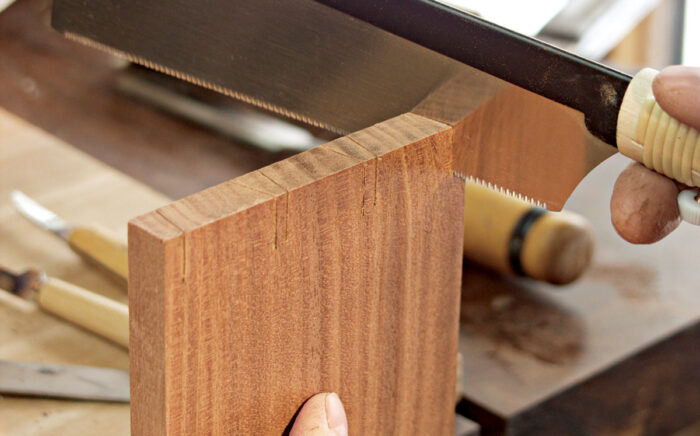
- Cut along the lines to form the pins, stopping at the marking-gauge lines on the front and back. B
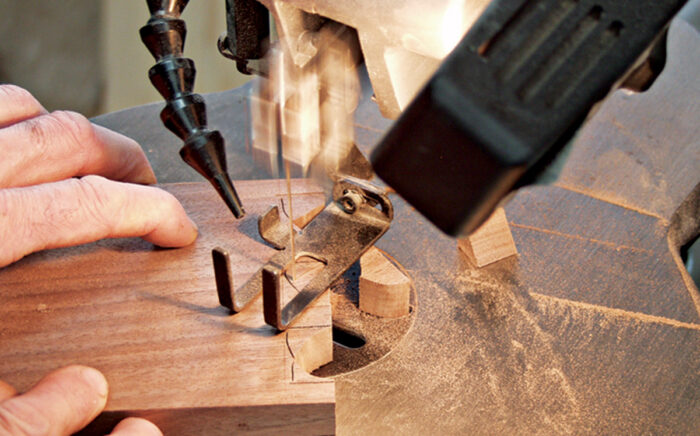
- Use a scrollsaw or coping saw to remove the waste between the pins. This speeds your work without sacrificing the look of the hand-cut joints. C
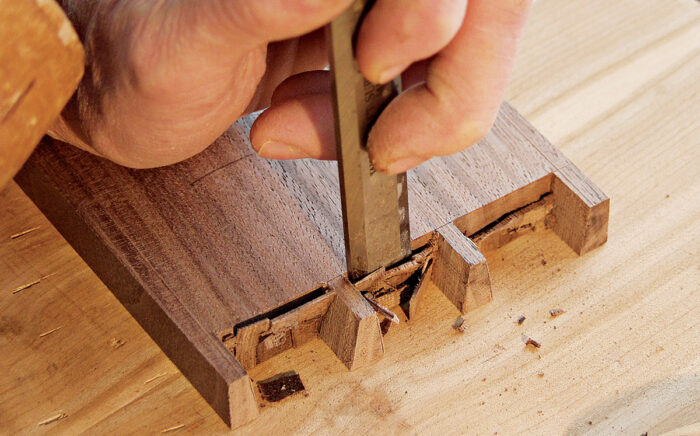
- Place your chisel in the marking-gauge line and chisel down toward the center of the stock. I angle the chisel slightly greater than 90 degrees, cutting in toward the stock. Once you’ve chiseled to the center of the stock, flip the board over and finish chiseling from the other side. D
A
 |
B
 |
C
 |
D
 |
Assemble the Box
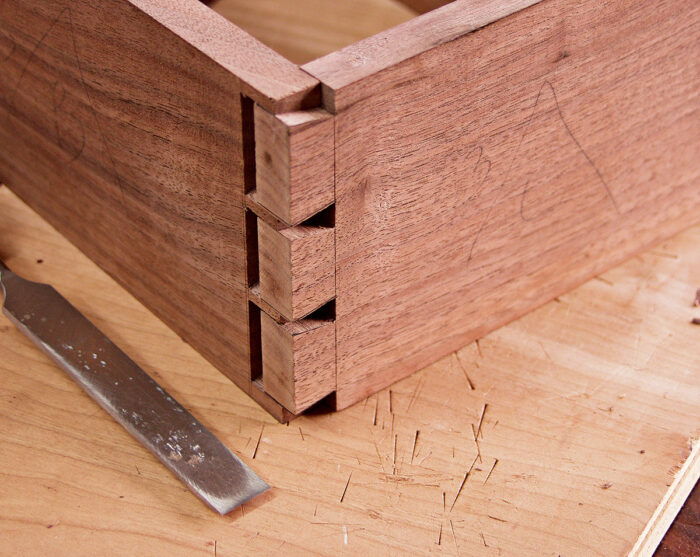
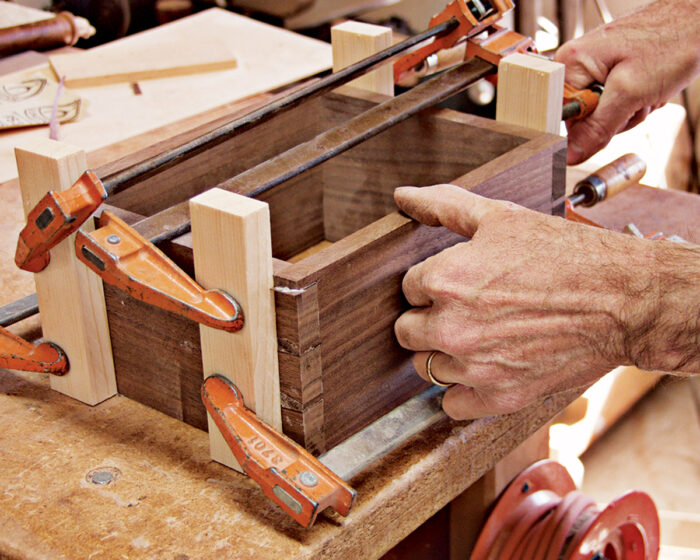
Before assembling the box, dry-fit all the dovetails, making certain there aren’t any obstructions and that each corner comes together in a good fit. A You’ll also want to sand all the inside surfaces of the box sides. Once you’re ready to assemble the box, be sure to have your clamps at hand before any glue is applied. To avoid leaving clamp marks on the sides of the box, have blocks of scrapwood ready to use as clamping pads. Spread a thin layer of glue on the surfaces of both the pins and the tails and then push the parts together. Use clamps to apply pressure and hold the parts together as the glue sets. As you can see in photo B, my box had a slight miscut in the dovetails, so I glued in a sliver of walnut to strengthen the joinery. Small repairs like this will be unnoticed in the finished box.
A
 |
B
 |
 Excerpted from Doug Stowe’s book, Basic Box Making.
Browse the Taunton Store for more books and plans for making boxes.
Fine Woodworking Recommended Products
Freud Super Dado Saw Blade Set 8" x 5/8" Bore

Olfa Knife

Starrett 4" Double Square



Comments
Inspired by Peter Lloyd's work, I have made many boxes such as these. They are great projects and VERY popular with gallery customers.
Log in or create an account to post a comment.
Sign up Log in