Tuning Your Drill Press
How to find and eliminate vibration, play and wobble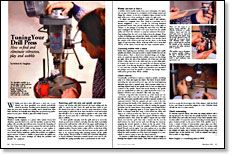
Synopsis: Robert M. Vaughan, who restores old tools for a living, talks about three things that can prevent top performance in a drill press: vibration, play, and wobble (runout). He explains how to take out vibration, which will involve some belt and pulley evaluation. He explains how to remove quill side play and spindle end play, how to find wobble and correct it, and how to remove and remount the chuck.
Whether you buy a new drill press, a used one or you inherit one from granddad, you should periodically check its precision. Provided you’ve chucked in a straight, sharp bit, your press should run steadily, and it should bore clean holes. But there are basically three things that can prevent top performance in your press: vibration, play and wobble (runout).
Taking out vibration
Vibration usually originates at a press’s drive system. If you feel vibration, open the head cover, turn the machine on and see if the pulleys idle smoothly and without noise, beyond the humming of the belt. If they don’t, kill the power, remove the belt and check its condition. If the belt is brittle or has bumps or cuts, replace it. Next, hand spin the pulleys to see if they have any cracks or are out of round. Before replacing a pulley that wobbles, try retightening its setscrew. If there’s a rumble or growl when the pulleys are spinning, dirty or worn bearings are likely the problem and should be replaced.
Removing quill side play and spindle end play
A press can develop side play between the head casting and the quill. To check for this, lower the quill and then shake it (not the chuck) from side to side to see how much slack there is. If the head casting is split at the front, there should be a bolt and locknut that will allow you to snug the halves together to take some of the play out. If your press has a solid head, then a remedy for side play is unlikely.
To check spindle end play, lock the quill, and try to move the chuck up and down. If there’s end play, then the slack is probably between the quill and the collar above the upper quill bearing. To fix this, loosen the collar’s setscrew, and slide the collar back to its original position. If you’re lucky, a plate will be on the front of the head to access the collar. If not, the feed lever and the pinion will have to be removed along with releasing tension off the quill’s return spring. This procedure is tricky and somewhat dangerous, so if your machine’s instruction manual doesn’t cover how to disassemble the spring assembly, have a professional do the work.
From Fine Woodworking #94
For the full article, download the PDF below:
Fine Woodworking Recommended Products
Freud Super Dado Saw Blade Set 8" x 5/8" Bore

Starrett 12-in. combination square






Log in or create an account to post a comment.
Sign up Log in