Safer table saw methods for tricky cuts
Is your workpiece trapped between the fence and the blade? If it is, does it have to be?Some table-saw operations are inherently dangerous. If you’ve worked with table saws, watched YouTube videos about them, or taken a woodworking class, you might be aware of these. The foundation of table-saw safety is having a complete understanding of all of the possibilities involved with any and all cuts you make.
The real danger lies in the gray area between things we know are dangerous and things that are absolutely safe. Unless you have a true understanding of what’s going on with the saw, you might think something is totally safe—and you might be able to get away with that task for 10, 20, or 30 cuts. But when things go wrong, they can go wrong quickly.
The main point is that you need a realistic assessment of the risks at every step when you’re using the table saw.
Question the cut
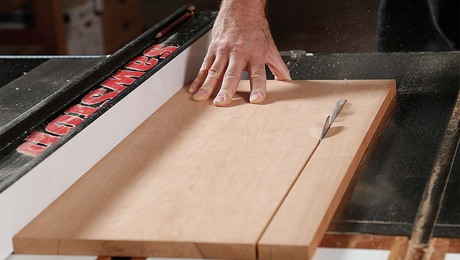
The primary question to ask is this: Is my workpiece trapped between the fence and the blade during this cut? If the answer is yes, then another question follows: Does it have to be? For something like a simple rip cut, the answer is usually yes. It’s a basic process, but it involves many moving parts, such as footwork, hand placement, and pressure. The key is controlling the workpiece through the cut, and that’s where push sticks and push pads come into play.
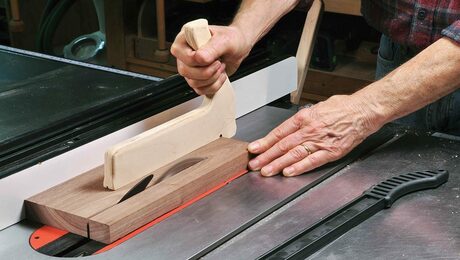
For narrow cuts, I recommend using a push stick. Avoid the small bird’s-mouth push stick that comes with every table saw. It’s not effective. You need to control the workpiece through the cut. A good push stick allows you to apply rotational force to keep the stock against the fence.
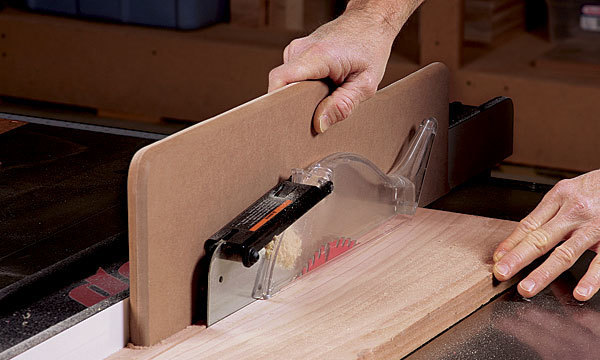
A paddle-style push stick with a long reference surface is ideal. Marc Adams has a design I really like. It has a recess to keep your hand forward of the hook, giving you better control.
Short, wide pieces have an even greater tendency toward kickback. A lot of people think that the heart of table-saw safety is keeping their hands far away from the blade. The problem is that as you’re pushing the stock through, it can lift up and spin around, pulling your hand into the blade very quickly before you can react.
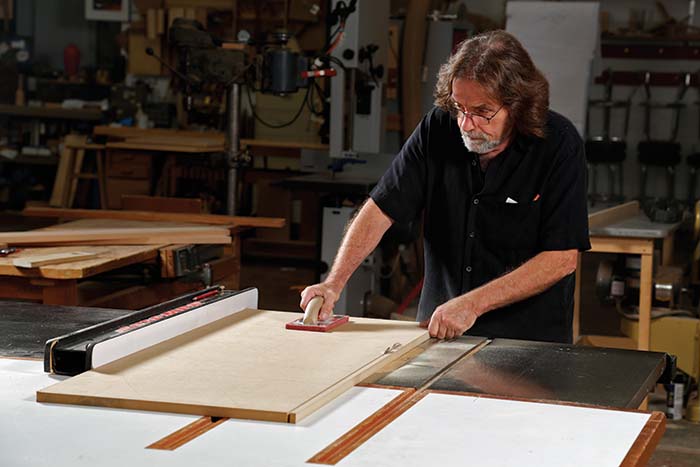
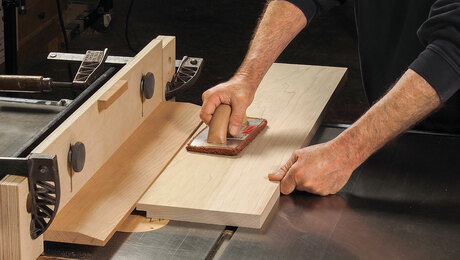
Kickback is a huge problem, which is why I like using a push pad. Push pads available for purchase often have small, slippery pads. I prefer using the rubber pad from a grout float. You can either use the float itself or attach the pad to a handle. This setup provides a good nonslip surface, allows you to apply rotational pressure, and keeps your hand above the blade, ensuring safety. This is a safe and effective way to manage your cuts.
A safer way to cut rabbets
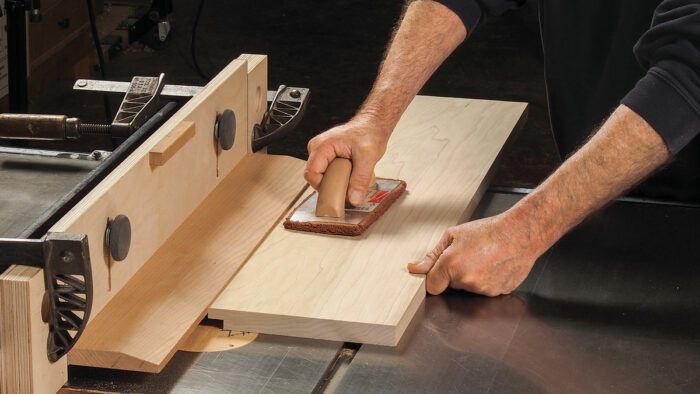
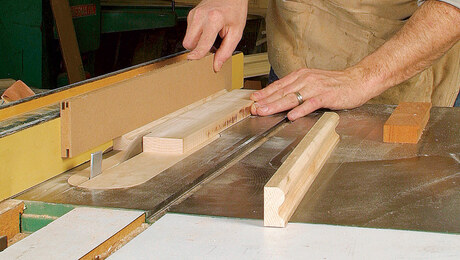
Now let’s discuss cutting a rabbet on the edge of a board. A common method is using a dado blade, but this can trap the workpiece between the inside of the dado set and the rip fence. This can lead to the workpiece coming away from the fence and into the blade, causing kickback. Instead, you can use an L-fence or a sacrificial fence. These tools support the workpiece and avoid trapping it, making the cut safer and cleaner.
Cutting octagons safely on the table saw
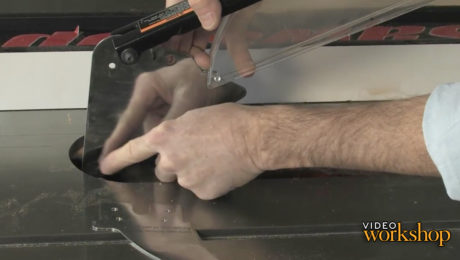
Similarly, when cutting the corners of an octagon or raising a panel, it’s crucial to avoid trapping the workpiece. Using an L-fence on the opposite side of the blade can prevent dangerous situations and ensure a safer operation.
In summary, always ask yourself if the workpiece is trapped between the blade and the fence. If it is, find a way to avoid it. Understanding these principles will help you work more safely and effectively. Good luck!




Comments
I'm all about it!! Great information. I wish I had seen this video sooner. I recently had to cut long octagon stock on the table saw, and know the dangers of controlling the piece after the reference faces where reduced by the previous cuts. I setup an elaborate set of feather boards on table and the a high fence jig, but just using an L fence and cutting on the piece with the fence on the left side of the blade would have been easier, quicker and more safe. Hopefully this video is appreciated by woodworker's phalanges everywhere.
All well and good, but when you have a tablesaw like the Laguna, it’s not possible to move the fence to the left of the blade for the Octagon blanks or bevel cuts.
When it comes down to it I rely on,
“Slow is smooth, smooth is good”, unless you’re a tradie enjoy your wood butchering, take your time.
I agree with the ideas in the article- I have a problem with the wording.
The workpiece is what NEEDS to be between the fence and the blade. Whether it is trapped or not is something of the point being made- that is, can you safely control the piece.
The problem I have with the wording goes to what I've seen people do, sometimes relatively experienced people (a few years in the trades). There's an all-too-common practice of wanting the offcut to be the piece that's being used. I've watched people move the fence repeatedly because they're trying to rip 1/4" pieces, and they think that the offcut (the piece on the other side of the blade from the fence) is the one they should keep. This is almost always false.
What you want to do is to keep the offcut from being trapped between the fence and the blade, and you want to keep the workpiece controlled.
The L fence is a variation of the sacraficial fence. That is, a board you can cut into with the blade. The dado method Marc shows is a good one. Another is cutting miters against the fence with the blade buried into a sacrificial fence, rather than angling the blade and cutting the miter far from the fence- this is a method that often creates burned edges, rough cuts, bows, and can grab a board and tear it out of your hands.
A better method is to rip the board to size, then install a sacrificial fence about 1/8" below the thickness of the board you're going to cut. place the board you want to miter on the table, push against the fence, and mark line. Then set the saw to the miter angle, estimate where it should be to cut just under the line you've marked, turn the blade on and raise the blade until it cuts into the fence. You'll likely have to tap the fence closer or farther to the blade to get it perfect. It should be cutting right on or a few thousandths below the line. Set the blade so it's cutting about 1/4" into the fence (I raise it, then lower it so the blade isn't running against the fence and heating up).
At that point you simply push the edge of the board you want mitered through the fence- the offcut falls off but isn't trapped between the blade and fence, but it is in the area. A kickback of that offcut is unlikely, but still possible so you don't want to stand behind it. The piece itself is highly unlikely to kick back, and even if it does, the piece won't be damaged and most of the blade is safely covered. If you can add a featherboard, the blade is entirely covered.
The benefit is that the cut will be perfect, you can put pressure on the piece right where the blade is, something you can't do if the miter is away from the fence.
Again- the point is controlling the workpiece and avoiding or minimizing kickback. But 9,999 times out of 10,000 the workpiece IS trapped between the fence and the blade AND that is the safest place for the workpiece to be.
Great video. Thank you for this. I have been using an L-fence thanks to Bob Van Dyke's article but not for some of the uses you have shown. However, I am confused by the technique for a beveled edge, the last in the video. Mike puts a piece of plywood against the fence and holds it by hand, which would seem like it could fall into the blade. The video then cuts to a completely different jig setup and that piece of plywood is nowhere to be seen. I don't understand how this technique works.
“[Deleted]”
Great video Mike. Trying not to trap the workpiece between the fence and the blade is a good rule to remember.
I would argue that keeping the blade guard on is important too. It can help keep your hand away from the blade in the event of a kickback or slip of your hand off of the push stick. I have seen it save someone's fingers.
I need to make a half-inch dado about 3/4 inch deep in the center of the small side of a 7 foot 2x6. It looks to me like a classic "trapped workpiece between blade and fence" problem. Is there some way to do this safely on my table saw? I could add a tall auxiliary fence to the existing one, which might make the job more stable, but it doesn't solve the basic problem. Any ideas? I have hardly used my dado set before.
Good stuff here. Hopefully it will prevent injuries. It is just the title that gets me. Makes it sound a bit cultish.
Log in or create an account to post a comment.
Sign up Log in