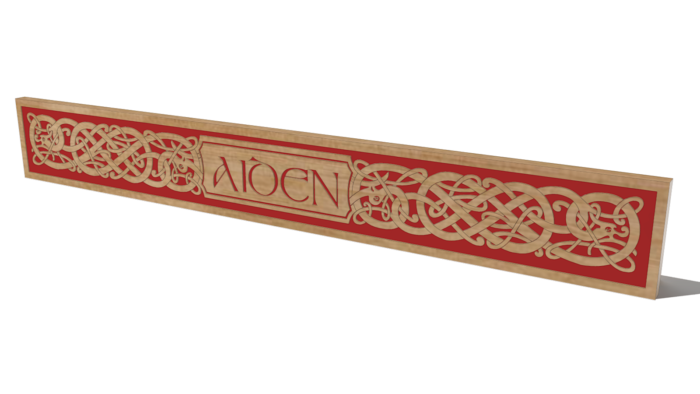
A friend of mine called me the other day to tell me he’s a new grandpa. He wants to carve a name board for the new cherub but he wanted to see it in SketchUp first. He had an image of a Celtic dragon banner to work from. One option would be to follow the method Tim Killen showed in his recent Design. Click. Build. entry. I opted for a different workflow for this, though. Here’s how I went about it using a plugin called BMP Tracer to do the heavy lifting.
I started with the artwork which Aiden’s grandpa sent me. It was a JPG image he’d found as a free download but you could make your own. The image needs to be black and white so this method wouldn’t work well using an image such as the one Tim was working from in his blog post. I opened the image in an image editor to make a few tweaks. I made the border around the outside larger and made sure there was at least two pixels between the smaller details. The plugin’s tolerance requires the 2 pixels. The plugin also requires that there be only black or white pixels. In the case of the image I was sent, there were some gray pixels but I fixed that by cranking the contrast up all the way to high. Then I saved the file as .bmp. It looks like this.

The next steps take place in SketchUp. Open a new session and find BMP Tracer in the Extensions menu. A dialog window will open. This first one doesn’t need any inputs for this so just click OK. See below if you need help installing this extension.
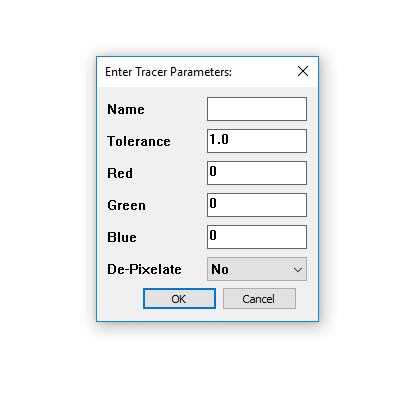
Navigate to where you saved the BMP file and click Open. The plugin will process the image automatically. Depending on the size of the image and its complexity this might take a few seconds and it might look like nothing is happening. Look at the cursor. You know the process is complete when it changes back to the last tool you had when you activated the plugin. If you don’t see anything on screen, don’t panic. Hit Zoom Extents from the Camera menu or Camera toolbar. The plugin creates the geometry at 1 inch per pixel. My BMP image is 3200 pixels wide and the resulting geometry made from the white areas is about 2900 inches long.
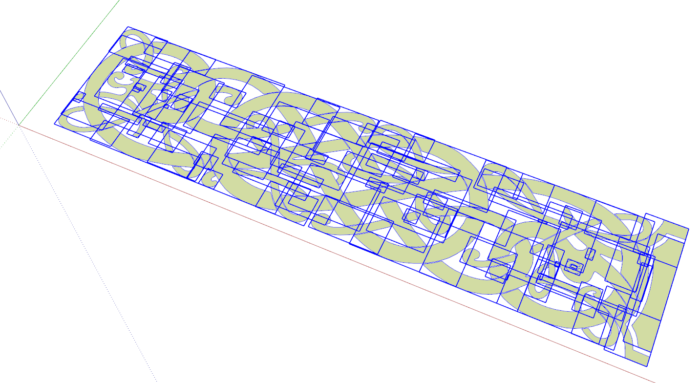
As you can see in the screen shot, each distinct white region in the BMP is made into a group. To use this to create the carvings the groups will need to be exploded and of course it’ll need to be scaled down to fit on the board. After exploding the groups, I used the Tape Measure tool to measure the distance between the lower right and upper right corners. I knew that distance needed to be 3-5/8 in. so after clicking on the two corners, I typed that distance and hit Enter. SketchUp asks if you want to resize the model and clicking Yes finishes up the resizing.
After resizing the geometry, I selected it all and created a component. This makes it easy to handle the geometry in one hunk and it also allows me to keep a copy of it in the In Model components collection for later use in creating a pattern or even other projects.
I copied the component with Move/Copy and flipped that copy along the component’s red direction which results in a mirror image of the original. I placed these components on top of a box drawn with the Rectangle tool and Push/Pull. in the screen shot, below, you can see the two components next to each other. At this stage I have already added some length to the center section by editing one of the components. Of course editing one results in the other one getting the same treatment.
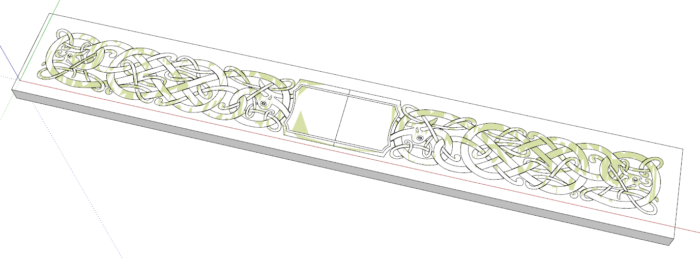
To get the relief showing in the model, the next step is to explode the pattern components so the geometry joins with the “board” underneath. Then a little Push/Pull action and it’s 3D.
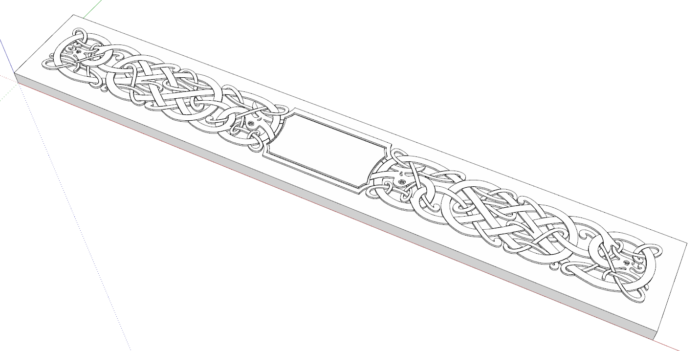
After grandpa decided on a font, I adjusted the overall length of the board and pattern by selecting the right half with a left to right selection and then using the Move tool to move the selection over to give me enough room for the text.
As for the text, I used 2D text made with the 3D Text tool. Since I want the text to be carved into the “board”, I unticked the box for Filled. This does two things. Of course it results in the text being created as only 2D edges but it also means that the edges will be on the face of the board when it is placed. If the 3D text has a face or is extruded, the text will be positioned so it floats just off the surface. There are some benefits to this in some applications but in this case we’ll want the edges of the text to split the face of the board into separate regions.
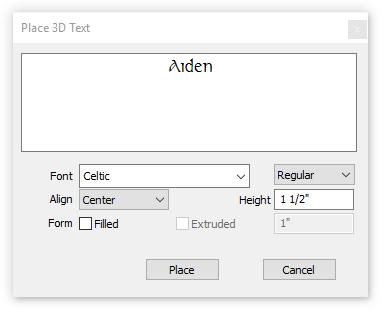
The text will import as a component. Once it’s moved into the right position, explode it and then use Push/Pull to push the letters in.
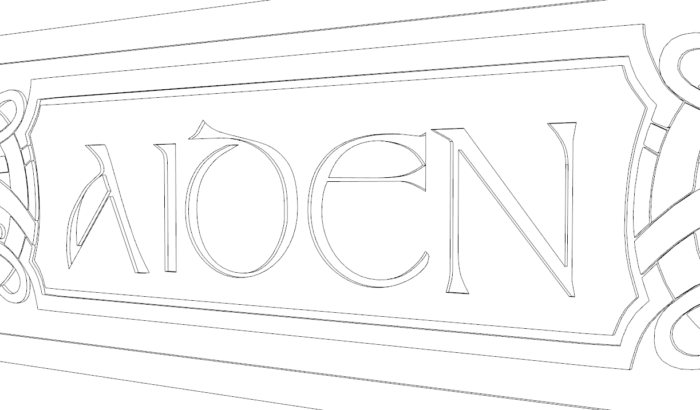
With the whole thing completed, of course I made it a component. The second goal was to create a printed pattern to layout on the board for carving. This can be done directly from SketchUp but it’s much easier to do in LayOut so I did it that way. Due to the length of the name board, I used Arch E paper which is 36 in. by 48 in. I create a scene in SketchUp with the camera set to Parallel Projection and the standard top view. After sending the SketchUp file to LayOut, I set the scale to 1:1. I made a second copy just for good measure and then exported a PDF which got sent to the local office supply store for printing.

It sounds like a lot of work but it all goes quite quickly thanks to BMP Tracer.
To install BMP Tracer download it from the link provided. It’ll come with the file extension .rbz. Go to Window>Extension Manager and click on Install Extension…, find the downloaded file, click Open and then Yes. If you are using an older version of SketchUp which doesn’t have Extension Manager in the Window menu, go to Preferences>Extensions and click on Install Extension… After it is correctly installed, look in the Extensions menu for it.
–Dave
More on FineWoodworking.com:
- Dave Richards and Tim Killen’s Design. Click. Build. homepage
- Dave Richards – Resize. Don’t redraw
- How To Create New SketchUp Textures For Your Models
Fine Woodworking Recommended Products
Drafting Tools

Sketchup Class







Comments
Hi, BMP Tracer is not working on my sketchup 2017. I didn't know what happened. I tried another way is to use image trace tool of illustrator to convert celtic border picture to dxf file. (It's lucky that only one small object is needed to redraw.) After import of file, you can use Multiple Push-pull tool to change the thickness of all objects.
Log in or create an account to post a comment.
Sign up Log in