Spice up your work with kumiko
Learn how to enhance your furniture with this Japanese latticework technique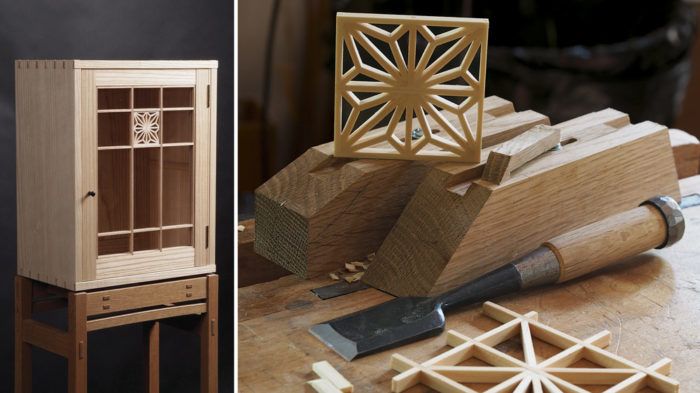
Synopsis: Learn how to enhance your furniture with this Japanese latticework technique. Mike Pekovich makes the half-lap grid at the tablesaw and handles the rest of the work with a sharp chisel and a beveled guide block.
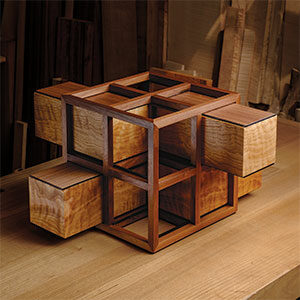
The Japanese latticework technique of kumiko is traditionally found on shoji screens, but it is making its way into contemporary furniture as well. The furniture of John Reed Fox inspired me to incorporate kumiko into my own work, and I’ve used the technique in a number of pieces over the last two years, from boxes to cabinets to case pieces. My process has evolved over that time. I make the half-lap grid at the tablesaw and handle the rest of the work with a sharp chisel and a pair of beveled guide blocks.
Making kumiko requires precise work, but I don’t find it tedious or boring. I actually look forward to the quiet bench time the process affords, and the result is always a nice addition to a project. I hope this article demystifies the process a little and encourages you to give it a try. For design inspiration and more information on shoji and kumiko, I recommend the excellent books Making Shoji by Toshio Odate and Shoji and Kumiko Design by Desmond King.
Start with a simple design
This article focuses on the asa-no-ha, or hemp leaf, pattern. It begins with a half-lap grid of pieces, or bars, that create four squares. Parts are then beveled to fit into the squares, creating the pattern. I make the bar grid using a finger-joint jig clamped to a tablesaw crosscut sled. The distance between the indexing pin on the jig and the sawblade determines the size of the grid.
I typically use 1 ⁄4-in.- or 1 ⁄2-in.-wide basswood or pine for the bars. Start by milling two pieces of stock to thickness. Then cut the notch for the halflap joints in one blank before ripping both into individual bars. The bars should fit snugly into the dadoes. I’ve planed the bars to final thickness in the past, but I find that a sharp thin-kerf blade leaves a clean surface that doesn’t require sanding or planning.
Guide blocks are the key to accurate chisel work
While the design looks complex, it consists of only three uniquely sized parts. The key is repeatability when making them. The ends of each part must be bevelled at a specific angle, and the parts must be of consistent length. To tackle the job, I use a pair of bevelled guide blocks with ends cut to various angles. A groove along the top holds the stock, and an adjustable stop sets the length of each part.
For the full article, download the PDF below:
Fine Woodworking Recommended Products
Whiteside 9500 Solid Brass Router Inlay Router Bit Set

Bahco 6-Inch Card Scraper








Comments
Kumiko... where have you been all my life? Michael, Thank you for introducing us to this ancient art that is most intriguing! Besides Thank you Michael, I have one word to say...MORE!
That's a wonderful process, Mike. I can't wait to give it a go. Thanks!
Well done Mike you are a truly inspiring me thanks !
I would like to incorporate this in a stickley book case design with a door and kumiko square in the middle . Thanks for your work. Dave
Boy it would be great to save the pdf so you can be able to reference the article in the shop. For some odd ball reason this isn't allowed anymore?
Freddie, nothing should have changed. What system are you on and what error message are you getting?
I am very pleased with the article and enjoy dipping my toe in another culture through woodwork. Please continue these adventures! I have a couple (or should I say "couple-few" like Mike...) questions and notes.
Is 8 inches the length of the pre-angled block or the measurement of the top after marking out the angled cuts? I started with a 8"x2x3 block and it seems *much* shorter than in the video.. especially the one with the 45 degree. Typing this out, i now realize it is because my block is so much taller that having the 45 extend to the bottom of the 3" would shorten the top substantially. D'oh!
The article would have been improved if there were a suggestion for the screw and washer size -- figuring out which screw would work in a 3/16 slot and have the right size pan head was a bit of "homework" for me. I'm sure experienced folks like you have a jar to try, but for me, I didn't have any that'd do and had to make a trip to the hardware store.
Additionally, it would be nice if the article had mentioned a range of grid spacings that work with the jigs.
@periodcraftsmen I have downloaded and printed the relevant pages for shop reference without a problem. I suspect that downloading vs viewing is more of an issue with your browser or pdf reader than anything else.
confused about the angle of the jigs. is the 22.5 longer than the 67.5 ? I see people making the jigs online and the 67.5 is the longer angle. But I trust Mike
In Safari - open the on line pdf, File>save as > job done. Or
File> print> pdf option.
Log in or create an account to post a comment.
Sign up Log in