Low-Tech Mortising
Get clean, consistent cortises with a drill press and chisels
Synopsis: The drill-and-chisel method is an approachable, accurate way for beginning woodworkers (or even experienced woodworkers) to cut mortises. It is nearly foolproof and doesn’t require any fancy machinery—just a drill and a chisel. Simply drill a series of holes to remove most of the wood from the mortise, and then finish the job with chisels. This Fundamentals cover the whole process, from layout to drilling to chiseling.
Over the years, woodworkers have devised all sorts of ways to cut a mortise. Some use a mortising machine to get the job done quickly, but you’d have to reach pretty deep into your wallet to ride in that fast lane. Some use a router and a straight bit, although that process usually requires a somewhat fussy setup. a mallet and bench chisel will get you a mortise on the cheap, but it’s a relatively slow and labor-intensive procedure.
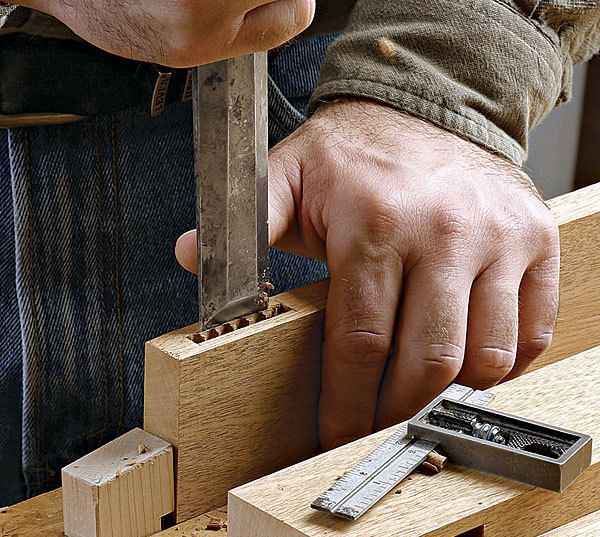
For most beginning woodworkers, the most approachable option is the drill-and-chisel method. That’s the one I used when I started woodworking some 35 years ago. It’s nearly foolproof and doesn’t require fancy machinery. you simply drill a series of holes to remove most of the stock from the mortise, then finish the job with chisels. Simple and precise, just the way I like it. For this exercise, we’ll assume the mortise is centered in the stock’s thickness.
Lay out the mortise
One of the first questions a beginner has is what size tenon to use. The rule of thumb is to use as big a tenon as you can fit. Here’s an easy method to get you started. Divide the thickness of the board by three, then round off that number to the nearest common drill-bit diameter. That means a 11⁄4-in.-thick board would have a 7⁄16-in.-thick tenon, a 1-in.-thick board would have a 5⁄16-in.-thick tenon, and so forth. This rule of thirds provides an adequate tenon while ensuring a thick enough wall between the sides of the mortise and the face of the board.
To lay out the mortises, you’ll need a pencil, a rule, a marking knife, and a square. I use the pencil to mark the mortise length on each workpiece. Then I use a marking knife for the rest of the layout. The sharp point of the knife can be placed flush against the blade of a combination square to give you very accurate scribe lines. You can also use the incised lines later as a guide when you are chiseling (see p. 24).
The square and marking knife also establish the width. Place the fence of the square against the outside face of the workpiece and adjust the blade to locate one side of the mortise wall. With the tip of the knife against the end of the square’s blade, slide the square and the knife in unison along the workpiece. Then, because the mortise in this example is centered, you can flip the square to reference off the inside face of the workpiece and repeat the process.
For the full article, download the PDF below:
Fine Woodworking Recommended Products

Pfiel Chip Carving Knife

Freud Super Dado Saw Blade Set 8" x 5/8" Bore

Leigh D4R Pro


Log in or create an account to post a comment.
Sign up Log in