Applied Fretwork Adds Color and Texture
Use this innovative technique to draw attention to overlooked spaces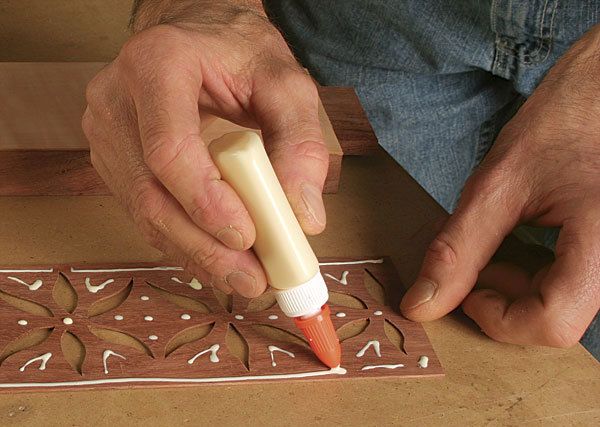
Synopsis: One way to add color and texture to a plain surface is to cut fretwork-like patterns in veneer and apply them. This technique adds texture, contrast, depth and shadow, but doesn’t make the part much thicker. Timothy Coleman provides a step-by-step guide to making the fretwork, assembling the veneers and gluing them together, trimming everything flush, and applying finish.
I am fascinated with patterns. I see them everywhere—in nature, on fabrics, on buildings, on playing cards—and I am always looking for ways to use them in my furniture to create surfaces that have depth and texture. One way I achieve this is to use my scrollsaw to cut fretwork-like patterns in veneer and apply them to table aprons. This technique produces a surprising amount of depth and shadow using a minimal amount of thickness. I also use a contrasting wood underneath, adding even more interest and flair.
The materials and tools involved are few and simple. I begin with veneer resawn to 1⁄16 in. thick on the bandsaw (you also could lay up sheets of commercial veneer to get the right thickness). I use a handheld fretsaw or a scrollsaw to cut the patterns, and follow with a knife, small files, and sanding sticks to clean up after cutting. pressing the underlayer of veneer and the fretwork pattern onto the apron involves MDF cauls and hand clamps. This is low-tech woodworking at its finest.
Where the contrast comes from
For the best effect, you want the surface under the pattern veneer to be a contrasting wood. I typically use two layers of veneer (an underlayer and the pattern) to create the contrast. However, you can eliminate the underlayer of veneer and apply the pattern directly to the apron if the apron wood is a contrasting color.
For stability, you should orient the grain of the veneer(s) with the grain of the apron. Using a thick apron (1 in.) will eliminate the need for a backer veneer, which is usually applied to prevent a veneered panel from warping. If the apron you’re using is 3⁄4 in. thick or under, it couldn’t hurt to add the backer. One other note: I cut all the joinery in the apron before applying the pattern.
Thick veneer works best
For this technique, the pattern veneer should be 1⁄16 in. thick to emphasize the layered effect and create a strong shadow. The thick veneer is also easier to cut with the scrollsaw. You also could glue together multiple layers of thin veneer to create thicker material. Some woodworkers would recommend orienting the plies cross-grain for stability. But I keep the grain running in the same direction and have had success. When glued and pressed between pieces of 3⁄4-in.-thick MDF, the assembly comes out quite flat. Cut the veneer slightly wider and longer than the exposed face of the apron. You’ll trim it flush after it’s applied to the apron.
From Fine Woodworking #214
For the full article, download the PDF below:
Fine Woodworking Recommended Products

Bahco 6-Inch Card Scraper
Whiteside 9500 Solid Brass Router Inlay Router Bit Set




Log in or create an account to post a comment.
Sign up Log in