How to Tame Squeeze-out
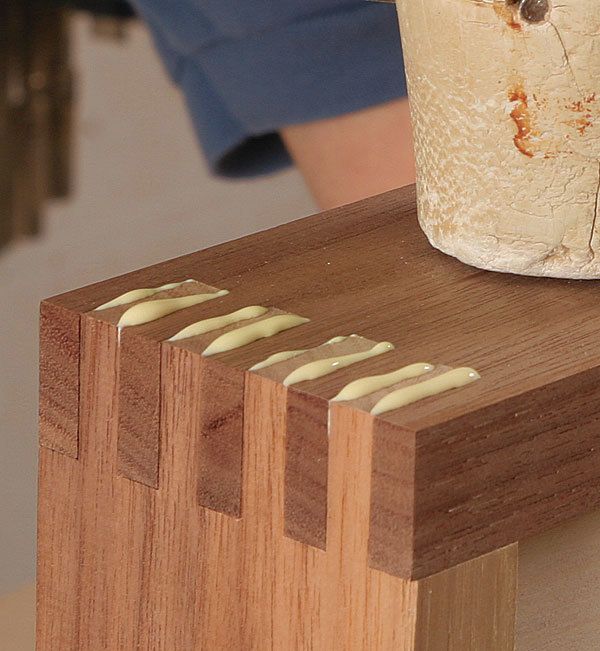
Hide glue inside the joint, or send it where it's easy to handle
Synopsis: Avoid problems with glue squeeze-out contaminating your finish by controlling the problem where it starts — inside the joint. This article offers valuable tips for hiding squeeze-out where it will not be seen, or sending it to areas where it is easy to clean up. You’ll learn to limit squeeze-out on mortise-and-tenon joints, in dowel holes, on solid edging, in dado joints, and on dovetails and finger joints.
Every woodworker experiences that moment of pleasure when the first coat of finish brings out the beauty of the wood, only to be dismayed when the finish also reveals an area contaminated by glue squeeze-out. There is plenty of advice out there on how to remove squeeze-out, but as the saying goes, an ounce of prevention is worth a pound of cure.
The first step is to control the amount of glue you use. Less glue doesn’t have to mean less strength, but it does mean less squeeze-out. The second step is to apply the glue to the right parts of a joint. If you follow both of these rules, squeeze-out will be either hidden inside the joint or directed to a place where it can be easily removed, such as the outside of a box that still needs planing or sanding rather than a finished inside corner, where a chisel might leave marks and a wet rag will leave behind a thin film of glue.
With most white or yellow woodworking glues, it is important that both surfaces are wetted by the glue within a short time. The normal method is to apply glue to both surfaces, but the downside on most joints is unavoidable squeeze-out However, you can apply glue to just one side of the joint How to Tame Squeeze-out if you use enough glue to wet the second piece. Just don’t let more than a few minutes pass between applying glue and assembling the joint, because skinnedover glue cannot penetrate the second side sufficiently. As long as your joinery goes together quickly, you’re fine.
Stop squeeze-out on mortise-and tenon joints
Cut the mortise a minimum of 1⁄16 in. deeper than the length of the tenon to provide a small void where the surplus glue can collect. Put glue in the mortise only and spread it with a thin dowel (below right). If you can see the wood clearly, you need more glue. If there is a huge puddle at the bottom, push the dowel to the bottom of the hole, pick up some of the glue, and wipe it off with a rag.
From Fine Woodworking #213
For the full article, download the PDF below:
Fine Woodworking Recommended Products

Stanley Powerlock 16-ft. tape measure

Estwing Dead-Blow Mallet


Log in or create an account to post a comment.
Sign up Log in