Making Curved Cauls on the Table Saw
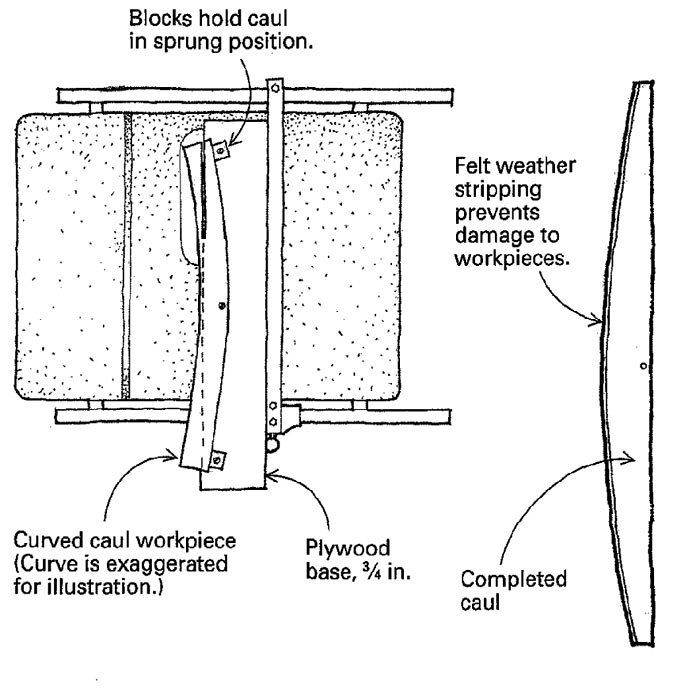
Recently, when I needed a dozen or so curved cauls for gluing solid wood banding to plywood shelves, I came up with this jig. The base is simply a strip of 3/4-in. plywood a few inches longer than the longest caul you want to cut. Rip the strip to 6 in. or so. Select the caul material. I used 1-in. by 1-1/2-in. oak. Ash or hickory would also work well.
Mount the caul material to the jig with one screw at its center point, placing it on the jig so that one edge is flush with the plywood edge. Move one end of the caul so that it overhangs the edge of the jig about 1/8 in. per foot of the length of the caul, and screw a scrap block in position behind it. Spring the opposite end to an equal amount of overhang, and screw another block in place. Now run the jig with the caul attached through the tablesaw to rip off the overhang. The fence is set to the width of the jig.
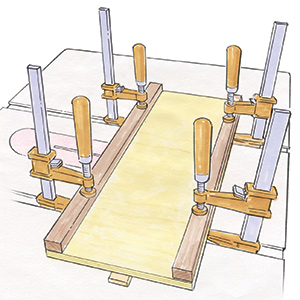
When the caul is removed from the jig, it will spring back to a gentle natural curve that provides uniform pressure when clamped down. Cauls of any length can be made by repositioning the stop blocks. This method is so quick and easy that I now have cauls in many sizes. To provide a cushioned pressure surface, I glue on weather-stripping felt to the face of the caul.
Rick Hodges, Deer Park, Wash.
Fine Woodworking Magazine, June 1997 No. 124
Fine Woodworking Recommended Products
Dubuque Clamp Works Bar Clamps - 4 pack
Bessey EKH Trigger Clamps

Estwing Dead-Blow Mallet




Log in or create an account to post a comment.
Sign up Log in