Small Stand is a Lesson in Curves
Cut joinery first, then saw the curves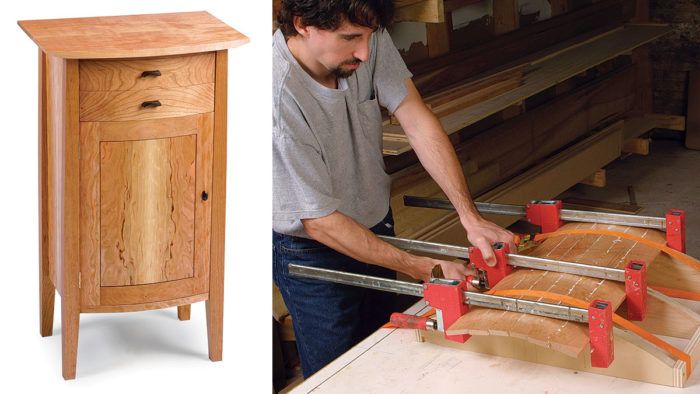
Synopsis: Here’s a challenging project for woodworkers weary of flat surfaces. Furniture maker Stephen Hammer leads readers through the construction of a small stand, with detailed plans and instructions. This article addresses designing curves into a piece, constructing and shaping coopered panels, joinery techniques for curved frame-and-panel doors, and shaping curved drawer fronts.
One way to add interest to a case piece is to add a gentle curve to the front plane. I wanted to explore this element of furniture making while attending a 12-week class at the Center for Furniture Craftsmanship in Rockport, Maine, so I designed and built this cherry cabinet, finding ways to curve the door and drawers that did not require steam-bending or veneering. The drawer fronts and the door frame are sawn out of thicker stock, and the door panel is coopered to match that curve—methods well-suited to the average small shop.
Arriving at a final design for a piece of furniture is often a laborious task. However, a few preliminary steps made this process easier and more successful. First, small thumbnail sketches allowed me to visualize the overall form quickly and easily. The thumbnails led me to a curved-body design with an overhanging top. Next, I drew the cabinet at quarter scale, where I set the top height at 35 in., then determined the width of the piece.
The appearance of this cabinet depended upon the leg shape being correct. I based the leg shape on the classical column, which curves slightly inward, starting one-third up the column height. Called an entasis, this narrowing is meant to keep the eye from thinking that the column is concave—an optical illusion that happens when a column’s sides are parallel.
A piece often changes when you take it off paper and put it into three dimensions. To work out the leg details, I made a full-scale mock-up in poplar, filling in the rest of the cabinet with cardboard cutouts. I curved the outside of the legs gently to the top, reducing the overall thickness by 3⁄8 in. The bottom inside edges of the legs taper toward the floor, starting from the case bottom. I tried different door and drawer dimensions by drawing them onto the cardboard.
It may seem like a lot of extra work to build a mock-up, but the process saves time during construction because you can focus on building the piece instead of revising its design. Also, you can refer to the mock-up for dimensions. My final step was a full-scale drawing to work out the joinery details.
For the full article, download the PDF below.
Fine Woodworking Recommended Products

Sketchup Class

Blum Drawer Front Adjuster Marking Template

Drafting Tools




Log in or create an account to post a comment.
Sign up Log in