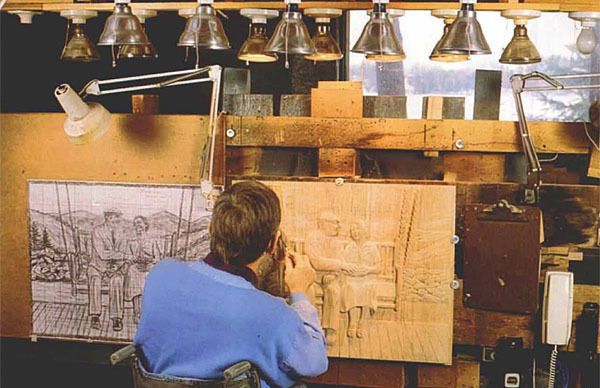
Synopsis: John E. Meyers compares relief-carving to a magician’s tricks; here, he explains how to visualize the foreground and background as many layers. He talks about how to prepare the drawing, glue up the panel stock, and transfer the drawing onto the stock with dark chalk or carbon paper. He teaches beginners how to rough out the relief, shape the major forms, and define the details. He sands and sometimes frames his completed carvings.
I’ve always been fascinated with relief carvings. I am amazed how much emotion and detail carvers can create by shaping two-dimensional images in a relatively thin slab of stone or wood. It’s really something of a magician’s trick: By “tucking” one piece of a person or object behind another, you can tell a visual story in what appears to be a miniature version of the real world. That’s satisfying on a very basic level. Relief carving may not be the world’s oldest profession, but it has probably been with us since someone invented the knife. Be it in the form of expertly detailed Eskimo scrimshaw, the ornate boats and paddles of the South Sea islands or the classical elegance of Renaissance murals, humans have a need to embellish the objects in their world.
When I explain relief carving to students, I ask them to visualize a magician taking a deck of playing cards from his bag of tricks. The deck of cards gives us a medium with 52 levels. In comparing this to the carving of work horses and a hay wagon, shown in the top photo on the facing page, the last 10 cards in the deck would equal the background. If you slide those 10 cards over so they stick out from the rest of the deck, the next level (working from the background forward) includes the trees and foliage at the horizon line. Pull out five more cards so that they are not quite as high as the ten background cards. The next level would be the sheaves of hay in the wagon and the wagon racks, and so on to the top of the deck.
One common error in carving a relief—forgetting how these cards stick out, yet remain part of the deck—is not tucking the subject matter into the carving in its proper sequence, The best way to avoid this error is learning to see how the foreground, usually the ground, water or a floor, “tapers” or “wedges” through several levels in the carving to the horizon line.
From Fine Woodworking #77
For the full article, download the PDF below:
Fine Woodworking Recommended Products

Starrett 4" Double Square

Suizan Japanese Pull Saw

Bahco 6-Inch Card Scraper


Log in or create an account to post a comment.
Sign up Log in