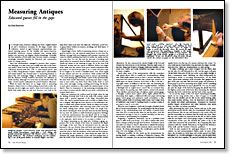
Synopsis: There’s a seemingly insatiable demand for historical and construction notes on vintage pieces, and Dick Burrows spoke with Carlyle Lynch, who has devoted years to measuring furniture, to find out how it’s done. This article covers reassuring nervous owners, systems that help ensure noting all vital details, making freehand perspective drawings and step-by-step measuring tips. Lynch uses a checklist that he prepares at home prior to inspecting the furniture, and he uses a carpenter’s rule or a small 6-in. sliding rule. He also brings a flashlight, angled mirror, calipers, soft pencils, among other tools. This article details each meticulous step Lynch uses to thoroughly measure furniture without damaging it in any way. A side article talks about how to compile a materials list.
In colonial times, furniture making was both a highly refined art and a farmhouse necessity. In the larger coastal cities craftsmen, trained in rigid European apprenticeships, produced stunning pieces for the wealthy and status-conscious. Meanwhile, numerous country craftsmen were turning native lumber into practical, yet elegant, family furnishings. Ironically, the best examples of both styles have become classics, creating a seemingly insatiable demand for historical and construction notes on vintage pieces.
Since few cabinetmakers managed to preserve their construction drawings or to take notes, you usually must rely on the furniture itself to show how the old guys did it. Museums and private collections abound with fine 17th- to 19th-century pieces, and are, in effect, living libraries of plans. Carlyle Lynch, cabinetmaker and retired teacher, has devoted years to measuring furniture at places like Old Sturbridge Village in Massachusetts, Old Salem and the Museum of Early Southern Decorative Arts (MESDA) in North Carolina. Although I’ve never been an aficionado of the old ways, I found Lynch’s enthusiasm for period furniture infectious.
While he insists that there are no magic tricks to measuring furniture, there’s more to it than poking around with a ruler. Before you can do it right, you need to learn how boards were surfaced, how joints were cut and how furniture was built in the days when hand tools were the only tools. Otherwise, you’ll never grasp what’s hidden by veneers, moldings and thick layers of yellowed finishes.
Surprisingly, if your skills at reassuring nervous owners are as good as Lynch’s, you can examine many pieces. As you trace the delicate carvings with your fingertips and examine centuries-old joints for telltale marking lines and tool marks, the maker and his art come alive. For me, that was the best part of working with Lynch when he measured Duncan Phyfe’s personal tool box at the New York Historical Society and two pieces at MESDA. Before you begin work, make sure the owners of the piece clearly understand what you want to do and how you plan to do it. Some old pieces may be too fragile to be moved or handled much. One owner might let you remove and trace an escutcheon, while another will ask you to leave for just suggesting you want to remove any hardware.
To avoid missing any vital details, Lynch works systematically. He starts with overall dimensions, measuring each major component in turn—sides, top, back, front—then works down to each joint, curve and angle, carving, molding and turning. He sketches each piece, measures it, then marks the measurements on his sketch. Then he remeasures it, By measuring everything twice, you ensure accuracy and the odds are you won’t overlook an important detail twice.
From Fine Woodworking #53
For the full article, download the PDF below:
Fine Woodworking Recommended Products

Blackwing Pencils


Drafting Tools


Log in or create an account to post a comment.
Sign up Log in