Quick and Tricky Little Boxes
How I bookmatch scrap wood into Christmas gifts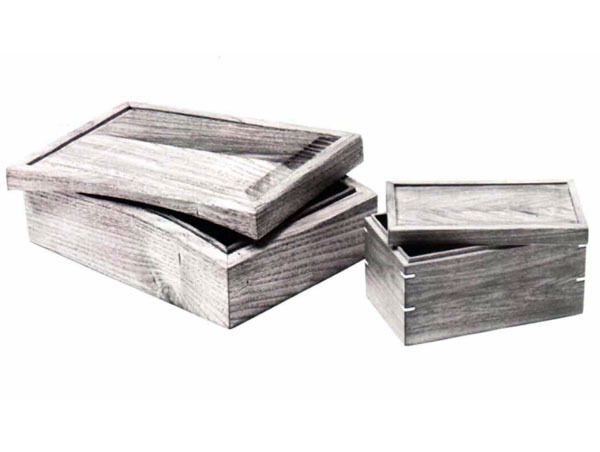
Synopsis: Jim Cummins talks about what he learned as he built small boxes from scrap in his shop. No two boxes are alike, most of them figure-matched in one way or another. He shares his mistakes and how he fixed them, as well as how to avoid making them. He talks about how to cope with seasonal movement, different styles of lids, hexagonal boxes, and self-keying lids. Side articles cover several subjects, including using tape and glue when assembling mitered corners; using panels for lids; and thoughts on design.
I’m an impatient putterer with thrifty inclinations. Over the past year I’ve gotten a big kick out of converting my scrap pile into a bunch of Christmas presents. Inspired by Sam Bush’s matched-grain box from FWW #32, I began exploring variations in the design and construction of small boxes, aiming to have fun while not making the same box twice. I ended up with a dozen variations, most of them figure-matched in one way or another, with different designs for lids and bottoms, and different joinery details. Some required a little thoughtful planning, some were last-minute adaptations based on chance, and a couple of my favorite details grew out of my efforts to fix mistakes. The elements can be combined in lots of ways, and there isn’t a box here that can’t be made in an hour or two, not counting the finishing, of course.
The first variation— Sam Bush’s box in figure 1 comes out of a board, but my first bookmatched box, shown in figure 2, came from a walnut turning scrap about 2 in. square by 9 in. long. First I bandsawed it into four strips, and planed them smooth on both sides. On one pair of strips, I laid out the box sides and ends the same way Bush did. The other pair of strips I edge-glued, using masking tape to clamp the joint (p. 34). This bookmatched piece was as wide as the ends of the box, and long enough to cut in half to become the bottom and lid. While the strips dried, I rabbeted the top and bottom edges of the sides and ends as shown in figure 2A, then I mitered and glued them, again with tape, adding rubber bands for more pressure. While the sides cured, I rabbeted the lid and the bottom to fit into the rabbets in the sides. I glued the bottom in, using tape damps, put the lid on and sanded the edges flush.
When I was done, I realized that I’d made three dumb mistakes. First, I hadn’t examined the direction of the grain in the turning square. Bookmatching, because of the sawkerf, is never perfect, but if you arrange the grain as shown in figure 2B, it will be close. I had sawn the blank at an intermediate angle to the annual rings, which gave me pretty wood, but a poor match. My second mistake was in jointing and thicknessing the stock before I joined the sides. Bookmatched figure matches best right at the sawkerf, so you want to remove minimum wood from the show surfaces. I should have smoothed the inside surfaces only, and waited until the box was joined before sanding the bandsaw marks off the outside surfaces.
From Fine Woodworking #43
For the full article, download the PDF below:
Fine Woodworking Recommended Products

Drafting Tools


Dividers





Log in or create an account to post a comment.
Sign up Log in