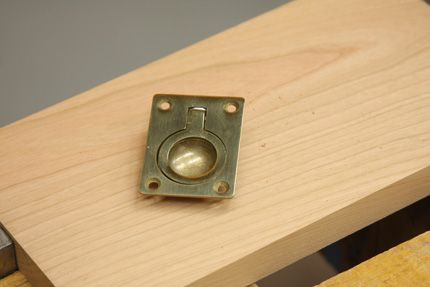
1) Here's the problem: this style drawer pull, with it's deep finger recess, can be a bit tricky to mortise for.
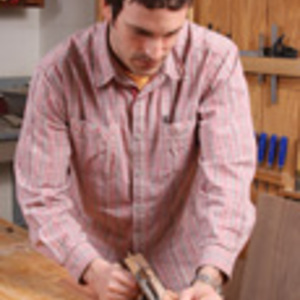
For those of you out there hoping to build a serious cabinetmaker’s workbench in the near future, my recent post on an upcoming Video Workshop may have caught your eye. This week, I wanted to offer one last sneak preview of our “Intermediate Workbench” series, with this tip on installing brass ring pulls in drawer fronts. After experimenting with a couple of methods, this is the one I settled on. For even more detail, you’ll just have to wait for the video series to be released in late August/early September. The series will take you step-be-step, through the construction process for an intermediate-sized workbench built of maple, complete with cast iron vise and lots of integrated tool storage!
How to Install Ring Pulls
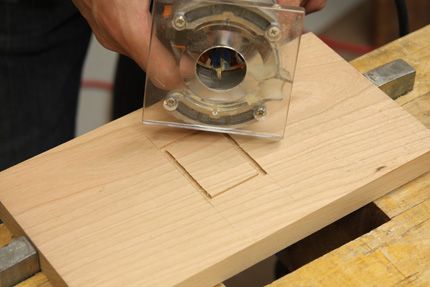
 This particular style of drawer pull can be a bit tricky to install. They’re meant to be mounted flush to the drawer front, but the backside of the pull reveals a whole mess of meat that needs to be mortised in to a depth much deeper than that of the flat 1/8-in.-thick escutcheon. My method began with construction of a router template for the flat, rectangular plane that makes up the basic shape of the pull.
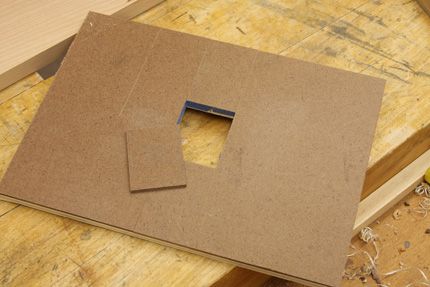
I began by making a masonite template representing the exact size of the escutcheon, plus the offset of the particular rub collar I planned to use with my plunge router. Next, I used an additive method to construct a basic router template around the masonite mentioned above. This is a vey simple technique I first learned from box-maker Doug Stowe.
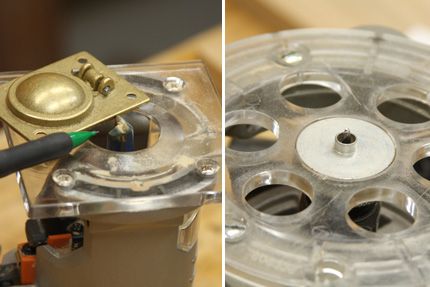
Next, I outfitted a router with a 1/8-in. bit and a rub collar, setting the depth of cut to equal the thickness of the ring pull’s escutcheon plus the thickness of the router template. Another router was outfitted with a larger straight-cutting bit however, the depth of cut on this router was set to the exact thickness of the pull’s escutcheon only.
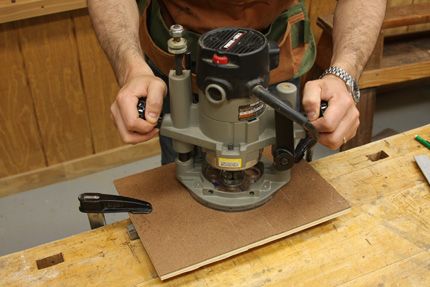
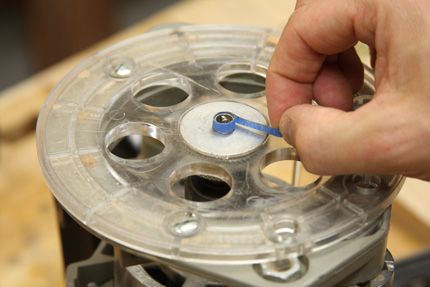
 Using the 1/8-in. bit and the rub collar, I defined the edges of the mortise with my template. Why use such a small bit? The 1/8-in. bit’s radius perfectly matches that of the corners of my brass escutcheon. The idea here is to define the perimeter, and then come back in with a bigger bit to hog out the rest of the waste. Here’s a quick tip: I wanted to make a perimeter cut that was a bit wider than just 1/8-in. I feared my other router might wander and potentially nick the edges of my perfect template-cut perimeter. The solution was to wrap the rub collar with a bit of tape, thus pushing the bit away from the pattern, thus widening the cut in a second pass. Now it’s just a matter of hogging out the waste with the larger straight-cutting bit.
Mortise the Spherical Recess
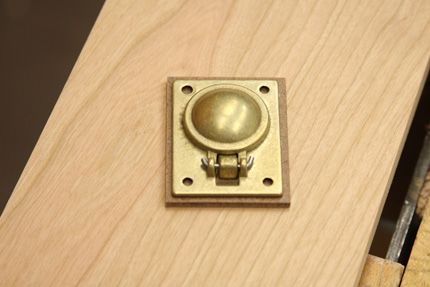
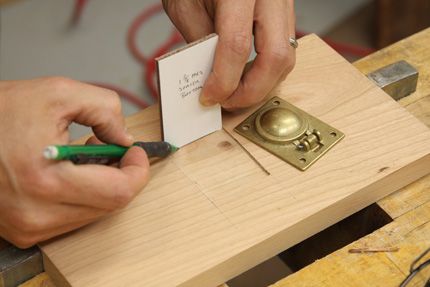
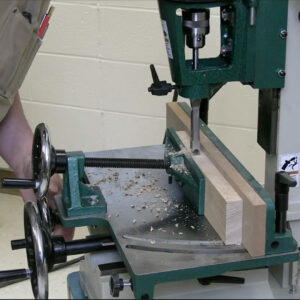
This style of pull incorporates a half-sphere recess into which your finger goes when pulling on the, err, “pull.” My next step was to use a Forstner bit to hog out that waste. I simply created some shims equal to the offset distance from the edge of the flat escutcheon to the beginning of the half sphere and used them to mark the offset within my mortise. Then it was just a matter of taking the drawer front to the drill press and making the cut.
 The balance of the material was excised using a smaller diameter Forstner bit and a bit of light chisel work. It seems fussy, but it pays to be tedious when mortising for this type of pull. Your goal should be to maintain as much “real estate” as possible for the mounting screws to grab onto when attaching to the drawer front. It’s quite easy to go hog wild removing waste, only to find that you’ve left very little for your screws to bite into!
-
1) Here's the problem: this style drawer pull, with it's deep finger recess, can be a bit tricky to mortise for.
-
2) I began the process by making a small masonite template equal to the size of the pull's escutcheon, plus the offset of my router's rub collar.
-
3) Next, I used box-maker Doug Stowe's additive method for building a simple router template around the the spacer block I made in step 2.
-
4) Now it's time to prep my routers. At left, I've outfitted a router with a larger diameter straight-cutting bit. Depth of cut is equal to the thickness of the escutcheon. At right is the smaller bit used to define the edges of the mortise. Depth of cut is set to equal the thickness of the escutcheon, plus the thickness of the template.
-
5) I begin the routing process by defining the perimeter of the mortise with the smaller bit and rub collar.
-
6) To make the perimeter routing a bit wider, I wrap a bit of tape around the collar. This will serve to push the bit further away from the template while routing. Instant wider cut while still maintaining the corner radius required for my escutcheon.
-
7) Now I just follow up with a bit of freehand routing to hog out the balance of the waste.
-
8) Now I mark out for the location of my next mortise, which will house the pull's recessed finger well. This mortise is made with a Forstner bit at the drill press.
-
9) Two more holes were drilled to produce a stepped mortise that accommodates the entire pull. Just a bit of chisel work is required.
-
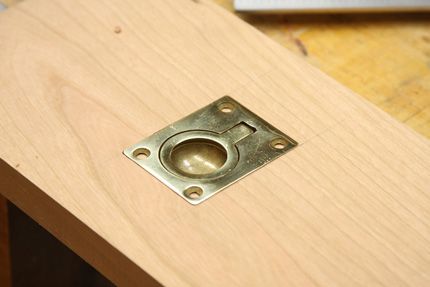
Presto! Perfectly flush drawer pull.


Comments
Regarding not hogging out too much wood to avoid not having 'any real estate for the screws to grab onto', assuming the pull is symmetric, why not just flip the pull into the mortise you have (after the forstner work), and draw holes where the screw holes land? There would be no guessing then.
Good advice. I also like the round recessed pulls although I haven't used them in a project. They could be easier to mount using the correct sized Forstner bit for the respective pull or even an adjustable Irwin bit and a brace. With that you'd get the exact size that you need.
Log in or create an account to post a comment.
Sign up Log in