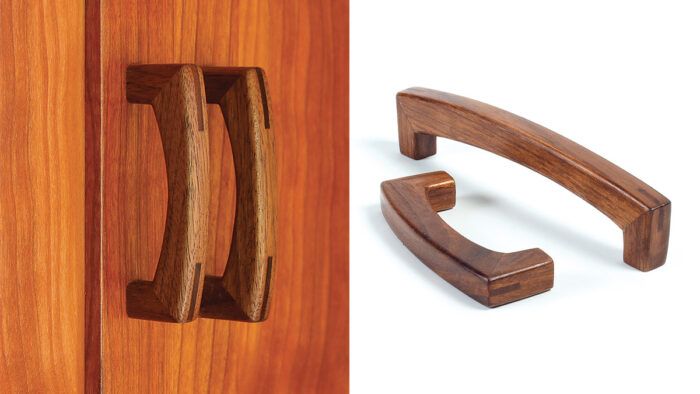
Continous grain, mitered door and drawer pulls
Larissa Huff and Robert Spiece's smart construction techniques make fashioning their small parts safe and repeatable.
Synopsis: Pulls are a final detail that can bring a whole piece together. The team of Larissa Huff and Robert Spiece at Lohr School of Woodworking has a safe, efficient method for safely cutting all the small parts in this set of continuous-grain, mitered pulls. A tablesaw sled with stop block, spacers, and a toggle clamp makes the work safe, accurate, and repeatable.
When we design and make custom furniture, we also design and make the pulls. We often leave pull design until deep into the building process so that we can use the physical piece for inspiration. Making those final details is exciting because they can be what brings the whole piece together—the icing on the cake, if you will.
Our pull designs vary, but one common denominator is batch production. We always need multiple pulls (which are typically made with tiny parts) and we want making them to be a safe, efficient process that yields consistent results. For us, that means designing good procedures and building good jigs. We’ll explain how we made these particular splined and mitered pulls, but the thinking behind the jigs and processes can be applied to other designs.
Marking and cutting the miters
We made the pulls in two sizes, shorter for doors and longer for drawers. To create a continuous grain match, we cut the three parts for each pull from a single blank. After milling all the blanks, we accurately laid out the parts for one short pull on a short blank and one long pull on a long blank. The blanks for the rest of the pulls were just quickly marked with chalk to indicate the direction of the miters. Using a different color marker for each blank, we also drew an offset line along the outer facing edge of the blank to keep track of the continuous grain after the parts had been cut.

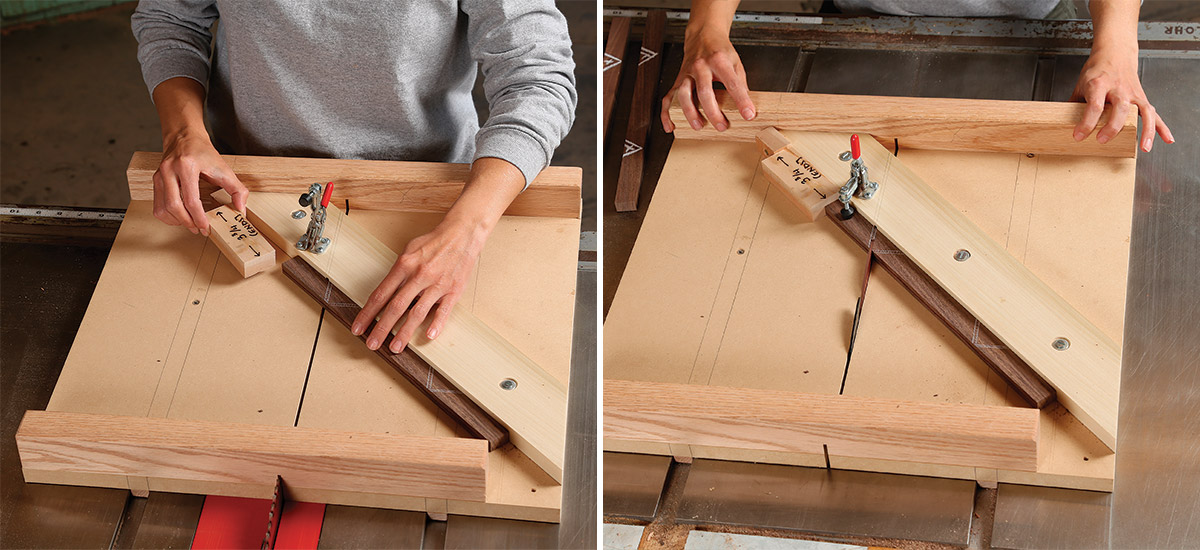
To miter the tiny parts safely, we made a small sled with an angled fence and a toggle clamp. We fixed a stop block to the fence 6 in. to the right of the line of cut. Then we made spacer blocks that register against the fixed stop to control the length of the various parts being mitered. We used the accurately laid-out blanks to determine the correct length for the different spacers. Our spacer block for the legs of both pulls was 3-3/4 in., but you could vary this based on your sled. Our spacer block for the longer pull’s crosspiece was 5/8 in., and for the shorter pull’s crosspiece it was 2-3/4 in. Once the spacers are made, you can cut all the miters.
Shaping the inside curves
Before the miters are glued together, you’ll shape the inside curve of the crosspieces. A template routing jig helps shape the small pieces safely. We made one for the shorter pulls and another one for the longer pulls.

From Fine Woodworking #289
To view the entire article, please click the View PDF button below.
Drawer and Door Pulls: Our Editors’ Favorites
Get a Handle on Your Pulls
How to Make a Wooden Pendant Pull
Fine Woodworking Recommended Products

Dividers


Stanley Powerlock 16-ft. tape measure


Log in or create an account to post a comment.
Sign up Log in