A Lesson in Basic Joinery
Practice cutting dadoes and rabbets while building a handy organizer.
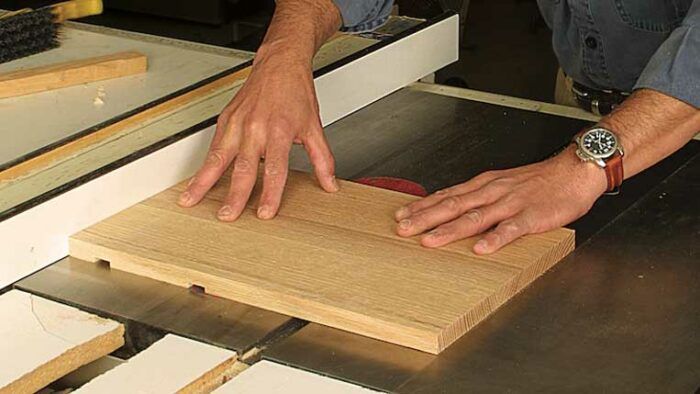
Synopsis: It’s always more satisfying to perfect joinery techniques when the end result will be a useful piece of furniture. This small storage case is joined with fundamental woodworking joints: dadoes and rabbets. The dadoes run the width of the sides to support the shelves. Stopped dadoes hold the interior partitions, and rabbets are used to construct the carcase and drawers. The joinery is cut on a tablesaw and router.
My students always find it more satisfying to perfect their joinery by creating a piece of furniture rather than by adding to the kindling in the scrap bin. The dado and the rabbet are fundamental woodworking joints found in all kinds of furniture, from bookcases to highboys. Building this organizer, which either can be hung on a wall or stood on a table, allows you to practice these joints while creating a useful piece of furniture.
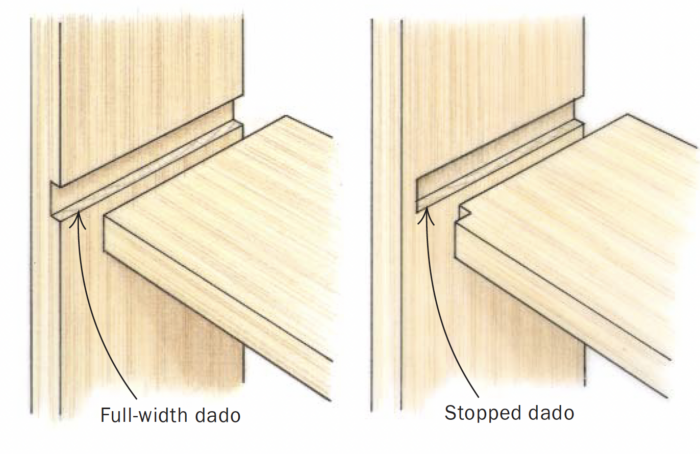
This piece features dadoes that run the width of the sides to support the shelves, and stopped dadoes in the upper shelf and the underside of the top to receive the partitions. Rabbets in the cabinet include those at the top of each side piece and partition as well as in the drawer construction. Both joints provide accurate alignment of the parts, load-bearing capability, and increased glue surface. They can be cut accurately on the tablesaw, with or without a dado set, and with a router using various fences and jigs.
Simple but useful joints
|
Materials are cheap and easy to find
I chose red oak as the primary wood for this project and pine for the drawer boxes and the back slats. If you can find 11-in.- wide oak boards, you will be spared the step of gluing up panels, but glue-up is not a big procedure for a project this size. The oak for the partitions needs to be thicknessed to 1 ⁄2 in., and most of the pine needs to be 3 ⁄8 in. thick; this is best done with a planer rather trying to resaw thicker stock. You will need about 18 ft. of 8-in.-wide oak boards, and 7 ft. of pine, which includes an extra 20% to be on the safe side.
Dadoes and rabbets can be cut on the tablesaw
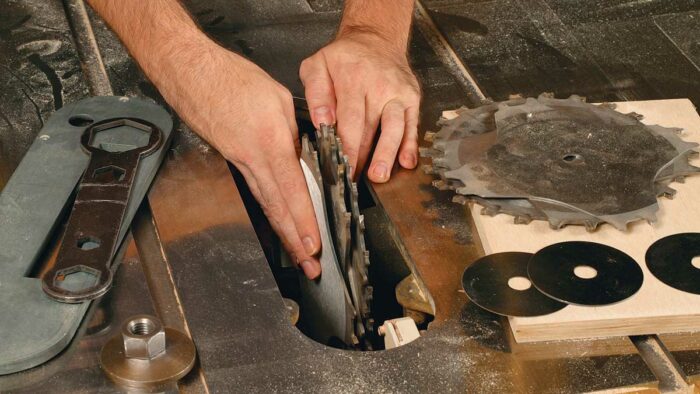
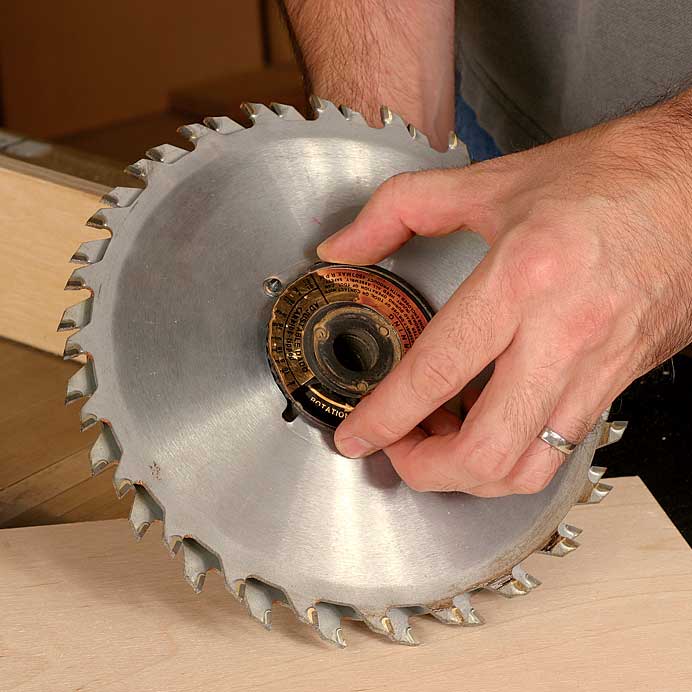
Most of the dadoes and rabbets for this project can be cut on the tablesaw using a set of dado blades. There are two types of dado blades (see the photos below): stackable blades, which consist of two outside blades to cut the sides of the joint and multiple chipper blades to remove the waste in the middle, and adjustable blades, also known as wobble blades. I prefer the stackable dado set because it makes a cleaner cut. Install a throat insert made for a dado set. Mount the two outside blades and sufficient chippers to make a cut just under 3 ⁄4 in. wide. Using a piece of surplus oak as a gauge to make test cuts, fine-tune the width by adding or removing shims between the blades until you achieve a snug fit.
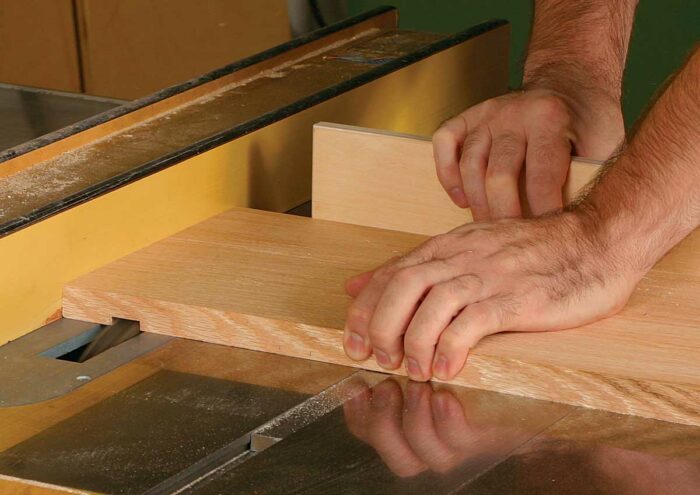
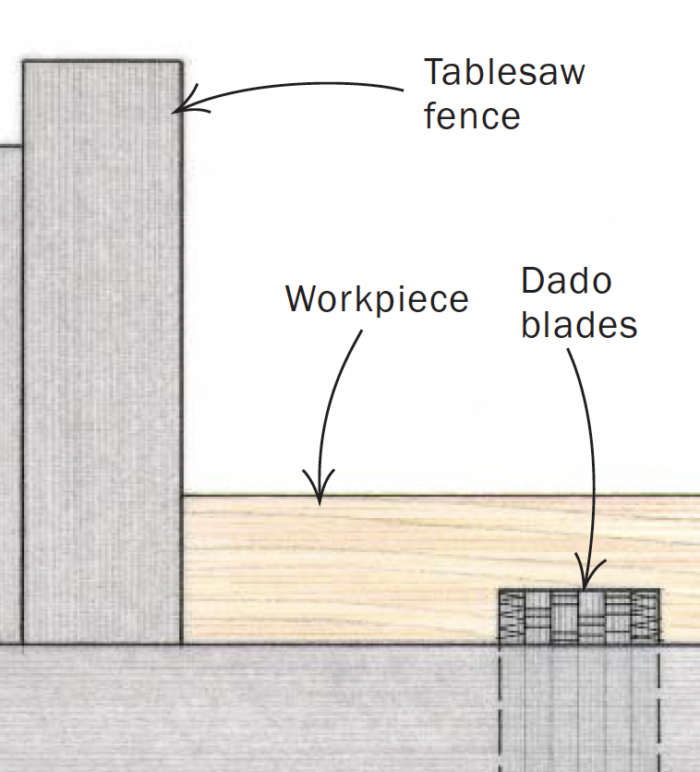
Each side piece gets a pair of dadoes for the shelves, and the top and bottom shelves each receives one narrow dado for the drawer divider. Dadoes shallower than 1⁄4 in. deep can be cut in one pass, but feed the workpiece slowly to achieve a clean cut and avoid straining the motor. Use the rip fence to guide the location of each dado, making the same cut on both side pieces before adjusting the fence for the next dado. Apply firm downward pressure on the workpiece to ensure that the depth of each dado is consistent throughout its length.
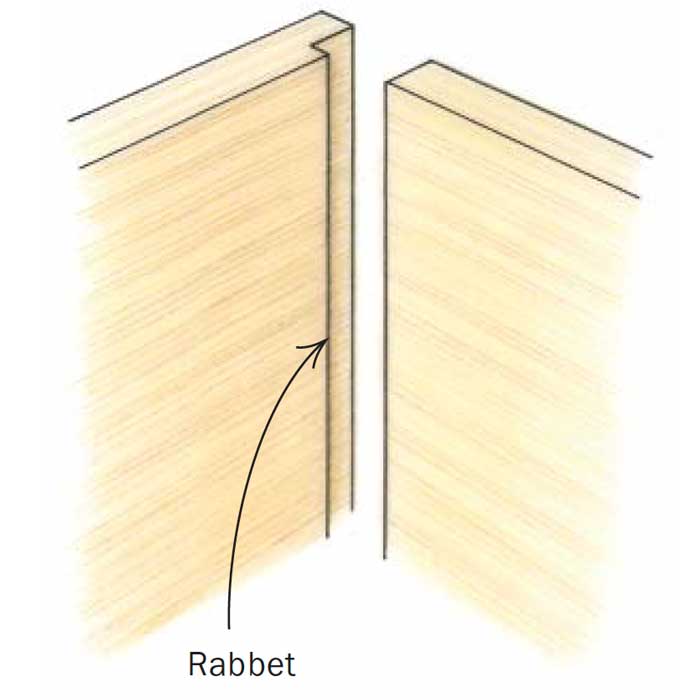
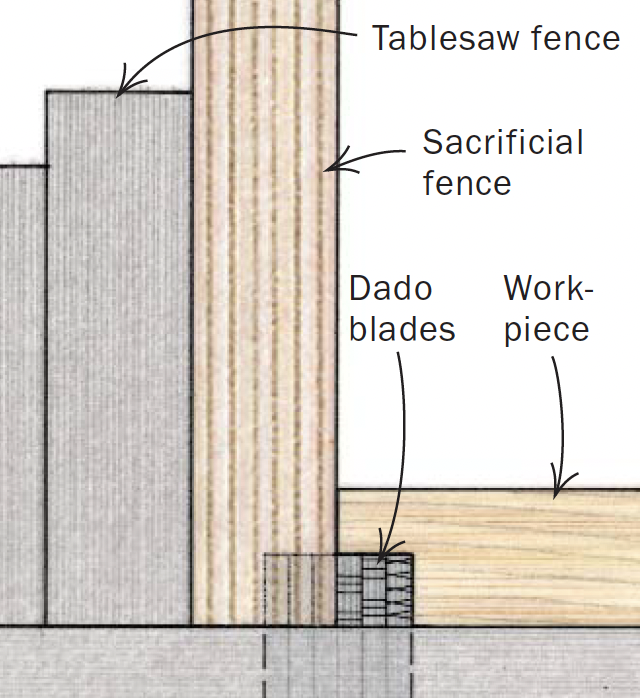
Even though the cut for the rabbets on the top of each side piece is 3⁄8 in. square, there is no need to reset the width of the dado set. Instead, clamp a piece of 3⁄4-in.-thick plywood or medium-density fiberboard (MDF) to the rip fence, locate the fence for the cut, and gradually raise the blade so that it eats into this sacrificial fence.
The final cuts with the dado blade are 1⁄8-in.-deep by 3⁄16-in.-wide rabbets on both sides of each end of the three partitions, and 3⁄16-in. deep by 1⁄4-in.-wide rabbets on overlapping sides of the pine back slats. Known as a shiplap joint, this allows the boards to move seasonally without creating a gap between them.
Cut full-length dadoes and rabbets on the tablesawTwo types of dado blades are available
The outside cutters of a stackable set of blades (above right) are placed on the arbor first and last, with chipper blades between them. The width of the cut is fine-tuned by placing metal or paper shims between the blades. Adjustable blades (above left), also called wobble blades, can be adjusted to width by rotating a dial on the side of the blade.
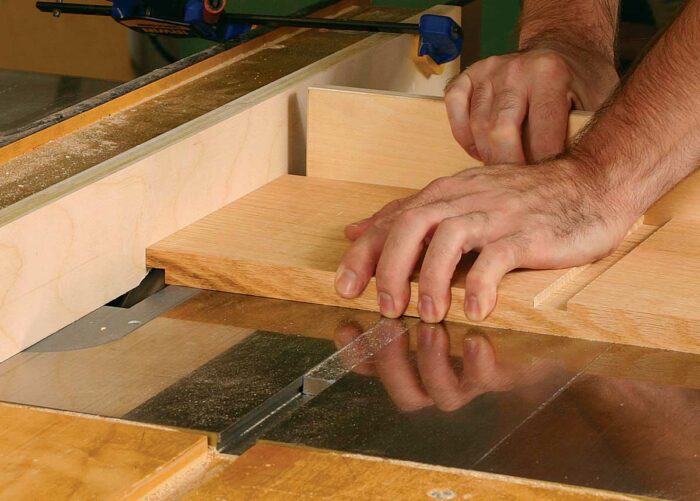
Cutting a dado. The depth of the dado should equal about a third of the wood’s thickness. Apply constant pressure both against the fence and downward to ensure that the cut is consistent in depth across the piece. With narrow workpieces, use a miter gauge for guidance and support.
Cutting a rabbet. After cutting the dadoes for the shelves, flip the board and cut the rabbet on the top of each side, creating a narrow tongue that will enter the top. To avoid damage to the rip fence, clamp on a sacrificial plywood fence. |
Stopped dadoes are best cut with a router
On this project the partitions are secured in stopped dadoes in the upper shelf and the top.
The stopped dadoes must be cut in identical positions on the top shelf and the underside of the top piece. To achieve this I use a rub collar (also called a template guide) in conjunction with a template. The collar has a tubelike piece of metal that surrounds the router bit and guides it by means of a template placed on the workpiece. When laying out the job and making the router template, the difference between the outer diameter of the rub collar (in this case 9⁄16 in.) and the router bit (1⁄4 in.) must be taken into account. Blocks of wood glued to the underside of the template act as stops to ensure accurate placement on both of the pieces to be cut.
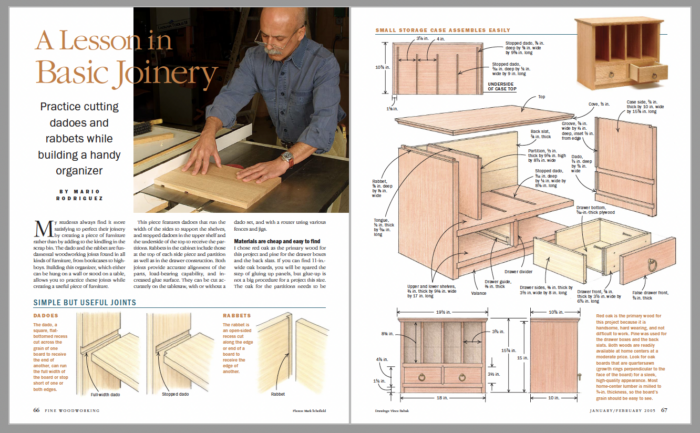 From Fine Woodworking #175
For the full article, download the PDF below:
Fine Woodworking Recommended Products

Starrett 4" Double Square
Veritas Standard Wheel Marking Gauge

Olfa Knife




Log in or create an account to post a comment.
Sign up Log in