Breadboard Ends: Tenons
Gary Rogowski demonstrates his methods for this traditional yet strong breadboard end.
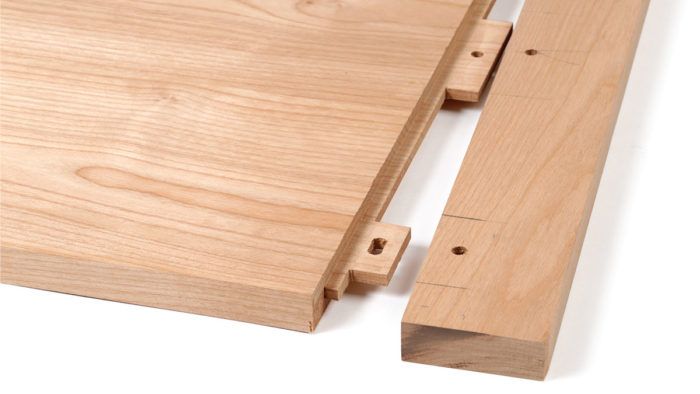
When I want an option that’s nearly bombproof, I use a series of pinned mortise-and-tenon joints connected by haunches between the tenons. It takes more time, but these ends are on to last.

The tenons, spaced across the width of the panel, provide great strength and allow you to pin the joint. The stub tenon fits in a groove, maintaining the integrity of the breadboard end by reducing how much material is removed. Here the groove is blind to conceal the joint and simplify fitting, but these types of breadboard ends work just as well with a through-groove.

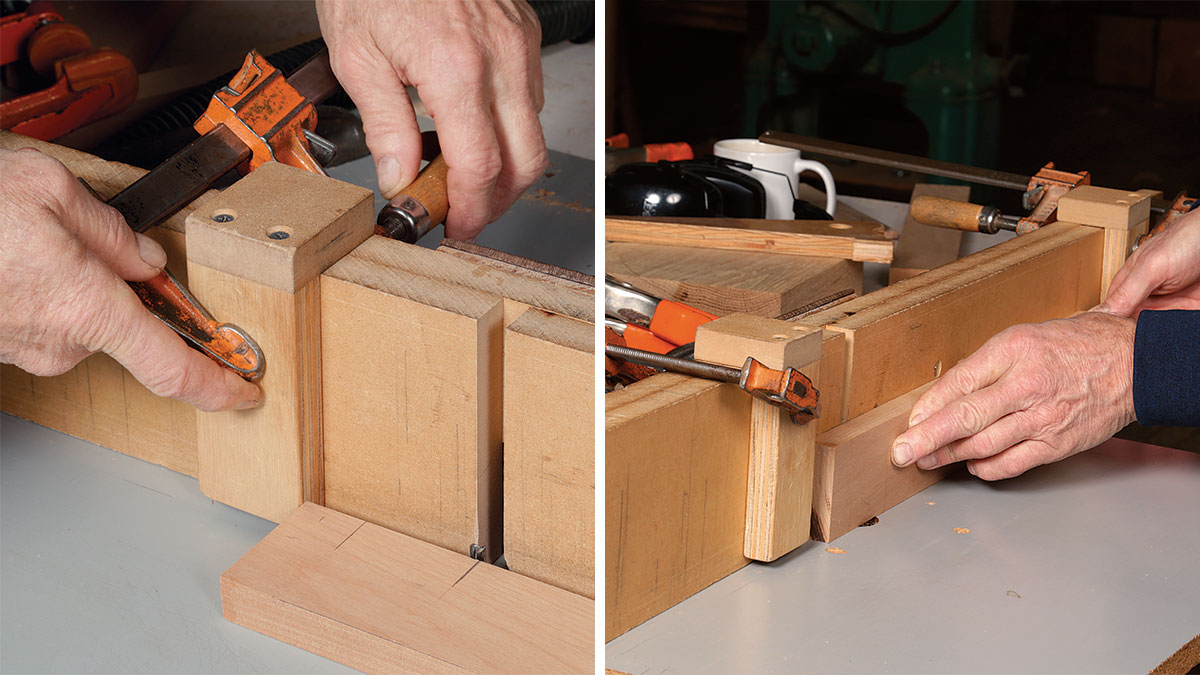
The outer tenons should be narrower than their mortises so there’s room for the panel’s expansion. For a tabletop 24 in. wide or more, I cut mortises 2 1/2 in. wide and tenons 2 in. wide. That gives plenty of space. To cut the groove and mortises, I use my router table with a fence and stops. The fence stays at the same setting, but the stops move for each cut. The mortises should be symmetrical along the length of the breadboard end, but don’t flip the breadboard end face for face. If you’re not mortising dead on in the middle of the thickness of the workpiece, you’ll end up having to tweak the joint, and that’s more trouble than the time saved flipping the piece. I mortise 3/4 in. to 1 in. deep depending on whether the piece might get lifted at the breadboard ends. Deeper mortises make stronger joints.
|
|
|
To create the full and stub tenons, I start by routing one continuous long tenon across the panel’s ends with a plunge router. I rout it slightly over thickness and then refine it with a shoulder plane. Then at the bandsaw, I cut the full tenons to width and crosscut between them to create the stub tenon. Once the mortises are cut and tenons fitted, I add the spring joint.

A great benefit of this method is that you can pin the joints for extra strength. After drilling through the mortises, dry-fit the panel and both ends, transfer the hole locations, and drill through the tenons. Elongate all but the middle hole into a slot so the pin doesn’t prevent the tenon from moving in the mortise as the seasons change.
|
|
|
Glue the middle of the joint, clamp it tight, and add the pins.
From Fine Woodworking #281
For more ways to attach breadboard ends, read the full article: Breadboard Ends: 4 ways
 |
|
 |
|
 |
Fine Woodworking Recommended Products

Suizan Japanese Pull Saw

Marking knife: Hock Double-Bevel Violin Knife, 3/4 in.

Leigh D4R Pro


Log in or create an account to post a comment.
Sign up Log in