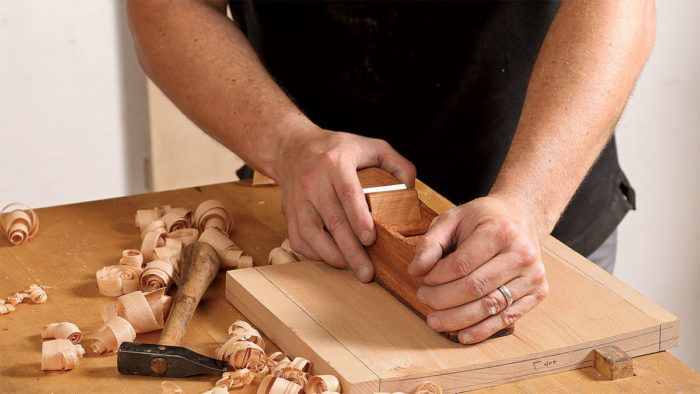
Handwork: Make a Coopering Plane
Clark Kellogg shows how he made his version, which is based on James Krenov’s classic bench plane design.
Synopsis: The best tool for creating a curved surface across the width of a board is a coopering plane. Clark Kellogg shows how he made his version, which is based on James Krenov’s classic bench plane design. First he shapes the sole to match the curve of the blade, then grinds and sharpens the blade with a hollow-grind.
I love using coopering planes. The long, curling scoop-shavings they make, and the slightly burnished, rippled surfaces they leave are incredibly satisfying to the touch. They can be used for a few different tasks, such as texturing a panel or creating a profiled molding, but their raison d’être is making curved surfaces across the width of a board. And, more often than not, they are the best way to create such a curve.
Although using a coopering plane, with its curved blade, can seem intimidating at first, in practice the tool is not different from an ordinary smoothing plane. If anything, I find coopering planes easier to use, because I don’t worry about obtaining an absolutely glass-smooth surface. I’ll show you how I build a wooden coopering plane: shaping the sole to match the curve of the blade, and grinding and sharpening the blade.
The coopering planes I make are based on James Krenov’s classic bench plane design. Indeed, all of the geometry is essentially the same; the only difference is a slightly thicker sole to account for the curve of the blade.
Make a bench plane, then shape the sole
Start by building the body using the technique popularized by Krenov (see David Finck’s “Wood Planes Made Easy,” FWW #196). Start with a blank, cut off the cheeks, and create a throat. Then glue the parts— minus the throat waste—back together. After the glue is dry, it’s time to shape the sole.
Begin by laying out the sole’s curve on both ends of the plane body. This curve is flatter than the curve of the blade, because the blade projects through the sole at a 45º angle. The 45° bedding angle creates an effective radius that’s larger than the blade’s actual radius. To find the effective radius without breaking out a geometry textbook, a good rule of thumb is to multiply the radius of the blade by 11 ⁄2.
Make a template of the sole’s curve on card stock. After cutting a centerline into both ends of the blank, and connecting the two lines with a pencil line along the sole, trace the template onto both ends of the body. Complete the layout with a marking gauge line along the body’s side that connects the ends of the curves. Now clamp the plane body in a vise, sole up. Use a block plane or small bench plane to shape the sole down to the layout lines. Start at the edges, and slowly work toward the center. Finally, use a hard sanding block, sanding with the grain, to remove any facets. When that’s done, sharpen the blade.
For the full article, download the PDF below:
Fine Woodworking Recommended Products

Stanley Powerlock 16-ft. tape measure

Suizan Japanese Pull Saw

Starrett 4" Double Square


Comments
Great article. Thank you.
Log in or create an account to post a comment.
Sign up Log in