A reader of my book recently asked why his mouse was not working like my book explanations. While drawing a line with the Line Tool, he could not get the mouse to “click-move-click”, rather he was required to drag the mouse by holding down the left mouse button.
In the book, I recommend not dragging, rather adopting the click (and finger-off) moving, then clicking again to end the line. My recommendation was based on watching students struggle with SketchUp when trying to use the drag method. I think students had trouble making lines at exact length by typing in the length. But now I’m not sure why there was so much difficulty with this method.
Back to the readers question how to change the behavior of the mouse….. I had forgotten that SketchUp includes setting options for mouse behavior. From a document viewed on SketchUp’s Help Center, the mouse options are described as:
Drawing
Use the Drawing preferences panel to define global mouse (or other input device) behavior.
Click Style
The Click Style options allows you to define how your input device reacts to clicks.
Click-drag-release: Use the Click-drag-release button to force the Line tool to draw by click and holding the mouse button to define the start point of the line, dragging the mouse to extend the line, and releasing the mouse to establish the end point of the line.
Auto detect: Use the Auto detect button to use either Click-drag-release and Click-move-click as necessary.
Click-move-click:Use the Click-move-click button to force the Line tool to draw by clicking and releasing the mouse button to define the start point of the line, moving the mouse to extend the line, and clicking again to establish the end point of the line.
Continue line drawing:Use the Continue line drawing checkbox to force the Line tool to treat an end point as the start point of a new line, saving you one extra click required establish a new start point for the second line.
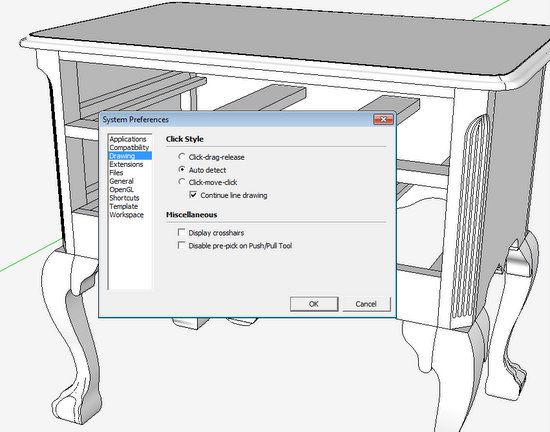
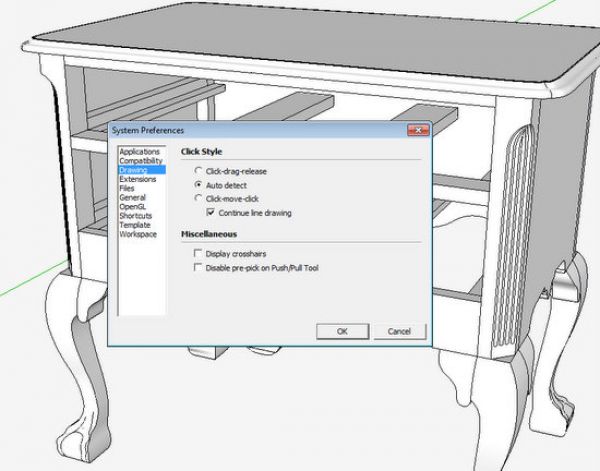
And you can set these options by opening the System Preferences dialog box – Window/Preferences/Drawing – see below.
The reader had the “Click-drag-release” check box selected, therefore causing the difference from my book instructions on placing a line. The default setting by Google is “Auto-detect”, and that is what I have been using (but without knowing it). See dialog box below:

For experimentation, I changed the setting to “Click-drag-release”, and to my amazement, I was able to use the mouse effectively, and easily remove my hands from the mouse to type in the exact length. So I’m not so adamant about the choice of this setting. Note: I did not do a full-scale comprehensive test of line placement with this setting, so I can’t be sure of some hidden quirks.
Aidan Chopra in “Google SketchUp for Dummies” recommends the click-move-click setting and explains that “you will have more control and your hand won’t get as tired”. He also suggests that with the drag method “you’re a lot more likely to drop your line accidentally”.
I will certainly not change my choice of mouse behavior – keeping the click-move-click operation. This is how I learned and I don’t see any advantage to changing. However, I suspect there are users happy and effective dragging the mouse.


Comments
I find click-move-click to be easier, especially if I need to zoom in to the start point, then zoom out, pan, and back in to the end point.
On the other hand, the other drawing programs that I use all follow the click-drag-release paradigm, which means I sometimes get mixed up when moving between them and SketchUp.
-Steve
To: saschafer
Thank you for chiming in..... you are absolutely right. I see what you mean about an advantage to click-move-click. It frees up your finger for zooming with the scroll wheel.
I think this alone is sufficient rationale for choosing click-move-click.
Tim
Hi Tim,
Thanks for all your post with SU.
My question is regarding to the BALL&CLAW FOOT you have in this post.
Where can I find the tutorial you did for this?
thanks again
Hi Tim,
Thanks for all your post with SU.
My question is regarding to the BALL&CLAW FOOT you have in this post.
Where can I find the tutorial you did for this?
thanks again
To Amarro:
I did a blog post on applying carvings in March 2008, however these old archives are no longer available here. I have shown this procedure in my book.
I implemented the claw and ball foot by "branding" the shape of the toes. I placed the flat shapes in front of the shaped foot, Push/Pulled the shapes into the foot, then did an intersection.
Tim
Hi TIM,
Thanks for your prompt response.
I have found the emphasis which you and Dave Richards place on understanding particular aspects of Sketchup , such as the current blog, has been very helpful for me in developing my Sketchup skills.
With the plethora of information and Sketchup tutorials on the internet showing all kinds of weird and wonderful things , its easy to forget about such basics as drawing lines.
I have had a copy of Aidan Chopra's book lying around for some time but your reference to the section on the click move click method of drawing lines encouraged me to re read this section which occurs in the chapter entitled "Establishing the Modelling Mind-set". It all made much more sense to me this time round , having struggled with Sketchup for a while . I was even able to appreciate his jokes ( carefully embedded in the text ) this time round too.
Your forum is a great source of inspiration for me , I look forward with anticipation to each blog.
Jonas Mac
Log in or create an account to post a comment.
Sign up Log in