Curved Bevels Made Easy
Tablesaw sled creates facets, and a bit of sanding finishes the job
Synopsis: Geoffrey Carson solves the problem of how to cut a wide bevel on the curved edge of a tabletop or other surface. The most obvious solutions—using a router or a shaper—are not practical. Router bits are generally too small to cut bevels wider than 1 in., and shapers are not common in home shops. So Carson devised a modified panel-raising sled that cuts wide bevels safely on the tablesaw. The sled rides over the tablesaw fence and cuts a series of uniform bevels that are easy to smooth into a uniform curve using sandpaper.
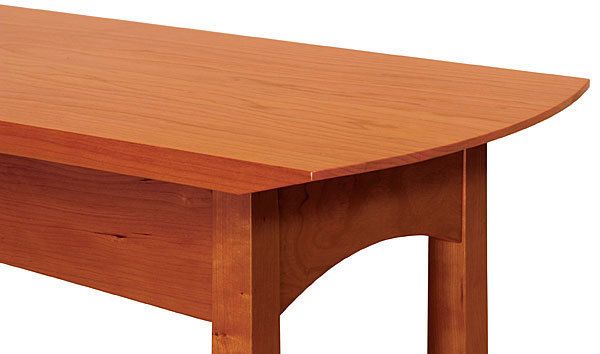
Several tables that I make have curved ends with bevels as wide as 2 in. The curves are a straightforward cut at the bandsaw, but the wide bevels can be a challenge. Bevels wider than 1 in. cannot be cut with a router, because bits that large aren’t available. A shaper with a tilting head or custom knives would work, but that’s an expensive solution. Also, in my experience router bits and shaper knives do a mediocre job on figured woods, often tearing out the grain more than cutting it.
So I devised an easy way to bevel curved edges using a tablesaw. All you need is a slightly modified panel-raising sled. The tabletop stands on end, clamped to the sled, as it is pushed past the blade. Then you make successive cuts, rotating the tabletop a bit each time, and leaving a curved, but faceted, bevel. These facets are surprisingly easy to level out with sandpaper, leaving a smooth bevel.
Modified sled is the key
The sled I use is basically a box that sits over the rip fence. It rides on the table and the fence guides it past the blade. I made it from ultra-lightweight MDF, which is just as flat and rigid as standard MDF but weighs much less.
The most critical part of making the sled is getting it to ride smoothly along the fence. If it is too tight, it will bind. If it’s too loose and wiggles side to side, the bevels won’t be accurate. Cut the sides first and place one on each side of the fence. Measure the distance between them and rip the horizontal spacers to that width. Then clamp them in place and test how well the sled slides. If the fit is loose, trim a bit off the spacers. If it’s too tight, shim the spacers with masking tape and try again. Screw the sled together after you are sure it will slide smoothly along the fence.
If you don’t have an outfeed table, use a roller stand to support the sled as it leaves the saw table. Otherwise, the sled and tabletop might tip downward, pulling the other end up.
From Fine Woodworking #217
For the full article, download the PDF below:
Fine Woodworking Recommended Products

Dubuque Clamp Works Bar Clamps - 4 pack

Stanley Powerlock 16-ft. tape measure

Estwing Dead-Blow Mallet


Log in or create an account to post a comment.
Sign up Log in