Weekend Project: Build a Shooting Board
Once you try this method of squaring the ends of a workpiece, you may think differently about power tools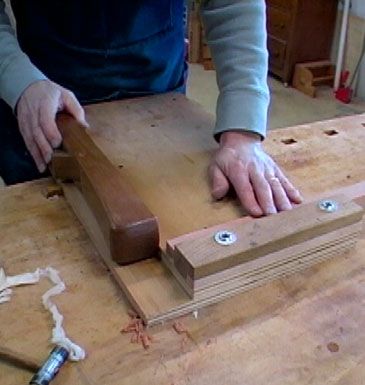
When you think about speed, accuracy, and repeatability, hand tools may not come to mind. But if you put a well tuned handplane and a simple device called a shooting-board to work, that mind-set may alter forever. Together, the plane and shooting board produce dead-on accuracy for squaring, mitering at any angle, or trimming parts to exact lengths – and do those jobs quickly. The shooting board registers the stock and the plane for repeatable cuts, stroke after stroke.
This article focuses on a so-called end-grain shooting board, but the same general know-how also applies to shooting side-grain (think edge jointing).
I admit, I probably let maintenance of my tablesaw and crosscut saw slip a bit. But even when those machines are in top shape, my plane and shooting board combo easily surpasses the machines’ quality of cut and accuracy. A few quick strokes and board ends are dead square, trimmed to exact length, and with polished end-grain to boot.
Construction tips
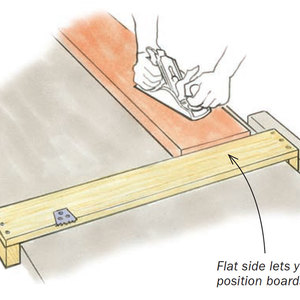
You must get two things right when making a shooting board. The stop block that supports the piece being planed must be square and flush to the edge that’s guiding the plane. That keeps the board being planed in perfect alignment and fully supported to prevent tearing out end-grain fibers when the plane exits the cut.
When the plane is set for a heavier-than-normal cut, the end of the stop block gets planed away and gives less support to the stock. The shooting board shown here addresses this problem with an adjustable stop block that can be slid and fixed at its proper position multiple times, while also making it simple to precisely square the stop block.
Shooting boards can be sized to the job at hand, but I have found a platform that’s 18 in.long and 11 in. wide works well for a variety of tasks. I use good quality ¾-in. plywood such as Baltic birch. I make the stop block and the slat supporting it from hardwood such as hard maple.
Assemble the plywood base and platform and mill the hardwood pieces, following the plan. Mill a pair of through mortises 1/4 in. wide and 1/2 in. long in the stop block. Then attach the stop block to the platform, perfectly flush to the edge, with two #12 x 2-in. pan-head screws and a pair of fender washers. Place the screws to one side of the mortise so the end of stop block can be fed toward the shelf side of the shooting board as it wears.
Once you’ve made a few trial shavings you can place a few shims of masking tape between the stop block and slat if the resulting cut is not perfectly square in the horizontal axis. Pay attention to proper shooting board technique, covered in the accompanying video, before you do this.
With use, a gap develops between the end of the stop block and the sole of the plane. When the gap is about 1/32 in., it’s time to reset the stop block flush to the sole of the plane. People are often concerned about planing into the edge of the shooting board and throwing the square relationship off. You will take a few shavings from the edge, but the sole of the plane below the blade (with the plane on its side) will soon bottom out on the edge of the platform, limiting the cut.
Mitering Angles
As you can see in the accompanying video, the shooting board can be used to trim the mitered ends of stock. There are two different fences you can use, as shown in the photos.
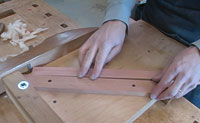 For picture-frame-type mitering, you screw a fence to the base at the desired angle, with a piece of 120 grit self-stick sandpaper on the bottom to keep it from slipping (see the photo at the left). To miter across the thickness of an edge, use a larger block of wood with one end cut at the desired angle. Clamp the block and a stop block to the shooting board’s stop block (see the photo below).
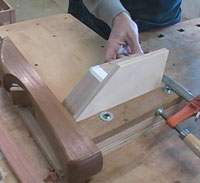 Plane a pair of trial corners and try them for fit. Adjust your plane or the fence as necessary for a precise fit. Use the shooting board to create opposing pairs that are the exact same length.
I find this arrangement preferable to the traditional “donkey’s ear” shooting board since gravity feeds your stock into the cut of the plane rather than pulling it away. If the stock you wish to plane is too large for this arrangement, you can build a simple ramp of plywood that is large enough to support it properly and temporarily screw the ramp to the shooting board.
Fine Woodworking Recommended Products
Double Sided Tape

Veritas Precision Square
Milescraft 4007 6in Bench Clamp






Comments
Too bad the link to the plan does not work.
Could you please refresh the download link?
Should be fixed now.
Log in or create an account to post a comment.
Sign up Log in