The Miter Joint for Casework
This surprisingly strong joint gives furniture clean, flowing lines
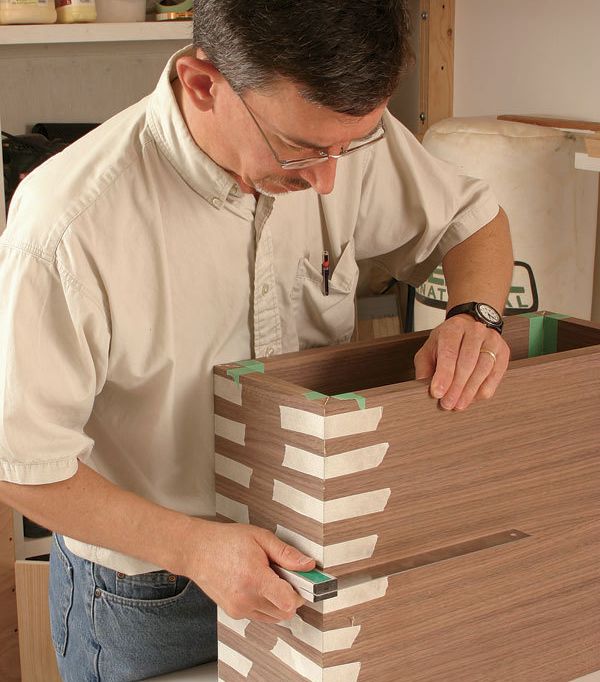
Synopsis: The miter joint is not only for use on picture frames, edging, or molding. This joint is also an attractive means of joining the body of a cabinet. Clean and simple, the carcase miter joint shows no core or end grain. It’s particularly appropriate for enhancing clean lines on furniture, and is strong enough for most locations using glue alone. David Hyatt shows how to cut miters safely on a tablesaw or on a router table. He also gives tips for assembly and clamping, and demonstrates how to burnish corners or add a solid-wood corner for added durability.
From Fine Woodworking #190
Many woodworkers are familiar with the miter joint as used in picture frames or on a solid edging that wraps around a tabletop. However, this joint is also a useful and attractive means of joining the body of a cabinet. Whether constructed from plywood or solid stock, this clean, simple joint shows no core or end grain, and can be particularly appropriate in enhancing clean lines on furniture.
Unlike many woodworking joints, the carcase miter with its long, straight cuts lends itself to easy production with a variety of power tools. Although the joint can be reinforced with splines or biscuits, accurately cut mitered surfaces are strong enough for most locations using glue alone.
Cut miters with a tablesaw or router The fastest and easiest way to cut miters is on a tablesaw, but you’ll need a sharp blade to get a smooth, accurate cut with no burning or tearout. With veneered materials in particular, check the entire surface of the tablesaw and outfeed table for bumps that will scratch the thin surface.
Use a slow, steady feed rate to reduce burning and tearout. Be vigilant about the last few inches of the cut; it is easy to twist the workpiece slightly and make a curved edge that will not fit properly with its counterpart. Also, make sure that the workpiece is pressed down firmly on the tablesaw. If the workpiece is at all warped, it will be difficult to cut a good joint.
Easier on a left-tilt saw— If you own a left-tilt saw, cut the workpiece roughly to size, tilt the sawblade to 45º, and cut the first miter with the inside of the workpiece face down. Then simply spin the workpiece 180º so that the mitered cut is against the fence. Make a series of cuts until the blade cuts the top of the workpiece to the correct width, and complete the cut.
For the full article, download the PDF below:
Fine Woodworking Recommended Products

Bessey K-Body Parallel-Jaw Clamp

Jorgensen 6 inch Bar Clamp Set, 4 Pack

Starrett 12-in. combination square


Log in or create an account to post a comment.
Sign up Log in