Slot-Mortising Table

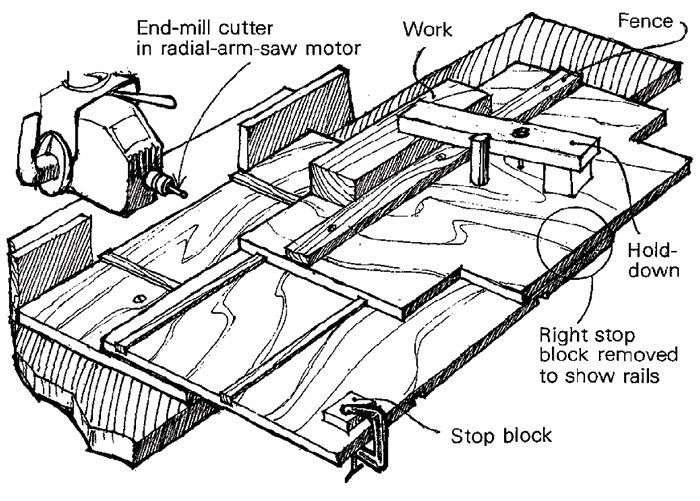
I cut slot mortises on my radial arm saw using this two-way sliding table. The table consists of three separate 3/4-in. thick plywood or particle-board sections. Cut the middle and top sections wider than the bottom to leave room for clamping stop blocks. To get the two-way sliding action, cut tracks and set rails in the parts, as shown in the sketch. I used 3/4-in. square, waxed hardwood rails glued into grooves cut just less than 3/8 in. deep. The shallow grooves will separate the sections a little so the surfaces won’t rub. Notch the back corners of the top section (so you have a place to clamp stop blocks) and add fences, handles and work hold-downs as needed.
To use the table, mount an end-mill cutter in a chuck on the saw’s spindle and set the height and depth of cut with the saw’s adjustments. Clamp the stop blocks in place to control side-to-side movement. Now you’re ready to mortise. Secure the work in position, turn on the saw and move the table from side to side as you slowly push the work into the cutter.
Bill Horton, Chino, Calif.
Fine Woodworking Magazine, February 1981 No. 26

Fine Woodworking Recommended Products

Incra Miter 1000HD

Freud Super Dado Saw Blade Set 8" x 5/8" Bore

Olfa Knife


Log in or create an account to post a comment.
Sign up Log in