Built-Up Moldings
Construct impressive moldings with just a router and off-the-shelf wood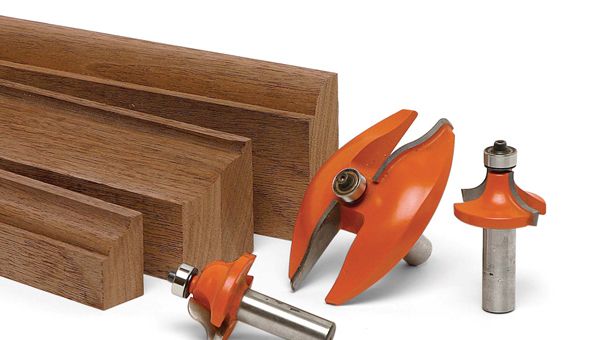
Synopsis: In a small shop with basic equipment it is still possible to tackle ambitious projects. With nothing more than a basic router, a few router bits, a shopmade router table, and small strips of hardwood, Alan Charney creates a wide variety of moldings. He profiles the individual strips with a router, then glues them together to form complex moldings.
My shop is small, with only the most basic equipment. I also have limited sources of hardwood, confining me to 3 ⁄4-in.- or 1-in.-thick stock. However, these obstacles haven’t stopped me from tackling ambitious projects, such as the crown molding on a secretary I built. Lacking thick slabs of wood and a shaper, I built up the molding from smaller strips, which I profiled individually using a router. When glued together, the individual strips formed a molding that looked like it was milled from one piece of solid stock. Following my approach, using just a basic router, a few router bits, and a shopmade router table, you can create moldings of almost infinite variety, which will enhance the appearance of your work.
Make templates from the router-bit profiles
There are two ways to choose appropriate moldings for a project. One is to research the moldings traditionally used on the style of furniture you are building and to make something similar. The second way is to create your own design. A deep molding creates an elegant concave profile suitable for more formal, detailed furniture. A convex shape makes a bolder statement more suitable to heavier, country-style furniture.
After you have a general design, draw a full-scale rectangle that matches the height and depth of the molding. Then lay the router bits you intend to use against some thin cardboard and trace their profiles with a pencil. Cut out each profile to create templates that can be arranged on the full-scale rectangle until you arrive at a design that matches your goal.
Play with the depths of cut and the positions of each cut, and also try flipping some bits by 90°. The most useful router bits are S-shaped, meaning they follow a curve, going from thick to thin. These include edgeforming bits, such as ogee, roundover, and cove bits, plus panel-raising bits. Round-nose and V-groove style bits also work well for creating profiles.
Choose stock with uniform grain and color
To make the molding look as if it were created from a single piece of wood, the strips need to match in color and grain pattern. The easiest way to achieve this is to take all of the strips from one wide board that is uniform in appearance. Another way is to use boards that were cut from the same tree, preferably in sequence.
Some router bits, such as panel raisers, have longer profiles and sometimes require a thicker board than I have on hand. If you need to join together two boards, matching the grain is crucial. Cut a straight-grain board in half, and then flip over one of the halves onto the other to create two adjacent layers with matching grain and color. You can use the same trick with figured boards, but because perfect grain-matching is almost impossible, you may have to rely on small steps, or reveals, between layers of molding to conceal contrasting grain patterns.
From #173
For the full article, download the PDF below:
Fine Woodworking Recommended Products
Bessey EKH Trigger Clamps
Dubuque Clamp Works Bar Clamps - 4 pack
Bessey K-Body Parallel-Jaw Clamp




Log in or create an account to post a comment.
Sign up Log in