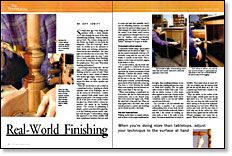
Synopsis: There are several ways to put a finish on a complicated surface, and spraying addresses only some of the challenges. Professional finisher Jeff Jewitt explains application techniques such as cross-brushing, padding, and “brush and feather.” Cross-brushing works for vertical surfaces. Use a pad to apply finish to round surfaces. And use the brush and feather technique for fast-drying finishes. Finally, a toothbrush and gel varnish are ideal for carvings and moldings. His tips will help prevent drips and sags, and he explains how to tackle the insides of cabinets and drawers.
Several years ago I was sitting in the audience while a noted finisher went through the paces of his class, demonstrating brushing, French polishing and so forth. The woman sitting next to me, Karen, was fidgety. At one point she whispered, “This isn’t finishing!” Afterward, we strolled up to the instructor to shake hands and exchange pleasantries. Karen was less than enthusiastic. She came right out with what was on her mind. “You know, you people make me crazy. I came here to learn something about finishing, and all you showed me was how to finish flat sample pieces. That’s easy. What about finishing real furniture?”
I never forgot what Karen said—she was right—not all surfaces are flat. If they were, finishing would be a piece of cake. There are two sides to doors, insides of cabinets with myriad right angles, vertical surfaces, molded edges, carvings and intricate shapes like those on chairs, spindles and turned legs.
There are several ways to put a finish on a complicated surface. Spraying on a finish addresses some of the challenges, but it’s not the answer for all furniture. I believe that a sprayed finish simply doesn’t look right on some pieces. One strategy is to finish all of the parts of your project before you glue it up, which renders a cleaner appearance and speeds up the finishing process. The concept of prefinishing is simple—protect areas that will be glued later so that finishing material doesn’t interfere with the glue. Unfortunately, taking this approach is not always possible with more complicated furniture that you need to scrape and sand after assembly. And if you are refinishing furniture, you usually don’t have the option of taking it apart. Another strategy is to adjust your approach to the surface of the finish, which involves some application techniques that you may not be familiar with—cross-brushing, padding and what I call the “brush-and-feather” technique for lacquer or shellac.
Cross-brush vertical surfaces
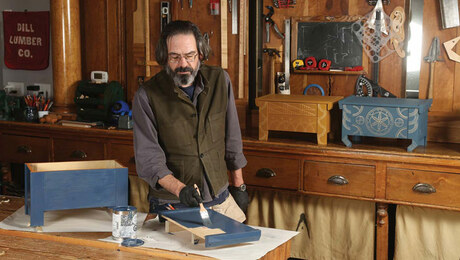
I cross-brush varnish using a good-quality bristle brush (see the photos at right). I apply the varnish horizontally, then tip it off vertically, using only the very end of the bristles to smooth out the finish. This sequence avoids drips and prevents sagging in the finish as it dries.
To use this method, dip the brush only about a quarter to a third of the way into the varnish. Start at the bottom of a panel and brush the varnish horizontally in both directions. Continue this pattern, overlapping each stroke by about in., and work all the way to the top. Then tip off the whole panel vertically, periodically wiping excess finish off the brush with a clean rag.
From Fine Woodworking #137
For the full article, download the PDF below:
Fine Woodworking Recommended Products
Osmo Polyx-Oil
Foam Brushes

Odie's Oil




Log in or create an account to post a comment.
Sign up Log in