Tips for Better Sanding
Whether fairing a curve or flattening a tabletop, the right tools and techniques yield quality results
Synopsis: With thoughtful planning and the right tools, sanding doesn’t have to be tedious. Lon Schleining actually enjoys sanding! He approaches it in two stages: shaping and smoothing. The first step toward efficient sanding is to make sure you remove all the scratches from the previous tool, he says. He details how to tune and use a belt sander, how to use orbital and random-orbit machines, and the best way to hand-sand with a block. Then he demonstrates flattening a tabletop, fairing a curve, and how to use a downdraft table to get virtually dust-free sanding.
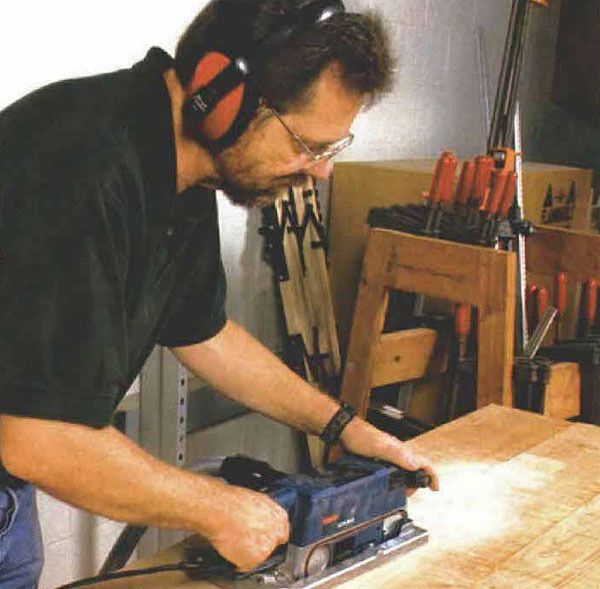
When I tell students in my woodworking classes at Cerritos College that sanding is one of my favorite activities, they usually look at me like I’m a little cracked. But the truth is, I look forward to sanding—especially that last hand-sanding, which tells me I’ve finished another job. With thoughtful planning and the right tools, sanding doesn’t have to be tedious.
I approach sanding in two stages: shaping and smoothing. If the piece still needs some work after it is cut and pared with other tools, then sanding tools can complete the shaping. If I’m working on a curved piece with changing grain direction, for example, I can shape it more easily with a sanding tool than with an edge tool. There is also less chance of tearing out the grain.
Shaping uses 80- to 120-grit sandpaper and powerful tools. I use a 4-in. by 24-in. belt sander, 5-in. and 8-in. rotary disc sanders, a right-angle randomorbit sander, an inflatable, handheld drum sander and a spindle sander—whatever best fits the job I’m up against. During shaping, I sand until I can no longer spot any machine marks, lumps, glue marks or deep scratches. If I find rough patches, I go back to shaping with 100-grit sandpaper before I begin smoothing.
Smoothing usually involves using less aggressive machines and paper grits of 120 and finer. I use an orbital sander, palmand pistol-grip random-orbit sanders, as well as hand-sanding blocks of various shapes and sizes—both flexible and rigid. If this sounds like a lot of sanding tools, it is. It just boils down to the fact that it takes different tools to handle different jobs efficiently.
Both sanding stages are best done sooner rather than later— ideally, prior to assembly. This usually saves me from sanding for long periods of time, and it also keeps me from sanding into tight spots. A drawer is a good example. If the interior pieces of a drawer need sanding, do so before assembling the drawer. This way the sanding can be done in minutes without the difficulty of sanding into inside corners. Any miters or frame-and-panel assemblies can be handled the same way, saving countless frustrations. Then after assembly, usually only a light hand-sanding is needed before the finish is applied.
Sanding involves removing all of the machine marks and the scratches left by rougher-grit sandpaper. Then, using finer and finer grits, the scratches from the previous sandpaper are reduced until the piece is smooth. Often, grains come off the paper as the sanding takes place. And if larger sanding grains from earlier grits are left on the surface, they can be rubbed into the board and gouge the wood. You can prevent this by vacuuming dust and sanding debris before moving to finer grits.
From Fine Woodworking #135
For the full article, download the PDF below:
Fine Woodworking Recommended Products

Odie's Oil

Foam Brushes

Bosch 12V Trim Router


Log in or create an account to post a comment.
Sign up Log in