How to Use a Combination Square
A perfect name for a near-perfect tool
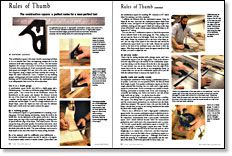
Synopsis: Anthony Guidice encourages his students to use a combination square to the exclusion of all other measuring tools, at least at first. In this article, he talks about how you can use a square as a depth gauge, a marking gauge, as a try square, and to calibrate your tablesaw. You can set your router with it, too. He also talks about qualities to look for when shopping for a combination square.
The combination square is the most versatile measuring tool there is. It is so valuable that I have my beginning students use it to the exclusion of all other measuring tools–at first. The tool teaches beginners the concept of accuracy in layouts and measurements. You mark a line and look at it. It isn’t automatically square. Does it look square and straight? If it’s not, you’re the cause, not the tool. For a beginner, using a simple tool helps develop this concept. It keeps the mind uncluttered. Later, a student can use marking gauges, cutting gauges and center markers. But far from just a great learning tool for woodworking students, the combination square is an indispensable little device for all woodworkers.
Use it as a depth gauge
A combination square works very well as a depth gauge and a thickness gauge. I use mine as a thickness gauge when I’m using a power plane. I lay a board flat on the workbench, loosen the thumbscrew on the square and measure the distance between the top of the board and the bench. To measure the depth of a mortise, rest the square on the edge, extend the blade into the mortise and read the depth. To use it as a height indicator for a tablesaw blade, preset the depth you want and raise the tablesaw blade until a tooth at the top center contacts the square.
As a marking gauge
The combination square is a good substitute for a marking or cutting gauge. For hand ripping and planing, clamp the work in the bench first. Set the dimension on the square and lock it. Slide the square along the edge of the board while guiding a marking knife or pencil with the edge of the blade. This takes practice, but you can get the hang of it pretty quickly. For mortises and tenons, mark with a sharp pencil on the work, adjust the square to that and mark the whole joint with the knife. The same technique can be used to mark depth on the end of the board for hand-cutting dovetails.
From Fine Woodworking #135
For the full article, download the PDF below:
Fine Woodworking Recommended Products

Starrett 12-in. combination square

Bessey EKH Trigger Clamps

Lie-Nielsen No. 102 Low Angle Block Plane


Log in or create an account to post a comment.
Sign up Log in